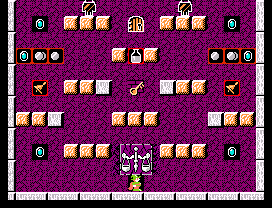
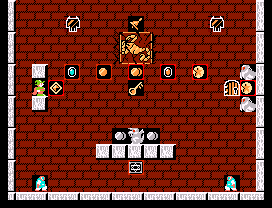
Time is limited in this board, so your best bet is to build a column directly up the middle. Be sure to maintain the gap on either side to prevent any of the monsters from getting you.
However, if you want the goodies, try this:
Start by ascending up one side, collecting the items along the way.
Once you reach the top, create a drain directly below the generator
Create Skull Jail using the edge of the upper deck. Build two blocks against the wall, just under the gray blocks. Do the same for both sides.
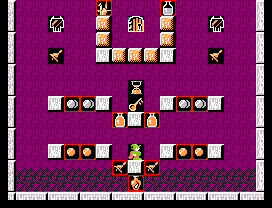
Wait until the bottom clears and retrieve the items.
Create two more jails using the left and right sides of the lower deck. For each side, build a floor between the gray blocks, but one level below. Punch a drain above the second jail to allow the Skulls to begin falling in.
Under each generator, you should now have two jails. This will catch the Skulls regardless if they fall to the right or to the left.
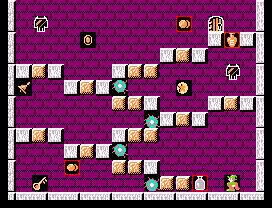
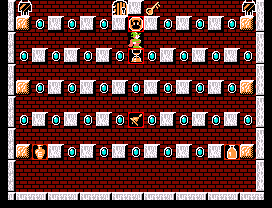
Destroy a block next to the lowest of the three blue flames. This will create skull jail.
Continue up to get the key.
On your way back down, adjust your blocking so the skulls are diverted into jail.
Drop the other blue flames out of your way and make your way to the left side. Avoid using the floor because you may not be able to get past the dropped flames.
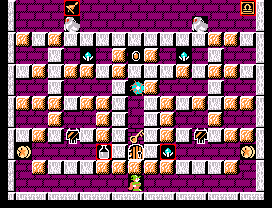
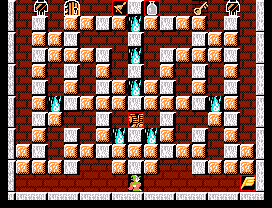
Very hard to not advance through this board. At most it will cost you one life. However, if you want to be greedy:
Dispatch the Gargoyle on the left side.
Leap off your starting block and land on the gray block to the right of the Gargoyle's perch.
Build two blocks is quick succession: one to block the incoming fire from the left Gargoyle, and the second to cover the gap between the perch and the block you landed on.
While avoiding the incoming fire from the right Gargoyle, drop the left Gargoyle as soon as you can.
Drop onto the single lone gray block near the lower left corner. DO NOT fall anywhere below the lone gray block or you will be stuck in a bad way.
Build a bridge toward the center, safely covering the blue flame. If you do not cover the left-most flame, you will not be able to get back above.