The goal[edit]
At the start of command mode, you will see a lot more objects on the galactic map than there were at the start of Training. There will now be four bases, and eight enemy squadrons (3 blue, 4 gray, and 1 purple). In addition, there will be six planets, and 2 asteroid fields.
Just as in Training, when you start the game, you will begin in Map mode. The new elements on the maps are the asterisks for planets, and a pair of broken slashes for the asteroid fields. How do the planets affect you? In Command mode, very little. However, they are worth twice as much towards your final score than bases are. So they are more valuable as far as your performance rating goes. Asteroid Fields are even less important. Enemies don't attack them, you don't get any points for them, and they can't provide you with anything in Command mode. At the very most, they can serve as strategic buffers that the enemy squadrons can't pass through.
Just as before, the enemies move around the map after the date clock counts 50 units time. Ultimately, your primary goal is the total annihilation of every enemy squadron, and your secondary goal is to preserve as many bases and planets as possible.
Strategy[edit]

The strategy for the order in which you engage enemy squadrons is entirely dependent upon the state of the galactic map when you arrive at the start of the game. Since the map is generated randomly, the difficulty of the situation can range from one extreme to the other. While situations that appear easy can take a turn for the worse, and difficult situations may not be as bad as they first seem, it may be worth your while to continue resetting the game until you end up with a map that you are comfortable with. The more enemies that start the game right next to a base or a planet, the more difficult it will be to defend everything. It is easier to start off with a map that only has a few enemies touching bases or planets (no enemies touching is quite rare to encounter).
Once you have settled upon a map, you must decide which enemy to attack first. Obviously any enemy that is touching a base should receive your immediate attention. The reason you should choose bases over planets in Command mode is because planets do nothing for you other than improve your ranking. Bases provide you with fuel and, new to Command mode, power-ups. If you have to choose between more than one, and can't make up your mind, a general rule of thumb would be to go after the closest one for minimum energy expenditure.
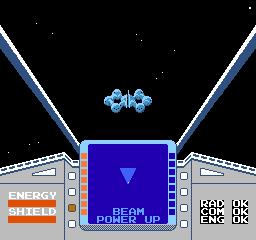
It is nearly impossible to complete Command mission in one pass without the need to refuel (although it can be done). So when you get a break in the action (no bases or planets under attack), be sure to head to a base for fuel and/or repairs. In Command mode, you will receive the added benefit of power-ups. Three of the bases increase the strength of one aspect of your ship, while the fourth can replenish your photon torpedo supply, but only under certain conditions that are not fully understood at this time. The power ups are as follows:
| Beam Power Up | Beam weapon strength improves, reducing the number of times you need to hit an enemy craft to destroy it. |
|---|---|
| Shield Power Up | Gaia's shield strength increases, lowering the enemies' weapon effectiveness by one degree (refer to the enemy charts). |
| Reactor Power Up | The energy expenditure of your ship decreases during hyperspace, making space travel more efficient. |
Defending bases and planets[edit]

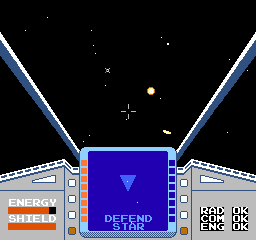
As you are fighting one enemy squadron, it is more than likely that other squads will move in to position to attack other planets and bases. If this happens, you will likely see the message "DEFEND BASE" or "DEFEND PLANET". Once you see these, you have a decision to make. If you are already in the middle of defending a base, you'll probably wish to ignore the message until you are through with the squad and can turn your attention to whoever needs it most. If you have only just begun to defend a planet, and a base falls under attack, you may wish to abandon the planet in favor of the base, unless the squad attacking the planet is a blue squad and you are confident that you can dispatch it quickly. If you are attacking an enemy that is not attacking a planet or base and you receive such a message, you should abandon the fight immediately and warp to the newly attacking squadron.
There is an exception to this. If you believe that two planets or bases are in dire straits, you have one alternative: your photon torpedoes. If you wish to save both objects, and you have no idea about the strength of either attack squadron, you can fire your photon torpedoes at the more distance squadron and deal with the closer one. If you know the strength of the squads (or know that one is purple or gray), use the torpedoes on whichever squad you think will be the biggest threat, regardless of the distance. The strength of the squadron determines how many photon torpedoes will be required to destroy the squad. Blue squads require 4 photon torpedoes, gray squads require 6, and purple take 8 torpedoes. As mentioned before, photon torpedoes can be replenished by the non-power-up providing base, but the conditions for doing so are unknown.
You must be in Map mode to fire photon torpedoes, and your map cursor must be lying on the enemy you intend to fire upon. No matter how many torpedoes you fire at the enemy, the enemy will still have ten craft for you to destroy if you warp to it without completely removing it with photon torpedoes. This weapon, if used wisely, can turn an impossible situation into a feasible one. If no threat of attack is imminent, and you are aware of the location of the purple squad, you may wish to simply fire all eight torpedoes upon it to remove it from play. Realize, however, that doing this will leave you unable to use them in a pinch situation, should the need arise to defend two objects at once (unless you get a new supply of torpedoes from a base, which can be performed twice).
One more note about defending planets and bases: Once they are under attack, their map symbol turns black, indicating that they are susceptible to destruction. Fortunately for planets, you can restore them by paying them a visit, thereby setting the map color back to blue, and bracing them for a future attack. However, bases cannot be restored in this fashion, and will remain in a weakened condition, making it easier for another enemy squad to come along and complete the job that a previous squad failed to do. Keep this in mind when choosing, between a weakened base and a healthy planet, which object to defend.
Score evaluation[edit]
A good player should be able to complete the Command game before Date 600 occurs. A score approaching 2000 can be difficult to achieve, but possible if: no bases or planets are destroyed, energy expenditure is kept to a minimum, and no subsystem damage is received that would impede your progress. If you are attaining scores in the 1700 to 1900 range, then you are probably ready for the mayhem of the Adventure game.