Jump to navigation
Jump to search
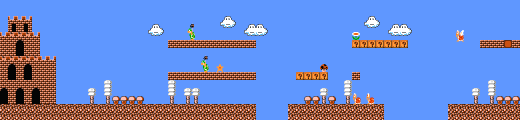
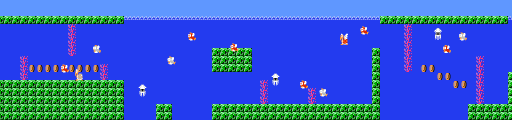
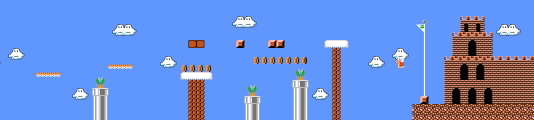

World 3-1[edit]
Part A[edit]

- Run under the Hammer Bros. here and collect the Starman.
Part B[edit]

- Beware of the very first pipe in this section! It leads to coin room B, but it ultimately leads to a World 1 Warp. You'll take two giant steps back if you enter that Warp Zone.
- If you emerge from the Coin Room pipe to the left of the block wall, you can make a vine sprout from the bricks above. Climb it to arrive at a coin heaven.
- If Mario is your man, you'll have to jump off of a Koopa in order to get the 1-Up at the end of this section.
Part C[edit]

- The lowest pipe leads to coin room C.
- The Super Spring towards the end of the level gives you enough hang time to reach the flagpole at level's end, but don't fly over it, or you will find yourself on a one way trip back to World 1.
- Once you catch the flagpole, you can no longer go backwards to World 1. You can only go forward from here until you arrive at World 5.
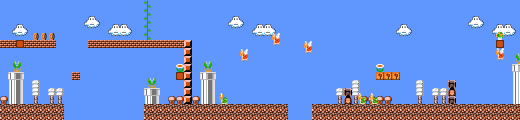
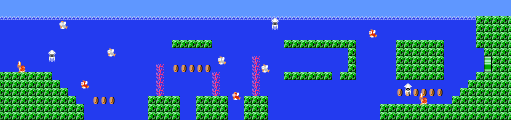
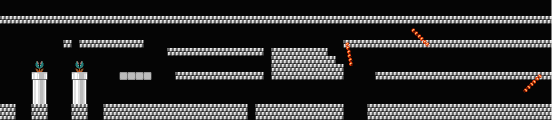
World 3-2[edit]
| Surface enemies underwater! |
| While you can normally jump on Goombas, Koopas, Buzzy Beetles and other enemies on the surface, you can't when they are underwater! You can only use fireballs to kill them. If you can't use fireballs or the enemy is resistant, you will have to avoid them at all times. |
Part A[edit]

- The fish swim to the left as you move to the right. Get out of their way.
- If you do the blooper dodge trick (walk on the floor or if you are big mario,duck under a blooper hovering over you) you will be O.K
Part B[edit]

- There's no getting rid of the Koopa Troopa that walks the ocean floor here. Swim on.
- The opening to dry land looks inviting, but jumping out of the water is a no go.
Part C[edit]

- Three nasty Bloopers cause trouble near the end. Wait for them to converge, then swim away.
- The pipe at the end leads to the standard ending.
- There are two blocks at the end at the standard map to get you to the top of the flag two squares before it if you fell off the tower.
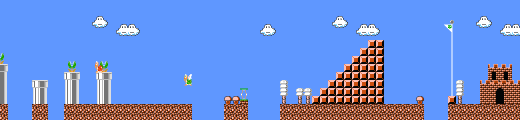
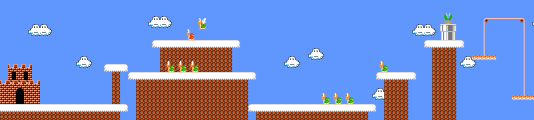
World 3-3[edit]
Part A[edit]

- Kick a Koopa shell to the left from the top of the first large land mass. It will bounce after it drops and clear out the Koopas below for a 1-Up.
Part B[edit]

- Position your plumber just to the left of center on the middle bluff and jump straight up to collect a Power-Up Mushroom or Fire Flower.
Part C[edit]

- The precarious platforms at the beginning of this section will fall if you stand on it for long. Jump repeatedly up and down as you wait for the pipe to clear.
- The best way to reach the high bluff at the very end is to jump from one floating block platform to the next. To help you out, make to hidden blocks appear over the first bluff in this section.
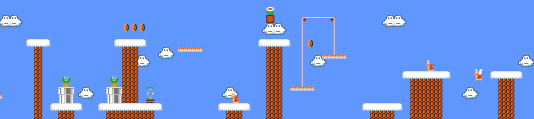
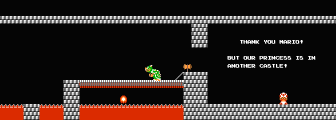
World 3-4[edit]
Part A[edit]

- If you don't follow the correct path through this dungeon, you will find yourself stuck in a never ending loop.
- The low ceiling at the very beginning will make for a disastrous first jump attempt. Start by running instead. You'll clear the first gap easily.
- In Super Mario All-Stars, the first floor before the staircase is longer while the gap between the first lava pit and the floating wall is shorter. This will make it easier to jump from the beginning, while you will need to jump the second lava pit a little earlier.
- Stay on the very bottom of this first leg. When the Podoboo is in the air, run over the narrow pit near the end with super speed to avoid two fiery obstacles.
- Deliberately take the wrong route if you want to power up. The hidden block resets automatically. Once Mario is big, you'll have to slide through the narrow passage.
Part B[edit]

- For the second leg, you must always take the highest path available.
- Uncover a series of four Coin Blocks and use them as a platform so that you can stay on course.
- If your character is super-sized, he may hit the ceiling when he attempts to jump from the small staircase in the middle. Make him duck, then jump.
Part C[edit]

- Once you take the proper route through the second leg, you will arrive at Bowser's bridge. Prepare to face him.