This page contains complete advancement solutions for each area of the game. As a result, it contains many spoilers. If you are trying to solve the game and reach the final area on your own, do not read beyond the specific area that you are stuck in.
Area 1[edit]
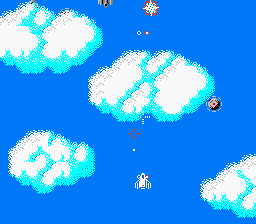
Clear Condition: Fly directly into one of the four clouds that appear in the middle of the stage. The correct cloud is chosen at random.
Summary: The first stage begins in a very similar fashion to the original Xevious. Easy aerial targets will fly forward to attack, while bomb-able ground targets slowly scroll by. Eventually, the ground seems to disappear as you enter the upper atmosphere. Clouds fill the screen, and enemies are easily hidden from sight. Be sure to fire ahead as you attempt to fly inside each of the clouds. You will know that you found the right cloud when the screen goes blank for a short period of time.
Area 2[edit]
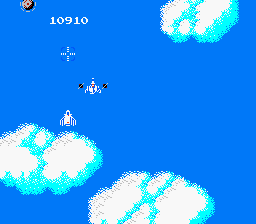
Clear Condition: Rescue the Phantom support ship and unite with it.
Summary: Up in the clouds, there are nothing but air targets to attack, so you will not need your bombs. Enemies still hide inside the clouds in an effort to surprise or ambush you, so continue to fire into the clouds before you pass through them. Eventually, the Phantom support ship will appear, shuttled by two small black ships on either side. Shoot the two ships and collect the Phantom in order to rescue it. The Phantom will disengage when the next area begins.
Area 3[edit]
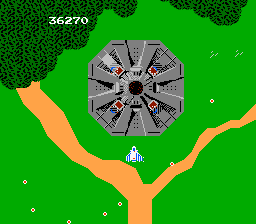
Clear Condition: Destroy the core of the Andor Genesis.
Summary: In a typical looking Xevious stage, the Phantom will begin dropping support items for you to collect and power up the Solvalou. Be on the look out for it so that you don't miss the items. Eventually, you will reach the end of the stage and encounter the great Andor Genesis mothership. You must bomb the core of the ship (which is much more easily done with the bomb reticule enhancement) in order to advance to the next area, which happens to be inside the Andor Genesis.
Area 4[edit]


Clear Condition: Bomb all of the glowing red ground targets (Dorude and Garudorude).
Summary: Inside the Andor Genesis, you'll need to carefully bomb the targets along the ground that resemble those shown on either side. They glow red and come in two different sizes. All of them must be destroyed in order to move to the next area. If you miss one of them, you will be forced to repeat the stage over, although those targets which have already been destroyed will remain destroyed.
Areas 5 and 6[edit]
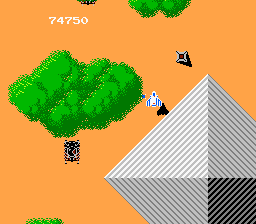
Clear Condition: Bomb all of the square ground targets (Danuku).

Summary: In stages 5 and 6, you will be unable to bomb, and you will only be able to fire your main guns forward. All enemies encountered in this stage can be destroyed without bombs. The goal is to destroy all of the square ground targets (as shown to the left), in order to advance to the next area. Area 6 looks nearly identical to area 5, and you may think that you missed a target, but you will notice that the enemy arrangement is slightly different in area 6. The hardest target to get is the own depicted in the screenshot to the right, behind the right pyramid. There are two gaps in the left pyramid that you encounter that you can fly through. Watch out for small insect like enemies that are easily obscured by the trees.
Areas 7 and 8[edit]
 →
→ 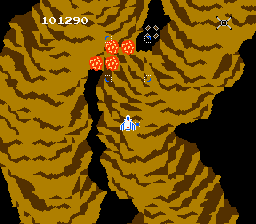
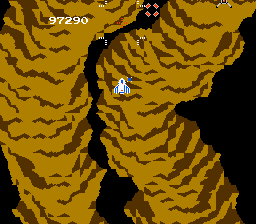
Clear Condition: Bomb the wall that divides the cave in half, bomb a rock in the left tunnel to obtain the hidden item (Pitoru), and return with it to the right tunnel.


Summary: Areas 7 and 8 take place in different sides of the same setting. As you enter the cave, you begin on the right side. You will find that your ability to bomb has returned, but now you may no longer shoot forward. As you fly through the cave, you will find a near horizontal wall dividing the two sides of the tunnel. This wall can be bombed, allowing you to pass from the right tunnel to the left tunnel. Advance through the left tunnel and bomb every rock (shown left) that you find until you find one that contains an item (shown right, known as Pitoru) underneath. Collect this item, and continue traveling down the left tunnel. Eventually you will return to the hole that you bombed in the wall. At this point return to the right side, and proceed through the right tunnel until you reach the exit.
Area 9 (regular)[edit]
 →
→ 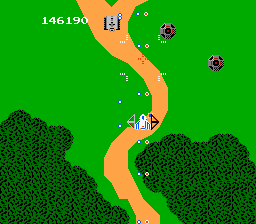
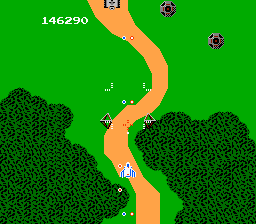
Clear Condition: Allow the diamond shaped enemy (Sheonite) to encase you.
Summary: In another typical looking outdoor Xevious stage, you will eventually encounter an enemy that was quite lethal in the original Xevious game, known as a Sheonite. These indestructible enemies would home in on the Solvalou's position and try to crush it. In this game, however, your objective is to allow the Solvalou to get caught in between them. The two parts of the Sheonite will encase the Solvalou, and allow you passage into the next area. There happens to be an extra life granting special flag at the very end of the stage. You will see three objects arranged in a triangle (pointing down) to the left of a pond. Bomb the left bank of the pond immediately next to the closest ground target to make the flag appear. If you have the Wide Blaster power up, the Special Flag will only appear if the direct center of the Blaster's blast strikes it.
Area 9 (special)[edit]
 →
→ 
Clear Condition: There is none.
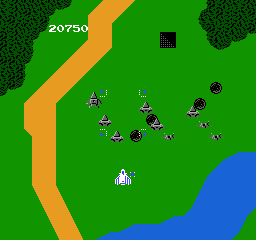
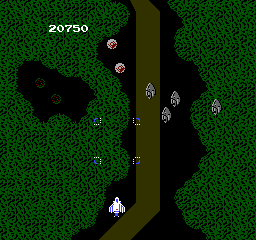
Summary: If you ignore the Sheonite that appears and allow Area 9 to loop once (ensuring most of the ground targets have been destroyed on the first lap), on the second lap you should find an odd square-shaped hole around the area's midway point where you previously bombed a grounded enemy. Gide the Solvalou over this hole and you will be transported to a nighttime version of Area 9. Here, the Sheonite is no longer required to pass Area 9, and the darkness will continue into Area 10, wearing off once you enter Area 11. There are no difference in the enemies you will encounter between the normal and Special versions of Area 9, and all of the grounded targets you bombed in the standard Area 9 will remain defeated.
Area 10[edit]
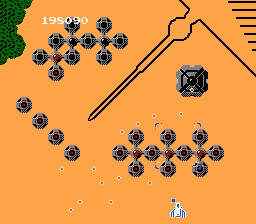
Clear Condition: Destroy all ground targets at the end of the stage.
Summary: This is a straightforward area, with no tricks to solve. You will encounter a set of enemies which appear in pairs side by side. They split apart a short distance, and create an energy barrier between them, which they send off in the Solvalou's direction. Destroy them quickly before they can complete the barrier, or dodge the barrier. When you reach the end of the stage, you will encounter a large assembly of ground targets, all of which must be destroyed in order to advance to the next stage. They will all fire at you, so you must dodge their shots effectively while aiming your bombs precisely on the targets.
If you entered this area through Area 9's secret hole, Area 10 will be darkened as well. Aside from the palette change, there are no differences between the two versions of Area 10.
Area 11[edit]
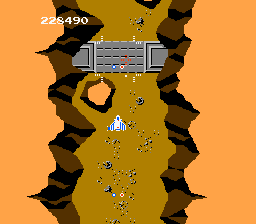
Clear Condition: Fire 5 bombs into the metal gate at the end of the area.
Summary: You will be flying along a low lying trench (presumably along the Nazca lines). You will encounter a black orb, accompanied by semi-translucent spinning discs. The discs cannot be destroyed. They can only be removed by attacking the black orb. Having the back-zapper will very much come in handy. Focus on the orbs; the tanks on the sides are only a distraction. Eventually, you will encounter a metal gate or bridge laid across the trench. You must successfully hit the gate with five bombs in order to open the entrance to area 12. If you do not manage to hit it five times, you will continue on and repeat the area.
Area 12[edit]
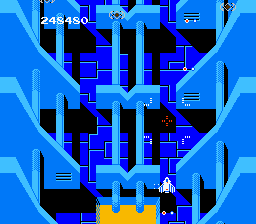
Clear Condition: Reveal and destroy all of the submerged pyramids.
 →
→ Summary: Throughout this area, you will notice small pyramid tips rising out of the ground. In order to destroy these, you must bomb them three times. The first time will fully reveal the pyramid. The second time will damage the tip, revealing a symbol underneath, and the third bomb will completely remove them. There happens to be two different exits in this stage. The first one you encounter will take you to the ordinary arrangment of area 13, while the second one will take you to a special arrangement of area 13, where you can combine with a support ship to obtain the super zapper.
Area 13 (regular)[edit]
Clear Condition: There is none.
Summary: You will simply fly through this corridor, where you must carefully navigate around enemy shots. Eventually, you will come upon the exit.
Area 13 (special)[edit]
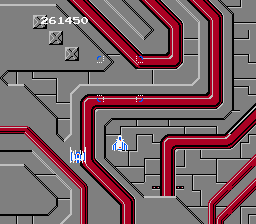
Clear Condition: There is none.
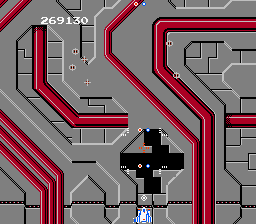
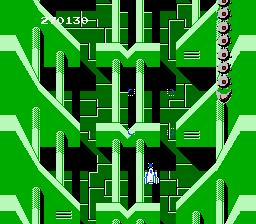
Summary: If you've skipped the first exit in area 12 and moved on to the second exit, you will end up in this slightly different stage. Here, you will have the single opportunity to discover and unite with the super zapper power up. Simply collide with the white craft that appears from one of the lower corners of the screen, and you will gain the ability to shoot the translucent plate like enemies which you were unable to destroy under your own power. Eventually, you will notice a section of the floor shift and open up. This is the exit to the second part of the special arrangement of area 13. In this green corridor, a snake like enemy composed of many enemy ships will snake down the corridor. Fire at the head to disrupt its movement, and destroy the remaining segments. Eventually the exit to area 14 will appear.
 →
→ 
Area 14[edit]
Clear Condition: Destroy the ground targets that contain symbols, but not those without symbols.

Summary: This area resembles area 12, and the goal is also slightly similar. This time around, the symbols of the pyramids are already exposed. Most contain a symbol like G, K, or V. A few do not contain any symbol. These pyramid with no symbol must be left alone, while those pyramids with symbols must be bombed. Even if you bomb every symbol pyramid, you will be forced to repeat the area if you bomb even one non-symbol pyramid.
Area 15[edit]
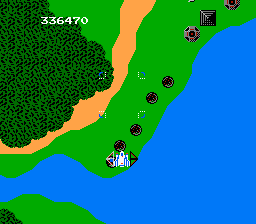
Clear Condition: Destroy the ground targets and allow the diamond shaped enemy (Sheonite) to encase you.
Summary: The clear condition for this area is the same as the clear condition for area 9. However, the difficulty and intensity of the enemy attack will be much higher. If you managed to collect the Super Zapper from the special arrangement of area 13, you will be in much better shape to survive this area. In order for the Sheonite to appear, you need to destroy the set of 5 ground targets that appear on the left of the screen. Once it appears, don't miss the opportunity to become encased by it.
Area 16[edit]
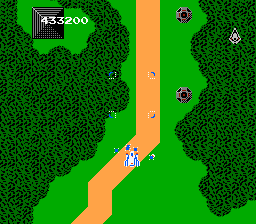
Clear Condition: Complete the stage with at least one Gemini swarm surrounding you.
Summary: As you move on to this area, the Sheonite will eventually fall off and crash into the ground. As it does, it will release a swarm of pods known as Gemini. The Gemini are attracted to your ship, and buzz around it. They are completely harmless, and are in fact required to escape this area and move on to the next one. The only real way to lose them is if they happen to leave the edge of the screen, so as long as you keep the Solvalou away from any screen edge, they should remain with you throughout the stage. If you move your ship for too long, the Gemini may be flung too far from your ship to recover. Any Gemini pods that you retain at the end of the area will transform into barrier stocks.
Area 17[edit]
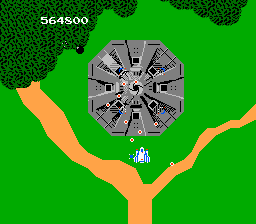
Clear Condition: Destroy the core of the Andor Genesis.
Summary: After fighting through another intense outdoor stage, you will encounter the second Andor Genesis mothership. This time, it has eight pods surrounding the core, which can be destroyed through bombing. The core itself is not always exposed, but rather opens and closes. It is only vulnerable when the core hatch is open, so you must time your bombing carefully.
Area 18[edit]
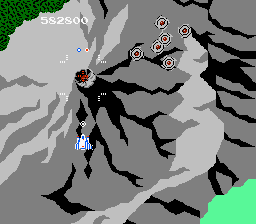
Clear Condition: Bomb all of the volcanoes, and enter the first volcano on the second trip.
Summary: In a new outdoor scenario, the Solvalou must fly over a region populated with numerous volcanoes, all of which are somewhat active. Once visible on the screen for a period of time, they spew eight rocks in eight different directions. If you bomb the tops of the volcanoes quickly enough, you can shut them down before they have a chance to erupt. All the while, you must still evade attacks from lethal enemy craft. After all of the volcanoes scroll by, the area will repeat itself. If you successfully bombed every single volcano, you will be able to enter the next area through the hole of the first volcano that you encounter.
Area 19[edit]
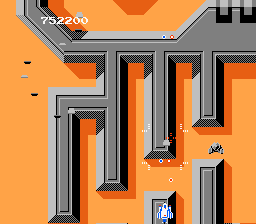
Clear Condition: Destroy all of the flying craft known as Nime.

Summary: The clear condition for this stage is to destroy every instance of the Nime craft (shown to the left) before reaching the entrance of the GAMP's lair. These craft will appear from the bottom of the screen, fly towards the top for a short duration before turning around and flying back down to the bottom again. If you do not destroy all of these Nime present before you arrive at the entrance, GAMP will use his magic to teleport you back to area 16. Do your best to attack every Nime in the area and avoid this unfortunate fate.
Areas 20 & 21[edit]
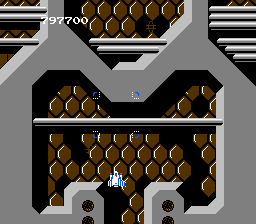
Clear Condition: Defeat the final boss.
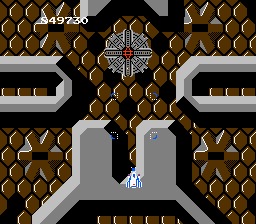
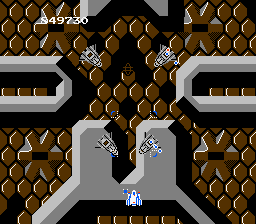
Summary: Once inside GAMP's lair, you must continue to fly forward, avoiding all enemy attacks, until you reach the very end. Once you do, a large round enemy will appear. This enemy is composed of four sections, each of which can pull away from the core and fly independently. All four sections will detach simultaneous, and fly towards the Solvalou in a weaving pattern. Although these enemies appear to fly through the air, they are completely invulnerable to your zapper, and must be bombed in order to be destroyed. If you time the release of your bombs properly, you can destroy two sections with one bomb. As a result, the entire boss can be defeated with two bombs, though this is difficult to do. If you succeed in destroying the sections, the game will be over, and you will be treated to the ending.
 →
→ 
Beyond[edit]
After the credits have rolled, you can press ![]() to continue your game at a higher level of difficult. The enemies will react more aggressively, and you will not be given access to the barrier power-up until area 16. If you complete the game a second time, you can continue again. The third time through, the enemies won't act any more fiercely, but you will not be able to collect the Super Zapper in the special arrangement of area 13.
to continue your game at a higher level of difficult. The enemies will react more aggressively, and you will not be given access to the barrier power-up until area 16. If you complete the game a second time, you can continue again. The third time through, the enemies won't act any more fiercely, but you will not be able to collect the Super Zapper in the special arrangement of area 13.
