Gelatinoid[edit]
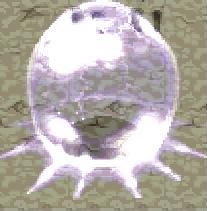
Location: Wendell's Nightmare
Hits with recommended weapon:
- Big Slime - 21 hits with the dagger.
- Medium Slimes - 14 hits with the dagger.
- Basic Slimes - 5 hits with the dagger.
Recommended Accessory: Herbs
Attacks: The Gelatinoid has no attacks to speak of, though if any form of the Gelatinoid (including the basic slimes) makes contact with Alundra, he will take one point of damage.
Strategy: The Gelatinoid slowly moves around the arena, trying to make contact Alundra, simply hit it with the dagger, moving away during its period of invincibility after each hit it takes, hitting it once it falls out of invincibility. Once the moves of the boss can be predicted to a certain extent, it's possible to keep him invincible for as long as possible, hitting the boss as soon as it stops.
After 21 hits, it splits into four smaller versions of itself, these function in the same way as the big Gelatinoid, along with the grace period whenever they get hit, just hit them with the dagger, aiming to get more than one of them per swing in order to make the fight go faster, and use Herbs if Alundra's health gets too low.
After one of the medium slimes takes 14 hits, it splits into four basic slimes, these take 5 hits with a dagger to kill, these have no sort of invincibility, making them extremely easy to kill as long as Alundra does not get cornered. After every slime is dead, the boss fight is over.
Ancient Guardian[edit]
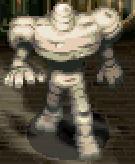
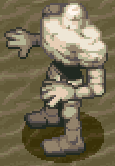
Location: Lars' Crypt, Ancient Shrine and Murgg Woods
Hits with recommended weapon:38 hits with the Dagger, 25 hits with the Iron Flail.
Recommended Accessory: Herbs or Bombs
Attacks: Contact with the Ancient Guardian or his rocks results in 2 damage being taken with the Cloth Armour and 1 damage with the Leather Armour.
- Circular Rock Fall - The Ancient Guardian slams the ground and a circle of rocks falls down around him.
- Circular Rock Fall (Extended) - The Ancient Guardian slams the ground and a circle of rocks falls down, however, after the first circle of rocks fall, two more circles of rocks, radiating from the original circle fall down, though every other rock is omitted from both of the outer circles. Dodging this can typically be achieved by either standing at the non-main cardinal points (North-East, South-East, South-West and North-West) though this may not always work, or just standing far away and heading in between the rocks at that point.
- Random Rock Fall - The Ancient Guardian slams the ground, and a trial of rocks begins to fall down. The patterns they follow appear to be largely random, though they are generally in a contained area and localized around the Ancient Guardian himself.
- Circular Rock Fall (Staggered) - The Ancient Guardian shakes briefly, and a large number of rocks fall down, one at the time, forming a circular pattern around him.
- Zig-Zag Rock Fall - The Ancient Guardian shakes briefly, before three lines of rocks fall, starting from the Guardian, these rocks are connected in one line, though, at every fifth rock, the line changes orientation to attempt to track Alundra, making this attack have limited homing capabilities, the best way to avoid them is to run in directions perpendicular to the lines whenever they shift directions.
Strategy: The recommended strategy for this boss is for Alundra to keep his distance whenever the boss is in his grace period from being hit. Keeping a distance allows the Circular Rock Fall to always miss and the extended version to be dodged much more easily. It also allows a heads-up for the Zig-Zag Rock Fall, allowing that to be maneuvered around. As will the Gelatinoid, try to hit the boss at any point when it is not invincible, though don't risk direct damage in order to do it, though occasionally a hit will prevent the boss from carrying out the attack it was going to do. Also, in the case of certain attacks, such as the any of the gradual rock falls, it might be wise to throw a Bomb, since Bombs deal 2.5 times the damage of a dagger hit to the Ancient Guardian.
For the Shrine Guardian, there are a few slight differences, while the sand there makes Alundra move slower, Alundra has slightly more life and takes half as much damage from the Guardian, he can also deal more damage from a further range with the Iron Flail, finally, the Guardian's attacks are weaker due to the smallness of the arena as well, many of the zig-zag falls terminate prematurely due to contact with the edge of the arena. In the fight, just attack with the Iron Flail whenever there is a chance, dodging the few rock drops that occur.
Sara[edit]


Location: Bonaire's Dream
Hits with recommended weapon: One hit with a Bomb or one hit with the Earth Scroll and nine dagger slashes.
Recommended accessory: Bombs, Earth Scroll and Herbs
Attacks: Every one of Sara's attacks deals two damage to Alundra, her attack pattern is normally Rapid Dash/Mirror Image → Energy Disc v1/2 → Rapid Dash/Mirror Image etc
- Mirror Image - Sara spawns 7 mirror images alongside herself which encircle Alundra and travel around him, contact with them deals damage to Alundra. If Alundra hits Sara, all images are destroyed and Sara teleports away, if Alundra hits an image, the image disappears and the attack continues.
- Energy Discs v1 - Three energy discs spawn, one after the other, each of them homes into Alundra immediately after they appear, they lose all homing capability after they begin moving, making them easy to dodge, but they carry on traveling until they hit a wall.
- Energy Discs v2 - Three energy discs spawn, all at once, in a triangle around Alundra, at that point they lock onto his current position and travel towards him. Like the previous energy discs, they have only the most limited homing capability, making them easy to dodge.
- Rapid Dash - Sara appears and proceeds to dash around the arena in straight lines, while damage with her causes Alundra to take damage, she is still completely vulnerable to him, disappearing as soon as she is hit.
Strategy: There are two main strategies that can be used for this battle, the first is to throw bombs around the arena almost constantly. If Sara takes damage from a bomb while using Mirror Image or Rapid Dash, she will be defeated instantly. The problems with this strategy lay with its reliance on luck, the five second fuse of a bomb and the fact that Alundra will take heavy damage from Sara's mirror images, since he is unable to hit them for fear of hitting the actual Sara and breaking off the attack. However, the battle is likely to end quickly with Sara sometimes dashing into an exploding bomb or materializing into one.
The second strategy is slower but a lot more reliable, the first time Sara uses her Mirror Image, use the Earth Scroll to destroy all the images and Sara, as well as removing 2/5ths of her health. Feel free to use an Elixir or Wonder Essence to restore Magic and do it again as soon as possible. If not, proceed to use the dagger almost constantly afterwards, since once Sara is hit, she will stop her attack and teleport away, generally using her energy disc attack.
Test of Strength[edit]

This fight is slightly unique, actually being a fight against eight of the Mummy Guardians found through the entire Ancient Shrine rather than against any specific boss.
Location: Ancient Shrine
Hits with recommended weapon: One casting of the Earth Scroll, one hit with a Bomb, 10 hits with the Iron Flail
Recommended accessory: Bombs, Earth Scroll and Herbs
Attacks: Contact with a Mummy Guardian deals two damage to Alundra.
- Hook (3 damage)- The Mummy Guardian stops briefly and then throws out a hook, as shown in the picture.
Strategy: For this battle, walk downwards and let the Mummies get around Alundra, as soon as they do, use the Earth Scroll, this should kill off most of them, after that, fire off the Earth Scroll once again to kill off any that are still alive. If any live through both spells, use Bombs to easily dispatch them in one hit.
The Watcher in the Water[edit]

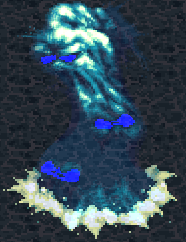
Location: Coastal Cave
Hits with recommended weapon: 10 Charged hits with the Sword
Recommended Accessory: Herbs or Earth Scroll
Attacks: Contact with the Watcher in the Water's vulnerable form deals 4 damage to Alundra, contact with his arms deals 3 damage to Alundra.
- Bubbleburst (2 HP)- While the Watcher in the Water is in his invincible form, he spits out a torrent of bubbles in a circle around himself, they can be destroyed with a single hit from a weapon.

- Minor Arm Summon - While the Watcher in the Water is in his invincible form, he occasionally summons an arm either where Alundra is or in a position near him, they can be destroyed in one hit, though they retract after a couple of seconds.
- Major Arm Summon - While the Watcher in the Water is in his vulnerable form, he sometimes summons many arms out of the water at once, these deal damage to Alundra if touched but can still be destroyed by weapons. The Watcher in the Water carries on using this attack until he receives damage, summoning another wave of arms as the last wave retracts.
- Homing Arms - While the Watcher in the Water is in his vulnerable form, he summons arms that rapidly home in on Alundra's position, while they are faster than Alundra walking, they can still be destroyed and most, but not all eventually retract after a couple of seconds. The Watcher in the Water carries on using this attack until he receives damage, at which point it stops a few seconds after he retracts his body.
- Circle of Arms - When the Watcher in the Water emerges, he occasionally summons a circle of arms around him that travel outwards and rotate in a circular pattern in an attempt to hit Alundra. These arms also retract eventually and are then followed by the Watcher in the Water himself.
Strategy: For this boss, there are two strategies that can be used, the first one that will be covered is the typical strategy while the second will be a strategy that allows Alundra to dodge all of the Watcher in the Water's attacks but at the slight expense of his own damage dealing capabilities.
The Watcher in the Water has two forms, the first of which is the face in the water, this deals no damage when contact is made with it and only has two attacks, Bubbleburst and a Minor Arm Summon, both of these can either be dodged or dealt with using the Sword. After some time, the Watcher in the Water will switch to his second, vulnerable form, at which point, he will use one of his attacks until the condition to stop the attack is met (hitting him for the Major Arm Summon and Homing Arms and either hitting him or waiting for the attack to finish for the Circle of Arms).
The typical strategy for this boss is to walk around in the water, dodging the arms as they spring up, though it is possibly safer to stand still since it lowers the likelihood of Alundra walking into an arm, though it does increase the chance of the Watcher in the Water summoning one right under Alundra. If he uses Bubbleburst, just attack the bubbles or dodge them. When the Watcher in the Water emerges, charge up a Sword Attack and use it on the body while dodging the arms, hitting them out of the way if it is a Major Arm Summon. After being hit, he will return to his invincible form and the cycle will continue until he dies.
The second strategy that can be used for this battle concerns the raised platform at the top left of the arena. While Alundra is standing on it, he is, for all intents and purposes, untouchable by the Watcher in the Water. Bubblebursts and arm summons cannot touch him and the Watcher in the Water will not attack with Homing Arms or his Major Arm Summon when he emerges, he will only use his Circle of Arms. The only drawback is the limited visual range that he has. If Alundra chooses to stand here, he should charge up his Sword attack and when either the vulnerable form of the Watcher in the Water becomes visible or no arms are visible on the arena for a prolonged time, he should jump down and attack him unless the Circle of Arms is used, due to the fact that he will retract much too quickly, before jumping up to the platform, repeat this until the battle is over.
Soul Leech (First Encounter)[edit]
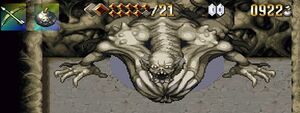
Location: Kline's Nightmare
Hits with Recommended Weapon: N/A
Recommended Accessory: Bombs and Herbs
Attacks: The Soul Leech only has 2 attacks. It will try and suck you in to it's stomach, taking HP off of you and spitting you back out in regular intervals, as well as spitting out 5 purple slime's to distract you until it starts sucking again.
Strategy: You're going to want to use bombs for this boss. The boss itself will constantly try and suck you into it, resulting in a massive loss of HP.
Your best bet is to jump up when you take out a bomb, and jump again when you throw it. That way, you won't be sucked in. You don't have to face the boss directly to throw the bomb at it, just jump throw a bomb once the boss' mouth is open, it'll just suck the bomb in anyway. Also note that both you and Kline can be sucked into the beast, either way, you take damage. Try to position yourself between Kline and the boss at all times.
The boss will also have a secondary attack of spitting out about 5 purple slime enemies in regular intervals. You might as well just avoid them because about 3 seconds later the boss is going to start his sucking attack and kill them all anyway.
Keep repeating the same technique until the boss fight is over and you exit Kline's Nightmare.
Kline[edit]
Location: Inoa Village outside Kline's House
Hits with recommended weapon: Sword
Recommended Accessory: Herbs if you need them, or bombs.
Attacks: Kline only has one attack. He will charge up an attack that takes roughly 2-3 seconds, and charge towards you, trying to slash you.
Strategy: Possibly the easiest boss fight in the entire game. Just hit Kline once with your Sword and get close to him and keep hitting him when he becomes vulnerable again. Kline's only attack takes about 2-3 seconds to charge so by the time he's vulnerable for attack again, he won't have had enough time to attack you.
Repeat the process until the boss fight is over.
Reptilicus Maximus[edit]
Location: Reptile Lair
Hits with Recommended Weapon: Charged sword
Recommended Accessory: Bombs and Herbs, Earth spell when surrounded
Attacks: Reptilicus Maximus basically just stomps around the area so not really a big threat. He will do a super stomp which stops movement for a little bit, this can be negated by jumping at the right moment.
Strategy: Drop down into the arena and get ready to move around nonstop. Have heals ready to go and use the charged sword attack to make short work of this boss, takes roughly 10-15 good hits (depends on how long he is left to heal). Four sword lizardmen will continuously spawn, two acid spitters spawn and should be destroyed immediately to make the fight a bit easier. Half way through the fight he will try to regenerate health, hit him to stop this from continuing. Keep using the sword charge attack and jumping around to end his reign.
Soul Leech (Second Encounter)[edit]

Location: Giles' Dream
Hits with Recommended Weapon: N/A
Recommended Accessory: Bombs and Herbs
Attacks: The Soul Leech only has 2 attacks. It will try and suck you in to it's stomach, taking HP off of you and spitting you back out in regular intervals, as well as spitting out 5 purple slime's to distract you until it starts sucking again.
Strategy: This Soul Leech is the exact same Soul Leech that we encountered the first time in Kline's Nightmare. The strategy is EXACTLY the same, but with a catch this time. In Kline's Nightmare, if Kline were to be sucked into the Soul Leech, it would only do some damage to you. Although this time, if Giles is sucked into the Soul Leech, it will kill Alundra! Better watch yourselves this time, so here's what you should do.
When the Soul Leech does it's suck attack, both you and Giles will be sucked towards the Soul Leech. Make sure you stand in front of Giles. Don't let him EVER be in front of you throughout the duration of this boss battle. It is your main priority to keep Giles alive.
Use your Bombs and perform the same jump/throw process that you did in the previous encounter with the Soul Leech and you'll be absolutely fine. Just remember to keep Giles within sight at all times and never let him be in front of you.
Continue this process until the boss battle is completed.
Corpse Worm[edit]
Location: Magyscar
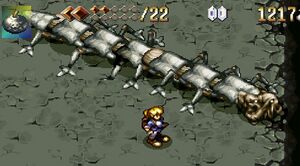
Hits with recommended weapon: Flail
Recommended accessory: Bombs and Herbs
Attacks: Runs around the screen and will run into Alundra. Lays eggs that hatch into bees and spits a ball that bounces around the area. Will stop and twitch tail before lashing out, invulnerable during this attack
Strategy: Using the flail and bombs knock off the armor plating on his body, don’t worry about the tail part. Only when the armor comes off can Alundra hit Corpse Worm in the head. After a little bit the armor will regenerate when the Corpse Worm makes a crescent shape and needs to be knocked off again.
The eggs can be destroyed with one bomb and the bees don’t move until Alundra gets close.
Continue to attack the Corpse Worm this way till complete.
Nirude[edit]
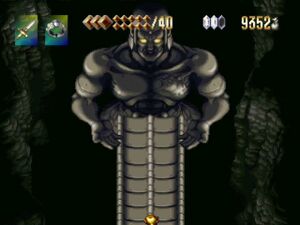
Location: Nirude's Lair
Hits with recommended weapon: Not needed.
Recommended accessory: None needed
Attacks:
- Rock Fall - Nirude makes rocks fall from the sky in order to block the way forward, large rocks take two hits with the sword or one charged hit to destroy, while all other rocks take one hit.
Strategy: Nirude is, for all intents and purposes, invincible. Alundra is not able to damage him in any way, instead he has to run away, reaching the bottom of the bridge as quickly as he can. The only obstacle in the fight are the rocks that fall onto the bridge, but these can be easily destroyed. As soon as the fight begins, begin running downwards. Use normal sword slashes to destroy the rocks unless there are more than two large ones in a row, then use a charge attack to destroy as many of them as possible. Eventually, the screen will begin to scroll downwards at a slower pace and the rockfalls would stop, keep on going downwards and eventually Nirude will stop and the trial will be over.
Hidden Eye[edit]
Location: Elene's Dream
Stone Golem[edit]
Location: Murgg Woods
Zazan[edit]
Location: Great Tree Tower
Wilda[edit]
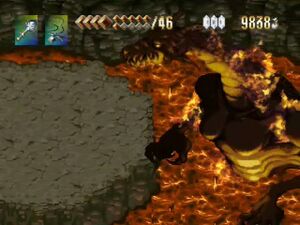
Location: Torla Mountain
Hits with recommended weapon: 20 charged hits with the Ice Wand.
Recommended accessory: Nava's Charm
Attacks:
- Flamethrower (14 health)- Wilda leans downwards and breathes out a stream of fire, it is always the same size and always fired in the same place and has a pushback property if Alundra is standing anywhere near it, preventing him from walking past it. This attack can be dodged by not standing directly in front of Wilda's head.
- Fireballs (7 health)- Wilda leans downwards and spits out 7 fireballs, spreading out in a fan shape, four of them impact with the back wall of the boss chamber and burn for four seconds, can be dodged by standing behind Wilda's head, either above or below it.
- Fireball Barrage (7 health) - Wilda does this attack when standing up, and spits out three waves of five fireballs, the waves are shot out in a random order but are always one of each range (close, medium or long). The fireballs burn for four seconds once they hit the ground. The furthest wave of Fireballs can be dodged by standing at the bottom right corner of the arena, and the other two waves can be dodged by standing near the back end of the arena.
- Cave-in - Wilda does this attack when standing up, it deals no damage and causes Alundra to move around slightly in a random direction, the rocks that fall from the sky are merely decoration.
Strategy: Wilda has three primary attacks to worry about, however equipping Nava's Charm blocks Fire damage, essentially making Alundra invincible. In the case of weaponry, Wilda is only weak to the Ice Wand and can only be attacked when he lowers his head. When he does, fire a charged Ice bolt at it and wait next to his head while charging up the Ice Wand. If he uses the flamethrower, let Alundra get pushed back and then walk directly towards Wilda's head, firing the Ice Wand once the flamethrower stops, if he fires the fireballs, head closer towards his head to dodge them, if Alundra gets hit, it's unimportant since he'll take no damage. When Wilda's head it up, it is best to stand on the upper right corner of the arena until he lowers it once again. Repeat this process until the fight is over.
Terror Twins[edit]
Location: Nestus' Dream
Ronan[edit]
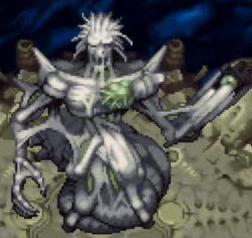
Location: Sanctuary
Hits with recommended weapon: 48 charged shots with the Willow Bow or 6 castings of the Fire Book.
Recomended accessory: Silver Armlets or Recovery Ring
Attacks:
- Summon shield (7 health)- Ronan briefly hunches over and summons eight orbs to circle him, hurting Alundra if he touches them and indirectly protecting Ronan from damage by short ranged weaponry, they can be destroyed with a few hits from most weapons though.
- Dismiss shield (7 health)- If the shield persists for too long and Alundra remains too far away, Ronan throws the remaining orbs downwards off the arena, sending them in a spinning pattern.
- Arm Cannon (10 health)- Ronan sticks out his left arm and fires a wide laser, this can either be fired straight downwards or slightly to the left or right. The attack is rather obviously telegraphed, allowing Alundra time to dodge to dodge it by running to the opposite direction his arm is pointed, or either direction if it is pointed straight down.
- Arrows from the Sky (8 health)- Ronan hunches over, sending out three waves of two blue arrows into the sky, the arrows cast a rather obvious shadow on the ground and the shadow stops for a moment before the arrows fall to the ground, make sure to stay away from the shadows since the blast radius is slightly larger than the shadow.
- NOTE - When Ronan summons his shield or sends out the arrows from the sky, he hunches over and becomes invincible.
Strategies:
Magic - At this point Alundra has 3 Magic Seeds, along with an Elixir and a Wonder Essence, this allows him 9 possible castings of the Fire Book, six of these have to make contact with Ronan in order to kill him. If you choose to use this strategy, only the first two castings of the Fire Book can be directly chained, the rest will have to be slightly staggered. This is since Ronan responds to the first with a series of Arm Cannon bursts, after the second casting, he responds to a Fire Book casting with a shield summon, making him invulnerable during the entire period of the spell being cast.
Pros
- With the exception of the initial arm cannon bursts and a stray hit from the shield spheres (which are destroyed from a single shot of the Fire Book), Ronan does not directly attack.
- The battle takes a much shorter time than it normally would.
Cons
- Very magic intensive, requires a method of Magic Restoration.
Physical - The Willow Bow will be the weapon used, charged shots from it have the advantage of both range as well. Alundra is able to stay near the bottom of the arena and fire charged shots with impunity, having to only occasionally move to dodge the arrows from the sky. The charged shots from the Willow Bow should be enough to destroy Ronan's shield, but if Alundra does get hit by the shield dismiss, he will be able to easily heal the damage. At that distance Ronan will not use his arm cannon attack.
Pros
- If Alundra is able to fire charged shots with enough timing and luck, he will be able to destroy all the shield spheres so Ronan will be unable to dismiss them, this means that Alundra will take no damage during the battle.
Cons
- 48 shots are required and Ronan spends a large period of the fight being invulnerable to damage due to the nature of his Arrows from the sky attack.
Zorgia[edit]
Location: Nava's Keep
Dragon[edit]
Location: Lake Shrine Interior
Hits with recommended accessory: 10 castings of the Fire Book
Recommended weapon: Spirit Wand
Melzas (First Form)[edit]
Location: Lake Shrine Interior
Hits with recommended accessory: 5 castings of the Fire Book
Recommended weapon: Spirit Wand
Strategy: Ironically, this is one of the final boss fights, and is also incredibly easy, if you know what you're doing.
The trick to beating this boss battle (after that horribly long cutscene) is to wait until Melzas appears. He should appear in 4 different places at once. The trick is to wait until the last Melzas pops up. 3 of which are only hologram's and only one of them will be damaged (similar to the Sara battle in Bonaire's Dream).
Keep your eyes open, and once you've hit the last Melzas to pop up, go back into the middle of the area. That way, you can see where every Melzas is going to pop up without missing your chance.
Normally, there will be 4 Melzas' to the upper left and right, and the lower left and right. He has another position though, which can be fatal. There will be 3 mirages of Melzas at the top of the boss area, which can release a devastating laser attack (similar to the Ronan battle) which takes off quite a lot of HP, so you want to watch out for that. Again, same method; look for the last Melzas to pop up and hit that one.
This boss fight is actually a lot easier than it sounds, method wise.
Repeat this process until Melzas has been defeated.
Melzas (Final Form)[edit]
Location: Lake Shrine Interior
Hits with recommended accessory: 6 castings of the Fire Book
Recommended weapon: Spirit Wand
