| Section | Map | Legend | Enemies |
|---|---|---|---|
| A |  |
A: To Arcadia B: Info C: Info D: To section B E: To section D |
none |
| B |  |
F: To section A G: Info Z: Hidden door to section H |
Bat Snake |
| C |  |
H: Info I: Info J: Prometheus |
Bat Snake Nemea Lion |
| D |  |
K: To section A L: Info M: Info N: To section F |
Bat Snake |
| E |  |
O: Info P: To section G Q: Temple of Hermes R: Info |
Bat Snake |
| F |  |
S: Spring of Recovery T: To section A |
Snake |
| G |  |
U: Shop V: To section A |
Salamander |
| H |  |
W: To section B X: Nymph Y: Info |
Bat Snake |
| I |  |
Bat Snake |
Arriving from Arcadia[edit]
The secret of fire[edit]

You will arrive in the upper left corner of section A. You will not encounter any enemies in this section. A man in the cave behind door B indicates that he saw a Nymph being taken into a cavern. A boy in the cave behind door C tells you that a shield made from Salamander skins can protect you from fire. Far to the right are two doors, D and E. They each lead to a different cave. For now, take door D into the cave of section B.
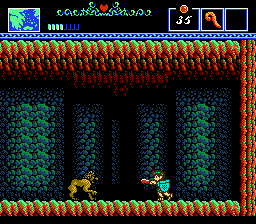
Inside these caves, you will encounter two new enemies. Bats hang from the ceilings and drop down to attack before flying back up. They are a nuisance, and can be difficult to hit unless you are prepared to stand still and smack them with your weapon when they approach. The snakes are a little easier to deal with, but no less dangerous. They slither along slowly until you get close enough, at which point they leap forward to strike. They can even hop up ledges. Try to strike them before they jump.
There is only one door of interest in section B (door Z is hidden and you cannot access it at this time.) A man behind door G will tell you that Prometheus is being guarded by a lion. May your way to the right past the bats and snakes, and on to section C. A man behind the first door tells you about the presence of Salamanders under Hermes' temple. Further in, another man also warns you about falling into a nest of Salamanders.


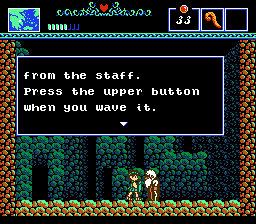
As you continue to the end of section C, you will encounter the Lion of Nemea sitting on the ground. He will not respond to your presence until you're fairly close to him, at which point he will leap up and begin running around. The lion is considerably faster than the bull outside of Zeus' temple, but he isn't must smarter. Once again, you can hold a single position and strike continuously, and the lion will inevitably do itself in after hitting your staff three times. At that time, door J will appear. Pass through the door to find Prometheus and speak with him. He will tell you about holding ![]() while you press
while you press ![]() to shoot a flame from the Staff of Fennel.
to shoot a flame from the Staff of Fennel.
After you acquire this knowledge from Prometheus, you can return all the way to the left, back to section A. Be careful, however, as several of the bats can potentially knock you into pits. Flames won't help you very much against the bats, but they can be used to take out some of the snakes from a distance. Once you return outside, turn back around to the right, and pass through door E to visit section D.
A missing god[edit]
Aside from a different background color, section D will resemble section B, with the same enemies. A man behind door L speaks of waking the earth with the ocarina, while the man behind door M speaks about the shores of Argolis, and how one connects with Crete. Be careful jumping over the final pit in section D. Unlike all of the other pits, which kill you if you fall in, this one leads to one of the nests of Snakes. Falling through the last pit leads to section F. In addition to many snakes, there is a door (S) that leads to a Spring of Recovery. Like the fountain outside of Athena's temple, the spring will restore all of your lost health. The only way out of the nest is to pass through door T, which takes you back out to section A.
Over in section E, a woman warns you (potentially too late) about falling into a nest of Salamanders. In fact, section E offers the chance to find such a nest as well. Leap over the pit before the higher ledge, and pass through the next door (Q) and you will find yourself inside the temple of Hermes. However, instead of finding Hermes, all you'll find is a curt assistant of his who tells you that Hermes was summoned by Zeus. There's nothing else that you can do, so head back out.

If you happen to have at least 50 olives at this time, head left, and fall directly into the very pit you most recently jumped over (marked with a P on the map). If you do not have enough olives, spend some time moving back and forth to fight the bats and snakes until you do, and then fall down pit P. Upon arriving in section F, you will see a few Salamanders slithering across the floor. They behave just like Snakes, except that they do twice as much damage and take twice as many hits to defeat. On occasion, they drop Salamander skins instead of Olives or Bay Leaves. Be careful while you're down here.
The goal is to reach door U, where you will find an old woman who will sell you something special for 50 olives. Accept her offer and your first Ambrosia will fall from the ceiling. Collect it, and your health meter will extend another four bars to a total of 12. In addition, your health meter will be completely restored. Leave the room, and continue to the right until you reach door V, which will return you to section A. If you wanted to, you could remain in the nest and fight Salamanders for salamander skins. The best place to do this is on the ledge in front of door U. This gives you control over the rate at which the Salamanders attack you.
Once you're back in section A, head back to the left and return to Arcadia through door A.
Returning with the Eye of Graeae[edit]
The first fragment[edit]

Once you return here with the Eye of Graeae, enter the first cavern. Standing between the doors F and G inside the cavern, use the Eye of Graeae, and a door that you could not see before, door Z, will appear. Step inside and you will find yourself in a new cavern. To the right is another section that contains no useful purpose. There is a shoreline that you could use to summon a dolphin, but a far out platform prevents you from even reaching the water.

Instead, head to the left. You will find two doors, one on the ground and one higher up. The one on the ground (Y) just contains information about the Minotaur of Crete. In order to reach the door X above, you'll have to jump along the ledges to the right that lead up to it. Once you pass through the door, you will reach another Nymph who has been captured and imprisoned there. Speak with her, and she will provide you with one of the Fragments of Love left to you by Helene. Read what she has to say, and then exit out of the cavern.
Having obtained the first Fragment of Love, the time has come to return to Attica. The best way to do this is to use the harp right in front of the sun monument in section A of Argolis to summon Pegasus. You will be dropped off in Athens, right where you need to go. However, before you leave Argolis, it is a great idea to make sure that you obtain 20 Salamander skins before you leave. Otherwise, you'll have to make a return trip here.
