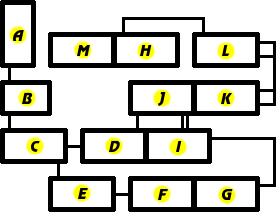
| Section | Map | Legend | Enemies |
|---|---|---|---|
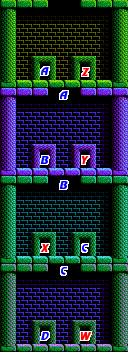
| A | See below | A,B,C,D: Correct doors W,X,Y,Z: Incorrect doors |
|
| B |  |
D: From section A E: To section C |
Cerberus |
| C |  |
E: To section B F: Nectar G: Info H: To section E V: To section D |
Bat |
| D |  |
V: To section C U: To Argolis (one-way) T: To section J |
Eagle |
| E |  |
H: To section C I: Info J: Password K: To section F |
Bat |
| F |  |
K: To section E | Shadow Eagle Monkey |
| G |  |
L: To section H (right side) M: To section I N: To section H (right side) O: Spring of Recovery |
Eagle Giant Snake |
| H |  |
L: To section G (outer) N: To section G (inner) P: Empty T: From section L U: Info V: To section M |
Ghost |
| I |  |
M: To section G Q: To section J (upper) R: To section J (lower) |
Eagle |
| J |  |
Q: To section I (upper) R: To section I (lower) S: Info T: To section D |
Bat Ghost |
| K |  |
Q: To section L (lower) R: To section L (upper) |
Bat Ghost |
| L |  |
Q: To section K (lower) R: To section K (upper) S: Nectar T: To section H |
Eagle |
| M |  |
V: To section H (left) P: To section H (right) W: To Palace of Hades |
Big Amazon Small Amazon |
Descending into Tartarus[edit]
Choosing the correct door[edit]
When you first arrive in Tartarus, you will descend into the top room of section A, shown to the right. On this map, as with all of the other maps above, red letters indicate doors that you should avoid going through, while blue letter indicate door worth exploring. In the case of section A, you must correctly guess which of two doors is the correct door to enter through four rooms. Choosing the correct door will advance you to the next room.
If you choose to enter any of the wrong doors, you will be taken to a fight against a stronger version of a boss you previously fought. If you enter through door Z, you must fight a golden Cyclops. Behind door Y is another version of the Graeae witches. If you pass through door X, you will find three short Amazons and one tall Amazon. And behind door W is not one, but two Dark Pegasuses. If you go through any of those doors, you will be forced to defeat whatever is on the other side before a door will open on the right and allow you to return to the room you came from.
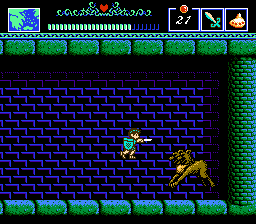
In order to guess the correct doors, you must recall a hint that was given to you in Crete. A woman told you that "Left, Left, Right, Left" was the path you needed to take to enter Tartarus. Indeed, if you enter doors A, B, C, and D, you will arrive in section B which contains a fight against a new boss, Cerberus. Cerberus behaves a bit like the Bull and the Lion; he stands back until you get close enough to him, and then he charges you. The Cerberus in this game is a little inaccurate, in that it only has two heads. It takes four hits to defeat each head. However, if you do not defeat the second head in a short enough period of time, the first head will grow back!
Defeating Cerberus can be a bit of a challenge. The best strategy is to stand in one place, and jump in advance of his charge. Strike him on the head with your sword so he bounces back, and jump up in the air almost as soon as you land to prepare for his next movement. If you get the timing down, you should be able to strike him continuously in the head eight times while simply jumping in place. Once he is defeated, door E will open on the left side of the room, allowing you to advance to section C.
The split in the path[edit]
Section C may remind you of an oddly colored Peloponnesus forest. As with Peloponnesus, you'll have to watch out for bats. Unlike Peloponnesus, there is no floor upon which to land, so you must carefully jump from branch to branch. The first door that you come to will be a welcome relief. The Nymph inside will give you Nectar. If your pitcher already contains Nectar, the Nymph will restore your health. You can leave and return inside as many times as you like.
Along the way to the right, there happens to be an entrance suspended in mid-air (G) which you can access by holding ![]() as you fall. If you enter, a man will ask if you've fallen. Answer yes, and he gives you nothing. Answer no, and he threatens to take away your pitcher, although he never actually does so. Exiting his door will return you to the entrance of section C.
as you fall. If you enter, a man will ask if you've fallen. Answer yes, and he gives you nothing. Answer no, and he threatens to take away your pitcher, although he never actually does so. Exiting his door will return you to the entrance of section C.
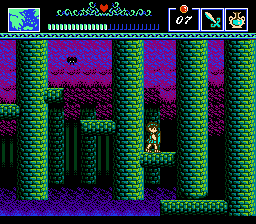
When you reach the end of section C, you will find two doors. One leads to section D, and the other leads to section E. However, section D does not lead you in the right direction. That section is intended to be a means to return to C if you happen to fall down from the intended path, and have no choice but to circle back around. In addition, door U high up in D is a one-way trip out of Tartarus, and back to Argolis so be very careful not to pass through it if you do not intend to leave.
Instead, head through door H to section E, which is another tree branch section. There is still no floor, but this section actually contains a few tree tops, so you can use your Hermes Sandals to safely travel across the top of the stage wherever possible. There is another door in mid-air (I) that is identical the one in section C. A bit farther to the right, you will find door J with a woman who can provide you with a password. This is the last password you can receive unless you intentionally exit Tartarus. Beyond that is the exit to section F.
Getting closer to Hades[edit]
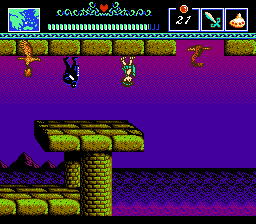
When you arrive in section F, you will see a Monkey sitting out ahead of you, and a Shadow demon occupying the ceiling. In addition, Eagles will fly overhead and drop rocks on you. The ceiling not only provides a safe means to cross most of the stage, it is necessary to walk across it in order to overcome the huge gap in the middle of the section. Do your best to jump when the Eagles won't interfere with your arrival to the ceiling, and defeat the Shadow demon or simply run away from it. Jump over the smaller gap in the ceiling and watch out for more Monkeys before dropping back down to the platforms below that lead to section G.
In section G, you will be greeted by a ghost. Defeat it, and prepare to jump over the long gap. To make this jump, you must leap at the last possible moment. On the other side of the gap is a Giant Snake. Defeat it by using the same tactic as in Phrygia. You will notice two doors below you that you cannot access. More ghosts will arrive to harass you as you make your way to the right. You will eventually arrive at two doors. Upper door M takes you closer to Hades, but it's worth taking a visit to section H through lower door L first.
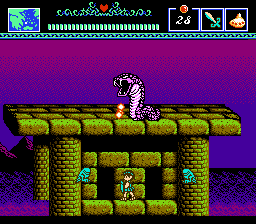
Section H is divided into two parts, a left side and a right side. While you will have to venture further into Tartarus to investigate the left side, you can explore the other two doors available to you on the right side. Door P on the far right leads to an empty room, and is only present as an unfortunate arrival point if you take the wrong door later on. Center door N, however, leads back to section G, specifically to the two doors that you were unable to explore. When you arrive there, visit the other door O, and you will find another Nymph who can provide you with Nectar. Accept the Nectar, and return through doors N and L until you are back in the lower right corner of section G. Then jump up and take the door M to section I.
The final leg[edit]
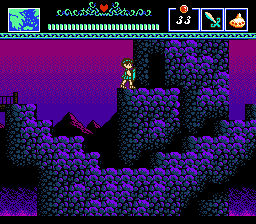
You arrive in the upper right corner of section I. A flock of Eagles will be flying over the bridge you must cross in order to reach the next section. Use the power of Argus to take out the Eagles if you like before crossing the bridge. Then pass through door Q to enter section J. You will be standing on a platform in the upper right corner of the section. Do not drop down. If you do, your only choice will be to return through door T on the far left to section D, and retrace your steps.
Instead, head to the right to section K. Watch out for ghosts and bats as you leap from upper platform to upper platform. If you happen to fall to the floor below, you can use the ledge toward the left to return to the upper path. Pass through upper door R on the right to enter section L. Then head to the left and jump over the gap between the ledges. Stop at door S along the way, and you'll find another Nymph who will provide you with Nectar. Then complete the journey to the left side of the section where you will find door T. Passing through this door provides a one-way trip to the left side of section H.
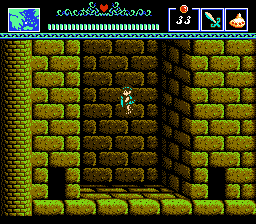
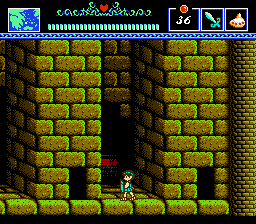
You will fall from the ceiling of the left side of section H, and land between two doors. Door U to the right only contains a Nymph that provides you with encouragement, but nothing else. Door V on the left leads to the final section M. In M, you will encounter a few short Amazons and one tall Amazon. You will also pass door P close to the one you arrived through, but do not enter this door. Once you do, no matter which way you exit from the room inside, you will be transported back to the right side of section H. Skip this door entirely and continue to run all the way to the left side, where you will find the entrance to the Palace of Hades.