Once you got out of the Dungeon, The Maku Tree contacts you and tells you of an Essence in the Fairies' Woods. Sure enough, that's your next destination.
| Optional items: | Plot items: | Dungeon items: |
Before the next quest[edit]
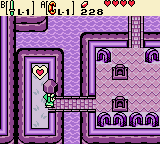
In Yoll Graveyard, you'll probably meet Maple for the first time as soon as you exit the Dungeon. Bump into her and quickly grab the stuff that fall out.
Go north, then west. Equip the Power Bracelet and take the stone away. Talk to the ghost. Push the tombstone and go into the hole. Talk to the ghost again and get out. Talk to the ghost once more to get the ![]() Poe Clock.
Poe Clock.
In the west portion of Yoll Graveyard is a Gasha soil spot. You can plant a Gasha Seed there. Go one screen south. Lift the stone with the Power Bracelet. Take your third ![]() Piece of Heart. Go back to the graveyard entrance and burn down the tree to exit. Go further to the town and identify the rings you found in the Spirit's Grave.
Piece of Heart. Go back to the graveyard entrance and burn down the tree to exit. Go further to the town and identify the rings you found in the Spirit's Grave.
Western Woods[edit]
 |
 |
Fairies' woods[edit]
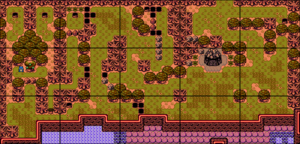
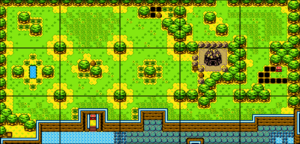
Leave Lynna Village to the south-west, passing near the Black Tower. Lift the stone to proceed west, and follow the path in the Faeries' woods until you reach the southern coast. If you follow the coast west, the screen will keep repeating, so go north.
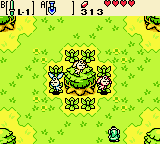
You'll encounter three faeries that want to play hide and seek. One will hide under a rock, one will hide near a pond, the third one will hide near a chest on the seaside. Keep walking back and forth between two screens until all three hiding places show up. When you find all the three faeries, they will lift the enchantment on the forest.
After the talk, go east and lift the stone to access the dungeon. When the entrance collapses, the Maku Tree suggests you to check Nayru's home, that is on the other side of Lynna Village, in the north-east. In the north part of Lynna Village you can now meet Bipin and Blossom with their child. Enter the house and talk to everyone. Name the child anyway you like.
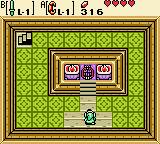
Continue to Nayru's house and talk with Impa. Push the statue and go into the hidden room and down the stairs. Inside the hidden cellar, you'll find a glowing item: it's the ![]() Harp of Ages. You'll be teached the
Harp of Ages. You'll be teached the ![]() Tune of Echoes. Leave the house. After a short talk with the Maku Tree, equip the Harp and play it. Enter the portal next to the house.
Tune of Echoes. Leave the house. After a short talk with the Maku Tree, equip the Harp and play it. Enter the portal next to the house.
Deku forest[edit]
You're back in Ambi's Age. Go to Lynna City. Enter the house of the postman, show him the Poe Clock, he'll take it and you'll get a ![]() Stationary. Leave the house and continue to the palace gates where you can meet Ralph again who want to save Nayru. Go to the west side of town. Enter the small house and talk to the hand. You'll exchange the Stationary for a
Stationary. Leave the house and continue to the palace gates where you can meet Ralph again who want to save Nayru. Go to the west side of town. Enter the small house and talk to the hand. You'll exchange the Stationary for a ![]() Stink Bag. Now you can leave town to the south-west towards the forest.
Stink Bag. Now you can leave town to the south-west towards the forest.
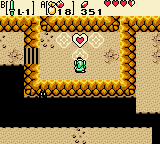
Talk to the all the people in the Deku Forest to learn that there are special seeds in the woods.
Continue to the north and go down some stairs. There are some enemies there like Keeses, Zols and Hardhat Beetles. First move down the right block of three blocks-formation left, then move the block west from the four blocks-formation right. Move the next block south. Go around to the three blocks-formation and move the block south and east. Get a ![]() Gasha Seed from the chest.
Gasha Seed from the chest.
Go back up follow the northwest path winding south to the seaside. Burn the tree using an Ember Seed. Climb down the stairs. Take the fourth ![]() Piece of Heart. Your heart containers should be raised to five now.
Piece of Heart. Your heart containers should be raised to five now.
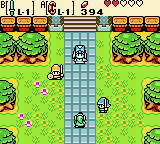
Back to the surface, continue west. Burn the tree and follow the path. The Deku Scrubs will offer a small shield for different prices, from 50 down to 10 Rupees. At the end of the path enter the cave. Lift the stone underground to the left and open the chest for 30 ![]() Rupees. If you have no wooden shield yet, follow that way until you reach another stairset. Go up there. Talk to the bush to buy a
Rupees. If you have no wooden shield yet, follow that way until you reach another stairset. Go up there. Talk to the bush to buy a ![]() Wooden Shield for 10 rupees. Go back to the chest then. Underground, follow the south path. When you're back at the overworld, be careful since Spiny Beetle hides under a bush. Use the sword to take the seed from the tree: you get 18
Wooden Shield for 10 rupees. Go back to the chest then. Underground, follow the south path. When you're back at the overworld, be careful since Spiny Beetle hides under a bush. Use the sword to take the seed from the tree: you get 18 ![]() Mystery Seeds. Use one Mystery Seed on the Owl Statue to find out what it do.
Mystery Seeds. Use one Mystery Seed on the Owl Statue to find out what it do.
Now that you have the seeds that Ambi is looking for, start backtracking towards Ambi's Palace. A soldier will help you. The Queen will take all of your mystery seeds and reward you with 10 ![]() Bombs. The guards will then escort you to the palace exit. Even if you're left without Mystery Seeds, you'll find some under bushes later.
Bombs. The guards will then escort you to the palace exit. Even if you're left without Mystery Seeds, you'll find some under bushes later.
Now you have to go back to the center of the Deku Forest. Blow up the entrance of the building you see here with a Bomb. Enter the door to get into the Wing Dungeon.
Wing Dungeon[edit]
Dungeon, part 1[edit]

This is your second real dungeon. Use the Mystery Seeds you find for the Owls to get hints about the dungeon. Destroy the jars by lifting them with the Power Bracelet. When you re-enter the room, the jars and seeds reappear. If you run out of hearts while you're in the dungeon, leave the dungeon and destroy the bushes for two hearts each time.
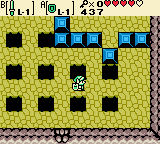
Equip the Wooden Shield and head up. Use the Wooden Shield against the Spiked Beetles here. When they lie on the back, hit them with your sword. When all three Spiked Beetles are slain, head left to the next room. Move the colorful cube as follows: three east, one south, one west, one north, then west into the hole; it should have a red top here. Go through the next door. Push the blocks to get away then go east and bomb the wall. Go through that hole and open the chest to get the ![]() Dungeon Map.
Dungeon Map.
Go back to the west and this time north through the door. Go west then. Avoid the Sparks here and go to the next room west. Defeat the Keeses and Blue Pig Warriors here and a ![]() Small Key falls down. Take it and backtrack to the entrance.
Small Key falls down. Take it and backtrack to the entrance.
Use the Small Key in the Spiked Beetles room. Kill the Ropes and bomb the southern wall (see picture). Go down there and through a side-view passage. Climb right on the ladders to the first platform and use the moving block to get to the second platform. On the other screen stay a little bit before the Thwomp. When it comes down and goes up afterwards, run through. Get to the moving platform to reach the ladder. In the next room defeat all enemies and open the chest for another ![]() Small Key. Go back to the room with the wall you've bombed.
Small Key. Go back to the room with the wall you've bombed.
Push the southernmost block now sideways and go through the passage. Open the chest to get the ![]() Compass.
Compass.
Go through the door, defeat both Blue Pig Warriors and use the Small Key in the west to go through another door. Jump into the mine cart. Go north to get to the miniboss.
Miniboss: Swoop[edit]
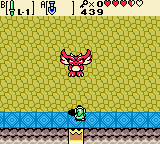
Swoop flies around. Stay on the blue border tiles and, when he's falling down trying to hit you, attack him with your sword. Beware: if he hits the yellow floor (as opposed to the blue edges) the piece where he lands falls out.
When this is done about five times, he starts to bump; this means you can hit two times in a row, but he'll hit you once. When he got hit about ten times he'll be defeated.
Dungeon, part 2[edit]
When the battle is won, take the fairy and go to the next room. There are two entrances that lead to different staircases: choose the north one. If you want, you can go through the south one, but it's just the room where you would have fallen if Swoop cracked the floor above.
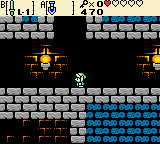
You'll come out a floor below. Go through the southern door and follow the path. Go through the door and in the next room go up the stairs. You come out in a side-view room where, after avoiding the Thwomp, you can get the ![]() Roc's Feather. This item allows you to jump.
Roc's Feather. This item allows you to jump.
Go to the west and jump the first step up (avoid the Thwomp). When the Thwomp comes down again, jump on it. When it goes up, jump left to the small passage to gain 30 ![]() Rupees. If you want, you can jump to the overhang to the right of the Thwomp by using it as a platform but there seems to be nothing (see picture).
Rupees. If you want, you can jump to the overhang to the right of the Thwomp by using it as a platform but there seems to be nothing (see picture).
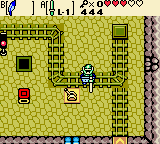
When you're back, use the Roc's Feather to jump over the colored block two times until it becomes red and the doors open. Be fast, or else the floor will crack. Go through the eastern door. Jump over the holes and jump in the Mine Cart. While it is running, hit the switch with your Sword so that you can land in the same room. Bomb up the eastern wall and defeat all enemies there to find a chest with a ![]() Small Key.
Small Key.
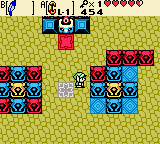
Go back into the previous room and push the dice west, north, east, north to open the barrier. Jump into the mine cart once more. After defeat the Peahats, jump over the right tiles until they get the colors of the left stones. Take the ![]() Small Key that falls from the ceiling. Continue west and up the stairs.
Small Key that falls from the ceiling. Continue west and up the stairs.
Open the Key Block to the right and walk along the path. Instead of the cart, jump down on the south-west side. Go south and jump over the holes. There's another colored field: jump over it until it is blue, then go back to the cart. When you arrive, jump over the hole to the right and open the chest to receive a ![]() Gasha Seed. Jump back and go north.
Gasha Seed. Jump back and go north.
Defeat all enemies here, lift the southeast jar and push (not lift) the east jar to the switch. Use the feather to jump when you have to. When the door is opened, go through. Go to the south and defeat all enemies. Copy the figure to the right on the marked floor. You only can move the statues with a color corresponding to the square you can jump over. Grab the ![]() Small Key that falls down.
Small Key that falls down.
Go north and through the eastern door. You'll come out in a room that is all red. Change the colors by jumping over the button in the middle and defeat quickly the enemies. Repeat this until all are destroyed. Open the chest for the ![]() Boss Key.
Boss Key.
Go back one room and open the north door. Avoid the Sparks as good as you can and go through the path to the boss door. Walk through and you're in a room with stairs, an Owl Statue and four jars. Climb up the stairs to the boss room.
Boss: Head Thwomp[edit]
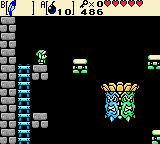
The Owl Statue gives you a hint: hit the red face with "something that smokes", that is the bombs.
Now you have to fight the boss of the Wing Dungeon, Head Thwomp. It consists of four faces: a green, blue, violet and red face. Try to throw bombs from above into the red face, that is the only face that takes damage.
- Red face: the boss can't attack, takes damage (the Boss drops a heart)
- Blue face: the boss throws circulating fireballs (stand below the boss to not get hit)
- Violet face: the boss falls down but doesn't get hit and fireballs fall from the ceiling
- Green face: the boss throws a few fireballs out (stay on the edge to be far out of range)
If you do nothing and wait, the boss also throws a few fireballs out (stay on the bottom of the edge and get cover from a stone). When it's over, every second time a bomb lies around; instead of exploding, you can pick it up and it refills four of your bombs.
Try to throw the first bombs while Head Thwomp's face is violet, and it will fall into the red face. After getting damage, it will then spin faster; throw the second bomb when it's blue. Now it will spin faster and backwards; throw the third bomb when it's blue again, twice.
When you've hit the boss four times, he'll finally fall down to his doom and leave two ladders and a ![]() Heart Container. Take it and go down the right ladder. Enter the room to the right and take the
Heart Container. Take it and go down the right ladder. Enter the room to the right and take the ![]() Ancient Wood.
Ancient Wood.
"It whispers only truth to closed ears from out of the stillness."

