Before the next quest[edit]
Two important items were obtained in the previous chapter: the Zora flippers and the power of spring.
Using the flippers, Link can explore the river between North Horon and Holodrum Plains. Starting from the north, Link can find an islet with a L-3 Gasha spot, then a cave with a man waiting for five Essences (come back later). Continue swimming west, and explore a cave with a magic ring chest inside, then Link will reach Spool Swamp.
Using the power of Spring, Link can get a ![]() Heart Piece in the Spool Swamp.
Heart Piece in the Spool Swamp.
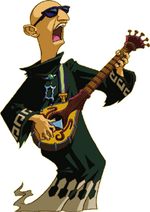
Also, Link can progress along the trading sequence. Bring the mushroom found on the mountains to Syrup the Witch in Sunken City: she excanges it for a wooden bird. This item is needed by the clockmaker in Horon village, and he trades it for some lubrificating oil. Link can then bring the oil to the musician in the eastern suburbs and trade it for a phonograph. This is the second-to-last item in the trading sequence, that will be completed during the next chapter.
Holodrum[edit]
Eyeglass lake[edit]
This region is just east from Impa's hideout. The default season is winter, and during this season there is only one notable feature: a L-4 Gasha spot. Plant a seed there.
Nothing special happens during springtime. In summertime, instead, the lake waters dry up. In the east part, Link can lift one rock and reveal a cave that leads to a ![]() Heart Piece. In the north-west corner of the lake, instead, Link can blast a wall with a bomb and get 100 Rupees from inside. Now, switch to a different season to proceed.
Heart Piece. In the north-west corner of the lake, instead, Link can blast a wall with a bomb and get 100 Rupees from inside. Now, switch to a different season to proceed.
The dungeon entrance is visible, but the path is blocked by stone mushrooms. Link needs the Power of Autumn to get through. It's time to visit Subrosia again: the gate is in the southmost portion of the lake.
Subrosian lava lake[edit]
From this gate, using various items, Link can go to the Tower of Autumn, just to find it blocked by big rocks. Some Subrosians there need a bomb flower to clear the passage. This item can only be found in the south.
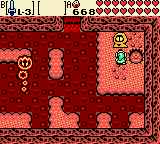
The lava lake can be explored with just the help of the Roc's feather. In its most remote part, Link can pick up a heavy Bomb Flower, but only using the power bracelet.
Tower of Autumn[edit]
Bring the bomb flower to the Subrosian outside the Autumn Tower, and they'll clear the passage for you. Get the power of Autumn, then head back to Holodrum.
Autumn on Eyeglass Lake[edit]
Back to Eyeglass Lake, switch the season to autumn.
Before entering the dungeon, head back to the entrance of the region. A chest on an islet can now be reached, because autumn filled all holes with leaves. Inside is a Gasha seed.
Now, you can enter the next dungeon.
Unicorn's Cave[edit]
Map[edit]
- From the entrance to the map
Enter the dungeon and go east. In the room with two carts, take the eastmost one. Hit the switch on the way and go north. Collect the first small key.
Go back, hit the switch again, then go east. Climb down the stairs. Use the Roc's feather only, no bombs yet. When you emerge, go east. Defeat all the enemies in the room and collect the map from the chest that appears.
From the map, you can see that the dungeon was shaped after its name: it looks like a unicorn's head. Notice the empty room corresponding to the eye: unlike other dungeons in the series, it's really empty, and there is no way to access it.
Magnet gloves[edit]
- From the map to the magnet gloves
After collecting the map, just go all the way west without using the stairs again. The first small key will be necessary to access the room where the magnet gloves are found.
Compass[edit]
- From the magnet gloves to the compass
Using the magnet gloves, pull the iron sphere on the button, so that the door may stay open. Walk back to the underground passage. Use the bombs to open a new way.
Link will emerge in a room in two parts, with an Armos statue on each side. Push the nearby statue south, east ad north, so that the other one will move simmetrically onto the button to open the door.
Link eventually gets to a room with another iron sphere. First of all, open the chest and earn 100 Rupees. Then, go north. The owl statue gives the solution for the puzzle in the next room; there, Link will collect the second small key. Now, go back south and move away the iron sphere.
Kill all the enemies, and a door to the west will open. Inside, you can skip most of the shifting walk using a Pegasus seed and the Roc's feather (or simply equip the Quicksand Ring, if you own it). The chest at the center holds the compass.
Sub-boss: Syger[edit]
- From the compass to the sub-boss
After Link leaves the compass room, continue all the way south. Stand of the differently coloured tile and use the magnet glove to cross the chasm. Follow the path and collect the third small key.
Link is now very close to the dungeon entrance. Unfortunately, he has to backtrack all the way to the underground passage, so to emerge near the first cart he used. Get back on the cart, then take the other one. Don't hit the switch, so to collect the fourth small key. On the way back, hit the switch, so that Link may continue to the north. In the dead-end room, defeat the Darknut, then push the block to the east: an iron sphere will appear. Leave it there for the time being.
Get back on the two carts, without hitting any switch. Then, use the magnet gloves to cross the chasm, then ride another cart and collect the fifth small key.

Backtrack just a little, use a key, and access the sub-boss room.
During this battle, equip the sword and the shield, so to get protected from Syger's attacks.
Big key[edit]
- From the sub-boss to the big key
The room north of Syger's has three exits. Link should start from the one without keylock. At the end of the path, all that Link has to do is to pull an iron sphere to the left as much as possible.
Back to the three-exit rooms, now it's the turn to the locked door (not the keyhole block). The Big Key is at the end of the path.
Boss door[edit]
- From the big key to the boss door
Back again to the three-exits room, use the last small key to unlock the block and follow the path to the boss door.
BOSS: Digdogger[edit]

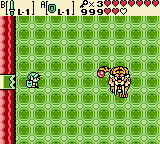
Following the "remake theme", Digdogger is a boss from The Legend of Zelda 1.
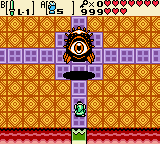
Unlike the original, this version of Digdogger is immune to sound effects. Instead, Link has to use the magnet glove to pull a spiked ball against the monster. When it splits up, keep using the spike ironball to destroy the mini-Digdoggers before they reunite.
After defeating the boss, collect the new Heart Container and the fifth Essence of Nature.

