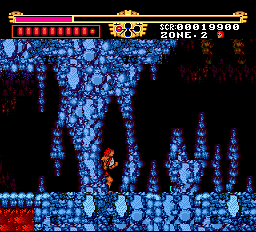
You start out dropping down to the floor of a cavern. Just like the first zone, this zone starts out with a large number of bats flying through. However, this time many more of the bats will be flying at a height that threatens Gogan, so be ready to clear them away with your axe.
The very first item statue of the zone happens to be rather concealed behind a rocky structure in the foreground. You can just see the very bottom edge of it peeking out behind the rock. You won't want to miss this one, it's another axe power-up item. Coupled with the power up from the first zone, this one will enabled your strength meter to 50%, allowing you to do even more damage with a fully powered up strike. However, you'll also have to wait longer to reach that full meter.

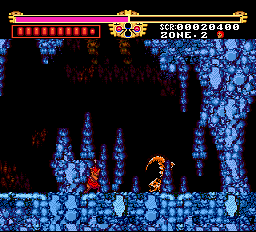
Shortly after the screen reveals a sea of lava beneath the ground, you will be attacked by the first lizard. These lizards are peculiar. They shoot a projectile at you, and then leap over you to shoot another one from the other side. Each time they land, they alternate between landing with their head high and low. The height of the projectile they shoot is dictated by this position. When you strike them with your axe, they pop up into the air a bit, making them easy to hit with a follow up strike. Do as much damage as you can with the first strike, and then hit them repeatedly with low strength strikes until they are defeated.
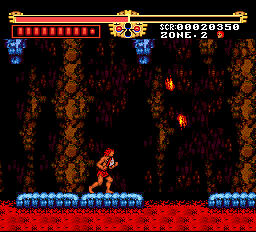
As you continue, gaps will open up in the floor, potentially exposing you to lava if you don't jump carefully. You may see the first poison moth float by. They move and attack in a very similar fashion to bats. Additionally, when you approach certain gaps, fireballs may pop out of the lava and fly into the air before falling back down into the lava. Time your jumps carefully to make it over the gaps without getting struck by the one or two fireballs that fly out.

Back on the safety of solid ground, continue going right. You will begin to encounter a good number of lizards from here to the end of the stage. Along the way, you will see an item statue that contains a speed up, so be sure to grab it. Lizards will appear one after another here, although you can control the number which appear by ceasing to advance whenever you see one on the screen. If more than one do attack, take out whichever lizard is closest to you.
As you reach the end, you will see a few more item statues, most of which contain items which restore your health. If you happen to die and come back around this vicinity, one of the status will contain a power up item to replace the one you lost. The last gap over lava is so long, you'll need the assistance of the vine which swings over the gap. Before you even reach the end of the stage, the first component of the boss battle will begin.
Boss[edit]

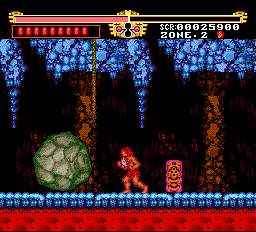
The so-called boss of this stage isn't really a boss at all. You must survive an encounter with two gigantic boulders. The second boulder that you find is "stronger" than the first, requiring many more hits. As explained above, the first boulder will appear before you even reach the end of the stage. That allows you to do one thing that you can't do with the second: retreat. Once the second boulder is on the screen, the screen won't scroll to the left anymore. However, when you see the first boulder, you still have that opportunity. The best strategy is to strike the boulder as soon as you see it, and back up to the left until you're at full strength again and hit it. You should be able to destroy the first boulder with three well times 50% strength attacks. Then advance to the right to find the second boulder and lock the screen in place.
The second boulder glows green to indicate the greater amount of damage it can take before it is destroyed. After hitting it enough times, it will turn brown like the first boulder. With the screen locked in place, you can't back away from the boulder, so you're forced to deal with it as it rolls back and forth across the screen. There is a vine over the ground, but it doesn't really help you avoid trouble until you climb all the way up. Even if you merely cling to it at the bottom, it has the benefit of preventing you from getting knocked backwards if you get struck by a boulder. Hit the boulder with as many fully powered attacks as you can. If you have plenty of health (the two item statues on the screen both contain health increases) then you can withstand getting hit by the boulder and simply set yourself to attack the boulder when it comes back in the opposite direction. Destroy both boulders to advance to the next zone.