Normal enemies[edit]
Nipata[edit]

HP: 60 Power: 80
These bat creatures appear in towers or caves. They swoop up and down, and stop occasionally. It is easy to get hit by them in a narrow passage. When they first appear, they will always fly to the right. When Lucia moves to the right, it is easy to remove Nipatas from the screen. However, be careful moving left through a narrow passage, as you are more likely to collide with them.
Nomaji[edit]

HP: 210 Power: 30
These creatures like to jump around Lucia constantly. Their motion makes them both difficult to avoid and to attack. They have a high degree of health, but very little power. It is not worth pursuing them very far; avoid dealing with them as much as possible. If you have to fight, the Flame Sword can be more effective than the regular sword.
Kikura[edit]

HP: 90 Power: 80
The Kikura appears like a jellyfish that can fly jaggedly through the air. Only attack them if they happen to get in your way. Otherwise, let them fly harmlessly over your head.
Nyuru[edit]

HP: 110 Power: 200
The Nyuru is infamous for being the most difficult enemy in this game. When you reach a point where the Nyuru begin to appear, they will stream in and gather at the location of Lucia's head. Each attack will cause 200 points of damage to Lucia, and it won't take long for them to do her in. However, if Lucia ducks, the Nyurus will not be able to harm her, and she will be able to attack them with her sword when she strikes overhead. The number of Nyuru that can appear at one time differs from location to location. If you run away from them, they will pursue you. You will not be able to shake them off, but they will be unable to catch up.
Dopipu[edit]

HP: 80 Power: 100
These diminutive mages walk in a straight line. Even if you jump over them, they will continue on in one direction. They are short, so Lucia must squat in order hit them with her sword. As they travel, they will jump if they hit an obstacle. Even though they don't normally pose a threat, they are particularly dangerous around stairs.
Spajyan[edit]

HP: 40 Power: 80
This small spider-like enemy jumps in order to get around and always turns to face Lucia. Lucia must squat down in order to strike them. Although they are easily defeated when they are alone, they can be difficult when you must fight them along with Nishigas, or with more Spajyans, especially in narrow passages.
Nishiga[edit]

HP: 90 Power: 80
A Nishiga is a type of bee. It flies up and down two times before approaching Lucia, and repeats the sequence. They don't travel very far when they approach Lucia, so you only have to attack them when they actually get in the way of Lucia's progress. Like the Spajyans, they are not dangerous when alone, but when met in combination with Spajyans, or possibly Nyurus, you might receive a lot of damage. Walk quickly to remove them from the screen.
Eyemon[edit]

HP: 110 Power: 100
Eyemons move by clinging to the walls or rocks. It pauses very briefly whenever it has to change direction. Although its motion is slow and simple, it is also easy to misjudge the way to avoid it or jump over. Wait patiently to dispatch it, or avoid altogether before moving on.
Hyper Eyemon[edit]

HP: 190 Power: 180
These red Eyemons only appear on the 16th stage. Their motion is identical to ordinary Eyemon's, but they are much faster and do more damage. A second Hyper Eyemon typically replaces the first one that you kill if you do not move, so remember to progress forward as you attack.
Fire[edit]

HP: 360 Power: 250
This flame-like enemy approaches slowly, and conforms to the height of the terrain it travels over. Despite its simple nature, it has a very high level of health (even more than a Hop Egg) and strength. In order to attack it, you need to squat down and attack the lower portion. It can't be defeated with a single blow of the sword at any strength, so it's safer to attack with the Flame Sword.
Boss enemies[edit]
Hop Egg[edit]
Mantle Skull[edit]

HP: 810 Power: 400
You will first encounter the Mantle Skull as the boss of Stage 2. He is a swordsman cloaked in a mantle that contains horns on the hood. He can toss fireballs ahead of him that will do 200 points of damage if they hit, but he will just as happily crash into Lucia and do twice as much damage to her. He will constantly walk forward, and he will jump if he hits a wall or an edge. Watch out for his fireballs and strike him quickly with your sword.
Nigito[edit]

HP: 810 Power: 400
This animated suit of armor first serves as the boss of stage 3. Like the Mantle Skull, it will walk forward and toss fireballs ahead, but it may also turn around if Lucia jumps over it. If it walks up to an edge, it falls over the side and continues. Since it is incapable of feeling pain, it does not stop when attacked. Therefore, it is much wise to attack from a safe distance using the Flame Sword than to try to strike at it up close with the regular sword.
Suneisa[edit]

HP: 1290 Power: 400
First encountered as the boss of stage 4, the Suneisa are the older sisters of the snake family. They slither along the ground and approach Lucia quite rapidly. She must jump over them to avoid being attacked if she is not attacking them herself. After jumping over them, they will typically continue on their way and disappear off the side of the screen. They will, however, typically try to wind up on the same level of height as Lucia, even going so far as to turn around if falling or jumping would prevent that.
Zado Fly[edit]

HP: 1290 Power: 400
These flying green lizards first appear as the boss of stage 5. They usually arrive flying through the air, and drop down to the ground where they dash forward at Lucia. Attack them with your Sword or Flame Sword as quickly as possible. Whenever they encounter some change in terrain, they typically begin flying back to the top again, so watch out in stages that feature very uneven ground or stairs.
Pera Skull[edit]

HP: 260 Power: 200
The boss of stage 6 happens to be one of the Pera Skulls, a flying head. Ordinarily, it floats upward as it moves forward, and it will stop to dive down at a target when it gets close to the ceiling. Since the Bound Ball is typically fired upward, it makes a good weapon to attack Pera Skulls with. When you meet them outside of Stage 6, you can generally disregard them as long as they are flying high above you, since they will be difficult to attack anyway. However, in a narrow space where avoiding them is difficult, the Flame Sword is best.
Gaguzul[edit]
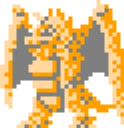
HP: 1930 Power: 600
A Gaguzul is a monster with big wings, first met as the boss of stage 7. They too are capable of sending balls of fire at Lucia. This is an extraordinarily strong monster that you must attack very carefully. Other than in the boss room where you are required to fight it, it is best to avoid them and remove them from the screen as quickly as you can. It hops around, and you can sometimes avoid taking damage by jumping up to attack it. It is possible to use the Magic Bomb to effectively defeat it as the boss in stage 7.
Bunyon[edit]

HP: 1610 (large), 810 (medium), 330 (small) Power: 350 (large), 180 (medium), 120 (small)
The Bunyon is a boss monster that you will never encounter as regular enemy. It is the boss of stages 8, 11, and 14 (where you must defeat two Bunyons). It is a mysterious creature. It stays in one large piece in stage 8, but in 11 and 14, it can divide from one large body to four medium bodies. Each medium body can further divide into four smaller bodies. It moved about by bouncing along the floor. The smaller Bunyons are weaker in strength, but faster in speed. When destroying a Bunyon, the original body can be defeated with a Flame Sword. The medium and small Bunyons should be attacked with Flash if you have enough magic points.
Joyraima[edit]

HP: 1930 Power: 600
Part man, part horse, you will first experience this beast's reckless dash as the boss of stage 8. When it spots you, it begins to accelerate in your direction. A special noise indicates when it is about to appear, so you can turn around and avoid it before it shows up, or you can advance towards it and be prepared to jump voer it. Once it passes you, it will turn around and attempt to stop moving in the original direction before gearing back up for another pass. This can usually be the best time to attack it with the Flame Sword before it really gets going in your direction again. If it drops down a level from where you are, it will be unable to reach you any more.
Bospido[edit]

HP: 2560 Power: 800
You will only encounter this gigantic spider just once as the boss of stage 13. It can spray many balls of fire at Lucia, even as it jumps and approaches her. While it's not particularly difficult to avoid the main body of the Bospido, the fire balls are another story. Try to destroy it using Flash continuously.
Byforce[edit]

HP: 2560 Power: 800
This boss-only type enemy appears as the boss of stages 12 and 15. He has the lower body of a snake, and the upper body of a man with six arms. He will send out fireballs as he approaches Lucia. Once his hit points are reduced by half, only the upper body will remain to continue the assault on Lucia. He makes very quick and deliberate strikes which can be difficult to avoid. If you use Flash from a safe distance, you can take him out relatively easily. The Flame Sword is also effective.
Only the upper half of the body can be harmed; striking the lower body causes no damage. As a result, using the Smasher is not effective until the tail is removed as the flames will gather upon the tail. Once the tail is removed, Smasher works perfectly. This works both ways; while the tail is attached, Lucia cannot be harmed while squatting down. However, it is very hard to strike a hit against a Byforce while squatting.
Darutos[edit]

HP: 2560 Power: 950
The once human Darutos has become twisted into the form of a monster due to the magic of the Wing of Madoola. He only appears as the final boss of the game. He will fill the screen with fireballs at regular inverals, as he jumps back and forth regardless of Lucia's location. His only weak point is the head. You could attempt to use Flash if you feel you have enough magic points, but Bound Ball is also a good alternative. You must remember to have at least 1000 MP in reserve after defeating him or you will be unable to complete the final stage.
