| A | |
|---|---|
| B | 
|
| C | |
| D | Nothing |
| E | 
|
| F | 
|
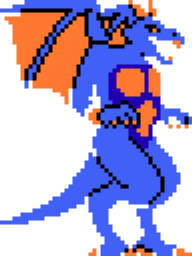
| G | Darutos |


|

|

|

|

|

|
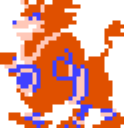
| Eyemon | Hyper Eyemon | Hop Egg | Nyuru | Nigito | Joyraima |
|---|
The final destination[edit]
This stage is not the most complicated stage, but the enemies that occupy will make up for that. Your first goal should be the Spring of Strength up in door E. However, to reach it, you'll have to jump across a string of pillars, and if you fail to land on them and fall below, you'll only make it back to the spring with a lot of difficulty. The two shafts on either side that lead to the upper portion of the stage are occupied by Nyurus. You'll find the Wings of Madoola located at the top when you arrive. After you collect it, you'll be granted the ability to float up through the air for 1000 MP at a time. Since you'll need to use it two times, you'll need to leave an extra 1000 MP available after you defeat the stage boss; the demonic form of Darutos.
Recommended route[edit]
The stage starts out simply enough. If you don't have 5000 maximum hit points yet, head to door C and collect the Jar. Likewise, if you don't yet have 5000 maximum magic books, collect the Magic Book from behind door B. No matter what, collect the third and final Flash weapon behind door A. Once you have it, head to the left and climb up the steps, and then back to the right. If you intend to visit the Spring of Strength, you'll need to traverse the bridge of pillars very carefully. Hop Eggs can occupy some of the pillars and if they jump up and hit you, they can knock you off and prevent you from accessing the Spring. Time your jumps very carefully until you reach the safety of the right side. Then turn around and jump up to the platform on the left. You'll still have to navigate a few more jumps before you reach door E, but they're not quite as tricky.
After you visit the spring, you have a very difficult task ahead of you: You must climb up the left shaft while being constantly attacked by Nyurus. There's a couple of strategies that you can use to accomplish this, but none are easy. The safest method is obviously the slowest method. You can hold you position squatting and attacking Nyurus until there's an unlikely break which you can use to advance a platform or two. Another method is to allow the maximum number of Nyurus to converge on one spot and then try to out run the entire pack. Even if you get hit, it will still only count as a hit from one Nyuru. This method is extremely difficult unless you're very skilled at jumping at as fast as possible. Flash is a very effective way to get around the Nyurus, but this is highly unrecommended because of the amount of MP that you'll need for the end of the stage. Another less effective, but fairly reliable method is to use the Shield Ring. Getting hit with the Shield Ring will stun the Nyurus just long enough for you to get away from most of them (but not all).
Whichever method you choose, your goal will be to reach the top with as much HP and MP as you can manage. When you reach the pathway on the right to the next shaft, it will be much easier, since you simply have to fall down and get to the bottom. You'll find another pathway on the right that leads to the central portion of the top of the stage, and the precious treasure of the Wing of Madoola. As soon as you grab the Wing, any enemy that was chasing you will disappear, and 500 MP will be instantly restored. You now have the power of flight which you can access, at a cost of 1000 MP per use, by pressing ![]() +
+![]() . You'll need to do this to access the area marked on the map as location G, where you will encounter Darutos.
. You'll need to do this to access the area marked on the map as location G, where you will encounter Darutos.
(If you happen to fall down on the way to door E, you'll need to take an alternate path to the top. Once you fall to the ground, run to the right where you'll encounter Nigitos guarding the ladder that leads to the top. Climb the ladder and head left, dealing with a large number Hyper Eyemon. On the left end, you can jump up and cross back over to the right. Nyurus occupy this level, but so does a Joyraima. You can prevent the Joyraima from appearing by letting a good number of Nyurus amass before proceeding to the right. Let them follow you as you run away, and you will also avoid the Hop Eggs that appear before the shaft. You'll have to climb the left shaft, and switch over to the next shaft on the right. Midway up that shaft, the number of Nyurus will increase, so use one of the methods described above. Climb to the top, then walk a short distance to the left and fall down to the bottom of the next shaft to arrive close to the Wing of Madoola.)
Boss: Darutos[edit]

|
| HP: 2560 Power: 950 |
The Demonic form of Darutos is very strong, but he's not the most difficult boss that you'll face. The hardest part is simply reaching him. This can only be accomplished by using the Wing of Madoola to float up to the top of the platform above you, and climb up the platforms on the side to Darutos location. The problem is, as soon as you begin to float, the screen will begin to rain with fireballs that are breathed out by Darutos. If you get hit in the process of floating to the top, you will fall back down to the ground and potentially waste 1000 MP. You must not let this happen. Be very careful about when you time your ascent so as to minimize the chance that you will get hit by a stray fireball.
Once your float to the platform above, it's a simple task to jump up to the top of the central platform up above where Darutos awaits. Once you make it there, you must begin your battle against Darutos. Before you begin, keep in mind that you'll need a remaining 1000 MP in order to truly beat the game and see the ending. If you don't have that much by the end, you'll need to reset the game and continue over from the beginning of Stage 16, as there is no way to die once the enemies have been removed.
Dealing with Darutos himself is relatively simple. He hops back and forth between the left and right edges of the platform. You can safely stand in the center and not worry about getting hit by Darutos when he jumps. His only weak spot is his head. You'll need to jump up and swing the Flame Sword at him. It is best to attempt this when Darutos is about to land from his jump, as he won't yet have spit any fireballs. Whenever he lands, he will send four fireballs into the air, which will likely hit you a number of times. It is still far better to be struck by one of the fireballs than by Darutos directly. It does not take a tremendous number of hits to kill Darutos with the Flame Sword, but you should still make every hit count so that you don't take too much damage and die. Once he has been defeated, you can fly to the door way up above provided you have the necessary 1000 MP to use the Wing again. If you reach the door, you will be treated to the game's ending.