Homer said: "Old Hawknose set out for the Dry Land, to kill the daemon that is said to live there."
About the Dry Land and its daemon[edit]

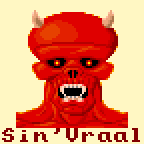
Stelnar from Jhelom said: "There is one that they call Sin'Vraal. If I had my way, that gargoyle would be a statue." [...] "He is a vicious daemon." [...] "Yes, Sin'Vraal is an evil wretch. How could Lord British imagine that a gargoyle could understand virtue?" [...] "Lord British defeated Sin 'Vraal in the underworld. The gargoyle went to live in the Dry Land." [...] "It is a desert east of the Bloody Plains. There is a shrine there."

Van Kellian from Jhelom said: "Starhelm and I have often debated the nature of the gargoyle Sin'Vraal." [...] "If Lord British suffers him to live, then I will not harm him. What possible threat could one gargoyle living alone in the Dry Lands be?"
The Dry Land is the desert where the Shrine of Sacrifice is located, east of Minoc.
The ant mound[edit]

Sin'Vraal lives in the south-west part of the Dry Land. When you get through the mountain pass, follow the edge of the desert southwards.
Ask Sin'Vraal about a pirate: "Yes, I once met a pirate here in the desert. He seemed to be hunting me, but he got dragged off by the ants!"
There are two entrances to the ant mound. The easiest one to find is exactly nort-east from Sin'Vraal's hut.
Dungeon walkthrough[edit]

The only enemy species in this dungeon is the giant ant.
- Floor 1
The two entrances are more or less at the center of the floor. The passage to the next floor is to the north-west, in the only large room of this floor. There are no items that can be found here.
- Floor 2
The Companions arrive on this floor from a passage in the north-west. The two passages to the next floor are (1) close-by, to the north-east and (2) way south. There are many nightshade mushrooms scattered on this floor. Seven meals can be found in an alcove to the west.
- Floor 3
The Companions arrive on this floor from either a passage in the north-east or from the south-east. The passages down are (1) approximately in the center and (2) to the north-west. In the north part of the floor there is a dome where the giant ants gathered their loot. The corpses have no items on them, everything is scattered around.
- Floor 4
The Companions arrive on this floor from the north-west. The hall of the Queen Ant is to the north-east. Just south from the Queen Ant you can find the dead body of Hawknose, with the part of the map on him.
Summary[edit]
| Ant Mound item list | ||||
|---|---|---|---|---|
| Rare items | Useful items | Weapons & armors | Useless items | |
| Floor 1 | - | - | - | - |
| Floor 2 | - | 26 nightshade fungi, 7 meals (grapes and meat) | - | - |
| Floor 3 | Zu-Ylem | Glass jar, cloth, 4 gold nuggets, 6 torches, 1 black pearl, 2 nightshade fungi, 1 meal (grapes), 1 lockpick | 3 clubs, swamp boots, wooden helm, 2 leather armors, 2 throwing axes, 2 cloth armors | Leather boots, 3 mugs, 2 plates, gavel, candle, lute, spatula, ring (yellow) |
| Floor 4 | Map part | 1 gem, 5 gold coins | Throwing axe, leather helm, dagger | Wooden shield, mug, wine |
Sell the glass jar for 7 GC to Zeke in Empath Abbey; sell the cloth for 20 GC to Marissa in Paws; exchange the gold nuggets for 10 GC each in Britain. The Zu Ylem dust can be used to knock off any one opponent.