X-Men 2: Clone Wars character moves[edit]
| Image | Controls | Action |
|---|---|---|

|
Claw swipe | |
| Low jab | ||

|
Upward slash | |

|
Aerial slash | |
| Wall climb | ||
| Aerial upward slash | ||
| Jumping downward punch | ||

|
Lunging slash |
Dragon Ball Z: Goku Hishōden Enemy[edit]
hmmm...new template?
| Clone Goku | |
|---|---|
 | |
| Battle # | 1 |
| HP | 256 |
| Ki | 28 |
| Clone Goku | |
|---|---|

| |
| Battle # | 1 |
| HP | 256 |
| Ki | 28 |
Virtua Fighter Series Template[edit]
Dragon Ball Z: Goku Hishōden Characters[edit]
Allies[edit]
| Image | Name | HP | Ki |
|---|---|---|---|

|
Yamcha | 256 | 25 |

|
Tien | 364 | 36 |

|
Chi-Chi | 256 | 25 |

|
Krillin | 364 | 36 |

|
Piccolo | 570 | 55 |
Final Fantasy Adventure Boss[edit]
{{{text}}}
| EXP | GP | Attacks |
|---|---|---|
| {{{EXP}}} | {{{GP}}} | {{{Attacks}}} |
Final Fantasy XIII Enemy[edit]
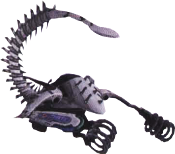
| Manasvin Warmech | |||||||||
|---|---|---|---|---|---|---|---|---|---|
| CP | |||||||||
| – | – | ×2 | ×2 | – | – | – | – | 0 | |
|
70% | 1% | |||||||
| 70% | 70% | ||||||||
| 70% | 0% | ||||||||
| 0% | 70% | ||||||||
| 1% | 0% | ||||||||
| 70% | – | ||||||||
| Level | Normal Drop | Rare Drop | |||||||
| 75 | Potion (100%) | None | |||||||
| HP | Strength | Magic | Chain | Stagger | |||||
| 360 | 15 | 15 | 0 | 300% | |||||
| The Hanging Edge | |||||||||
| |||||||||
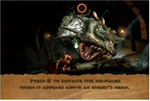 A short tutorial will be played about the basics of combat.
Marvel vs. Capcom 3 Assist[edit]
| Type | Name | Class | Direction | Cross-Over Combination |
|---|---|---|---|---|
| α | {{{1}}} | {{{2}}} | {{{3}}} | {{{4}}} |
| β | {{{5}}} | {{{6}}} | {{{7}}} | {{{8}}} |
| γ | {{{9}}} | {{{10}}} | {{{11}}} | {{{12}}} |
| Type | Name | Class | Direction | Cross-Over Combination |
|---|---|---|---|---|
| α | Shield Slash | Shot | → Forward | Hyper Charging Star |
| β | Stars & Stripes | Direct | ↑ Upward | Hyper Stars & Stripes |
| γ | Charging Star | Direct | → Forward | Hyper Charging Star |
Guilty Gear Table of Contents[edit]
Kingdom Hearts: Birth by Sleep Enemy[edit]
Sonic the Hedgehog Green Hill Zone[edit]
This is the first zone of the game and the easiest of the six. This area is overflowing with trees, waterfalls, loop-de-loops and more.
Act 1[edit]

Jump and get the game's first three rings, then hop up to the short plateau and jump on the 10-ring monitor. Kill the fast blue bee robot, Buzzbomber, as it speeds by to shoot you, then jump to the nearby tree to your right. It's barely visible, but there's a yellow spring hidden in the treetop. Hop on it and you'll shoot upward to five more rings. Go forward past the fish jumping up out of the water and then jump in the top of the second tree past that bridge. You'll hit an invincibility monitor that's there but that you can't see that well. Run forward until you reach a yellow spring opposite a cliff overhang. Jump to that area, but watch out - the cliff overhang crumbles underneath your feet, as do all others that look like this one. Go past about two more of these falling edges until you reach a blue post. It will turn red when you run past it - it's a checkpoint. You'll start back at that point should you happen to die.
Run straight forward from that goal point. You'll go through the famous dizzying loop-de-loop that mesmerized gamers in the Genesis' formative months and through a tunnel that takes a short break to make room for another checkpoint. You'll shoot up a natural half-pipe of sorts and get a couple of rings in a large trapezoidal formation. When you come down, there's a short way to go until you make the exit. If you have 50 rings or more when you get there, there will be a humongous ring above the sign and to its right. Jump into it as you pass the sign and you'll be taken to a rotating bonus stage where you can try for one of the six Chaos Emeralds. If you don't have fifty rings, pass on to the next act.
Act 2[edit]
Grab the rings hovering horizontally over the bridge and vertically over the spring, then take a detour to the left. There are spikes to the left of that yellow spring, and if you control your jump right, you can sort of dive past them to a lower area holding twenty rings and a shield, which will allow you to take a hit without causing you to suffer any ring loss. You're now in this bottom pit area then (if you made it past the spikes, that is - if you didn't then you more than likely died), and you have no apparent way to get out. To do so, start from up against the spikes (you won't get hurt by touching their sides) and run to the wall to the right, pressing Down before you get in front of it. If executed properly, you'll roll up into a ball and destroy the weak wall ahead of you, which opens up into a more expansive area where you can get a super-speed shoe. After getting that, ride the moving ledge above you to the waterfall with rings in front of it. Make your way to the half-pipe ahead, which plants you on a swinging ledge. Get the rings that are in the ledge's path and stop at the tree to the left for a shield if you've lost your other one. Some invincibility to the right will help you blow right through to a checkpoint. Go straight ahead from here until you reach the exit (and hopefully, another large ring!)
Act 3[edit]
Hit the top of the second tree from underneath to reveal invincibility, then speed ahead with it. Use the spring to get up to the cliff edge that falls under Sonic's weight and keep progressing up the high road to a shield. Try to stay along this high road until you make a checkpoint. You have two choices here; get the super-speed shoe and speed ahead for a load of rings, or take the high road along the moving platforms and make it to another quick checkpoint. The high road reaps an eventual convenient reward, so take it.
When you make the second checkpoint post, ride along the moving ledges until you get to one that just falls. Let it take you down; you'll be on the top of a loop-de-loop and right near an accessible 1-up (the small reward I was talking about). Jump down to the left to get a shield out of the palm tree below, then continue through the loop as normal and jump when you reach a small mound in front of the red springboard on the rock to get back on higher ground.
Ride the swinging ledge that stops in front of a series of ledges that fall shortly after you land on them. Jump across them to a cliff, above which is more invincibility. Grab that and run with reckless abandon across the rotating spike log, which normally requires patience and good timing to get past. Continue forward to the platform on a chain swinging very low over a bed of spikes. You'll come to a short curve that will result in you uncovering a 10-ring monitor. Shortly after that, if you get a running start from way back near the bed of spikes and jump at the correct moment, you'll get your third invincibility of the level out of a very tall palm tree. This comes just in time for your first battle with Dr. Robotnik.
Act 3 Battle[edit]
Here, you are introduced to the main villain of the Sonic series, Dr. Ivo Robotnik (often referred to as Dr. Eggman by Sonic and co.) You are given two platforms to attack Robotnik from (one on the left and one on the right.) Immediately stand on the right platform upon entering the area. When Robotnik enters from the right, begin attacking him before he pulls out his swinging weapon. When the pendulum comes towards you, jump through the small space between the ball and the main machine and head for the other platform to attack Robotnik. Eventually, the machine will be destroyed and you will be free to release the animals trapped in the nearby machine.


