Chapter One[edit]
With the heroic sacrifice of Grom Hellscream, the pit lord Mannoroth was slain, and the demon curse that had plagued the orcs was put to an end. However, the combined human and orc forces have moved deeper into Ashenvale Forest to ascertain whether a demonic threat still lingers in the land.
Tyrande Whisperwind, the leader of the night elf Sentinels, believes that the outlanders will bring only doom to her enchanted homeland.
Mission Objectives[edit]
- Main Quest - Invaders
- Slay the Paladin
- Main Quest - Night Elf Base
- Entangle a gold mine
- Construct a Moon Well
- Construct an Ancient of War
- Train 5 Archers
- Optional Quest - Furbolg Village
- Locate 10 missing Furbolgs
- Return Tyrande to the Furbolg Shaman
Overview[edit]
This is an easy scenario. This happens because it is an introductory scenario, but any player will have already completed 3/4 of the campaign, and may have much more experience with the game in addition. There are a couple of minor challenges, because the designer didn't want to make it a complete cakewalk. Of course, some players may have no experience with the Night Elves.
In this scenario, you will only be able to produce Archers. They are very fragile, and at this level, not very powerful. Archers have two main advantages. They can easily focus fire, and should always be used this way. In addition, they are very good against flying units.
This walkthrough describes a methodical approach. Should you prefer, you can fast expand, produce a humungous army, and then roll over any opposition. However, in case you don't know this yet, an expansion implies taxation, so, as opposed to other games, having two gold mines in operation only increases your income by 40%.
About Moon Wells[edit]
Moon Wells are the Night Elves' "farms". In addition, they replenish health and mana for nearby friendly units. The Replenish ability can be auto-cast. However, you do not want to always set it to auto-cast. There are two main reasons for this. First, Replenish is used both for health and mana. Since mana regenerates much faster than health, you hardly ever will want to use a Moon Well to replenish mana. Save the Moon Well for health, and let the mana regenerate naturally. This requires manual control. Second, you generally want to heal your most badly wounded units first, but for that you need manual control. Otherwise, you are likely to find that your Moon Wells restored a bunch of lightly wounded units to full health, and your badly wounded units were allowed to die.
The main situation where you want your Moon Wells to automatically Replenish nearby units is when you have a lot of them, they are well-stocked (sic), and you are fighting a major non-magic battle amongst them.
For people familiar with Starcraft, the Moon Well is very similar to the Protoss Shield battery.
About Wisps[edit]
Wisps are the Night Elf workers. Wisps are similar to Undead Acolytes in that they do not need to walk around while harvesting resources, except that with the Wisps, this applies to both gold and wood. This makes it very easy to switch Wisps between gold and wood and any other tasks. The Wisps never actually carry any resource. This means that you never need to worry about where the Wisp is in the harvesting cycle. Gold remains fully in the mine until a full load is transferred to your stockpile. If you interrupt a gold miner at any time to send it to harvest wood, no gold is ever lost, and vice versa. Of course, a Wisp never uses up trees at all.
Wisps also have some special combat roles such as draining mana.
Getting started[edit]

Send your Tree of Life to Entangle the gold mine. Harvest wood with all 4 initial Wisps. Produce one more right away to harvest wood.
Send Tyrande's Owl to explore. You can keep spitting out Owls ad nauseum, because Tyrande has no other uses for mana in this scenario. Just make sure that she isn't standing near a Moon Well that is auto-casting Replenish, because you want to save them to heal your troops.
You will quickly find some friendly Furbolgs. They want to talk to you, and then Tyrande volunteers to help them. You also find three Archers that you can recruit. In order to recruit them, and in order to call many of the wandering Furbolgs home, a single Archer will suffice. A Wisp would also serve, but your Wisps will all be busy.
When your gold mine is ready, send a bunch of Wisps to mine. Produce one more Wisp. You won't need any more Wisps in this scenario, unless you decide to expand. There simply won't be anything to spend resources on. Later on, as the resources pile up, cash in a pair of Wisps for Ancients of War and replace them with an Archer.

Start pumping out Moon Wells. You will need a lot of them. This is not a joke. Your scouting should have revealed that there is only one entrance to your home area. "Fortify" that area with literally 10 or so Moon Wells. Strengthen that area with some walking Ancients of War.
If you are planning to complete the Furbolg quest, get a total of 11 Archers. Otherwise, you can go up to 40 food.
Move out[edit]

Tyrande can only increase one level in this scenario, and this will happen easily, so whether she participates in all the combats or not is irrelevant. However, only Tyrande can pick up items, so she should do most of the running around. Tyrande plus 5 Archers is all you need to clear out the whole map, except for the main enemy base. There is no need to provide any details. Your other 6 Archers plus three or so Ancients of War will be able to defend your base. The Orc attacks are weak and can't hurt you. The Human attacks are quite dangerous, however, and will cause some damage if you only use the minimum defense.
Your reward for completing the Furbolg quest is three melee units, one of which is quite large. They eat 12 food in total, and they complement your Archers nicely.
The final assault[edit]
If you stay within the zero-upkeep limit, killing the human Paladin will be rather difficult. He will always have lots of troops available for defense, and he can heal and resurrect them. However, you can run in to his base, shoot at him and only him, maybe lose a bunch of troops, and maybe run away before you all die. Since he can't heal himself, a couple of these pyrrhic raids will finish him off. If you wish, you can easily find ways of improving this attack.
Played this way, you will never need to expand.
Powerhouse strategy[edit]
Setup[edit]
If you want to quickly overrun your enemies, do it this way. Build Moon Wells on the outskirts of your base, but make sure they don’t obstruct movement of your forces. Construct 4 Ancients of War for fast unit production. Set their rally points to Tyrande.
You should exploit the second gold mine south of your base. Don’t count on the Furbolgs to defend it, because they will not engage enemy forces that will pass through their camp. However, if you defend at the choke point, this is irrelevant.
Duke Lionheart[edit]

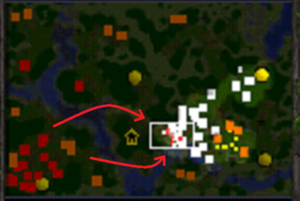
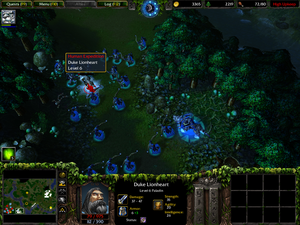
The Paladin is a Level 6 enemy Hero unit found in a camp in the SW corner of the map. Once you build two full groups of Archers and 8 Wisps, it’s time to attack. Take the eastern entrance and start by destroying the tent right outside the Paladin’s base. Use the Healing Wards found within.
Detonate your Wisps near the Paladin, draining all of his mana, otherwise he will not only heal wounded units, but may also resurrect the ones you’ve already killed. You need to control your archers manually. Always focus-fire on enemy units one by one. Soften up his army before focusing on the Paladin.
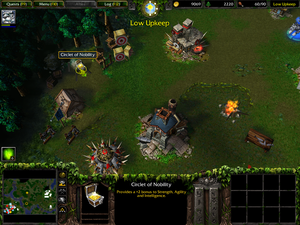
Ignore buildings except for a tent at the far back of the base, which holds a Circlet of Nobility. You will find every other treasure on this map along the southern path to Paladin’s base (which makes the optional Furbolg quest even less relevant).
Treasures[edit]

- Potion of Healing hidden in a Human tent south of the Fountain
- The other tent there has a Scroll of Protection in it
- Ring of Protection +1 in a crate SW of the main Furbolg camp
- Healing Wards in a tent just east of the Paladin’s base
- Circlet of Nobility in a tent at the far back of the Paladin’s base
It will be rather difficult to get the Circlet of Nobility, especially if you didn't know it was there a priori. If you kill the enemy Paladin first, the scenario is over. If you don't kill the enemy Paladin, then he will keep healing his troops. If you ignore the enemy troops and head for the Circlet, then the enemy units will be whaling away on you.
A good way to get the Circlet is to go at night and use Tyrande's Hide Ability to get the Circlet and leave without dying.