Chapter Introduction[edit]
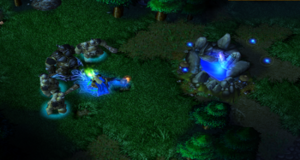
Early in the morning, Arthas and Jaina approach the village of Hearthglen.
Mission Objectives[edit]
- Main Quest - Defend Hearthglen
- Survive for 30 minutes
- Optional Quest - Grain Caravan
- Destroy the grain caravan before it gets to last village
- Reward
- Medallion of Courage and Scroll of Town Portal
Strategy[edit]
Focus your resources on a small party of defenders that move from gate to gate, upgrades, and Guard Towers. The waves of attacks follow a repeatable pattern, so for extra help refer to the list of attack times and locations below.
Initial Undead Attack[edit]
The level starts with an attack underway. Quickly select all of your current troops (give them a quick key) and start focusing on individual Undead attackers. Four Footmen and a Rifleman drop dead almost instantly. You should be able to keep all of your remaining starting troops alive. (Five Footmen, two Riflemen, a Priest and Arthas.)
Upgrades and Guard Towers[edit]
As soon as you defeat the initial attack, start focusing on improving your defenses. Don't spend too much money on Farms and extra men; instead, invest your current gold and wood in four more Peasants up front and upgrades. Send three of the Peasants to the gates (one each), and put them in auto-repair mode. Send the fourth Peasant to help gather lumber. In the meantime, start upgrading everything you possibly can. Without building extra structures, this means the Blacksmith upgrades (weaponry and armor), Lumber Mill upgrades (masonry and harvesting), and some Barracks upgrades. As you are able, add more Guard Towers at the gates (aim to have six at each gate within the first five to eight minutes), max out your upgrades, and build three or more Farms as your resources allow. Remember, you can adequately defend the town with a single party that travels between the heavily Towered gates. There is at least a minute between attacks, usually closer to two minutes, which should give you time to cast some healing spells and make sure the Peasant is repairing the Towers before doing it again.
The Core Party[edit]
Keep your core party handy. In between attacks gather them in the center of the town so that they are equidistant from the three gates. You can also refer to the table below and anticipate the attacks at certain gates - in particular, you receive alternating attacks from the purple and green bases, helping you to determine which two gates you need to defend. Consider using Arthas as a forward scout; with Divine Shield active he can safely anticipate where the next attack will take place, and also destroy Meat Wagons before they reach your Towers. This could be very important; while your Tower defense should generally defeat the attacking forces, if you don't eliminate the attacking artillery immediately, it can easily smash your Towers. Then you have to keep throwing time and resources into replacing your defenses.
You have one Priest, who is extremely useful in auto-healing your men. Make sure you heal him as your first priority. As you get down to ten minutes, you might want to see if you can manage building an Arcane Sanctum, and improve the Priests' healing ability, as well as provide a Priest at every gate.
Optional Quest[edit]

When the Optional Quest comes, you should be able to send Arthas out alone to take care of it. Wait a little bit, though, otherwise you have a long way to travel. Wait for at least the first town to fall, in the upper left corner of the map. Consult the table below and try to pick a longer interval between attacks, to minimize Arthas' absence. When ready, send Arthas out to meet the caravan. He should not run into any other trouble along the way. Have him target a Grain Caravan (Meat Wagon) as you only have to destroy the Grain Caravans to fulfill the quest, and activate his Divine Shield just as the Undead start attacking. If you have the level 3 Divine Shield (which the walkthrough has advised you to do), you should be able to take out three Grain Caravans before running away and lowering the Shield. You'll be pushing it, so don't activate until the last second. Keep Arthas out of harm's way until he can cast Divine Shield again, and send him back in for the last two Grain Caravans. Then get back to town. The last Grain Caravan will drop a Scroll of Town Portal, but by now you probably have some good permanent items you don't want to part with. But you will get back much quicker, because in the mean time the town has had to defend itself without Arthas, through two or more waves. Your reward is a Medallion of Courage.
Final Wave[edit]
The final wave comes on at less than a minute remaining. In anticipation, try to get as many extra hands on deck as your resources allow. The Farms you set up earlier will allow several more people, but money and wood may say otherwise. The goal, however, is to simply make sure at least one building is still standing at the end of the countdown. Arthas doesn't even need to survive; just put up a good fight to delay the Undead for as long as you are able to. Uther will return and put everything in order.
Attack Times[edit]
All times are in remaining minutes and seconds before Uther's return, which can be found in the upper right corner of the screen. This timer is started as soon as one unit in the initial zombie wave is killed (this is before you can react.)
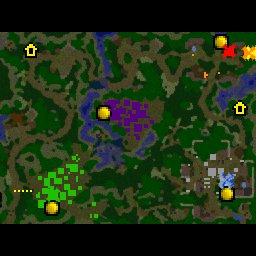
The Undead forces have three entrances to your base. The purple forces will usually attack the northwest or north gate, while green focuses on the west or northwest gate. Their choice of entrance can change depending on any factor, whether it's force buildup, or randomness. Their choice of entrance also influence their attack time, as some entrances are further from their base. The listed times are early, but possible.
| Time | Colour | Easy/Normal | Hard |
|---|---|---|---|
| 28:30 | Purple | 6 Ghouls. | 6 Ghouls and 2 Abominations. |
| 27:20 | Green | 3 Ghouls. | 6 Ghouls. |
| 25:30 | Purple | 4 Ghouls. | 4 Ghouls, 1 Necromancer and 2 Abominations. |
| 24:20 | Green | 4 Ghouls. | 4 Ghouls, 1 Necromancer and 2 Meat Wagons. |
| 22:30 | Purple | 4 Ghouls and 1 Necromancer. | 8 Ghouls and 3 Necromancers. |
| 21:20 | Green | 5 Ghouls and 1 Necromancer. | 8 Ghouls and 4 Necromancers. |
| 19:30 | Purple | 2 Ghouls and 1 Abomination. | 4 Ghouls, 1 Necromancer and 2 Abominations. |
| Green/ Purple | Skeletal Longevity, Unholy Armor and Necromancer Adept Training. | Cannibalize, Skeletal Longevity, Unholy Armor and Necromancer Adept Training. | |
| 18:20 | Green | 3 Ghouls, 1 Necromancer and 1 Meat Wagon. | 4 Ghouls, 1 Necromancer and 2 Meat Wagons. |
| 16:30 | Purple | 2 Ghouls, 2 Necromancers and 1 Abomination. | 5 Ghouls, 2 Necromancers, 2 Meat Wagons, 2 Abominations and a Level 6 Lich. |
| 15:20 | Green | 6 Ghouls. | 10 Ghouls. |
| 13:30 | Purple | 3 Ghouls, 2 Necromancers and 1 Meat Wagon. | 4 Ghouls, 1 Necromancer, 2 Meat Wagons and 2 Abominations. |
| Green/ Purple | Unholy Strength. | Unholy Strength, Ghoul Frenzy and Disease Cloud Aura. | |
| 12:20 | Green | 1 Meat Wagon and 2 Abominations. | 2 Meat Wagons and 3 Abominations. |
| 10:30 | Purple | 4 Ghouls, 1 Necromancer and 2 Abominations. | 4 Ghouls, 4 Necromancers, 2 Abominations and the Level 6 Lich. |
| 9:20 | Green | 6 Ghouls, 2 Necromancers and 2 Abominations. | 6 Ghouls, 4 Necromancers and 3 Abominations. |
| 7:30 | Purple | 3 Ghouls and 1 Necromancer. | 4 Ghouls, 1 Necromancer, 2 Meat Wagons, 2 Abominations and the Level 6 Lich. |
| 6:20 | Green | 6 Ghouls, 2 Necromancers, 1 Meat Wagon and 1 Abomination. | 6 Ghouls, 4 Necromancers, 2 Meat Wagon and 2 Abominations. |
| 4:30 | Purple | 4 Ghouls, 1 Necromancer, 1 Meat Wagon and 1 Abomination. | 8 Ghouls, 1 Necromancer, 2 Meat Wagon and 3 Abominations. |
| 1:45 | All | All Ghouls, Necromancers, Meat Wagons and Abominations and two Liches, Levels 6 and 10. | |
| 1:30 | Purple | 4 Ghouls, 1 Necromancer, 2 Meat Wagons and 1 Abomination. | |
| 0:40/ 0:25 | All | All Ghouls, Necromancers, Meat Wagons and Abominations and two Liches, Levels 6 and 10. |
The caravan follows a simple schedule: After a given time, the caravan advances to the next village. Intercepting the caravan during its travel will push the schedule back. To some degree, the caravan also intercepts itself, making hard difficulty roughly a minute slower. With the exception of the starting time, all times are therefore approximate, and increasingly less reliable.
| Time | Easy/Normal | Hard |
|---|---|---|
| 22:30 | 5 Grain Caravans, 6 Ghouls (4 on easy) and 2 Necromancers are created. They have Disease Cloud Aura. | 5 Grain Caravans, 2 Ghouls, 2 Necromancers and 4 Abominations are created. They have Disease Cloud Aura. |
| 20:30 | 3 Zombies and 3 Ghouls attack. | |
| 16:30 | 4 Zombies and 4 Ghouls attack. | |
| 13:00 | 4 Zombies and 4 Ghouls attack. | |
| 11:00 | Quest Failed! | |
| 10:00 | Quest Failed! | |
| 09:30 | 7-8 Zombies and 4-5 Ghouls attack. | |
| 07:30 | 4 Ghouls attack. | |
| 06:30 | 6 Ghouls attack. |
Summary[edit]

Under no circumstances launch an attack on the Undead base. It's trouble that's not worth anything. (Actually, there is one circumstance: you want to take the hardest possible approach to beating this level.) There's a Gold Mine to the north of your base you could expand into. That's not advised either, since the Undead forces will attack that isolated base.
Train four Peasants for lumber and focus on upgrading your existing units. Develop your preexisting units into a mobile force that moves to meet the Undead attackers.
At each exit, build six Guard Towers and leave a Peasant for Auto-Repair. Don't bother with advanced buildings unless you're good with defense. At that point, build the Arcane Sanctum first to upgrade and train more Priests.
If you want to deal with the Optional Quest, Arthas can handle the Grain Caravans (Meat Wagons) solo with Divine Shield activated.
When the final attack comes, all you have to do is hold out long enough to keep one building standing when the counter hits zero.
An extreme challenge[edit]
It isn't necessary to attack the Undead bases, and we do not recommend it. However, it is possible to win by attacking and destroying those bases. You will needs lots of artillery for the static defenses and lots of other combat power. Only try this if you are an expert. Try it on hard for the most fun.
Treasures[edit]

- Jaina's inventory will be available at the start of the game in the middle of the town.
- To the bottom-right of the town is a destructible building which reveals a crate which reveals a sheep which reveals a Potion of Restoration.
- There is a farm with three villagers at the bottom of the map very near the western entrance who will turn into Zombies when approached. The nearby crate contains a Scroll of Healing.
- If you have the time, travel westwards to right below the purple Undead base where there is a small group of Murlocs guarding a cage. Defeat them for a Potion of Mana. Release the villager within the cage and the grateful man will give you Boots of Speed.
- In the far north-west corner of the map, there is a Fountain of Health. However, attempting to use it will cause four nearby Ogres to attack. They carry Gauntlets of Ogre Strength +3 and a Potion of Greater Healing.
- In the far south-west corner of the map (reachable from the northwest), there are three more Ogres. They carry a Periapt of Vitality.
- Doing the Optional Quest earns you a Scroll of Town Portal and a Medallion of Courage.
- A Goblin Merchant to the north of your base sells Potions of Healing, Potions of Mana, Scrolls of Healing, Scrolls of Protection, Wands of Negation, Gems of True Seeing and Scrolls of Town Portal.
Points of Interest[edit]
- To the south of your base, there is a small peasant farm. Send any unit there to recruit three Footmen for no extra cost. The disadvantage of doing this is that you may need those population slots for better units.