Greenhorn Forest is a simple level to introduce the player to the mechanics of the game. As the name suggests, it is populated with lots of trees and logs to traverse through. As is with every level, there are eight Red Diamonds, eight treasures, eight Gold Statue Parts, and five Spritelings. Most enemies do not pose much harm, and some cannot even hurt Wario altogether.
Treasure: Pink[edit]
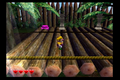
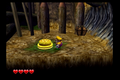
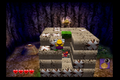
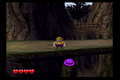
The first treasure is not too far from the start of the stage. To the left of the bridge over the small stream, one of the trees seems to have peculiar carvings into it. These carvings actually serve as a ladder to climb to a high-up platform! On the top left corner of the platform is the pink button while the bottom-right corner is the chest.
-
Button
-
Treasure


Spriteling 1[edit]
This Spriteling is entirely unavoidable, as a cutscene will force Wario to save the trapped creature. It does explain that there are 40 available to find through the upcoming levels, however.
Gold Statue Parts 1 and 2[edit]

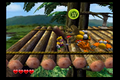
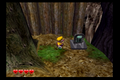
The first Gold Statue Part can be found floating over the last log platform that crosses the waterfall immediately after the first Spriteling. The second part is almost directly next to it on top of another log with a ladder carved into it. Alternatively, the log can be grabbed on to from the slide, and Wario can crawl onto the log instead.
Treasure: Red[edit]
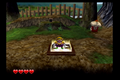
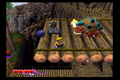
This is the easiest treasure in the game! The button and respective chest are directly next to each other, and serve to demonstrate how the mechanic of pressing buttons to summon chests works. There is also a Wooden Chest to the right which may hold coins, a bomb, or health-restoring garlic.
-
Button
-
Treasure


Treasure: Yellow[edit]
While crossing the chasm appears to be the correct first step, exploring the lower path will actually reveal the yellow button for the treasure. After pressing it, there is a pole halfway across the chasm that contains the yellow treasure.
-
Button
-

Treasure


Trapdoor 1 and Spriteling 2[edit]
The first Trapdoor is after the canyon with the yellow treasure. To enter, perform a ground pound over the hole and enter into the small room inside. In this challenge, there are two floating blocks in the air before reaching a platform with a Red Diamond and a Gold Statue Part. These blocks in the air are called Drop Blocks, and quickly sink the longer Wario stands on them. By jumping quickly, there should be no challenge in reaching the other side. To escape, utilize the Escape Spring in the bottom corner of the room. The second Spriteling is found directly behind the first Trapdoor, and next to the first of many health-restoring Garlic Dispensers.
-
The first Trapdoor
-
The second Spriteling

Trapdoor 2[edit]

The second trapdoor is located in between two layers of stone blocks just past the first Trapdoor. This one is focused on learning to rotate the camera utilizing the C-Stick. There are simply some platforms ascending to the Red Diamond at the top. The Gold Statue Part is located halfway up the structure.
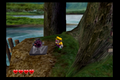
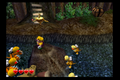
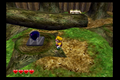
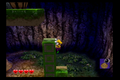
Spriteling 3 and Trapdoor 3[edit]
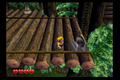
The third Spriteling is past the Bunny Spring to the right of Trapdoor 2. After saving the third Spriteling, traverse left to find a second Bunny Spring above where the first was located, and use it to find Trapdoor 3 on a tree stump. This features a large cube of stone blocks. While the Gold Statue Part is on the center green block, the Red Diamond is inside the whole structure. The simplest way to collect it is by simply punching straight forward and ground-pounding downward from where Wario is first spawned, although most of the entire cube can be destroyed in any way the player sees fit.
-
The third Spriteling
-
The Red Diamond is within the cube

Treasure: Chartreuse[edit]
To the left of Trapdoor 3 is another tree-ladder that branches in two directions. Heading left will eventually lead to the chartreuse button, and returning to the base of the tree-ladder will be the location of the treasure.
-
Button
-
Treasure


Gold Statue Part 6[edit]

Heading to the right at the top of the tree-ladder from Trapdoor 3 will lead Wario along a path, and over one bridge is the Gold Statue Part floating in the air.
Treasure: Green[edit]
Continuing forward from Gold Statue Part 6 will be the green button for the treasure. The chest can be found backwards somewhat by the first bunny spring. After collecting it, continue to the right on the ground from where the third Spriteling was.
-
Button
-
Treasure


Trapdoor 4[edit]

This Trapdoor is located just past where the third Spriteling was, and is roughly directly under the Green button. The solution for the puzzle is to break one stone block from either end, and to break four from the center. Alternatively, the player could break one from one end, two from the center, and four from the opposite side, although this serves no benefit. This Trapdoor has a Red Diamond, but also a Wooden Chest.
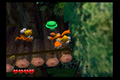
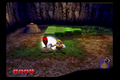
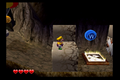
Gold Statue Part 7 and Trapdoor 5[edit]
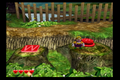
This part is located in the middle of the pond area past Trapdoor 4, floating on a small dirt patch. The fifth Trapdoor is also located in the small watery pond: Upon entering, a Glue Globe will descend from above. Wario must grab on and move accordingly to fit past the open spots in the ring. Once past, the Red Diamond is as good as yours.
-
Enemies cannot hurt you on this dirt mound
-
Use to C-Stick to see if Wario will fit through the gap to avoid taking damage.


Treasure: Light Blue[edit]
Located on the tree above the Gold Statue Part is a tree ladder that holds the light blue button. It can be hit by jumping and throwing the button, or by jumping forward and punching it. The treasure is found past the wood log barrier passed the Bunny Spring.
-
Button
-
Treasure


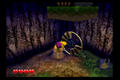
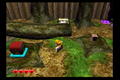
Trapdoor 6, Unithorn's Lair, and Spritelings 4 and 5[edit]
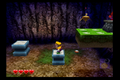
After departing Trapdoor 5 and clearing the large log barrier with the Bunny Spring, Trapdoor 6 is at the top of the path. This is also a very simple Trapdoor, as the staircase to the Red Diamond is activated at the punching of the switch. That's it!
The fourth Spriteling is on the left of a bottomless chasm, on a tree stump below Trapdoor 6. The fifth is on the other side. Normally, whichever bridge the player picks first will snap halfway through, leading to the player falling into the pit and then entering the Unithorn's Lair. This can be skipped by activating a Corkscrew Conk halfway across the bridge, however.
-
Punching a switch is the only challenge here
-
Fourth Spriteling
-
Fifth Spriteling
-
Unithorn's Lair


Once the bridge is crossed, the player could interact with the Stone Doohickey, but there are more collectibles to encounter first by continuing right.
Treasure: Dark Blue and Trapdoor 7[edit]
The dark blue button is directly above the seventh Trapdoor, and the chest is past the Ankiron to the left of Trapdoor 8. The seventh Trapdoor features two switches that rotate a large L-shaped block. By pressing the left switch two times and the right switch three times, the block will be positioned in a perfect way to get to the top and collect the Red Diamond. The order in which the switches are pressed do not matter.
-
Button
-
Treasure
-
The correct position of the block


Treasure: Purple[edit]
Moving right of the seventh Trapdoor will lead Wario to the final tree ladder, where the purple button can be found underneath the bridge heading left. Either drop down and ground pound the button, or throw an enemy at it. The purple chest is back across the chasm to the left of the wood bridges. The fastest way there is to continue moving right from Trapdoor 8, as you have enough height to jump over the crevice.
-
Button
-
Treasure


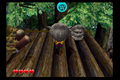
Trapdoor 8[edit]

The final Trapdoor is just left of the purple button. It has spike balls floating around a platform with the final Red Diamond and final Gold Statue Part. When Wario grabs the platform, he will hang from the side. Jump again quickly after first grabbing hold to avoid taking damage.
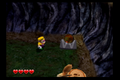
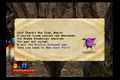
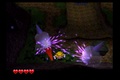
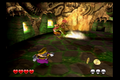
Boss: Greenfist[edit]

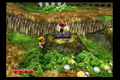
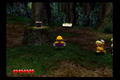
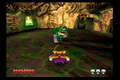
In order to enter the boss's arena, the Stone Doohickey needs removed. In order to do this, three Red Diamonds from any of the eight Trapdoors need to have been collected. The diamonds will automatically will open the gate for you. Once entering via ground pound, Greenfist will emerge from his arena. Relatively speaking, the boss is harmless if you keep your distance. To begin, punch the boss three or four times. It will charge up an attack, so use this time to give some distance. Greenfist will start charging after the player attempting to punch them in a frenzy. If it gets too close, Greenfist can easily be jumped over. After this, another few punches should stun the boss. In order to deal substantial damage, Wario must use a Mad Move on the boss. This process is repeated twice more without any significant changes, and will lead to victory! Another method to hurt the boss is to have Greenfist charge off the end of its battle arena into the pit.
-
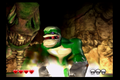
The start of the fight
-
The boss approaches
-
Small punching attack
-
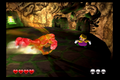
Large punching attack after being damaged
-
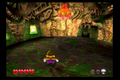
Recovering after being damaged
-
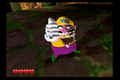
The level is complete
-
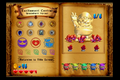
If everything has been collected, the pause menu will look similar to this


Completion of this stage will unlock Greenhorn Ruins.