Jump to navigation
Jump to search
Regular enemies[edit]
Default sorting is according to the enemies weaknesses (last 4 columns on the right).
- Legend
- Name: except for the monsters that appeared in the movie, enemies in the game are nameless, but since it is a Zelda clone, names from The Legend of Zelda were chosen.
- Exp: experience points gained from defeating the enemy.
- Earliest location: many enemies appear in several areas, but usually each one is a threat only in the first one.
- Magic:
- The High Aldwin's magic acorns paralyze some enemies;
- Renew transforms some enemies into a different species (useful against shielded enemies);
- Terstorm blows away some enemies (usually flying enemies);
- Ethereal enemies can only be harmed by the Devil Eye sword.
| Sprite | Name | Exp. | Earliest location |
Notes | Acorn | Renew | Ter- storm |
Devil sword |
|---|---|---|---|---|---|---|---|---|
 |
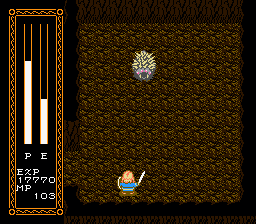
Death Dog | 20 | 1.2. Rugged forest | An enemy from the movie! | Yes | Yes | No | No |
 |
Troll | 20 | 2.1. Rugged forest | An enemy from the movie! | Yes | Yes | No | No |
 |
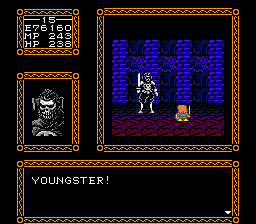
Nockmaar soldier 1 (brown) |
100 | 6.3. Tir Asleen castle | An enemy from the movie! | No | Yes | Yes | No |
 |
Nockmaar soldier 2 (blue) |
110 | 6.3. Tir Asleen castle | - | No | Yes | Yes | No |
 |
Nockmaar soldier 3 (red) |
120 | 7.3. Nockmaar outer castle | - | No | Yes | Yes | No |
| Zol & Gel | 10 | 1.2. Rugged forest | Zol splits into 4 smaller Gels. | Yes | Yes | No | No | |
 |
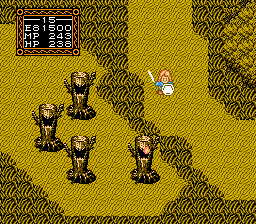
Darknut 1 (gray) |
50 | 2.1. Rugged forest | Shielded! | No | Yes | No | No |
 |
Darknut 2 (blue) |
60 | 2.2. Death forest | Shielded! | No | Yes | No | No |
 |
Darknut 3 (red) |
70 | 2.3. Rock mountain cave | Shielded! | No | Yes | No | No |
| Stalfos 1 (gray) |
10 | 1.2. Rugged forest | - | No | No | Yes | No | |
| Stalfos 2 (blue) |
20 | 2.1. Rugged forest | - | No | No | Yes | No | |
| Stalfos 3 (red) |
30 | 5.1. Canyon maze | - | No | No | Yes | No | |
 |
Rope 1 (green) |
20 | 1.3. Bogarda's forest | They shoot fireballs | No | Yes | Yes | No |
 |
Rope 2 (yellow) |
30 | 2.3. Rock mountain cave | They shoot fireballs | No | Yes | Yes | No |
 |
Rope 3 (pink) |
40 | 5.1. Canyon maze | They shoot fireballs | No | Yes | Yes | No |
 |
Tektite 1 (red) |
30 | 1.4. Bogarda's cave | - | No | Yes | Yes | No |
 |
Tektite 2 (blue) |
40 | 2.3. Rock mountain cave | - | No | Yes | Yes | No |
 |
Tektite 3 (gray) |
50 | 4.2. Confusing cave | - | No | Yes | Yes | No |
 |
Gleeok 1 (pink) |
50 | 2.2. Death forest | They shoot fireballs | No | Yes | Yes | No |
 |
Gleeok 2 (blue) |
60 | 4.3. Sacred towers | They shoot fireballs | No | Yes | Yes | No |
 |
Gleeok 3 (gray) |
70 | 6.2. Rocky mountain | They shoot fireballs | No | Yes | Yes | No |
 |
Patra 1 (gray) |
20 | 1.3. Bogarda's forest | - | Yes | No | No | No |
 |
Patra 2 (blue) |
30 | 2.1. Rugged forest | - | Yes | No | No | No |
 |
Patra 3 (yellow) |
40 | 2.2. Death forest | - | Yes | No | No | No |
 |
Patra 4 (red) |
50 | 5.1. Canyon maze | - | Yes | No | No | No |
 |
Keese & Vire 1 (brown) |
20 | 1.4. Bogarda's cave | They appear as small Keese bats, then transform into Vire. |
No | No | No | No |
 |
Keese & Vire 2 (yellow) |
30 | 2.3. Rock mountain cave | They appear as small Keese bats, then transform into Vire. |
No | No | No | No |
 |
Keese & Vire 3 (blue) |
40 | 4.2. Confusing cave | They appear as small Keese bats, then transform into Vire. |
No | No | No | No |
 |
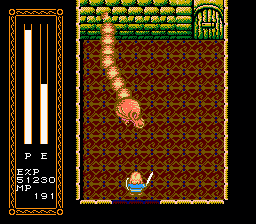
Gohma | 100 | 4.1. Lake of Fin Raziel | Shielded! | No | No | No | No |
 |
Stone Statue | 200 | 5.1. Canyon maze | They shoot fireballs. Weak against lightning. |
No | No | No | No |
 |
Like-Like 1 (gray) |
80 | 1.4. Bogarda's cave | They cast "Renew", then shoot 5 times |
No | No | No | Yes |
 |
Like-Like 2 (orange) |
90 | 6.3. Tir Asleen castle | They cast "Renew", then shoot 10 times |
No | No | No | Yes |
 |
Like-Like 3 (purple) |
100 | 7.3. Nockmaar outer castle | They cast "Renew", then shoot 15 times |
No | No | No | Yes |
 |
Wizzrobe 1 (gray) |
80 | 2.2. Death forest | They cast "Lightning" | No | No | No | Yes |
 |
Wizzrobe 2 (blue) |
90 | 4.3. Sacred towers | They cast "Lightning" | No | No | No | Yes |
 |
Wizzrobe 3 (yellow) |
100 | 5.2. River cave | They cast "Lightning" | No | No | No | Yes |
| Bubble 1 (gray) |
80 | 2.3. Rock mountain cave | They split up using Willow's magic pts. |
No | No | No | Yes | |
| Bubble 2 (yellow) |
90 | 4.3. Sacred towers | They split up using Willow's magic pts. |
No | No | No | Yes | |
| Bubble 3 (pink) |
100 | 6.3. Tir Asleen castle | They split up using Willow's magic pts. |
No | No | No | Yes | |
| Ghini 1 (green) |
80 | 3.2. Daikini crossroads, W | They shoot fireballs | No | No | Yes | Yes | |
| Ghini 2 (yellow) |
90 | 4.2. Confusing cave | They shoot fireballs | No | No | Yes | Yes | |
| Ghini 3 (pink) |
100 | 4.3. Sacred towers | They shoot fireballs | No | No | Yes | Yes |
Obstacles[edit]
These enemies are indestructible, and they have to be dodged.
-
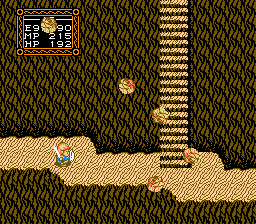
Falling rocks
You might have to backtrack in order to dodge them. -
Death stumps
They have poor aim. -
Sandtraps
Willow should use the Specter spell to avoid awakening them.


Bosses[edit]
Willow has to defeat these enemies in order to progress to further areas.
- Bosses exclusive to the NES game:
-
Bogarda, a Daikini (human) who was turned into a monster by Bavmorda.
-
Muzh, another Daikini who was turned into a monster by Bavmorda.


- Bosses from the original movie:
-
Eborsisk, a huge two-headed monster that attacked Tir Asleen. It is a transformed troll.
-
General Kael, a Daikini warrior wearing a skull-shaped helmet.
-
Queen Bavmorda, a selfish sorceress.


