While some enemies only take one hit to kill, many of the enemies require a more concerted effort to defeat. Many such enemies have a jewel visible somewhere on their bodies. This jewel reflects the state of their health. The jewel goes through several colors as you weaken the enemy. A red jewel means the enemy is close to defeat, while a blue jewel means the enemy is quite healthy. A blue jewel will progress through cyan, green, yellow, and orange before turning red. An enemy with a blue jewel may take many hits before the jewel even begins to show any sign of changing colors. This does not mean you are not hurting the enemy; it merely means you have not hurt the enemy enough to change the color of the jewel yet.
Note: While the jewel is present on most of the enemy sprites, the color change functionality was not programmed into the PC Engine version of Bikkuriman World. As a result, you cannot gauge the remaining health of an enemy or boss.
Basic enemies[edit]
| Snakes | Cobra |
|---|---|
  Points: 200. Snakes are immobile enemies that simply sit in one place as an obstacle that you must either slay or jump over. They only require one hit to remove, and will usually drop a coin when defeated the first time. |
 Points: 200. Cobras are a little bit more of a challenge that their stationary cousins. They like to slither back and forth across a short stretch of territory. Stabbing them pushes them back before they resume their behavior. |
| Mushroom | Jellyfish |
 Points: 200. Mushrooms are found in the early stages of Monsterland. They wander about, trying to track Wonder Boy down. They can even hop up steps. They take one hit to kill. |
 Points: 200. Jellyfish like to hop up and down in the ocean breeze. They sit in one place and leap straight up into the air, before falling back down to their resting place. One hit will knock them out. |
| Red Spirits | Blue Spirits |
 Points: 200. Red spirits are commonly found inside castles and dungeons. They roam back and forth restlessly in an area. If they are above you, they tend to float down to your level, making them much easier to hit. They take one hit to kill and they never provide money, but they do drop valuable point items. |
 Points: 30,000. You won't encounter blue spirits until much later in the game. They are one of the toughest basic enemies to defeat. When hit by a sword, they go flying away. You may eat up precious time trying to kill just one, but if you succeed, you are awarded a whopping 30,000 points, which may help you get that next heart much sooner. |
| Sling Goblin | Bat |
  Points: 300. Goblins are stationed as guards in certain areas. Their favorite means of attacking Wonder Boy is to sling arrows at him. Even the most basic shield can defend you from the arrows. Green goblins are found in later stages of the game. |
 Points: 300. Bats are typically found in caves. They hover near the ceiling until you get within striking distance. Then they swoop down. As soon as you see them move, freeze and swing your sword when they are just about to hit. Bats are killed with one hit and commonly leave hearts behind. |
| Skeleton | Strong Bat |
  Points: 500. Skeletons guard several indoor passages. They run back and forth, but they also like to hop about. They are not easily killed, and will jump on you if you're not careful. Skeletons in blue are tougher than those in red. |
 Points: 500. The yellow bats which are found later in the game are much tougher than their purple cousins. They have a greater range of attack, and take a few more whacks to defeat. What's worse, they are less likely to leave hearts behind when defeated. |
| Crab | Octopus |
 Points: 500. Crabs quite logically inhabit tropical islands. Their only means of attack is to blow bubbles at you, but don't underestimate them; they may not hurt much, but even one can mean the difference between life and death. With their hard exterior, crabs can take some punishment before going down. |
 Points: 500. The Octopus is a rare enemy that you will typically only encounter in the few hidden underwater sections. It leaps off the ground, spits a glob of goo from its nose, and floats back down to the surface. It can't hurt you if you stand right next to it, but you'll have to stab it many times to defeat it. |
| Red Rat | Blue Rat |
 Points: 500. Rats are among the fastest enemies that you'll encounter. They race along the ground at incredible speeds, ramming into anybody that gets in their way. The trick is to stab them just before they reach you. They will be repelled back, but they won't stay stunned for very long if they survive the first attack. |
 Points: 800. The only difference between red rats and blue rats, besides their color, is that blue rats can take many more hits before dying than red rats. They still race along the ground just as quickly, but because they need to be hit more often, they stand a better chance of escaping. |
| Ape | Snow Ape |
 Points: 500. Apes are fairly simple minded—as soon as they see an intruder, they start picking up rocks and chucking them. Fighting them can be tricky, since hitting them with your sword will likely push them back far enough for them to hit you with a rock. Press your attack by closing the distance between you two. |
 Points: 800. Snow apes are a lot like their normal cousins, except instead of tossing rocks at you, they toss cubes of ice. These ice cubes have a tendency to ricochet off of objects, so even if you dodge the first attack, be on the look out for the reflected cube barreling your way. |
| Mudman | Plant |
 Points: 500. Mudmen can be frustrating to fight against. They collapse to the ground and slide back and forth across a small area. In this form, they are not vulnerable to attack. It is only when they stand up to spit mud at you that you can slash at them. Block the mud with your shield and move in to attack before to drop back down. It takes several hits to defeat them. |
 Points: 500. These carnivorous plants are as deadly as they are rare. They are stationary and can't move from the location that they are rooted in, but they will spit needles at you wherever you are. Your shield can block the needles, and if you swing your sword quickly enough, you can freeze them until they are defeated. The hard part is approaching them safely. |
Boss enemies[edit]
Note: In the PC Engine version of Bikkuriman World, all of the following enemies were changed into characters from the Bikkuriman series. Furthermore, there is no equivalent to the Minotaur in Bikkuriman World. All instances of the Minotaur have been replaced with the equivalent to the Demon. Scroll down to see a gallery of the bosses which appear in Bikkuriman World, and who they replace.
| Death | Poverty | |||
|---|---|---|---|---|
 Points: 2000. Death is the first boss that you will encounter. It hovers in the air before dropping down to attack you with its sickle. After you smack it with your sword, it hovers at roughly the height of your head which you can easily jump up to strike. Death reappears as a regular enemy roughly halfway through the game. |
 Points: 4000. Poverty attacks in exactly the same manner that Death does. The only difference is that when Poverty strikes you, he steals money from you in addition to dealing damage to you. Keep your money in your wallet by keeping Poverty at bay. He will also reappear as a regular enemy shortly after you encounter him as a boss. | |||
| Vampire | Mushroom King | |||
 Points: 2000. Though perhaps not the most fearsome vampire you've ever seen, it is dangerous none the less. It attacks in a manner quite similar to death, although a bit more aggressively. That added aggression makes it slightly easier to defeat since it runs into your sword range more willingly. |
 Points: 2000. In order to escape one of the stages, you must defeat the Mushroom King. This is a difficult enemy who hops continuously back and forth across the floor. As he does, he chucks Mushrooms about, giving you more clutter to deal with. Focus your attacks on the king, and clear the mushrooms only when they get in your way. | |||
| Kraken | Sphinx | |||
 Points: 3000. You must face the Kraken after an excursion across a tropical region of Monster Land. Endowed with the ability to survive outside of water, it also floats through the air, and tosses out poisonous orbs that float to the ground. The one aspect you can take advantage of when you fight it, is that it can't hurt you right after you've struck it. Jump into the air, swing your sword, and pass through the Kraken after you hit it. Then turn around and set yourself up for the next attack. |
 Points: 3000. The Sphinx is either the easiest boss in the game, or definitely one of the hardest. It all depends on how good your investigative skills are, or how lucky you are. Before the Sphinx starts the fight, he asks you to answer a question. If you get the answer right, he simply gives up, allowing you to collect his money and advance. Get it wrong and… | |||
| Kong | Snow Kong | |||
 Points: 3000. This giant ape is no joke. If you thought the rocks that the regular apes tossed were bad, the boulders that Kong tosses hit the ground and split up into smaller pieces that spread out. Kong has a rather large amount of health too. You'll have to press your attack continuously, chasing him around the room in order to prevent him from having the chance to counter attack. |
 Points: 4000. As if regular Kong weren't hard enough, the Snow Kong doesn't toss boulders around—it tosses out smaller Snow Apes, and they toss out ice cubes. You don't have time to mess around with this guy, get rid of him as quickly as you possibly can before you become overrun with Snow Apes and ice cubes. | |||
| Demon | Minotaur | |||
 Points: 3000. Fortunately for you, the demon is a rare encounter. Unfortunately for you, it is the guardian of the best sword in the game. If you want it, you're going to have to face this boss, and his six whirling balls of fire. The Demon won't do much to attack you—it doesn't have to. It can simply sit back and let the circle of fireballs do all the work. Get inside, stab him quickly, and back away even quicker. |
 Points: 4000. Without a doubt, one of the most difficult bosses short of the final boss in the game, the Minotaur runs back and forth attempt to strike you. When it gets some distance between the two of you, it will fire a laser! Since you can't duck, your only means of avoiding this attack is to jump! Strike at it as quickly as you can to avoid a lengthy battle with this laser firing beast. | |||
| Knights | ||||
| ||||
| Dragon | ||||
  Points: 30,000. The dragon is the final boss of the game. If you manage to make your way through the maze-like Castle of No End, you will find the chamber in which the dragon resides. Once you defeat it, however, your battle is not over as it will reveal its true mechanical form, and you will have to commence the fight all over again. However, if you succeed in defeating it a second time, Monster Land will be saved. If you complete the trading sub-quest of the game, you may receive an item which can substantially reduce the difficulty of this fight. | ||||


PC Engine Bikkuriman World boss gallery[edit]
-

Satan Maria replaces Death
-

Satan Maria replaces Poverty
-

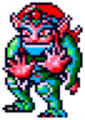
Super Devil replaces Vampire
-

Satan Maria replaces Mushroom King
-

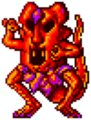
Masho Nero replaces Kraken
-

Satan Maria replaces Sphinx
-
Noaphom replaces Kong
-

Noaphom replaces Snow Kong
-
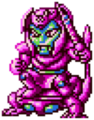
Satan Nero replaces Demon
-
Wonder Maria replaces Red Knight
-

Wonder Maria replaces Blue Knight
-

Wonder Maria replaces Silver Knight
-
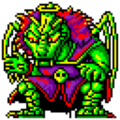
Shiso Jura replaces Dragon form 1
-

Black Zeus replaces Dragon form 2


