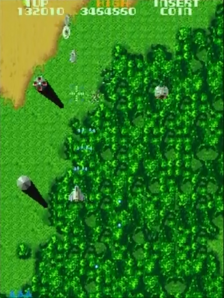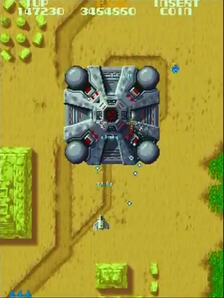
Once the text of "AREA 4" has disappeared from the bottom of the screen, four groups of five Torkan shall come flying down towards the Solvalou while firing projectiles at them; once you've fired a shot at each of them to kill them, four groups of five Toroids shall come flying down towards you while firing projectiles at you. Once you have fired a shot at each of them to kill them you will have to drop a bomb on the location of the game's ninth Sol (shown in the above image) to make it reveal itself - and once you drop another bomb on this ninth Sol to kill it, five more groups of three Torkan and Toroids shall come flying down towards you while firing projectiles at you. Once you have fired a shot at each of them to kill them you will have to drop a bomb on the location of the game's third Zos (again, shown in the above image) to make it reveal itself (but only after all enemy projectiles have gone off the screen).

Once you've dropped a second bomb on this third Zos to kill it, two Derota shall emerge from the ground below you; once you have dropped a bomb on both of them to kill them, you will come to a Grobda below you (which will move forward as you get closer to it). Once you have dropped a bomb on it to kill it, two more Derota and a Logram shall emerge from the ground below you - and once you have dropped a bomb on all of these to kill them, you will come to a second Grobda which is moving forward below you. Once you've dropped a bomb on it to kill it five more groups of three Torkan and Toroids will come flying down towards you while firing projectiles at you; once you have fired a shot at each of these to kill them, two more Derota and a second Logram will emerge from the ground below you. Once you've dropped a bomb on each of these to kill them, a Bacura will come tumbling down towards you - and once you have manoeuvred around it a group of thirty-five Zakato shall materialise in front of you (exploding and launching a projectile at you almost instantly) as the game's first Komochi Andor Genesis, which is an updated version of the original, flies down into view from the top of the screen. Once you've fired a shot at as many of the Zakato as you can to kill them (then avoided the projectiles launched at you by the rest), the Komochi Andor Genesis's four Kodomo (which are the spheres on its corners) will fly diagonally outwards, grow eight spikes and and a core, and start revolving around it in a clockwise direction while firing projectiles at you; once you've dropped a bomb on each of them to kill them, another group of twenty more Zakato shall materalise in front of you (again, exploding and launching a projectile at you almost instantly). Once you've fired a shot at as many of them as you can to kill them (and, again, avoided the projectiles launched at you by the rest), you will have to drop a bomb on each of the Komochi Andor Genesis's cannons to destroy them, then drop a fifth bomb on its core to kill it completely - and once you have done so, an indestructible Bragza will emerge from its wreckage and fly away off the top of the screen. Four groups of three Jara and Zoshi shall now come flying down towards you while firing projectiles at you; once you have fired a shot at each of these to kill them, seven groups of four Varge will fly down into view from the top of the screen, rotate 180 degrees anticlockwise and fire three Giddo Spario at you (which can be blocked by your own shots for 10 points apiece). Once you have fired a shot at each of the Varge themselves in order to kill them, the game shall segue into the fifth area as the text of "AREA 5" appears at the bottom of the screen.