Arcade[edit]
| Stage 2 Path of Penance |
|
苦行の道 Kugyou no Michi |
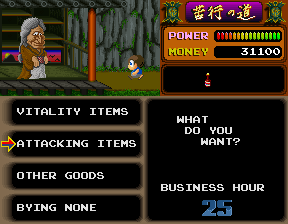
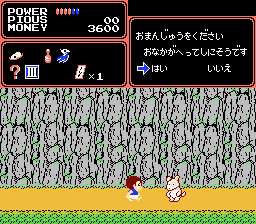
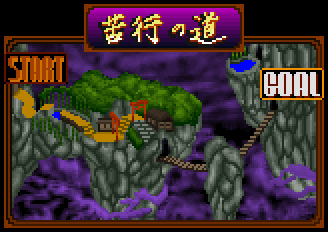
You start this stage just outside of shop. You'll need to fight a few gray zombies and falling frogs to reach the steps, then jump up to the top to reach the shop. Defensive beginners should purchase food to replenish health, while offensive experts will probably pick up the strongest attack upgrade they can afford. Either way, be sure to save 2000 for the Sake that increases your walking speed. If you can afford it, pick up the Kappa foot as well. When you're done, hop back down the stairs. Walk to the right after taking out a few more zombies. A moth will fly overhead, and as you reach the gate, blue monks will approach you from the stairs, along with one rolling rock. Shoot them as you make your way up to the next region, where you will be greeted by a bouncing snake.
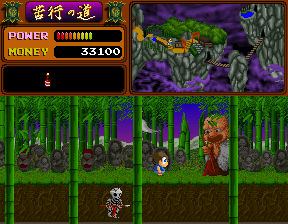
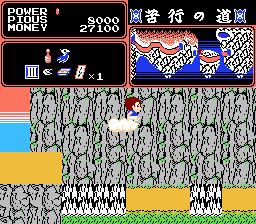
After the snake, you will face a difficult set of challenges, starting with jumping over a set of starving souls to a small cloud. These small clouds do rotate so don't stand still on them for long. Leap across to the next cloud and over to the first small ledge. Leap over the next pit of starving souls, and down into the muddy water below. You will be attacked by a set of enemies, beginning with a red hunger demon, followed by spear wielding skeleton and slower moving blue monk. You can jump over the hunger demon and up to the cloud if you prefer, or you can stand back and pick them off, but you can't charge your shots in the mud, and if you stick around for too long, face demons will appear. Use the cloud to reach the next ledge, and clear out any enemies behind you. After you walk a short distance, a giant fire breathing Buddhist will rise out of the ground. He will constantly spit fireballs at you which you should either shoot or leap over. You'll have to remove him by pelting him with a lot of shots, or four fully charged shots. Once he sustains enough damage, he shrinks back into the ground. Jump into the air to collect any money bags on your way back to the ground and continue right. You may need to fight the skeleton if he followed you underground. Frogs will fall from the sky until you reach your next challenge, a rather large and disfigured monk. They take only two charged shots to destroy, and even though they don't pose a large threat, you're best off doing it as quickly as possible so that more enemies aren't attracted to your location. After you defeat the large monk, continue right, jumping into the air to collect more money bags. More frogs will appear, and blue monks will approach when you reach the pavement.
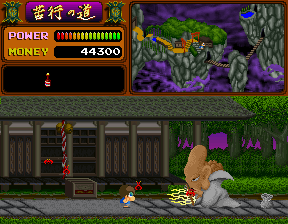
As you reach the bottom of the next gate, you will encounter three Shishimai, or lion dancers, for the first time. They are fast, but easily removed with one simple shot each. Jump up the steps, and watch out for a rock that rolls down the ramp, as well as one that appears to the left when you reach the top. Walking your way will be the first of many more giant disfigured monks. Charge up two shots and remove the first one. Then charge up again and walk through the building interior to encounter the second monk. Hit him twice, and you won't get to advance far before meeting the third. By now, frogs may be falling from the trees and face demons may start to appear, but don't get hung up in one spot trying to fight them all for too long or things will only get worse. You'll meet one more monk your way to the next steps, where a few blue monks will approach from the right.
Walk through the cavern and fight off the lion dancers and blue monks that appear. As you cross the bridge, watch out for rolling rocks, and face demons. After you make it across the bridge, you'll see another shop entrance, along with a long snake-like ghost that pass below the steps. Jump up to the shop if you wish, and be sure to purchase the Kappa foot this time to help you swim in the next level. Pick up any weapon upgrades you can afford and spend the rest on food. As you leave the shop and walk to the right, prepare to fight a bouncing snake, a few bouncing green zombies, and any face demons that might appear. Jump up the next steps to another bridge, where you'll mostly deal with both gray and green zombies.
Inside the cavern, jump over the starving soul pit. On the other side, you'll encounter an odd collection of two kimono demons and a red demon. Defeat them and continue until you reach a set of stairs. If you wish, you can continue to the right and collect more money bags, but it's much more valuable to take the steps. When you reach the top of the steps, you can opt to go left or right. Investigate the path to the left first, and you will reach a long set of polished stairs that climb to the top of the mountain. If you decide to follow them, read the sidebar to the right for more info. Be very careful not to stick around for too long now because Hell Wheels can appear now. One touch from a Hell Wheel means instant death no matter how much health you have! Having the cat or dog by your side is especially helpful against Hell Wheels. Head to the right along the top path, leaping over a few starving soul pits, and on top of small clouds, until you reach a 500 money bag floating over a large cloud. After that, walk across the last ledge, encountering a few hunger demons at the end, and then fall off the edges to reach the boss below.
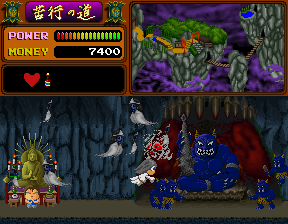
Like the previous stage, when you land at the bottom of the pit, you will encounter another Oni, only this one is blue. In addition to introducing himself, he offers to allow you to pass if you give up everything you own. You might think agreeing with him will make getting past this boss a breeze, but even if you agree and he takes all your stuff, he still makes you fight him. The clear choice is to say no (the bottom option). After that, Tarosuke will summon Monmotaro and the fight will begin. Unlike the last boss, this one is oddly easier than the last one. The reason is that the ghosts which appear do not fly freely throughout the screen, but rather occupy specific heights. This allows Monmotaro to occupy a space just above where the blue demons walk. The ghosts won't fly down to that height, and while the blue demons can jump up, they don't do it very often. Once you find the correct height, you can simply stay there and shoot spirit flames until the boss is defeated. Be sure to collect the 10,000 money mark that the boss leaves behind when defeated.
PC Engine[edit]
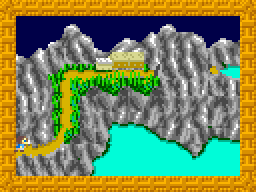
The second stage begins with two green zombies walking towards Tarosuke just before the first instance of Zakka's shop in the stone wall. The cat will be wandering around the entrance. He will ask if you would like him to fight enemies for you. You can reply yes or no, however you must have purchased the treat from the bouncing man at the end of the previous stage or the cat will refuse to join you even if you say yes. Inside the shop, you may want to buy the first two dishes to restore lost health. The third item will restore six bars if your health meter runs out. The sake bottle will increase Tarosuke's walking speed, and the Kappa's foot will increase his swimming speed (this item is vital for the next stage). If you have enough money left after buying all these items, you may want to consider one of the Rensha as they increase the number of ki shots that you can fire one the screen.
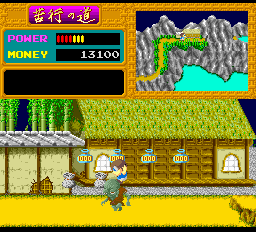
Continue to the right once you have left the shop and jump onto the next platform. There is a 1000 money bag suspended in mid-air over the floor with several frogs and a skeleton patrolling below (the latter of which will leave a 200 money bag behind when killed). You can only collect the bag at the height of the first cloud's ascent, and you are safe from damage from the skeleton while you stand on the cloud. Once you have made it to the other side, use the cloud to jump over the pit of starving souls and drop down to the floor, which has three Moths and a hunger demon patrolling it. Once you have made it the next platform, you will see a large headed Buddhist blocking your path and spitting fire at you. He takes several hits to defeat, but will leave a 1000 money bag behind when killed. Shortly after, there are several 1000 money bags suspended in mid-air, along with a giant disfigured monk who is moving slowly towards you. He takes two fully powered shots to defeat, and will leave another 1000 money bag behind when killed. Two green zombies come down the next staircase. Except for the last 1000 money bag which can be collected by jumping from the lowest step, the only way to collect the others is to bounce along the heads of the zombies as they walk to the left. The same goes for the 500 money bag at the top of the stairs, while the next bag is easier to collect. beyond the stairs, you will see three rocks rolling around, which cannot be killed by Tarosuke's ki. Two more 500 money bags and a 5000 money tile are suspended in mid-air just after the second instance of Zakka's shop. The bags can be obtained by jumping on the heads of the monks, but the tile is incredibly difficult to collect. If you have enough money for further shoping, you may want to consider the next level of Rensha as this will increase Tarosuke's firepower further.
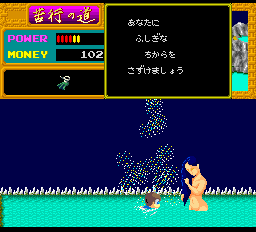
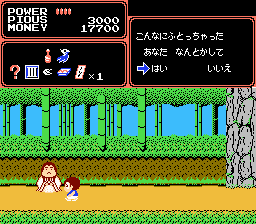
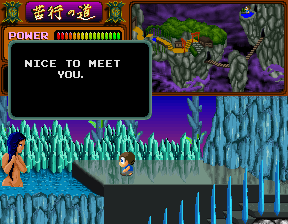
Past the shop, you will see blue monks (who will leave a 200 money bag behind when killed) and a face demon floating around in mid-air. Continue to the right, jump onto the next platform and collect the 1000 money bag as you jump over another starvation pit before dropping down to the next stone floor, which contains a variety of money bags. The next platform has another large headed Buddhist blocking your path. After you defeat him, another bouncing monk will appear and offer to sell you a treat for 10,000. This one is needed to employ the dog that you encounter in the third stage. After defeating the Buddhist, jump over a small starvation pit. A demon head will be floating around in mid-air. You will now have to jump onto a series of cloud platforms in turn, collecting the 500 money bags suspended in mid-air. If you fall down before reaching the other side, you will advance straight to the boss fight. If you succeed in reaching the other side, several one-eyed demons will be waiting for you, and a few smoke demons will be hovering nearby. Walk to the right, and you will reach the "Pond of the Gods". Tarosuke will meet up with a goddess bathing in the pond. She will invite him to bath in the pond, and she will give him a heart which will fully restore his energy if he dies. After collecting the heart, return to the left and fall into the chasm below the clouds to reach the boss.
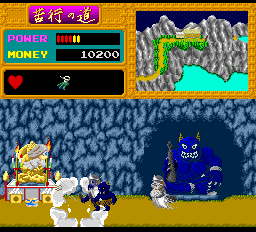
The boss of the second stage is the Blue Oni, whose appearance is identical to the Red one apart from the colour. Before the fight, he will ask you to pay a tribute of 20,000. Just like the previous boss, he will attack you whether you agree to pay or not, so do not part with your hard earned money. He will attack by summoning three of his minions (like those of the Red one, they look exactly like him only much smaller) and three ghosts. Once again, Tarosuke will kneel at the statue of Buddha and pray to it in order to summon Momotaro. Momotaro must fire his spirit flames at the Oni until he is defeated. Just as before, the flames are attracted to the closest threat, and may target the minions or the ghosts, depending on who ever is closer. The minions and ghosts drop 200 and 100 money bags respectively. Once the Oni is defeated, he will leave a 10,000 money tile behind, and all enemies still present on the screen are instantly defeated.
Famicom differences[edit]
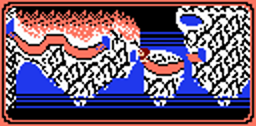
As a general rule, you should always explore regions to the left of staircases. That is where you will find the most interesting things. The first temple is found to the left of the first staircase that ascends to a new level. Also, if you happen to fall into the water when hopping across clouds, you will land in a room with a demon which you must defeat in order to return to the beginning of the cloud section and try again.


