Of all conversion of Ys I, the Famicom makes the most drastic changes, containing material that is not present in any other edition. This page contains a list of all of the changes that exist in the Famicom version of Ys I.
Adol's movement is slower than in most versions. His health regeneration is also quite slow.
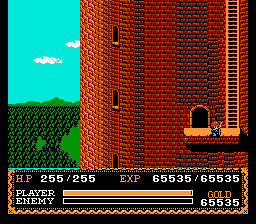
There are 24 levels of experience rather than 10. The last level is reached at 65,535 points.
Adol can read any of the Books of Ys in his possession at any time without any assistance.
Combat in the game is less flexible; Adol and his enemies are all 16 pixels wide, and they are restricted to movement on an 8 pixel grid. Therefore, you can only safely attack when you are exactly half-way to one side of the enemy. There is no in-between.
Entrance to Zepik is no longer above the pond, but rather below a line of trees south of the pond.
In the south east corner of the plains, there are four statues that resemble kings. Standing before these kings will teleport you to a location before another statue. The statue in the lower right corner will send you to an island off to the west.
In addition to the solid path that leads up the mountain, there are chains that connect various islands. You need to traverse them to reach the Thieves' Den.
Below the Thieves' Den, there is a one-way teleport from the east side of Mountain Path to west side.
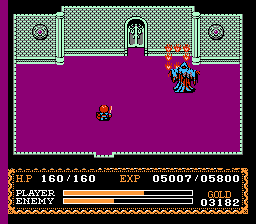
When fighting against the first boss, there are no flame jets present along the sides of the room. Instead, the boss teleports in, sends eight fireballs outward, and disappears.
Most of the treasures in shrine are rearranged. You'll find the Treasure Box key to the south of Feena's prison.
The teleportation goddess statues in shrine are more complicated than in the original version. To reach the second boss, you must also double back on one of the statues.
Second boss
Although you collect the Mask of Eyes in the Shrine, you don't actually need it to collect any items or reach the boss. You can still see the enemies when you wear the mask on one of the floors of the Shrine.
On certain levels of Shrine, you can still see enemies when wearing the Mask of Eyes.
With a little effort, it's possible to reach Level 19 (10,000 experience points) by fighting the monsters on the lower level. It is highly recommended that you do this before facing the boss of the shrine.
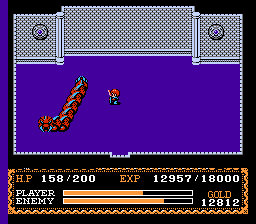
When fighting the boss at the bottom of the Shrine for the first Book of Ys, you can only safely touch the tail. Adol will take damage if you touch the middle, just as you would touching the head.
Unlike the original version, you can't immediately access the entrance to the mine. And even once you do, the entrance to the actual mine will be locked until you complete a second quest.
Locate the teleport statues in the south east corner of the Plains, and stand before the lower-right statue. When you arrive, walk over to the neighboring statue and stand before it.
You will arrive on an island. Head north to find a pond. Walk around the edge of the pond and stand on the southern bank. A water spirit will appear. Her name is Frea and she lost her staff. She thinks it's in Minea.
Step 3: Search the well
Step 4: Return to Frea
Stand before the statues until you teleport back to the south-west corner of the Plains, and walk back to Minea. To find the Frea's staff, you must explore the town. Investigate the wells, and you'll find the staff in the right well.
Use the same series of statues that you found to return to Frea. She will be delighted that you found her staff. She'll allow you to keep it, and she'll give you a flute as well, and tell you to use it by a group of trees.
Step 5: Find the trees
Step 6: Clear the water
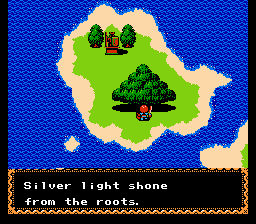
The group of trees that Frea is referring to can be found to the east of the two bridges from Minea, and a short walk to the north. Stand before the tree that blocks you from entering, and it will move aside. Inside, the staff will be recharged.
Head out, and walk to the right, and then up and around the line of trees to reach a small lake. Stand in the upper right corner of this lake, and the staff will cause the water to evaporate, creating a path to the mine entrances.
Step 7: Investigate the right mine
Step 8: Minea gate puzzle
There are not one, but two mine entrances. The left door is blocked by a mysterious force. Inside the right door, there are no monsters, and two Heal Potions. Find a sign near the bottom which reads, "Enter the decayed gate, then the protecting hand's gate, and finally the attacking hand's gate."
The sign is referring to the small gates which line the north wall of Minea's interior. First enter the gate that is missing a door knob. When you reappear, go through the door to the right. When you reappear, go through the door on the left. You will arrive at the top of the Rampart, where a voice will tell you that the mine is now unlocked.
Most of the items found in the Abandoned Mine are positioned in similar places as the original version. The most notable omission is that of the Silver Harmonica.
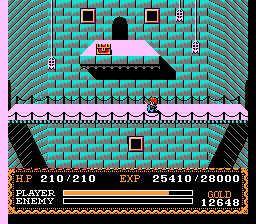
Third boss
The Roda See may be the most difficult item to find. You can see the chest sitting on a balcony as you cross a bridge. To reach it, cross over either bridge in the first basement level to the right side. If you crossed the extra long bridge, go all the way to the right. If you cross the short bridge with the visible balcony, head down, and then all the way to the right. Then continue to follow this path as it leads you back up and to the left until you reach the balcony entrance.
It is highly recommended that you level Adol up to the highest level, level 24 (65,535 experience points) before you attempt to fight this boss. The monsters on the first basement level are the best targets for grinding.
Surprisingly, the third boss is relatively unchanged from the original version, but he's just as difficult, primarily because of the damage the bats can deal to you, and the relative ineffectiveness of the Silver Sword. However, it is possible to get multiple hit off of him before he breaks apart. Stay in the middle when the bats split apart to reduce how much damage you take.
The Roda Tree which used to reside in the north now resides in the south, effectively where the south Roda Tree used to be.
The south Roda Tree has been moved to an island. You can only reach it by first teleporting to the island where the water spirit Frea lives, and then using the same statue that brought you to the island to teleport to the small island where the Roda Tree can be found.
Unlike other versions of the game, the entrance to Darm Tower is not one-way. You are free to come an go through the Thieves' Den as you please. You can use the Wing to return to Minea at any time as well.
There are no exterior balcony transitions throughout Darm Tower. Every floor is connected through the interior. So there is no safe place to sit and heal, and healing is only possible with the Heal Ring.
Unlike the original game, the statues that line the hallway on the third floor (as well as those found on a few other floors) are alive and will move about and attack you.
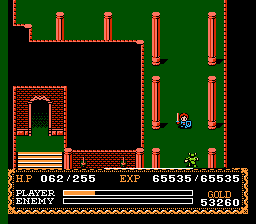
As a result of the lack of exterior scenes, pillars have been added to the interior of one of the floors in order to maintain the execution of the Devil's Corridor puzzle, in which Adol must strike one of the pillars with the Hammer in order to quiet the life draining music.
Cross this bridge to find Reah
To obtain the Silver Armor, Adol must return to the higher of the two floors containing mirrors after obtaining the Rod by defeating the fourth boss. Adol must use the mirrors to warp throughout the floor until you reach a closed off room lined with statues on either side. Walk to the north wall, and a hidden elevator will take you down to the floor below. From here, you must navigate another mirror of mazes. There are one of three possible outcomes; you may find the chest containing the Silver Armor, you may find the path that leads to a special ornate mirror that you can't interact with, or you may find a mirror which deposits you on the floor below, which is the only exit.
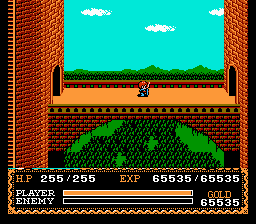
Rescuing Reah is essentially the same, although this will actually be your first time meeting her since she wasn't present in Minea. When you pass through the correct doorway, you will see Adol standing on a bridge that connects Rado Annex to the rest of the tower. Cross the bridge to find Reah. Note that she does not give you the Monocle, since you are capable of reading the books without any assistance. She simply gives you the clue about how to defeat Dark Fact. You still need to rescue her before Luta will give you the Blue Crystal.
No one busts through the wall when you're approaching the Flame Sword. It's simply in a chest that you can walk up to and open. However, Adol will have to investigate and "break" through a wall to get the Battle Armor.
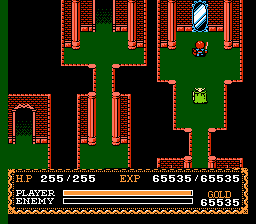
Find this mirror to find the real Dark FactClimb this ladder to reach the true rooftop
Unlike the original game, the Dark Fact that you find and do battle with after defeating the sixth boss is not actually the true Dark Fact. After you defeat him, you won't obtain the sixth Book of Ys, but rather an item called the Dark Mirror. If you wander around the roof, you will hear laughter coming from somewhere. You must return to the floor where you initiated your search for the Silver Armor. You must find the secret chamber with the hidden elevator, and you must navigate the mirrors until you find the path that leads to an especially ornate mirror (shown left). Only with the Dark Mirror will this mirror transport you to the exterior of the tower (shown right), where you must climb to reach the true Dark Fact, and the final battle of the game.
The fourth boss of the game is relatively similar to his original counterpart. The blades tend to move in slow straight lines instead of curving through the air. They track Adol's vertical position through the room, so it's a bit more difficult to run away from them without also running to the other side of the room. It is recommended that you climb one story before this fight and re-obtain the Silver Shield before you attempt this battle.
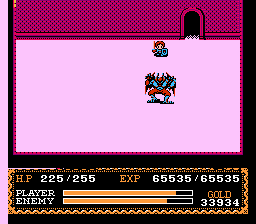
The fifth boss, on the other hand, has changed drastically. Instead of a hovering orb of energy surrounded by stone, the fifth boss is devil-like monster who continuously shoots fire in eight directions around him. Whenever you get close to him, he leaps out of the way and over to a different section of the room. To defeat him, you must move Adol in the direction where you think he is most likely to land, in order to continue striking him. His fireballs will do a lot of damage to Adol if he is wearing Silver equipment, so it is recommended that you actually climb several floors to find the Battle Armor and Battle Shield, before returning to his room to fight him.
Boss 6
Dark Fact
The sixth boss of the game continues the "two heads" concept, but executes it quite a bit differently. In this version, there are still two heads, but for long periods of time, the vulnerable head is encased inside the invulnerable head. You must wait for the mask which serves as protection for the vulnerable head to split apart into four pieces, exposing the smaller inner head. Then you must attack the smaller head while avoiding the four pieces of the mask which float around the room as well. Eventually, the two heads will return to the center, and you must wait for the inner head to be exposed again.
In this version of the game, you must fight Dark Fact not once, but twice. The first Dark Fact that you fight is an inferior copy, while the second one is the true Dark Fact. Copies aside, they both fight extremely similarly. The only difference between them is that true Dark Fact leaves small bits of flame behind him as he floats over the floor. Unlike the original version, Dark Fact does not remove a square of the floor that you're standing on whenever you strike him. This actually makes the Famicom version of this battle significantly easier than the other versions.