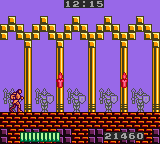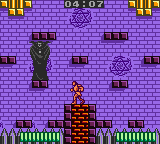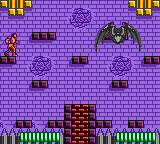
The final leg of the journey is at hand. Spikes, Knights, giants and a super secret room will keep you guessing at every turn. The most difficult jumps in the game await you, so be prepared to lose a few lives. Whatever you do, don't despair. You're mission is almost complete!

- A: The courtyard leading up to the castle is lined with ceremonial armors. But not all of these armors are there for decoration. A selection of them will come to life when you get near them. Some will awaken as you approach them, while others will wait for you to pass before coming to life and chasing you from behind. When you see them move, don't wait for more to join them. Strike with your whip to remove them as quickly as possible.
- B: Before you reach the rope that leads to the interior of the castle, two strong foes await you. The first is a Night Stalker. Use the usual strategy to defeat it. Beyond the Night Stalker, however, is Gobanz, the boss of the first stage! He appears here as a regular enemy, so he's a little easier to defeat, but his chain whip is no less dangerous. Keep your distance when you attack, but don't back up too much! If you back up too far, another Gobanz will appear to replace the one you just defeated.
- C: Your first challenge inside the castle is the Hall of Spitters. Four Spitter monsters occupy this path, and you'll have to overcome each of them to make it further into the castle. Naturally, they all spit fireballs at you. If you get lucky, the fireballs will bounce right over your head as you approach each Spitter, but you can't count on that. Be prepared to whip a fireball out of your way if one gets too close.

- D: After clearing the upside down Spitter, you have to choose whether or not to deal with the second Spitter above. You can safely ignore it if you want, but the candle far behind it contains a whip upgrade orb that might be especially helpful to you. The problem with it is it's so far back that after you collect the orb and return to the right, the Spitter will also return. The fireballs it spits may strip you of the upgrade you just earned if you're not careful.
- E: The room is the first jumping trial full of spikes. Wait for the lower platform to approach the rope on the right, and fall down on to it. As it crosses back to the left, be prepared to jump up to the platform moving up and down. Then carefully time your jump to the ledge on the left. Too slow and you'll get impaled by the spikes in the ceiling. Too fast, and you get impaled by the spikes on the wall.
- F: In the next room, you must climb up the rope until you're high enough to leap to the first platform on it's way down. Then get ready to jump from one platform to the next as they pass each other. Try to time the jumps so that you transfer around the middle of the room. Do that twice until you reach the rope that leads up. Then repeat the process in the next room, but in the opposite direction.

- G: You get a break from the jump challenges, but you'll have to take down two Night Stalkers back to back. Dodge their boomerangs before advancing. Then climb the room to the next room where you must deal with a single Spitter. The Spitter isn't so bad, but the gaps in the platforms above the spikes can spell bad news if you're unlucky and get struck by a fireball. It could knock you off the platform and onto the spikes, instantly killing you.
- H: There's one last Night Stalker to deal with, and he has an unfair advantage over you. While you are busy climbing up the rope, he will throw a boomerang at you. If he throws it low, you should reverse course and return to the previous screen before climbing back up and trying again. Assuming he throws it high, you should immediately jump off the rope and squat down, giving you just enough time for the boomerang to sail over your head. Just as quickly, jump up when the boomerang reverses course so you don't get struck from behind.
- !: There is a secret nearby! Check the secrets page for more information.
- I: This room is the first of three very dangerous jumping challenges that you must overcome if you wish to face Dracula. Four spikes will extend from the walls, three on the left, and one on the right. All four will come out at the same speed and create a ladder of sorts for you to climb to the top. Wait by the rope to watch the timing of the spikes, and then get ready to jump on top of them after they reset and start over. Ignore the candle at the top until you have reached the safety of the top ledge. It contains a whip upgrade orb, and is absolutely worth collecting unless you already have fireball power. To get it, wait for the top spike to extend to the left, then jump out to strike the candle, collect the orb, and hop back to the right to leave the room.
- J: This room is similar to the last, with two major differences. The first is that the spikes will alternate which sides they come out from, and the second is that each spike comes out faster than the last. Again, watch the room for a while to learn the timing of the spikes, and then prepare to jump your way to the top when you're ready. You'll have less time to jump with each spike. If you make a mistake, it's not necessarily game over, but you'll have to recover as quickly as possible. Make it to the left rope and climb down to enter an entirely different room than the one you arrived from.

- K: One last jumping challenge to go, and this one is relatively simple. Only two spikes will extend in this room, and at the same time. Making it to the bottom of the room can be difficult if you don't get the timing right. You should leap out to the top spike before it completes its journey across the room. When the spikes begin to retract, leap to the right again to get a head start falling to the bottom. If you time it right, you should land on the floor before the spikes start extending again.
- L: You can't rest easy just because you survived the spikes. Between you and Dracula stands four Gobanzes. While no more difficult than the Gobanz you fought at the entrance to the castle, the pressure they put on you to back up puts you at constant risk of causing them to respawn, making it impossible to make any progress. Instead, you must put the pressure on them, starting to advance to the right as they explode. Gobanz can't respawn while their explosion is still on the screen.
- M: This is the final room before the Count's lair, and where you'll respawn if you die in battle with Dracula. Fortunately, one of the candles in the middle of the room contains a whip upgrade orb. You better hope it's enough to beat Dracula with.
Boss: Dracula[edit]

Dracula starts off this fight in his human form. He teleports to four different locations around the room, and then he sends four projectiles off in six sets, alternating between straight directions and diagonal ones. If you position yourself just below whatever platform he chooses, you can jump up to strike him when he fires straight projectiles, and then duck down to dodge the diagonal ones. When he occupies the ledge in the very center of the room, consider instead standing on one of the platforms level with his head, strike him with your whip and jump over the straight projectiles. He teleports to the same locations in the same pattern every time, so you can predict where he's going to go next and get Christopher into position before he fully materializes.

After his human body is defeat, Dracula will turn into a giant vampire bat. He will remain high above the floor and fly back and forth. He stops occasionally to summon three smaller bats. These bats typically fly outward in three different directions, but they can be unpredictable. It's best to remove the ones closest to Christopher as quickly as possible. To attack the bat, stand on one of the mid-level platforms and jump up to strike the bat whenever he approaches. The strategy isn't any more complicated than that, besides anticipating when he will stop and unleash more bats, which can throw off your timing. Whip the giant bat until all of its health has been drained away, and you will have defeated Dracula, and taken down Castlevania.
Hard mode[edit]
Once you beat the game and see the ending credits, you can press any button and start a new game. Each time you do this, the damage will double, so the second time through, enemies will do twice as much damage. The third time through, they will do four times as much damage, until you beat the game five times, at which point all enemies will effectively one-hit kill you.