First Visit
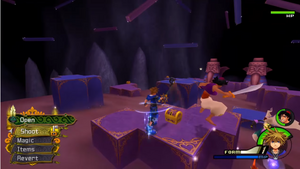
Begin the world by getting rid of the Heartless present, consisting of the easily-defeated Luna Bandits and Shadows. A scene will interrupt a while into the fight in which Iago unintentionally distracts the never-ending Heartless, giving the party a chance to escape into the Peddler's Shop. You can find a save point and a moogle in here if you feel the need to save or manage equipment. Head back outside once you're ready to go and climb up the steps to find two chests by an unusable exit, containing a Hi-Potion and a Mythril Shard. Head northwest from here for a Drive Recovery, and turn right along this ledge for another Mythril Shard. Continue right and drop to the lower ledge for a Dark Shard, then backtrack to the previous chest and continue down into the alley. To the left of this ledge should be a slightly lower one, where a chest containing an AP Boost will be sitting in the corner. Lastly, a ledge on the other side of this alley holds a Serenity Shard. Leave the alley and make a left turn to exit to the Palace, where Aladdin will join the party.
Return to the Peddler's Shop. After the scene, take the exit to the right of the Peddler's Shop to find yourself in the Bazaar. Jump up the ledge to your right for a Mythril Gem. Head down the steps to find a chest hiding by some shops, containing a Power Shard. There are three chests at the end of the marketplace, by the town exit: one against the wall to the left containing a Mythril Shard, another between some shops to the right of it containing an AP Boost, and one right by the exit containing a Hi-Potion. Exit to the Palace Walls, where you're free to save and pick up a couple of treasures (a Mythril Stone to the left of the save point and a Skill Ring by the exit) before heading off to the Cave of Wonders.
Cave of Wonders

Head behind the cave for a Mythril Shard and a Power Stone, then enter. Defeat the Heartless upon entering and jump up on the first ledge in the sand for a Hi-Potion. A short way forward is a platform to the left holding a Mythril Shard and the right holding a Mythril Stone. Another short way ahead across from this one is an AP Boost. Defeat the two Fat Bandits that stand in the way of the exit by getting behind them, or for an easier route, use Donald's Comet limit to stun them continuously. Exit to the Stone Guardian and examine the pedestal at the end of the room to begin a short mini-game. Lead Abu across the dangerous path by pressing ![]() to make him move and again to make him jump over obstacles when necessary. Because Abu doesn't have any health to protect, this mission is significantly easier than some of the others. For completing it, Sora will obtain Summon Boost, Donald will obtain Donald Blizzard, and Goofy and Aladdin see an increase in their maximum HP.
to make him move and again to make him jump over obstacles when necessary. Because Abu doesn't have any health to protect, this mission is significantly easier than some of the others. For completing it, Sora will obtain Summon Boost, Donald will obtain Donald Blizzard, and Goofy and Aladdin see an increase in their maximum HP.
Next up is the Chasm of Challenges, in which you must defeat all enemies within the allotted time. Step up to the pedestal and press ![]() to activate the challenge. The floor will collapse and the clock will start ticking, with enemies ready to fight on the next floor. Overall, this task shouldn't prove too difficult, especially with the availability of Valor or Wisdom Form and limits. Head up the steps after completing the challenge and open the chest on the left for a Cave of Wonders Map, and the chest to the right for an AP Boost.
to activate the challenge. The floor will collapse and the clock will start ticking, with enemies ready to fight on the next floor. Overall, this task shouldn't prove too difficult, especially with the availability of Valor or Wisdom Form and limits. Head up the steps after completing the challenge and open the chest on the left for a Cave of Wonders Map, and the chest to the right for an AP Boost.

Examine the pedestal to open the door to the Treasure Room, then enter. After the scene, another challenge begins, this time requiring the party to defeat fifty Heartless. While this challenge gives you the benefit of unlimited time, the tight space and abundance of Heartless makes this more of a matter of surviving, especially on Critical. Make use of the limits and drives available to you (Wisdom Form is recommended for its strength in magic, which can hurt the Fat Bandits no matter where they are hit) to aid you in completing this task. Doing so will earn Sora, Donald, and Aladdin an increase in their maximum HP, and Goofy Auto Healing. Back in Agrabah, head to the Palace for a boss fight.
Bosses: Volcano Lord and Blizzard Lord

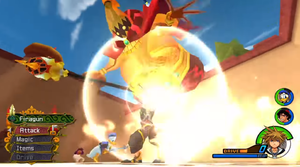
This boss battle is against two large Heartless who tend to hit hard, but fortunately, they are easy to combo. Begin by performing a combo on one of the two. It will then attempt to hop around and spread its flames if it was Volcano Lord that was provoked, or breathe its icy breath (which forms icicles that stick onto the ground) if Blizzard Lord. Perform the reaction command when prompted to send them flying, then continue to combo to make it burst into smaller Fiery Globe or Icy Cube Heartless. These Heartless are very easily taken care of, so you can attack the other boss while you're at it. Once the smaller Heartless are gone, the other boss will eventually reform to continue the battle. Defeat them both with the use of quick combos and reaction commands to clear the battle, earning Finishing Leap for Sora, a maximum HP increase for Donald and Aladdin, and an extra armor slot for Goofy. After a scene, you will receive the Lamp Charm to summon Genie for clearing the world. Continue on to Halloween Town.

