| Line 10: | Line 10: | ||
==Wasteland of Woe== | ==Wasteland of Woe== | ||
[[Image:Disgaea Episode 10-2.jpg|right|thumb]] | [[Image:Disgaea Episode 10-2.jpg|right|thumb]] | ||
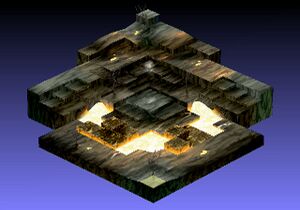
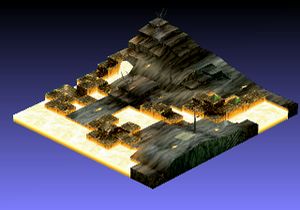
Well, this map's quite the doozy. The entire area your'e on is knee-deep in a Silence, Ally Damage 20%, and Enemy Boost combo effect. You're also surrounded by an army of Treants, and four Dark Knights. You should focus on destroying or knocking away the Geo Symbols producing the effect. Have your toughest characters thrown onto the land nearest the symbols and have them move to attack the symbols. You may have to end your turn once to do so, so beware of the nearby Treants that may attack your thrown characters. Take the damage, and destroy the symbols ASAP. Ignore the Treants till then. After that's done, you will have two teams. One attacking the enemies that attacked them, and the one coming from the Base Panel. Dispose of the Treants first, then have ALL of your characters regroup and/or Heal. This way, you can combo the Knights one by one. Be mindful that if you have been using your Healer a lot up to this point, she should have a high Staff Weapon Mastery. This may | Well, this map's quite the doozy. The entire area your'e on is knee-deep in a Silence, Ally Damage 20%, and Enemy Boost combo effect. You're also surrounded by an army of Treants, and four Dark Knights. You should focus on destroying or knocking away the Geo Symbols producing the effect. Have your toughest characters thrown onto the land nearest the symbols and have them move to attack the symbols. You may have to end your turn once to do so, so beware of the nearby Treants that may attack your thrown characters. Take the damage, and destroy the symbols ASAP. Ignore the Treants till then. After that's done, you will have two teams. One attacking the enemies that attacked them, and the one coming from the Base Panel. Dispose of the Treants first, then have ALL of your characters regroup and/or Heal. This way, you can combo the Knights one by one. Be mindful that if you have been using your Healer a lot up to this point, she should have a high Staff Weapon Mastery. This may enable her to heal the team on the other side of the map. Keep this in mind when destoying the Treants. | ||
{{-}} | {{-}} | ||
Revision as of 21:51, 29 June 2010
Fervent Melody
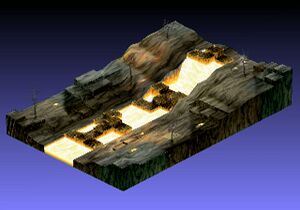
The enemies get a lot tougher now, so it is recommended to power up in Item World or new weapons/armor at the very least before you start this episode. You will have to fight Scarecrows, Treants, and a Dark Knight on this map. The Treants are basically monster versions of Archers. They have attacks that hit certain formations with status ailments, most notably Poison and Dazed, with some Sleep mixed in there, too. Scarecrows attack lines with their knives, but are pretty much close-range fighters. Dark Knights are pure power and pure close-range, despite having one Special that can hit with a Spear's range. Now, to effectively battle Treants, staus resistance is recommended, but not entirely needed. They have poor defense with moderate HP, so area-of-effect attacks (Such as Etna's Chaos Impact or a spear-users' Asteroid Drop are life-savers, especially when used in a Combo.) The Scarecrows have some tough stuffing, with moderate HP, and moderate Defense. Use close-range attacks to overpower them, or use Mages/Archers/Gunners and the like to snipe them from afar. The Dark Knight is your biggest obstacle. He has a ton of HP, very tough Defense, and decent Attack power. He's basically a mini-boss. So, use the combo-and-swamp strategy, while your Healers help from afar. Include your Archers and long-range fighters, too. Having them attack early will up the Combo Counter, increasing your remaining attacks' strength. Note that the enemies on the other side of the "Bridge" terrain will move if you step on it. But, this isn't a totally bad thing. The bridge has an Experience +50% effect.
Wasteland of Woe
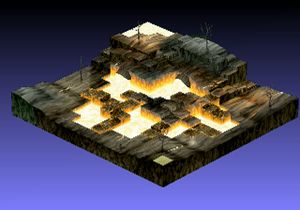
Well, this map's quite the doozy. The entire area your'e on is knee-deep in a Silence, Ally Damage 20%, and Enemy Boost combo effect. You're also surrounded by an army of Treants, and four Dark Knights. You should focus on destroying or knocking away the Geo Symbols producing the effect. Have your toughest characters thrown onto the land nearest the symbols and have them move to attack the symbols. You may have to end your turn once to do so, so beware of the nearby Treants that may attack your thrown characters. Take the damage, and destroy the symbols ASAP. Ignore the Treants till then. After that's done, you will have two teams. One attacking the enemies that attacked them, and the one coming from the Base Panel. Dispose of the Treants first, then have ALL of your characters regroup and/or Heal. This way, you can combo the Knights one by one. Be mindful that if you have been using your Healer a lot up to this point, she should have a high Staff Weapon Mastery. This may enable her to heal the team on the other side of the map. Keep this in mind when destoying the Treants.
River of Lava
Searing Tyranny
Inferno
