| Line 12: | Line 12: | ||
==Floor 2== | ==Floor 2== | ||
[[Image:Kung-Fu Master Floor2.png|thumb|right|Floor 2]] | [[Image:Kung-Fu Master Floor2.png|thumb|right|Floor 2]] | ||
Throughout the first four sections, snake pots, dragon balls, and confetti balls fall from the ceiling. Ignore dragon balls and confetti balls behind you if possible. Look out for snake pots that land on the floor, and be prepared to jump over snakes freed from them. Punch or kick dragons in the mouth only if you are sure to reach them before they spit hot fire, otherwise duck. Jump kick confetti balls in your path whenever you have the chance, before they explode.<br> | |||
Past the fourth pillar, Grippers, Tom Toms, and Knife Throwers will appear. Charging Tom Toms can only be defeated with low attacks - but if they flip toward you, stand or jump up out of a crouch so they don't stomp your head. | |||
Approach the Boomerang Fighter with caution. Try to avoid the two boomerangs he will throw, then close and attack | Approach the Boomerang Fighter with caution. Try to avoid the two boomerangs he will throw, then close and attack before the boomerangs swerve back. Done properly, he won't have a chance to throw a third one …. | ||
{{-}} | {{-}} | ||
Revision as of 22:11, 28 May 2019
Stage layout
Each stage is divided in to six sections, although each of the sections are similar. Signs written in Japanese are posted on pillars to denote the current section. The signs are ordered from 1 to 6 and appear as 一, 二, 三, 四, 五, and 六. Floors 1, 3, and 5 advance from right to left. Floors 2 and 4 advance from left to right.
Floor 1
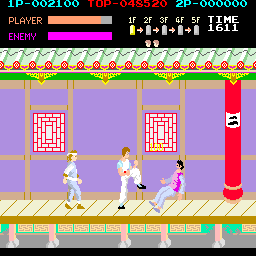
Floor one features only Grippers and Knife Throwers before Thomas encounters the floor boss, the Stick Fighter. It is much safer to get into the habit of stopping just before an enemy walks up to you before you strike him. For enemies behind you, continue forward until just before the enemy reaches you, then stop, turn around, and strike them until it is safe to proceed. One or two Knife Throwers will appear by the time you reach section 3. Duck or jump the knife that they throw at you, then hit him twice to dispatch him.
When you reach the Stick Fighter, remember to move in close enough to be safely inside his strike range, preferably with a forward jump kick as you rush toward him. You'll either jump over a crouching stick attack, or trade blows if he swings high. With a bit of luck, you may never incur a loss of health when attacking him. A forward jump kick may also connect twice for more damage. Once in close, use punches, then kicks after he backs out of range of punches. If needed, close the distance again with a flying jump kick toward him to close with him again.
Floor 2
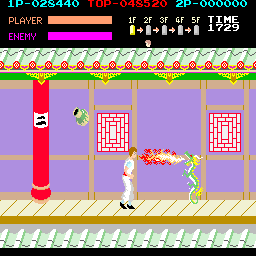
Throughout the first four sections, snake pots, dragon balls, and confetti balls fall from the ceiling. Ignore dragon balls and confetti balls behind you if possible. Look out for snake pots that land on the floor, and be prepared to jump over snakes freed from them. Punch or kick dragons in the mouth only if you are sure to reach them before they spit hot fire, otherwise duck. Jump kick confetti balls in your path whenever you have the chance, before they explode.
Past the fourth pillar, Grippers, Tom Toms, and Knife Throwers will appear. Charging Tom Toms can only be defeated with low attacks - but if they flip toward you, stand or jump up out of a crouch so they don't stomp your head.
Approach the Boomerang Fighter with caution. Try to avoid the two boomerangs he will throw, then close and attack before the boomerangs swerve back. Done properly, he won't have a chance to throw a third one ….
Floor 3
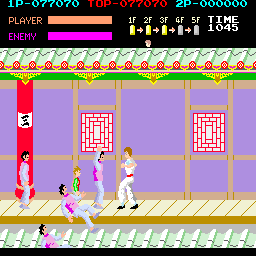
Floor 3 is much like Floor 1, and also with Tom Toms. Enemies appear far more often and it is especially important to wait until every enemy is defeated before proceeding. Two Knife Throwers should appear shortly before you arrive in section three. Take special care to remove the enemies that walk past the throwers while still advancing on them so that you can remove them before proceeding.
The Giant's punches and kicks are the most damaging strikes in the game. However, the best bet is to rush in with a forward jump kick to his head from a distance that lands you in a crouch so that you can't get any closer. Crouching punches fired rapidly should fell him before he can hit you twice or get away from you. For those who wish to test their nerve, kicks to the chest and feet can also be useful, so long as he is backing away from you.
Floor 4
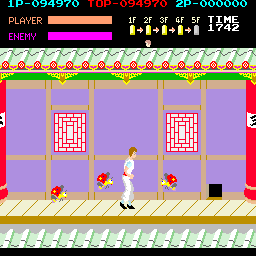
Much like Floor 2, Sections 1-4 of the 4th have a unique characteristic. The first three sections feature holes in the walls from which poisonous moths are released. The moths fly in a predictable pattern, but are still difficult to avoid since they move about as fast as you, and their height off of the ground is often changing. Best to avoid them by ducking under or jumping over moths when possible, forward jump kicking when opportunities arise (never backward), stopping for standing punches or kicks only when necessary, and proceeding past the pillar that marks section 4 (which the moths will never pass) as quickly as possible. Grippers and Tom Toms, and even a Knife Thrower will attack until you reach the Black Magician.
Although you can punch or kick the fireballs the Black magician casts, it is impossible to predict if he will cast a viper or a firebreathing dragon on the ground, a naked fireball high or low, a high fireball that turns into a poisonous moth and swerves back at your head, or two or three or four of any random fireballs in rapid succession. It is safer to assume he will throw high and duck so that when his next fireball (hopefully) flies overhead, you can close with him, or at least back him up. With enough space to discern a high or low fireball, try to kick high fireballs or jump over low ones, then close for crouching punches. The main goal is to pin the Black Magician against the staircase, then let loose a flurry of crouching punches that will keep the Black Magician from casting any more shots.
Foot sweeps always miss entirely. High or jumping attacks will seem to decapitate him, until he disappears and freezes you in place, while he reappears a few steps behind you, regrows his head unharmed, and attacks again. Stick to crouching punches. If you do not defeat him quickly enough, he will eventually project a fully capable copy of himself behind you …
Floor 5
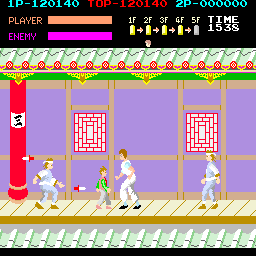
Floor 5 consists of the same enemies at Floor 3, but even more often, which can overwhelm even the best players. You may find yourself defending your position from an assault of up to 24 enemies before you can proceed. Knife Throwers also appear more often and more randomly than before. It's not the worst idea to let a Knife Thrower follow behind you since his presence will prevent anyone else from behind. Just remember to dodge the knives he throws. Also remember that if a Tom Tom jumps in the air, stand up quickly to negate his attack and beat him at the same time. If you find that you are getting pinned between groups of enemies or pairs of Knife Throwers, only patience and quick reactions will save you. Rely on kicks more than punches since the range is better. If a Knife Thrower is following you by the time you reach Mr. X, be sure to dispatch the thrower before you take on Mr. X.
Mr. X's defense is nearly impregnable, until he drops his guard just before he attacks you. Alternating between high and low attacks is one good way, but try to watch his movements as closely as possible. He is usually most vulnerable to the attack that he's about to use on you, but he's so quick, it can be hard to determine which attack that will be in time. If you move forward throw a high standing kick then a low crouching kick then back away, you'll see his posture reset. Then do the same again; move forward throw a standing kick then a crouching kick (in rapid succession) and move away from him to reset. Do this over and over until he is defeated. Using this strategy, you will seldomly incur any damage.