(Breaking up) |
(Page revamped) |
||
| Line 3: | Line 3: | ||
[[File:SMB3-Level8.png|right]] | [[File:SMB3-Level8.png|right]] | ||
Ludwig von Koopa is kaput, and only big Bowser, the terrible king og the Koopas, stands between you and the princess. To get to Bowser, you'll have to defeat an entire Koopa army. | |||
{{-}} | {{-}} | ||
==Tanks | ==World 8 Big Tanks== | ||
[[Image:SMB3-8-Tanks.png|thumb|right|Click on the image for the unedited NES map]] | |||
* | Bowser has called in the heavy metal, and they're rolling right toward you. Bowser's pulling out all the stops in this last world, and the challenge has never been greater! A parade of Koopa's finest tanks will fill the air with flying lead. You'll need to use fancy footwork to evade the hail of bullets! | ||
* | {{-}} | ||
{{Scrolling map|SMB3 W8 T1 a.png}} | |||
* '''1''': These stubby cannons fire Bob-ombs as projectiles. Wait until the Bob-omb explodes and then make a dash for it. Always be watchful of cannon fire. Don't go anywhere near an exploding Bob-omb—the blast radius can be huge. Wait until the coast is clear, then leap across. | |||
* | * '''2''': Don't rush! The faster you run ahead, the more likely you are to run into easily avoidable traps like flamethrowers. | ||
* | * '''3''': Wait to see what's ahead before you jump in front of the sights of a tank cannon. Don't wait too long, however, or you'll have to contend with the tools Rocky Wrench pitches at you. Jump on Rocky's head to send him packing. | ||
{{Scrolling map|SMB3 W8 T1 b.png}} | |||
==Battleships== | [[Image:SMB3 W8 T1 c.png|right]] | ||
* '''4''': You can't destroy the propellers on some tanks, but you can stand on top of them. It's possible to collect the power-up on the back of the tank as Super Mario by sliding underneath the block, but it's hardly worth the danger or the effort. It's easier to grab as small Mario, so be sure to pick it up when you're passing through to super-size yourself. | |||
* '''5''': The massive cannon fires equally enormous cannonballs at super-sonic speeds. You can jump on top of them to disarm them, but it's much safer simply to leap over them. | |||
* | * '''B''': A lone Boomerang Brother guards the control room. You've made it this far, don't let him get you. He should be easy compared to the tanks. | ||
* | {{-}} | ||
* | ==World 8 Battleships== | ||
[[Image:SMB3-8-Battleships.png|thumb|right|Click on the image for the unedited NES map]] | |||
An armada of Bowser's armored warships sets sail to stop you. A finer trio of battleships has never graced the seas. Like everything else in Bowser's underworld, these ships are armed to the teeth. | |||
{{-}} | |||
==Hand Trap 1== | {{Scrolling map|SMB3 W8 N1 a.png}} | ||
* '''1''': Pound the Rocky Wrench manning the ship's gun turret. Unfortunately, there'll be plenty more to replace him. | |||
* '''2''': Stay on the far right of the screen until you can drop to the ship's deck. Race underneath the '''?''' Block. Duck while cannonballs whiz over your head, then bust the '''?''' Block to reveal a power-up. If you're Super Mario, you'll find a Fire Flower. Stay crouched and jump to snatch the Fire Flower above the block, then use it to flame the ship's crew with ease. If you're small, collect the Super Mushroom as you duck in front of the gun barrel to the right. | |||
* | * '''3''': It takes practice, but Mario can swim underneath the battleships, but if he gets pushed too deep he'll sink into the abyss. The trick is to tap {{nes|A}} as quickly as possible. | ||
* | {{Scrolling map|SMB3 W8 N1 b.png}} | ||
* | [[Image:SMB3 W8 Stage End.png|right]] | ||
* '''4''': You can swim under this third and final ship as well, and then hop up behind the back of the ship to access the pipe with leads to the stage boss. | |||
==Hand Trap 2== | * '''B''': A sea-faring BOOM-BOOM is waiting for you in the battleship's cabin. If you're Fiery Mario, use fireballs to light BOOM-BOOM. Otherwise, crush him in the usual manner. | ||
{{-}} | |||
* | ==World 8 Hand Traps== | ||
* | A monstrous hand pulls Mario into a trap. You'll have to fight your way out of this one. The flame lined bridge leads further into Bowser's underworld. It looks safe to cross, but no sooner do you step on to it than a monstrous hand reaches out to grab you and take you into a mini-world. If you're lucky, you can make it through without being snatched, but you may want to hesitate on the bridge and get captured on purpose; for each trap that you finish, you'll get a Super Leaf! | ||
=== Hand Trap 1 === | |||
==Hand Trap | [[Image:SMB3-8-HandTrap1.png|thumb|right|Click on the image for the unedited NES map]] | ||
You'll have to defeat all the members of the Hammer Bros. family here to make it the goal. They should be easy for you to deal with by now. | |||
* | {{Scrolling map|SMB3 W8 H1 a.png}} | ||
* | [[Image:SMB3 W8 Hand End.png|right]] | ||
* '''1''': They may be rare, but Fire Bros. have a devastating fireball attack. Squash him for a generous 1000-point bonus. | |||
* '''2''': First a Fire Brother, then a Boomerang Brother—it's a brother reunion! Either attack with lightning speed before he can throw boomerangs, or jump to evade them. | |||
* '''3''': A mighty Sledge Brother is the last brother you'll have to face, and he really throws his weight around. Wait for him to hurl a pair of hammers before you pounce on him. | |||
* '''4''': '''Super Leaf'''. At the end of each Hand Trap stage, you'll be rewarded with a Super Leaf that will soon prove critical. | |||
{{-}} | |||
=== Hand Trap 2 === | |||
[[Image:SMB3-8-HandTrap2.png|thumb|right|Click on the image for the unedited NES map]] | |||
Make it over a broken bridge harassed by Podoboos, and you deserve that Super Leaf! Actually, it's a pretty easy stage if you take your time. | |||
{{Scrolling map|SMB3 W8 H2 a.png}} | |||
[[Image:SMB3 W8 Hand End.png|right]] | |||
* '''1''': The second Hand Trap consists entirely of jumping over platforms to reach the goal. You'll need impeccable timing to evade the spurting fire, but it's nothing you haven't seen and conquered before. Collect as many coins as you can along the way, except for those that put you at risk of slipping into the lava. | |||
* '''2''': Don't stumble into the molten lava in your hurry to get to the goal. You have plenty of time, so use it. | |||
{{-}} | |||
=== Hand Trap 2 === | |||
[[Image:SMB3-8-HandTrap3.png|thumb|right|Click on the image for the unedited NES map]] | |||
A swarm of attacking Cheep-Cheeps will make this the most challenging of all the Hand Traps. It's also the longest. Use the {{nes|B}} button run to get through, and don't be distracted by the meager coins in the '''?''' Blocks. | |||
{{Scrolling map|SMB3 W8 H3 a.png}} | |||
* '''1''' The most difficult Hand Trap has you crossing a bridge suspended over lava while attempting to survive a hail of Cheep-Cheeps. When you have to move, move quickly. That way, the Cheep-Cheeps will be one step behind you. The best way to survive is to stay high above the bridge whenever possible. Stand on blocks to stay out of attack range. | |||
* '''2''': If you feel like risking it, snag the power-up sealed in the '''?''' Block. If you're Super Mario, you'll have to slide underneat the wall to continue forward. The maneuver is especially difficult amidst all of the flying Cheep-Cheeps. Wait for a lull, then go for it. | |||
{{Scrolling map|SMB3 W8 H3 b.png}} | |||
[[Image:SMB3 W8 Hand End.png|right]] | |||
* '''3''': If you're Fiery Mario, use your fireballs to cull the annoying Cheep-Cheeps. Always keep a volley of fireballs rolling ahead of you to tag any Cheep-Cheeps as they leap. If you're not so well-equipped, make a run for the exit. | |||
{{Footer Nav|game=Super Mario Bros. 3|prevpage=World 7 Part 3|nextpage=World 8 Part 2}} | {{Footer Nav|game=Super Mario Bros. 3|prevpage=World 7 Part 3|nextpage=World 8 Part 2}} | ||
Revision as of 03:16, 26 January 2011

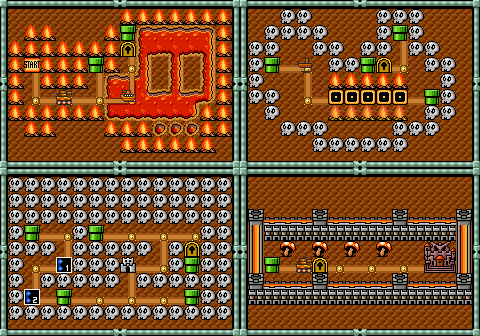
Ludwig von Koopa is kaput, and only big Bowser, the terrible king og the Koopas, stands between you and the princess. To get to Bowser, you'll have to defeat an entire Koopa army.
World 8 Big Tanks

Bowser has called in the heavy metal, and they're rolling right toward you. Bowser's pulling out all the stops in this last world, and the challenge has never been greater! A parade of Koopa's finest tanks will fill the air with flying lead. You'll need to use fancy footwork to evade the hail of bullets!
- 1: These stubby cannons fire Bob-ombs as projectiles. Wait until the Bob-omb explodes and then make a dash for it. Always be watchful of cannon fire. Don't go anywhere near an exploding Bob-omb—the blast radius can be huge. Wait until the coast is clear, then leap across.
- 2: Don't rush! The faster you run ahead, the more likely you are to run into easily avoidable traps like flamethrowers.
- 3: Wait to see what's ahead before you jump in front of the sights of a tank cannon. Don't wait too long, however, or you'll have to contend with the tools Rocky Wrench pitches at you. Jump on Rocky's head to send him packing.

- 4: You can't destroy the propellers on some tanks, but you can stand on top of them. It's possible to collect the power-up on the back of the tank as Super Mario by sliding underneath the block, but it's hardly worth the danger or the effort. It's easier to grab as small Mario, so be sure to pick it up when you're passing through to super-size yourself.
- 5: The massive cannon fires equally enormous cannonballs at super-sonic speeds. You can jump on top of them to disarm them, but it's much safer simply to leap over them.
- B: A lone Boomerang Brother guards the control room. You've made it this far, don't let him get you. He should be easy compared to the tanks.
World 8 Battleships

An armada of Bowser's armored warships sets sail to stop you. A finer trio of battleships has never graced the seas. Like everything else in Bowser's underworld, these ships are armed to the teeth.
- 1: Pound the Rocky Wrench manning the ship's gun turret. Unfortunately, there'll be plenty more to replace him.
- 2: Stay on the far right of the screen until you can drop to the ship's deck. Race underneath the ? Block. Duck while cannonballs whiz over your head, then bust the ? Block to reveal a power-up. If you're Super Mario, you'll find a Fire Flower. Stay crouched and jump to snatch the Fire Flower above the block, then use it to flame the ship's crew with ease. If you're small, collect the Super Mushroom as you duck in front of the gun barrel to the right.
- 3: It takes practice, but Mario can swim underneath the battleships, but if he gets pushed too deep he'll sink into the abyss. The trick is to tap
 as quickly as possible.

- 4: You can swim under this third and final ship as well, and then hop up behind the back of the ship to access the pipe with leads to the stage boss.
- B: A sea-faring BOOM-BOOM is waiting for you in the battleship's cabin. If you're Fiery Mario, use fireballs to light BOOM-BOOM. Otherwise, crush him in the usual manner.
World 8 Hand Traps
A monstrous hand pulls Mario into a trap. You'll have to fight your way out of this one. The flame lined bridge leads further into Bowser's underworld. It looks safe to cross, but no sooner do you step on to it than a monstrous hand reaches out to grab you and take you into a mini-world. If you're lucky, you can make it through without being snatched, but you may want to hesitate on the bridge and get captured on purpose; for each trap that you finish, you'll get a Super Leaf!
Hand Trap 1

You'll have to defeat all the members of the Hammer Bros. family here to make it the goal. They should be easy for you to deal with by now.

- 1: They may be rare, but Fire Bros. have a devastating fireball attack. Squash him for a generous 1000-point bonus.
- 2: First a Fire Brother, then a Boomerang Brother—it's a brother reunion! Either attack with lightning speed before he can throw boomerangs, or jump to evade them.
- 3: A mighty Sledge Brother is the last brother you'll have to face, and he really throws his weight around. Wait for him to hurl a pair of hammers before you pounce on him.
- 4: Super Leaf. At the end of each Hand Trap stage, you'll be rewarded with a Super Leaf that will soon prove critical.
Hand Trap 2

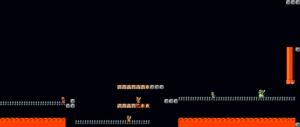
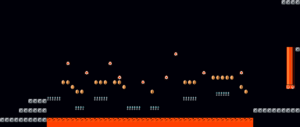
Make it over a broken bridge harassed by Podoboos, and you deserve that Super Leaf! Actually, it's a pretty easy stage if you take your time.

- 1: The second Hand Trap consists entirely of jumping over platforms to reach the goal. You'll need impeccable timing to evade the spurting fire, but it's nothing you haven't seen and conquered before. Collect as many coins as you can along the way, except for those that put you at risk of slipping into the lava.
- 2: Don't stumble into the molten lava in your hurry to get to the goal. You have plenty of time, so use it.
Hand Trap 2

A swarm of attacking Cheep-Cheeps will make this the most challenging of all the Hand Traps. It's also the longest. Use the ![]() button run to get through, and don't be distracted by the meager coins in the ? Blocks.
button run to get through, and don't be distracted by the meager coins in the ? Blocks.
- 1 The most difficult Hand Trap has you crossing a bridge suspended over lava while attempting to survive a hail of Cheep-Cheeps. When you have to move, move quickly. That way, the Cheep-Cheeps will be one step behind you. The best way to survive is to stay high above the bridge whenever possible. Stand on blocks to stay out of attack range.
- 2: If you feel like risking it, snag the power-up sealed in the ? Block. If you're Super Mario, you'll have to slide underneat the wall to continue forward. The maneuver is especially difficult amidst all of the flying Cheep-Cheeps. Wait for a lull, then go for it.

- 3: If you're Fiery Mario, use your fireballs to cull the annoying Cheep-Cheeps. Always keep a volley of fireballs rolling ahead of you to tag any Cheep-Cheeps as they leap. If you're not so well-equipped, make a run for the exit.


