The game is composed of 12 distinct rounds. After the 12th round is complete, rounds 9 through 12 repeat indefinitely. Each round is played in the same manner. The player starts in the bottom left corner of the map, and must progress to the Dragon's lair in the mountain in the upper right corner of the map. In order to do this, the player must choose from the available pathways (if there is more than one), and stop to explore the dungeons at the various locations along each particular path.
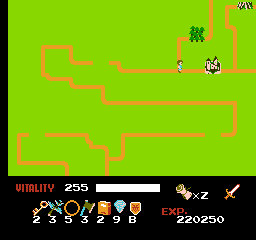
At the start of each new round, your vitality is always replenished to its maximum, and you begin at the castle in the lower left corner. Although very little action takes place on the overworld map, some of the most important decisions are made here regarding which path you take, how many locations you visit between your starting point and the destination, and what items you can potentially obtain along the way. On the map screen, you can see the current round and your current location, along with your current vitality, collection of scrolls, and whether you possess a sword, shield, scepter, or crown. If you do not move the player along a path after a number of seconds, the computer will force you down a particular path of its own choosing, so don't delay on this screen or you may end up somewhere you don't intend to visit.
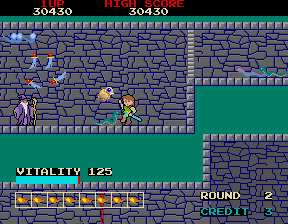
While the layout of the dungeons change and grow increasingly complex, the fundamental rules remain the same throughout the game. You begin at a predetermined location. Likewise, the locations of the exits are also predetermined. Enemies are randomly generated and will attack you periodically as you explore each dungeon. As you move through the hallways or chutes of each dungeon, you will eventually encounter rooms with higher ceilings. Once you enter these rooms, access to the hallways that leave the room are closed off, and you are forced to defeat one of four randomly chosen room guardians. While the room guardian that you must face is random, the relative strength of the guardian is not, and is determined by the round number.
Once a room guardian is defeated, two things will happen; access to the hallways is granted, and a prize will appear over the location of the defeated guardian. You must typically double jump to collect the item. While the particular prize that you receive in each room is not predetermined, each dungeon has a preset selection of items that are placed in different rooms. Therefore, if a dungeon is known to have two potions, then you will find two potions as long as you beat the room guardians in every room. However, the rooms in which you will find those potions may change from one game to the next.
If you defeat the room guardian of the room which contains the exit, the exit doors will appear in lieu of a prize. From the moment that the doors appear, there is a chance that the Cave Shark will appear, hunt you down, and latch on to you and begin to drain your health. While the Cave Shark is attached to you, it switches back and forth from side to side. You can swing your sword to attack it and eventually defeat it, but not before sustaining a fair amount of damage. Therefore, it is in your best interests to leave relatively shortly after discovering and exit. When you leave the dungeon, your remaining vitality is drained for points, and then restored up to the previous amount plus 32 more points.
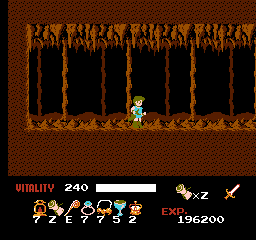
When you reach your final destination in each round of the Dragon's mountain in the upper right corner of the screen, you will enter what appears to be a side-scrolling dungeon view. You start by falling down a long chute into the chasm below, which serves as the Dragon's lair. There is a chance, particularly in the earlier rounds of the game, that the dragon may be sleeping, giving you an opportunity to score a few free strikes against it before it is all the way up and able to retaliate.
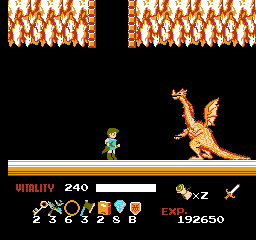
The Dragon is capable of attacking you in a number of ways, from trashing you with its tail, neck, or any other limb, to breathing fire on you. The Dragon can breathe a long continuous blast of fire, or it can shoot individual fireballs at the ground which land and continue to smolder for a while. Each time you encounter the Dragon, which the exception of the 12th round and ever four rounds thereafter, he will have one particular weak spot which, when hit, will cause double damage. If you hit the weak spot with a Super Sword, it causes quadruple damage. When the Dragon's vitality is reduced to zero, the dragon dies.
In certain rounds, Rounds 3, 5, 8, and 12, the player will be greeted by Celia after defeating the dragon. However, if the player is not holding at least one of the Princess' possessions, a Crown or a Sceptre, Celia will be carried off by a different dragon. If you have one of the items, you will see a brief intermission in which Celia thanks Clovis for his heroism. If you are in possession of both the Crown and the Sceptre, Celia's outfit will change depending on the number of times you accomplish this feat.
Notice the forest which requires an Axe to cross over.Pause to choose your magic item.The weak spot will flash red while other parts flash blue.
While generally the same game, there are a few differences to the gameplay of these two particular versions that alter the strategy subtly.
Your score is now described as your experience points. For every 50,000 experience points, you will automatically receive an extension to your vitality bar as if you had collected a mushroom from a dungeon. You have one less point of max health (255) than in arcade version (256).
Instead of simply providing you with fireball scrolls, there are multiple magic items that have different effects from one another, and you must pause the game in order to select which magic item you wish to employ.
In addition to magic items, there are also utility items which are used automatically when the appropriate moment occurs; e.g. if your vitality reaches 0, and you possess an herb, your health will be restored up to 128 points. If you die, you will be allowed one continue per book that you possess.
Starting from round 4, the overworld map will not necessarily fit entirely on one screen. Instead, it will be much larger, and there is a chance that you will encounter certain barriers which can only be crossed if you have the correct item; e.g. you can only cross a forest if you have an axe, and you can only pass a gate if you have a key.
The room guardians that you encounter are still chosen at random, but some of the items you find in each particular room appear to have fixed locations from one game to the next.
The two downward sword attacks are far more effective when used against the room guardians than they were in the arcade version; in most instances they can be used to kill the guardian in one hit.
You no longer rescue Celia until the very last round, Round 12, which ends the game. Instead, you rescue her servants in Rounds 3, 6, and 9. You no longer need a Crown or Sceptre to properly rescue these women.
The Shield remains a great defensive tool, but it is destroyed once you are pierced by the pike of a Bishop. You can, however, hold more than one Shield at a time.
Likewise, the Super Sword doubles your offensive power, and it can be increased to triple offensive power if you collect more than two swords. However, the sword can be stolen by the short and fast Thief enemies. If one grabs your sword, be sure to slash it before it gets away so you can reclaim your weapon. You may also lose your sword if you take too much damage.
There is no chance that you will ever encounter a dragon sleeping. Dragons change color at every round. You will also be unable to see their vitality value.
Double jumping is substantially easier, but still requires fairly strict timing in order to accomplish.
After beating Round 12, instead of repeating last few rounds, you are given a special command. Input this command immediately will let you start the "hard mode" from Round 1, with increased difficulty. You will only keep your experience points and vitality bar, but none of your inventory item. In hard mode, the servants and Celia will change their outfit.