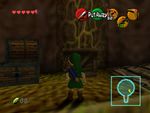
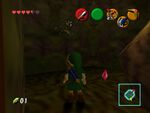
You can get into the Great Deku Tree after you obtain the Kokiri Sword ![]() and have bought the Deku Shield
and have bought the Deku Shield ![]() .
.
Ascend to the Slingshot[edit]
Walk into the first room. Turn to the left, there should be a ladder (do not use the vines, there's a Skullwalltula ![]() crawling on them). Jump across the log (be wary of the Keese
crawling on them). Jump across the log (be wary of the Keese ![]() ) and in front of you there should be a large chest and a Gohma Larva
) and in front of you there should be a large chest and a Gohma Larva ![]() egg. Dispatch the egg before it hatches (or kill the larvae with two sword strikes). There is also another egg up above you that will drop down if you run underneath it. Open the chest to obtain the Dungeon Map
egg. Dispatch the egg before it hatches (or kill the larvae with two sword strikes). There is also another egg up above you that will drop down if you run underneath it. Open the chest to obtain the Dungeon Map ![]() .
.
Since the only door on this floor is covered in a spider web, the only way to go is up. Climb the vines to the third floor. Find the golden torch and dispatch of the lone Keese to cause you less pain. Look around for a switch not far from the torch, and step on it. It will light the torch, burning the web covering it. Go through the door.
In this room, if you light a Deku Stick ![]() and light the torch in the center of the room, a chest will fall. This chest will hold a Deku Shield
and light the torch in the center of the room, a chest will fall. This chest will hold a Deku Shield ![]() if you don't still have one, or a Blue Rupee
if you don't still have one, or a Blue Rupee ![]() if you do. What you have to do in this room is kill all the enemies. There is an egg on the top of the room that you have to make fall to be able to do this. All the rest are pretty easy to see. You can press the switch on the same platform as the door you came in to make three platforms rise out of the ground to get to the higher ledges. Once you kill all the enemies a chest will appear. Open it to get the Fairy Slingshot
if you do. What you have to do in this room is kill all the enemies. There is an egg on the top of the room that you have to make fall to be able to do this. All the rest are pretty easy to see. You can press the switch on the same platform as the door you came in to make three platforms rise out of the ground to get to the higher ledges. Once you kill all the enemies a chest will appear. Open it to get the Fairy Slingshot ![]() , and leave the room.
, and leave the room.
Opening the Basement[edit]
Kill the Keese ![]() as soon as you get out of there to avoid losing your Deku Shield if it lights itself on fire and touches you. Then run back to the vines that you climbed to get up here. Break the egg hanging above the vines with your new Fairy Slingshot
as soon as you get out of there to avoid losing your Deku Shield if it lights itself on fire and touches you. Then run back to the vines that you climbed to get up here. Break the egg hanging above the vines with your new Fairy Slingshot ![]() , and climb the vines back down (if you jump towards the vines Link should grab them). Kill the Gohma Larva
, and climb the vines back down (if you jump towards the vines Link should grab them). Kill the Gohma Larva ![]() if need be. Then, light a Deku Stick
if need be. Then, light a Deku Stick ![]() and take it to the web covering the door from earlier, and go through it.
and take it to the web covering the door from earlier, and go through it.
In this room, break the eggs, and then kill the Big Deku Baba ![]() (targeting him and shooting the slingshot at him seems to work best) and then go through the door to the next room. You will see a floating platform in this room. Do not step on it! A Big Skulltula
(targeting him and shooting the slingshot at him seems to work best) and then go through the door to the next room. You will see a floating platform in this room. Do not step on it! A Big Skulltula ![]() will come down on top of you while the platform begins falling causing damage to you. Instead, shoot the egg in front of the treasure chest, and break another one on the ground. Shoot down one of the Skullwalltulas
will come down on top of you while the platform begins falling causing damage to you. Instead, shoot the egg in front of the treasure chest, and break another one on the ground. Shoot down one of the Skullwalltulas ![]() climbing on the vines, then climb the vines. Run behind the chest and shoot the backside of the Big Skulltula hanging from the ceiling to kill it. Then you can open the chest and get the Compass
climbing on the vines, then climb the vines. Run behind the chest and shoot the backside of the Big Skulltula hanging from the ceiling to kill it. Then you can open the chest and get the Compass ![]() . You can now try to use the floating platform to get back to the door you came in from, or you can shoot the ladder down with your slingshot and climb it. Leave the room, and get back to the central room of the dungeon.
. You can now try to use the floating platform to get back to the door you came in from, or you can shoot the ladder down with your slingshot and climb it. Leave the room, and get back to the central room of the dungeon.
Jump down to the first floor of the dungeon and use the torch to burn away the web on the ground (rolling on the web seems to work best for lighting it on fire) and drop down into the basement.
Through the Basement[edit]
The Boomerang ![]() is required for this Gold Skulltula. Go in the room behind the other web in the four torch room. Kill all the enemies. The Gold Skulltula
is required for this Gold Skulltula. Go in the room behind the other web in the four torch room. Kill all the enemies. The Gold Skulltula ![]() is in the very back on the wall.
is in the very back on the wall.
Climb out of the water and onto the platform that has two Deku Babas ![]() and a switch on it. The switch lights a torch on the platform across the room. Use this torch to burn away a web with a switch behind it. Pressing the switch causes a chest to fall that contains a Deku Shield
and a switch on it. The switch lights a torch on the platform across the room. Use this torch to burn away a web with a switch behind it. Pressing the switch causes a chest to fall that contains a Deku Shield ![]() if you need one. Now use your Fairy Slingshot
if you need one. Now use your Fairy Slingshot ![]() to hit the golden eye switch above the door to and go through the door it unlocks.
to hit the golden eye switch above the door to and go through the door it unlocks.
In here you have to kill all the enemies so that the door you came from gets unlocked. The easy way to get rid of the eggs on the floor quickly is to throw a couple of Deku Nuts ![]() near them. There are also some eggs are hanging on the ceiling. Once you dispatch of the enemies, go back out through the door, and use the torch to light a Deku Stick
near them. There are also some eggs are hanging on the ceiling. Once you dispatch of the enemies, go back out through the door, and use the torch to light a Deku Stick ![]() and bring it through the door so you can light the two unlit torches. This will unlock the door and allow you to move on.
and bring it through the door so you can light the two unlit torches. This will unlock the door and allow you to move on.
First get rid of the egg on the ceiling. There is a blue switch that will light the torch as long as you stand on it. When you step off the switch the torch dies out, but it gives you enough time that you are able to light a Deku Stick with it. Make sure that the platform in the water is right next to you when you do this so that you can jump right onto it. As the platform approaches the spiked log, prepare to roll underneath it (or hold ![]() to kneel using your shield or while holding a Deku Stick). Jump off the platform at the other end and light the two unlit torches to unlock the door. To avoid waiting to kill the hanging Big Skulltula
to kneel using your shield or while holding a Deku Stick). Jump off the platform at the other end and light the two unlit torches to unlock the door. To avoid waiting to kill the hanging Big Skulltula ![]() , throw a Deku Nut to stun it and then sneak past.
, throw a Deku Nut to stun it and then sneak past.
An alternative method is after getting rid of the egg, light a Deku Stick and when the platform is near you go on it and roll under the spiked log. Then light the two torches. Then you can go behind the Big Skulltula and use the slingshot to kill it.
All you have to do in this room is kill all the enemies. The next room is easiest if you just kill all the enemies in it first. There is another blue switch in this room that does the same thing to all four of the torches. You have to use the flames to burn the web with a hole behind it, and then you can go to the first room of the basement, on the highest platform.
The Business Scrub ![]() to the right will sell you a Deku Shield for 50 rupees. On the left you must push the block so that it drops down to give you a step back up. Then use the torch to light a Deku Stick, and climb up the block you pushed so that you can burn the web on the floor and drop down to the last room before the boss.
to the right will sell you a Deku Shield for 50 rupees. On the left you must push the block so that it drops down to give you a step back up. Then use the torch to light a Deku Stick, and climb up the block you pushed so that you can burn the web on the floor and drop down to the last room before the boss.
This room also requires you have a Deku Shield. You have to deflect the nuts the Deku Scrubs ![]() shoot at you back at them. The order is a bit tricky as it is obtusely hidden in this very room. In the water there is a Recovery Heart
shoot at you back at them. The order is a bit tricky as it is obtusely hidden in this very room. In the water there is a Recovery Heart ![]() in front if the first Deku Scrub, and two in front of the second Deku Scrub. This means the correct order is 3 (right), 1 (left), 2 (middle). Just run into the middle one when he starts hopping around. He will give you a hint as to how to beat the boss, and then open the door for you. Go through the door to fight the boss.
in front if the first Deku Scrub, and two in front of the second Deku Scrub. This means the correct order is 3 (right), 1 (left), 2 (middle). Just run into the middle one when he starts hopping around. He will give you a hint as to how to beat the boss, and then open the door for you. Go through the door to fight the boss.
Boss: Gohma (Quick Strategies)[edit]
- Wait until Gohma is on the ground and starts heading towards you.
- Once Gohma's eye is red, shoot it with your Fairy Slingshot
 or use a Deku Nut
  to stun Gohma.
 - Run up to Gohma and start slashing her eye while it's on the ground and stunned. Keep slashing it as many times as you can.
- Shoot Gohma with the slingshot when she climbs to the ceiling and starts laying Gohma Larva
 eggs, or destroy the eggs she drops.
 - If you shoot Gohma on the ceiling when her eye is red, she will drop to the ground without producing any eggs.
If you need more help see Full Gohma Strategy.


