These are the enemies you encounter throughout the game. They are divided up depending on what area you first find them in. Enemies that have slight variations in them (Like say the black and red bat) will be found in the category of which you first encountered one of them (so black and red bat would be in Start Cave).
Start Cave
Bat

- Damage: 1-2 HP
- Health: 1 HP
- Found In: Start Cave, Grasstown, Plantation, Balcony
The earlier bats are largely useless as they fly in up-and-down patterns only. Grasstown and Plantation bats however use "dive bombing" techniques along with flying in somewhat unpredictable patterns. Red bats are found only in the final cave and in one of the last boss battles. While they don't do the dive bombing tactic, they fly in unpredictable patterns and are faster than the average bat.
Critter
- Damage: 1-6 HP
- Health: 2-6 HP
- Found In:Start Cave, Egg Corridor, Grasstown, Labryinth, Plantation
More or less the most common enemy in the game, these guys shouldn't give you too much trouble. Be wary of the flying versions later on. Once again, the red versions of the critter are only found in the final cave, but they do not fly so just pick them off from afar.
Mimiga Village
Pignon
- Damage: 1 HP
- Health: 2 HP
- Found In: Mimiga Graveyard
These guys should give you no trouble at all. They do not actively seek you out so the only way you will get hurt by them is if you accidentally run into one of them. They are only found in the graveyard section of the Mimiga Village.
Grave Keeper
- Damage: 10 HP
- Health: 20 HP
- Found In: Mimiga Graveyard
Watch out for this guy! The grave keeper will walk towards you and strike with his knife, causing quite a lot of damage to your character. Luckily you cannot be hurt by just walking into him. To defeat him, you must strike him from behind. The easiest way to do so is to jump over him as he is raising his knife.
Giant Pignon
- Damage: 1 HP
- Health: 12 HP
- Found In: Mimiga Graveyard
The giant pignon is basically the exact same as the normal pignon. It will not actively seek you out so the only way to get hurt is by running into it. The only real noticeable difference is that when shot, the giant pignon tends to "bounce" around a lot more than the normal one, so be careful of that. The giant pignon is found only in the graveyard section of the Mimiga Village.
Chin Fish
- Damage: 1 HP
- Health: 2 HP
- Found In: Mimiga Reservoir
Quite possibly the easiest enemy in the whole game. The chin fish (there is only one) does absolutely nothing but float; it doesn't even bother to move. To kill it, just shoot it however you want, it doesn't matter. The chin fish is only found in the reservoir section of the Mimiga Village.
Egg Corridor
You'll revisit the Egg Corridor once to meet Sue, and again to visit Kazuma.
First Visit
Basil

- Damage: 100 HP
- HP: Unlimited
This guy is NOT killable. If you fall onto the bottom and touch him, he WILL kill you instantly.
Behemoth

- Damage: 2 HP
- HP: 8
A quite small elephant type. When four HP is down, he will go berserk, so be aware of that.
Beetles

- Damage: 2 HP
- HP: 4 HP
There are two kinds of beetles. One follows you wherever you go. The other just flies back and forth.
Basu

- Damage: 4
- HP: 16 HP
A slightly bigger version of the beetles. Unlike them, he can shoot energy balls at you. You can shoot them to prevent damage.
Second Visit
Dragon Zombie

- Damage: 10 HP
- HP: 54 HP
Dragons from the egg that had an error when hatched. It can breathe fire, so be careful.
Counter Bomb

- Damage: 30 HP
- HP: ???
This enemy basically self destructs. Anything in its range will be damaged as well.
Grasstown
Power Critter
- Damage: 2 HP / 12 HP when landing upon
- Health: 16 HP
- Found In: Grasstown
These guys are just moderately harder than their smaller critter cousins. They only come in the flying variety. While they really aren't threatening, watch out for when they fly over you, because you will sometimes not be able to destroy them before they come down due to the increased health. They deal a staggering 12 damage if they hit you on the way down or land on you, so watch yourself.
Jelly
- Damage: 5 HP
- Health: 4 HP
- Found In: Grasstown
Don't be worried about these guys. While they may cause moderate damage, you can only be hurt if you run into them. They float around in predetermined patterns and never really stray far away from where they start. Pick them off from afar. They are only found after talking to Chaco in Grasstown.
Giant Jelly

- Damage: 6 HP
- Health: 50 HP
- Found In: Grasstown
The giant jelly likes to use similar tactics as the dive bomb bats but it moves much slower and floats side to side when it is coming down. It is best to pick it off from below while moving side to side so it doesn't know where to come down on you. The giant jelly drops Jellyfish Juice as many times as you want. It is only found after talking to Chaco in Grasstown.
Mannan
- Damage: 3 HP
- Health: 11 HP
- Found In: Grasstown
Fighting these guys is pretty easy. Although they look intimidating by the numbers that they come in, they don't move at all. Also, they will not attack you unless you attack them, and even then they only shoot out an easy to avoid ring of energy in the direction they are facing. Just jump over them and keep on shooting in the back.
Frog
- Damage: 3 HP
- Health: 10 HP
- Found In: Grasstown
The frog isn't very threatening when solitary. They simply bounce towards you and turn around if you jump past them. However, they are a pain in the neck in situations involving many enemies. Take out these guys as soon as possible to save yourself a headache.
Sand Zone
Polish

- Damage: 10
- Health:
- Found In: Sand Zone
try not to get hit by these guys, they deal a lot of damage. when they die, they split into many baby Polishes so watch out for that.
Baby Polish

- Damage:
- Health:
- Found In: Sand Zone
Sandcroc

- Damage: 10
- Health: 30
- Found In: Sand Zone
These crocodile-esque sand beasts are a pain, quite literally, if they get you. However, you can avoid them by running at full speed, and their snaps will miss. Don't try to jump out of the way, that won't work. They stay up until you shoot them, and you can safely use them as a platform.
Crow

- Damage:
- Health:
- Found In: Sand Zone
Armadillo

- Damage:
- Health:
- Found In: Sand Zone
Skeleton

- Damage:
- Health:
- Found In: Sand Zone
Skullhead

- Damage:
- Health:
- Found In: Sand Zone
Skullstep

- Damage:
- Health:
- Found In: Sand Zone
Labyrinth
Outer Wall
Plantation
Balcony
Bosses
Balrog (Shack)
Damage
- Jumping attack: 2 HP
- Running attack: 2 HP
Just shoot him and jump over him when he charges at you. Be wary of when he jumps in the air because he could connect with you as you are jumping. The reward for fighting Balrog is 5 experience points for your weapon.
Igor
Damage
- HP:200
- Energy Balls: 2 HP
- Contact with him: 2 HP
Use the same tactics that you used for the first fight against Balrog. The only real difference is that he may occasionally open his mouth, in which you should either jump over him immediately or run away. If you have a level 3 Polar Star this battle will not be hard.
Balrog (Power Room)
Damage
- Energy Orbs: 2 HP
- Contact with him: 2 HP
- Landing upon: 10 HP
This fight is pretty easy. Balrog will just jump and fly over you for roughly three seconds before falling down. Just shoot him when he passes over you and when he lands on the ground. Be wary when he spits out the energy orbs but one shot from any weapon will destroy them. If you have the level 3 Bubbler at this point, this fight will be a simple affair, due to the fact that this weapon can hit him hard if you let it charge, and blocks his energy orbs.
Balfrog
Damage
- Energy Orbs: 2 HP
- Contact with him: 5 HP
The easiest way to kill Balrog (or Balfrog) at this point is to use a level three Fireball and just sit in the fans, firing madly as he approaches. You won't damage him like this, but it will kill the smaller frogs on the ground. Once he is close, use the fan you're in to jump over him, still firing to clear the way on the ground. He should open his mouth--get as close as you can and just pump fireballs into him. Too close and they won't hit his mouth, though, so watch out!
You can use Missiles, but if they hit his energy orbs they won't hit him--so many players choose just to use the Fireball. Once his health is half depleted, he'll make larger jumps, bringing down larger frogs--just be more careful than you were before, and you'll win easily.
Curly Brace

Damage
- Contact with Mimiga: 2 HP
- Machine Gun shot: 6 HP
- No contact damage
Curly has a simple strategy: she runs around and shoots you every now and then. This battle is more irritating than hard. Using the Polar Star or Fireball, shoot out the mimigas to get to Curly and avoid their attacks. Then with the Fireball, attack Curly with full force (do not try to use missiles, she has a shield). She'll occasionally begin to flash, signaling the beginning of her only attack: her machine gun will fire a burst that you can just barely jump over.
Omega
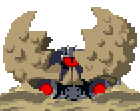
Damage
- Spheres: 3 HP
- Stomp: 20 HP
Omega is one of the first hard bosses, assuming you had no problems with Balfrog. Fireballs are the most useful in the beginning of the fight; you can deal 150 damage to him very easily if they are level three, simply by standing right next to him and pumping him full of shots while he releases dirt spheres (whatever they are) into the air. After he goes under, shoot out the dirt spheres--the machine gun is good for this if you have it, as is the level 3 bubbler--and then be prepared for him to pop up somewhere. You can only hurt him when his maw is open, so wait for that before you begin firing.
After he has lost about half of his health, he'll come out of the sand and begin to jump around, all the while launching dirt spheres. Watch out for him when he jumps so he won't land on you! While this makes it harder for you to survive, it also make it easier to damage him since his head never closes. Use your machine gun, missiles, or fireballs (if you are good with them) to finish him off. The dirt spheres will give you experience, health and missiles if you destroy them, so take advantage of it! Before you know it, Omega will be dead and gone.
Frenzied Toroko

Damage
- Touch: 5 HP
- Blocks: 10 HP
- Contact with flower: 1 HP
Frenzied Toroko can be a hard battle; It's best to max out your weapon levels before you head in. She basically runs and jumps around, throwing blocks straight at you constantly. You should keep moving, and always keep an eye for the flying blocks, since beside the significant damage, your weapon is going to delevel if you're hit. When she jumps, a good strategy is to run past her from below, since you won't get hit by a block that way. The flowers only have 1 HP, so they're not that dangerous, and they provide minor EXP and hearts.
Pooh Black

Damage
- Landing upon: 20 HP
- Bubbles: 5 HP
He can jump on you, which does 20 damage. When the black bubbles starting to fall, dodge to the side as he is going to land. Use the Missiles against him to finish this battle with ease. Machine Gun, Snake, or Polar Star will do as well. Keep shooting him until he jumps through the screen, then move like crazy. When he's down, be careful not to touch the still-boiling black bubbles; it still does damage until he's completely gone.
Monster X
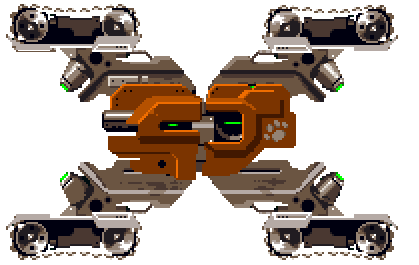
Damage
- Run Over: 10 HP
- Missiles: 5 HP
Monster X is the toughest boss you'll meet before you take on the Core. Damage is really high, as well as the speed. Destroying him will take a while since you have two painful steps. First off, destroy the green spots on him when he first opens up. Use your blade for this one, because no matter how much levels it decreases, it is still strong. Monster X will shoot at you, so be careful.
After that's done, the next time he opens up, use your missile launcher and shoot the face. Unfortunately, green missiles will be shot everywhere. Use another gun to take them down, but only after you are done with Monster X for now.
Balrog (Boulder Chamber)
Damage
- Rockets: 5 HP
- Contact with him: 5 HP
Curly will be wiped out, so you're on your own. Unlike the past fights, Balrog will now start shooting missiles at you. What you can try doing is to use your missiles and shoot him. If you run out, you might as well choose another gun. Fireballs are okay when he's on the ground. Balrog attacks in a pattern: charges at you, then jumps and shoots missiles. The only way he can snatch you is if you are under him or if you jump into him.
The Core
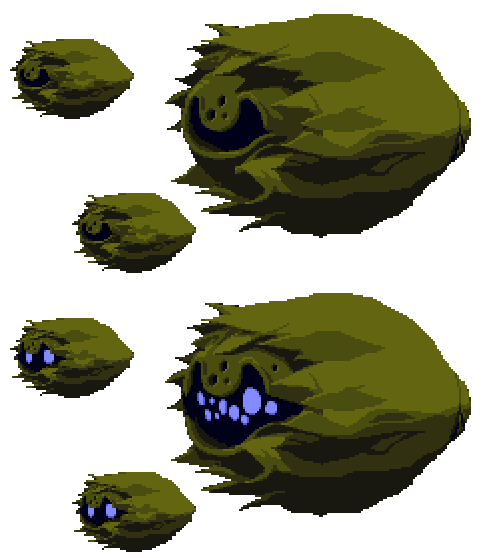
Damage
- Energy Balls: 20 HP
- Small energy balls: 3 HP
The Core can be quite difficult. Do not go after the small ones. Go for the large one, since that is the only way to harm them. Curly won't fight for a while, but she'll get up and fight with you.
The best gun here is the Missile Launcher and Polar Star/Machine Gun/Snake. The Core can attack by two ways. One way is to fill up the whole map with water, then drowning you before the water is drained. The other way is to send strong winds to hurl you back while shooting energy balls at you. The mini-cores can shoot small energy balls and block your shots from hitting the main core. A level 3 Machine Gun can help with the water, since you can fire downward and fly by propulsion. If you didn't take Machine Gun, be sure to surface for air every time the water gets low. remember that this fight will be a giant pain in the neck if you don't have the lvl 3 machine gun or the booster v. 0.8, but if you want to get the spur and the booster v.2.0, persevere, you'll get him eventually. The big white energy balls deal massive damage, and need to be dodged.
Ironhead

Damage
- Contact With: 5-10 HP
- Blocks: 10 HP
Ironhead is really a miniboss. You can use missiles here, but I wouldn't risk it unless you're at very close range, since there's blocks all over. Stick with another gun for now. Ironhead can't be really hard, so try fighting him like you did with some past minibosses. Fun fact: Ironhead is a full boss in one of studio pixel's other games.
If you can defeat him without taking damage, you get an Alien Medal.
Ma Pignon

Damage
- Contact With: 5 HP
- Boulders: 10 HP
He's really a shrimp, but you must fight him to get into the Sacred Grounds, because not fighting him would not let Curly join you underground. At first, he'll jump around and bash his head into the wall to cause falling boulders. His head will be stuck, so shoot him there. Once in a while, he'll summon clones of him, so destroy the clones to find the real Ma Pignon. Your reward is himself to feed to Curly.
Misery
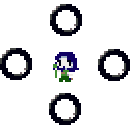
Damage
- Rings: 2 HP
- Blocks: 10 HP
- Thunderbolt: 10 HP
- Bubble Ray: 6 HP
- Contact With Her: 1 HP
Finally, a fight with Misery! As a nearly end boss, she's not easy to deal with. Her attacks are quite strong, as well as her magic. Take out your Nemesis, Spur, Machine Gun, Snake — whatever you have. However, I would recommend the Nemesis, or charged Spur. As she floats in the air, shoot her from under. That way you can deal more damage. She'll always shoot a bubble ray at you unless it’s every third strike, which makes the attack a falling brick. Every second attack she'll shock you with lightning.
Once 1/3 of her HP is off, she'll form two rings around her. If 2/3 is taken, four rings. These act as shields, but keep shooting to decrease her HP more. After circling for a bit, these rings turn into bats which you can shoot for powerups, so take advantage of that.
The Doctor


Damage
- Red Crystal: 1 HP
- Red Energy: 5 HP
- Contact with: ?? HP
The Doctor can be hard if the battle takes a while. With the Red Crystal in his hands, he can be quite strong. One of your choices would be to use the Missile Launcher. If at level 3, the Doctor will be wiped out easily. But doing that would be bad. You'll need that Missile Launcher for either the Frenzied Doctor or the Undead Core. The other choice would be to use another gun. When fighting the Doctor, take him down quick and look out for his attacks. He will eventually shoot red energy at you. After a while he'll be in the center of the air and spread red energy all over. Any time there is no red energy, he is vulnerable.
After the Doctor is down, he'll upgrade to Frenzied Doctor. In this mode, he cannot really shoot energy at you. His attacks are usually in this order: jump at you, teleport, charge at you, jump at you, and so on. I suggest using the missiles here, since the next boss you can use spur or nemesis. A flurry of level 3 missiles can take him down in no time; if you're short on missiles, then a level 3 or MAX Spur is a good alternative too.
Sue, Misery, and the Undead Core


Damage
- Sue
- Somersault: 4 HP
- Misery
- Bats: 2 HP
- Critters: 2 HP
- Undead Core
- Fireballs: 5 HP
- Blasts along the floor and the ceiling: 4 HP
- Energy Balls: 10 HP
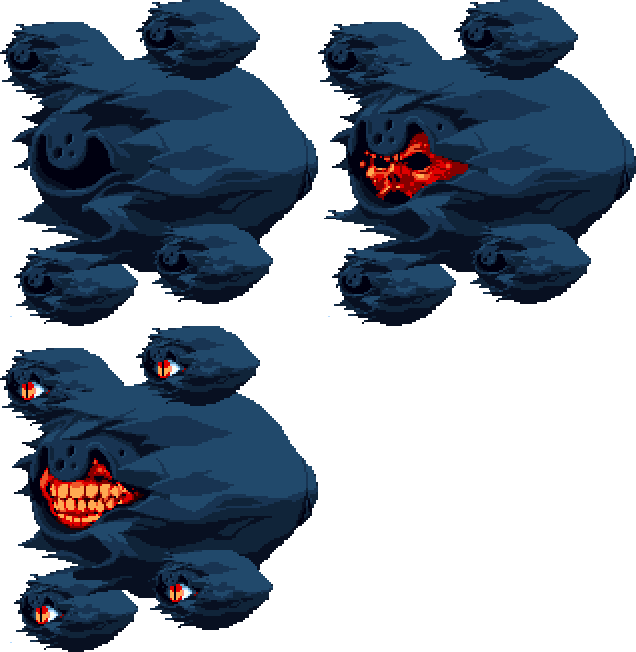
This is the final boss for those who are not doing the secret area. It's practically a three way boss, with the Undead Core as your main target. Sue and Misery are there to help him fight you. Sue annoys you by twirling towards you. Misery, if either her or Sue are hurt, will summon bats and critters; and if Sue is down first, Misery will start to summon homing missiles, which are much harder to deal with then the critters. Therefore a good strategy is to focus the shots on Misery first.
Like the normal core, when the Doctor shows his face, shoot him. He does not appear for long, so use the time wisely. The blasts along the floor are easy: just avoid being on the floor. The fireballs are tougher, since they absorb shots; if he shoots fireballs, focus on dodging rather than dealing damage. When he gets low on HP, he opens his mouth, and he will perform the Energy Ball attack similar to the Core's.
Heavy Press
Damage
- Lightning Bolt: 10 HP
- Contact With: Instant Kill
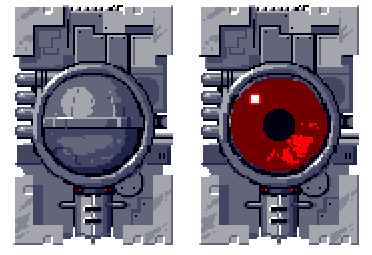
Heavy Press may look like a hard boss, but he's really not unless you don't have the missile launcher or spur. At Sacred Grounds I, you should have the missile launcher at level 2. At that point, your missiles should be strong enough to kill Heavy Press. Charging the spur, shooting him, then dodging and shooting again works pretty well too. He has companions, such as the Roller and the Butes. Once Heavy Press is dead, he'll fall as a normal press — a pound would be 127 damage, so stay out of the way!
Ballos

Damage
- Contact with: 10 HP
- Lightning Bolt(1st form): 10 HP
- Skull Blasts(1st form): 4 HP
- Landing upon(2nd form): 16 HP
- Spiked Spheres: 14 HP (3rd form), 10 HP (4th form)
This is it — the final boss! Like any final boss in any game, Ballos is very tough. He will have four forms for you to deal with.
Let's start with form one: himself. Eventually he will charge at you. He follows a basic strategy: charge at you, jump in the air, charge at you, and pound you down to the ground, and it repeats over and over. While he is doing this, shoot him with Nemesis or Spur. If he is not dead for about 8 times he performs his strategy, he'll hang in the air and shoot lightning at you. He'll leave a target to aim at you, so move fast.
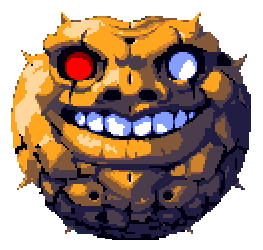
At form two, he'll crash through the ceiling and come back down as his HUGE head. The only thing he can do is jump around making bones pop through the ground. This is probably his easiest form. I suggest using your spur or nemesis here. Jump onto his eyes and shoot at it. Don't hold onto him while he jumps, or you'll get hurt by green innocent devils flying around.
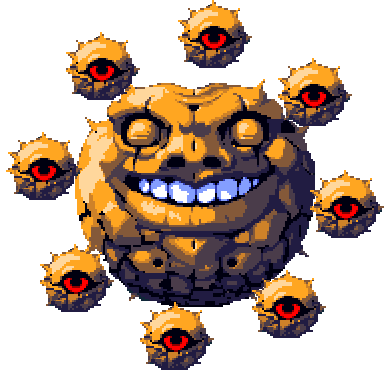
After that, he'll grow spiked spears around him. There's really nothing to drop. Just shoot the balls until they close their eyes. Ballos will roll all over the map, and when he rolls on the ceiling, he'll drop skull bombs on you. Don't touch the spiked balls either, or you'll get -14.
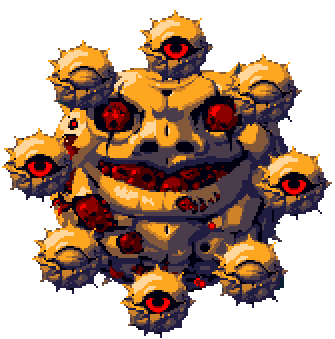
Once all spheres are closed, he will float in the middle. The ground is covered in spikes, there are platforms all over him — it's the final form! The spiked spheres will stick onto him and will be hurled at you. His eyes are gleaming bloody red, and red butes will go after you. Hang onto his eyes and shoot into it with missiles, or whatever you've got. After that…you're done!