(rename) |
Metroidking (talk | contribs) (rewrite, adding infobox and images) |
||
| Line 1: | Line 1: | ||
{{Header Nav|game=Metroid Prime}} | {{Header Nav|game=Metroid Prime}} | ||
{{Metroid Prime/Infobox | |||
|Creatures - Plated Beetle | |||
| | |||
*Missile Expansion | |||
*Morph Ball | |||
| | |||
*Plazmites | |||
*War Wasps | |||
*Scarabs | |||
*Beetles | |||
*Eyons | |||
|Plated Beetle | |||
}} | |||
{{Control selector|GameCube, Wii}} | |||
With the Missile Launcher equipped, more areas are open to you. Your next objective is to recover the Morph Ball. | |||
You | ==Transport Access North== | ||
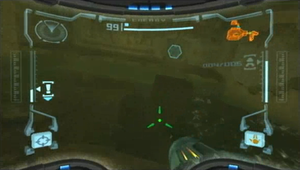
You do not have the necessary equipment to proceed past this room, so head to the Ruined Gallery. | |||
==Hive Totem== | |||
[[File:Mp1 Hive Totem platforms.png|thumb|right|Use these platforms to exit the room]] | |||
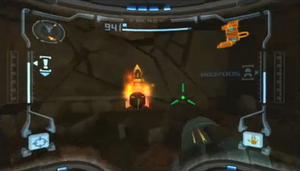
Part of the roof will collapse here, allowing you to reach the door. | |||
Path: Hive Totem, Totem Access | |||
{{-}} | |||
==Ruined Gallery== | |||
[[File:Mp1 Ruined Gallery Missile Expansion 1.png|thumb|left|The first Missile Expansion]] | |||
Head to the bottom section of the room then fire on the fractured wall to reveal your first Missile Expansion. | |||
Next, destroy the Missile Lock Door and enter the Map Station. | |||
{{-}} | |||
===Map Station=== | |||
Download the map to the Chozo Ruins then head to Save Station 1. | |||
==Save Station 1== | |||
With the game saved and your energy recharged, head to the Main Plaza. | |||
Path:Save Station 1, Ruined Nursery, Eyon Tunnel, Nursery Access, Main Plaza | |||
== Ruined Shrine == | ==Main Plaza== | ||
[[File:Mp1 door to Ruined Shrine Access.png|thumb|right|Take this door]] | |||
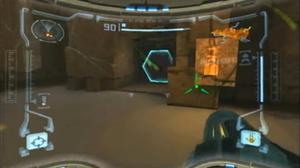
Head to the Missile Lock Door near where you were attacked by a swarm of Beetles. Blast it open then continue on to the Ruined Shrine Access. | |||
{{-}} | |||
==Ruined Shrine Access== | |||
Two groups of Scarabs are in this room, destroy them before attempting to progress further. | |||
==Ruined Shrine== | |||
'''Scan''': Plated Beetle | |||
You'll see the Morph Ball on the far side of this room, however before you can acquired it, a wall will obstruct your path and you'll be attacked by a swarm of Beetles. If there are several Beetles grouped together, uses Missiles (keep at least three in reserve) to destroy them, otherwise stick to the Power Beam. After you slay the swarm, you'll be attacked by a Plated Beetle. | |||
=== | ===Boss battle: Plated Beetle=== | ||
[[File:Mp1 Plated Beetle.png|thumb|left|Defeat this creature to claim the Morph Ball]] | |||
{{sidebar|float=right|width=200px|title=Advanced strategy|contents=You'll be able to kill this Plated Beetle immediately after it rams by rapidly firing Missiles ({{control|{{gc|y}} followed by {{gc|a}}|{{wii|Down|Dpad}} followed by {{wii|a}} (on default settings)}}). If done at close range, all the Missiles it takes to defeat the Plated Beetle will make contact before it turns around for another run.}} | |||
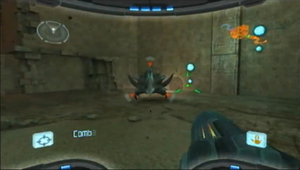
This creature behaves like a normal Beetle, however it is invulnerable to frontal attack. It'll make a screech just before it rams you, so dodge it then blast its vulnerable abdomen with Missiles. The creature will succumb to the damage after two or three hits with Missiles, depending on the set difficulty of the game. | |||
{{Footer Nav|game=Metroid Prime||prevpage=Welcome to Tallon IV|nextpage=Charge Beam}} | {{Footer Nav|game=Metroid Prime||prevpage=Welcome to Tallon IV|nextpage=Charge Beam}} | ||
Revision as of 19:50, 30 May 2011
| Morph Ball | |
|---|---|
| Logbook entries | Creatures - Plated Beetle |
| Items |
|
| Enemies |
|
| Bosses | Plated Beetle |
With the Missile Launcher equipped, more areas are open to you. Your next objective is to recover the Morph Ball.
Transport Access North
You do not have the necessary equipment to proceed past this room, so head to the Ruined Gallery.
Hive Totem

Part of the roof will collapse here, allowing you to reach the door.
Path: Hive Totem, Totem Access
Ruined Gallery

Head to the bottom section of the room then fire on the fractured wall to reveal your first Missile Expansion. Next, destroy the Missile Lock Door and enter the Map Station.
Map Station
Download the map to the Chozo Ruins then head to Save Station 1.
Save Station 1
With the game saved and your energy recharged, head to the Main Plaza.
Path:Save Station 1, Ruined Nursery, Eyon Tunnel, Nursery Access, Main Plaza
Main Plaza

Head to the Missile Lock Door near where you were attacked by a swarm of Beetles. Blast it open then continue on to the Ruined Shrine Access.
Ruined Shrine Access
Two groups of Scarabs are in this room, destroy them before attempting to progress further.
Ruined Shrine
Scan: Plated Beetle You'll see the Morph Ball on the far side of this room, however before you can acquired it, a wall will obstruct your path and you'll be attacked by a swarm of Beetles. If there are several Beetles grouped together, uses Missiles (keep at least three in reserve) to destroy them, otherwise stick to the Power Beam. After you slay the swarm, you'll be attacked by a Plated Beetle.
Boss battle: Plated Beetle

This creature behaves like a normal Beetle, however it is invulnerable to frontal attack. It'll make a screech just before it rams you, so dodge it then blast its vulnerable abdomen with Missiles. The creature will succumb to the damage after two or three hits with Missiles, depending on the set difficulty of the game.