'''Enemies''':[[File:Tower of Druaga Slime Blue.png|16px]][[File:Tower of Druaga Slime Blue.png|16px]][[File:Tower of Druaga Slime Blue.png|16px]][[File:Tower_of_Druaga_Wizard.png|16px]][[File:Tower_of_Druaga_Wizard.png|16px]][[File:Tower_of_Druaga_Wizard.png|16px]][[File:Tower_of_Druaga_Wizard.png|16px]][[File:Tower_of_Druaga_Will'o_Wisp_Blue.png|16px]][[File:Tower_of_Druaga_Will'o_Wisp_Blue.png|16px]]<br>
{| {{prettytable|notwide=1}}
{| {{prettytable|notwide=1}}
! colspan="2" | Treasure: Pearl
! colspan="2" | Treasure: Pearl
Line 34:
Line 34:
|-
|-
! AC
! AC
| Press the 1 Player Start button on the arcade.
| Press the 1 Player Start button. In Namco Museum Battle Collection on PSP, press {{psp|select}}. In Namco Museum DS, press {{ds|Start}}.
|-
|-
! FC
! FC
| Press the {{nes|Select}} button.
| Press {{nes|Select}}.
|-
|-
! PS
! PS
| Press the {{psx|Start}} button.
| Press {{psx|Start}} to pause the game, then unpause it.
|-
|-
! GB
! GB
Line 46:
Line 46:
|-
|-
! AT
! AT
| Push and hold the {{nes|Neutral|Dpad}} in one direction with the sword drawn until the [[File:Tower_of_Druaga_Treasure.png]] appears.
| Stay in the middle of a block at the outer wall, and keep the sword drawn for 10 seconds until the [[File:Tower_of_Druaga_Treasure.png]] appears.
|-
|-
! ATp
! ATp
| You must actually push the Open button on the [[PlayStation]] to expose the CD, and then close the CD lid. If playing on the PS2 or PS3 eject the CD and re-insert it. It may take a few seconds to appear.
| Press the Open button on the [[PlayStation]] to open the CD lid, then close the CD lid. If playing on the PS2 or PS3 eject the CD and re-insert it. It may take a few seconds to appear.
|}
|}
{{-}}
{{-}}
Line 62:
Line 62:
|-
|-
! AC
! AC
|Simply draw your sword two times.
| Draw the sword twice in quick succession. This takes a little timing. You should visibly see the sword get drawn and put away twice.
|-
|-
! GB
! GB
| Draw your sword in one of the four corners, but make sure that you don't accidentally destroy your pickax in the process! (Note: This does not appear to be fully correct, but the corners are definitely involved somehow.)
| Draw the sword in one of the four corners, but make sure that you don't accidentally destroy your pickax in the process! (Note: This does not appear to be fully correct, but the corners are definitely involved somehow.)
|-
|-
! AT
! AT
| You must kill the [[File:Tower_of_Druaga_Quox.png|16px]] when it is facing south.
| Defeat the [[File:Tower_of_Druaga_Quox.png|16px]] when it is facing south.
|-
|-
! ATp
! ATp
| In order to reveal this [[File:Tower_of_Druaga_Treasure.png]], you must defeat three [[File:Tower_of_Druaga_Wizard.png|16px]] ''without ever returning your sword to it's sheath''. So once you draw your sword to kill one Wizard, you must leave it out until every other Wizard is defeated. Try to start out in such a way that you can kill your first two Wizards in one shot whenever they overlap.
| Defeat every [[File:Tower_of_Druaga_Wizard.png|16px]] ''without ever returning the sword to its sheath''. So once you draw the sword to defeat one [[File:Tower_of_Druaga_Wizard.png|16px]], you must leave it out until every other [[File:Tower_of_Druaga_Wizard.png|16px]] is defeated. Try to start out in such a way that you can defeat two [[File:Tower_of_Druaga_Wizard.png|16px]] in one shot whenever they overlap.
| Pass through the [[File:Tower_of_Druaga_Dragon_Silver.png|16px]].
|-
|-
! GB
! GB
| Kill the [[File:Tower_of_Druaga_Dragon_Silver.png|16px]].
| Defeat the [[File:Tower_of_Druaga_Dragon_Silver.png|16px]].
|-
|-
! AT
! AT
| Destroy the two [[File:Tower_of_Druaga_Slime_Red.png|16px]] before any other enemy on the floor.
| Defeat both [[File:Tower_of_Druaga_Slime_Red.png|16px]] before any other enemy.
|-
|-
! ATp
! ATp
| There are exactly four walls in this stage, and they must all be broken (whether by pickaxe or by dragon breath.) But they are rendered invisible once gameplay begins, so you must try to remember their location when the stage is being introduced. They are located at 2 rows and 4 columns left of the BOTTOM RIGHT corner, 5 rows and 7 columns from the BOTTOM RIGHT corner, 3 rows and 0 columns from the BOTTOM LEFT corner and 2 rows and 4 columns from the UPPER RIGHT.
| There are exactly 4 walls in this stage, and they must all be destroyed. (whether by pickaxe or by dragon breath) But they are rendered invisible once gameplay begins, so you must try to remember their location when the stage is being introduced. They are located at 2 rows and 4 columns left of the BOTTOM RIGHT corner, 5 rows and 7 columns from the BOTTOM RIGHT corner, 3 rows and 0 columns from the BOTTOM LEFT corner and 2 rows and 4 columns from the UPPER LEFT.
|}
|}
{{-}}
{{-}}
Line 106:
Line 106:
|-
|-
! AC
! AC
| Kill one particular [[File:Tower_of_Druaga_Knight_Mirror.png|16px]]. The correct one is random.
| Defeat one particular [[File:Tower_of_Druaga_Knight_Mirror.png|16px]]. The correct one is random.
|-
|-
! AT
! AT
| Either collect the [[File:Tower_of_Druaga_Key.png]] and then pass through a [[File:Tower_of_Druaga_Knight_Mirror.png|16px]], or do those two steps in reverse order.
| Either collect the [[File:Tower_of_Druaga_Key.png]] and then pass through a [[File:Tower_of_Druaga_Knight_Mirror.png|16px]], or do those two steps in reverse order. In either case, the [[File:Tower_of_Druaga_Knight_Mirror.png|16px]] cannot be killed before the treasure appears.
|-
|-
! ATp
! ATp
| You must allow a [[File:Tower_of_Druaga_Knight_Mirror.png|16px]] to cross paths with you while you stand motionless. You must have your sword drawn to survive the interaction. Just like the original game, the correct one is random. So do not kill one or you risk a 50% chance of failure.
| Cross paths with a [[File:Tower_of_Druaga_Knight_Mirror.png|16px]] while you stand motionless. Just like the original game, the correct one is random.
|}
|}
{{-}}
{{-}}
Line 125:
Line 125:
|-
|-
! AC
! AC
| Pass through both of the [[File:Tower_of_Druaga_Roper_Green.png|16px]].
| Cross paths with both [[File:Tower_of_Druaga_Roper_Green.png|16px]].
|-
|-
! AT
! AT
| Kill the two [[File:Tower_of_Druaga_Druid.png|16px]], and then block a spell from a [[File:Tower_of_Druaga_Slime_Dark_Green.png|16px]].
| Defeat the two [[File:Tower_of_Druaga_Druid.png|16px]], then block a spell from a [[File:Tower_of_Druaga_Slime_Dark_Green.png|16px]].
|-
|-
! ATp
! ATp
| Kill both [[File:Tower_of_Druaga_Roper_Green.png|16px]].
| Defeat both [[File:Tower_of_Druaga_Roper_Green.png|16px]].
|}
|}
{{-}}
{{-}}
Line 144:
Line 144:
|-
|-
! AC
! AC
|Provided that you have the Red Necklace, you need to pass through the fire spell of a [[File:Tower_of_Druaga_Sorcerer.png|16px]].
| Pass through a flame.
|-
|-
! AT
! AT
| Draw your sword and allow a [[File:Tower_of_Druaga_Lizardman.png|16px]] to pass through you while you stand still.
| Cross paths with a [[File:Tower_of_Druaga_Lizardman.png|16px]] while standing still.
|-
|-
! ATp
! ATp
| Stand directly on top of a flame and draw your sword repeatedly.
| Stand directly on top of a flame and draw the sword repeatedly.
|}
|}
{{-}}
{{-}}
Line 160:
Line 160:
! colspan="2" | Treasure: Hyper Helmet
! colspan="2" | Treasure: Hyper Helmet
|-
|-
| style="background:black" |[[File:Tower_of_Druaga_Hyper_helmet.png]]||Like the Power Potion, this winged armored helmet increases Gil's energy. However, if you did not collect the Balance, this treasure will contain the Evil Helmet, and decrease your energy (Like the Energy Drain Potion). If you did not obtain the Balance, this treasure should be avoided. You will lose this for good if you are ''zapped'' to a lower floor.
| style="background:black" |[[File:Tower_of_Druaga_Hyper_helmet.png]]||Like the Power Potion, this winged armored helmet increases Gil's energy. However, if you did not collect the Balance, this treasure will contain the Evil Helmet, and affect Gil's health. If you did not obtain the Balance, this treasure should be avoided. You will lose this for good if you are ''zapped'' to a lower floor.
|-
|-
! AC
! AC
| Defeat all 2 [[File:Tower_of_Druaga_Ghost_Druid.png|16px]]s on the floor, then pass a [[File:Tower_of_Druaga_Roper_Red.png|16px]].
| Defeat both [[File:Tower_of_Druaga_Ghost_Druid.png|16px]], then cross paths with a [[File:Tower_of_Druaga_Roper_Red.png|16px]].
|-
! FC
| Same as in AC. The only difference is that the Evil Helmet also increases energy like the Hyper Helmet, but Gil cannot defeat Druaga with wrong helmet.
|-
|-
! GB
! GB
| Defeat the sole [[File:Tower_of_Druaga_Ghost_Druid.png|16px]] on the floor, then pass a [[File:Tower_of_Druaga_Roper_Red.png|16px]].
| Defeat the [[File:Tower_of_Druaga_Ghost_Druid.png|16px]], then cross paths with a [[File:Tower_of_Druaga_Roper_Red.png|16px]].
|-
|-
! AT
! AT
| Pass through a [[File:Tower_of_Druaga_Ghost_Druid.png|16px]] once. Then defeat one [[File:Tower_of_Druaga_Roper_Red.png|16px]], and touch a [[File:Tower_of_Druaga_Ghost_Druid.png|16px]] once more.
| Defeat a [[File:Tower_of_Druaga_Roper_Red.png|16px]], then cross paths with a [[File:Tower_of_Druaga_Ghost_Druid.png|16px]].
|-
|-
! ATp
! ATp
| You must pass through, in any order, a [[File:Tower_of_Druaga_Roper_Green.png|16px]], a [[File:Tower_of_Druaga_Roper_Blue.png|16px]], and a [[File:Tower_of_Druaga_Roper_Red.png|16px]]
| Cross paths with, in any order, [[File:Tower_of_Druaga_Roper_Green.png|16px]][[File:Tower_of_Druaga_Roper_Blue.png|16px]][[File:Tower_of_Druaga_Roper_Red.png|16px]].
|}
|}
{{-}}
{{-}}
Line 185:
Line 188:
|-
|-
! AC
! AC
| Block a spell from a [[File:Tower_of_Druaga_Wizard.png|16px]] with your ''sword drawn'' (on the side. If done on front, one Gil will be lost).
| Block a spell from a [[File:Tower_of_Druaga_Wizard.png|16px]] with your ''sword drawn''. You may ''only'' do this when spells approach the direction the shield is facing. It is recommended you do this in a corner, where the shots can only come from two directions.
|-
|-
! AT
! AT
| Same as above.
| Same as AC.
|-
|-
! ATp
! ATp
| You must defeat the [[File:Tower_of_Druaga_Dragon_Silver.png|16px]] and the [[File:Tower_of_Druaga_Dragon_Black.png|16px]], but you must ''not'' defeat [[File:Tower_of_Druaga_Quox.png|16px]]
| Defeat the [[File:Tower_of_Druaga_Dragon_Silver.png|16px]] and the [[File:Tower_of_Druaga_Dragon_Black.png|16px]], but do not defeat the [[File:Tower_of_Druaga_Quox.png|16px]].
|}
|}
{{-}}
{{-}}
Line 197:
Line 200:
== Floor 39 ==
== Floor 39 ==
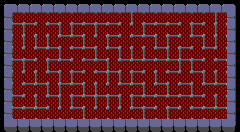
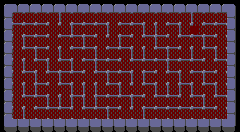
[[File:Tower of Druaga Floor 39.png|frame|Floor 39]]
[[File:Tower of Druaga Floor 39.png|frame|Floor 39]]
'''Enemies''':[[File:Tower_of_Druaga_Slime_Blue.png|16px]][[File:Tower_of_Druaga_Slime_Blue.png|16px]][[File:Tower_of_Druaga_Slime_Blue.png|16px]][[File:Tower_of_Druaga_Slime_Blue.png|16px]][[File:Tower of Druaga Ghost Mage.png|16px]][[File:Tower_of_Druaga_Ghost_Mage.png|16px]][[File:Tower_of_Druaga_Knight_Red.png|16px]][[File:Tower_of_Druaga_Knight_Red.png|16px]][[File:Tower_of_Druaga_Will'o_Wisp_Red.png|16px]][[File:Tower_of_Druaga_Will'o_Wisp_Red.png|16px]]<br>
{| {{prettytable|notwide=1}}
{| {{prettytable|notwide=1}}
! colspan="2" | Treasure: Red ring
! colspan="2" | Treasure: Red ring
Line 204:
Line 207:
|-
|-
! AC
! AC
| Enter {{nes|Up|Dpad}} {{nes|Up|Dpad}} {{nes|Down|Dpad}} {{nes|Down|Dpad}} {{nes|Down|Dpad}} {{nes|Down|Dpad}} {{nes|Down|Dpad}}.
| Enter {{nes|Up|Dpad}} x2 {{nes|Down|Dpad}} x5.
|-
|-
! GB
! GB
| There will be Ropers on this level. Wait until the timer drops below 10,000, and pass through one of the Ropers.
| There will be Ropers on this floor. Wait until the timer drops below 10,000, and pass through one of the Ropers.
|-
|-
! AT
! AT
| Remain in contact with any outer wall for approximately 10 seconds.
| Keep walking while remaining in contact with any outer wall for approximately 10 seconds.
|-
|-
! ATp
! ATp
| One of the [[File:Tower_of_Druaga_Will'o_Wisp_Red.png|16px]] is fake, and can be killed (it should be slower than the rest). Find it and destroy it.
| Defeat the fake (slow) [[File:Tower_of_Druaga_Will'o_Wisp_Red.png|16px]].
|}
|}
{{-}}
{{-}}
Line 226:
Line 229:
|-
|-
! AC
! AC
| Pass through a [[File:Tower_of_Druaga_Roper_Green.png|16px]] when the timer is below 10000.
| Cross paths with a [[File:Tower_of_Druaga_Roper_Green.png|16px]] when the timer is below 10000.
|-
|-
! FC
! FC
| Pass through a [[File:Tower_of_Druaga_Roper_Green.png|16px]] regardless of timer.
| Cross paths with a [[File:Tower_of_Druaga_Roper_Green.png|16px]] regardless of timer.
|-
|-
! GB
! GB
| Exit the stage normally. Face the next mini-boss, two giant wizards. Defeating one of them will make the [[File:Tower_of_Druaga_Treasure.png]] appear, and you have no choice but to pick it up.
| Exit the floor normally. Face the next mini-boss, two giant wizards. Defeating one of them will make the [[File:Tower_of_Druaga_Treasure.png]] appear, and you have no choice but to pick it up.
|-
|-
! AT
! AT
| Simply kill any one enemy.
| Defeat an enemy.
|-
|-
! ATp
! ATp
| Find the [[File:Tower_of_Druaga_Key.png]] and open the [[File:Tower_of_Druaga_Door.png]]. Then draw your sword repeatedly to make the [[File:Tower_of_Druaga_Treasure.png]] appear. Collect the treasure. At that moment, ten [[File:Tower_of_Druaga_Quox.png|16px]] will appear. Of the ten, only one of them will not be affected by the Pearl (it won't stand still when you come close.) Kill this Quox, and [[File:Tower_of_Druaga_Druaga.png|16px]] will appear and escape to the door. If you attempt to leave this stage before Druaga does, you will be ''ZAPPED'' back to the previous level.
| Complete the steps in the following order:
# Collect the [[File:Tower_of_Druaga_Key.png]] and open the [[File:Tower_of_Druaga_Door.png]].
# Draw the sword repeatedly to make the [[File:Tower_of_Druaga_Treasure.png]] appear.
# Collect the [[File:Tower_of_Druaga_Treasure.png]]. At that point, 10 [[File:Tower_of_Druaga_Quox.png|16px]] will appear. Of the 10, only one of them will not be affected by the Pearl (it will not stand still when you come close.)
# Defeat this [[File:Tower_of_Druaga_Quox.png|16px]]. At that point, [[File:Tower_of_Druaga_Druaga.png|16px]] will appear.
# You ''must'' let [[File:Tower of Druaga Druaga.png|16px]] reach the [[File:Tower of Druaga Door.png]] and escape before you exit the floor or you will be zapped back to the previous floor.
This precious stone has the power to stop dragons in their tracks and prevent them from moving about the floor when you are near.
AC
Press the 1 Player Start button. In Namco Museum Battle Collection on PSP, press . In Namco Museum DS, press .
FC
Press .
PS
Press to pause the game, then unpause it.
GB
Walk (completely) through the starting point of the stage three times.
AT
Stay in the middle of a block at the outer wall, and keep the sword drawn for 10 seconds until the appears.
ATp
Press the Open button on the PlayStation to open the CD lid, then close the CD lid. If playing on the PS2 or PS3 eject the CD and re-insert it. It may take a few seconds to appear.
This balance is just as important as the last one, as it is needed to collect the Hyper Shield. Without it, the on Floor 33 would become the Evil Shield, possessing a diminished ability to block spells.
AC
Draw the sword twice in quick succession. This takes a little timing. You should visibly see the sword get drawn and put away twice.
GB
Draw the sword in one of the four corners, but make sure that you don't accidentally destroy your pickax in the process! (Note: This does not appear to be fully correct, but the corners are definitely involved somehow.)
AT
Defeat the when it is facing south.
ATp
Defeat every without ever returning the sword to its sheath. So once you draw the sword to defeat one , you must leave it out until every other is defeated. Try to start out in such a way that you can defeat two in one shot whenever they overlap.
The best shield in the game, no other shield can match this shield's ability to block the evil spells of the magicians. This treasure will be the Evil Shield if the Balance is not collected which will prevent Gil from blocking more spell attacks. Do not obtain this treasure if you did not obtain the Balance. It will be lost for good when you are zapped to a lower floor.
AC
Pass through the .
GB
Defeat the .
AT
Defeat both before any other enemy.
ATp
There are exactly 4 walls in this stage, and they must all be destroyed. (whether by pickaxe or by dragon breath) But they are rendered invisible once gameplay begins, so you must try to remember their location when the stage is being introduced. They are located at 2 rows and 4 columns left of the BOTTOM RIGHT corner, 5 rows and 7 columns from the BOTTOM RIGHT corner, 3 rows and 0 columns from the BOTTOM LEFT corner and 2 rows and 4 columns from the UPPER LEFT.
Treasure: Key Detection Book (a. k. a. Book of Keys)
Without this book, the on the next floor (35) won't be visible to you so you will unable to advance to Floor 36. Collect the Book of Keys and keys will be visible.
AC
Defeat one particular . The correct one is random.
AT
Either collect the and then pass through a , or do those two steps in reverse order. In either case, the cannot be killed before the treasure appears.
ATp
Cross paths with a while you stand motionless. Just like the original game, the correct one is random.
This set of scales is required to properly reveal the Hyper Helmet on the next floor. Without it, the Helmet revealed will be the Evil Helmet, which decreases your overall health.
AC
Pass through a flame.
AT
Cross paths with a while standing still.
ATp
Stand directly on top of a flame and draw the sword repeatedly.
Like the Power Potion, this winged armored helmet increases Gil's energy. However, if you did not collect the Balance, this treasure will contain the Evil Helmet, and affect Gil's health. If you did not obtain the Balance, this treasure should be avoided. You will lose this for good if you are zapped to a lower floor.
AC
Defeat both , then cross paths with a .
FC
Same as in AC. The only difference is that the Evil Helmet also increases energy like the Hyper Helmet, but Gil cannot defeat Druaga with wrong helmet.
Like many treasures before it, this rod is necessary to collect the greater rods to come.
AC
Block a spell from a with your sword drawn. You may only do this when spells approach the direction the shield is facing. It is recommended you do this in a corner, where the shots can only come from two directions.
This ring grants you protection from the touch of a . Possession of this ring is necessary later on, but be aware that you will lose the Green Ring, and the protection from that it provided.
AC
Enter x2 x5.
GB
There will be Ropers on this floor. Wait until the timer drops below 10,000, and pass through one of the Ropers.
AT
Keep walking while remaining in contact with any outer wall for approximately 10 seconds.
As the name implies, this is not a potion that you should attempt to collect. It causes time to count down much faster, giving you less time to complete the floor.
AC
Cross paths with a when the timer is below 10000.
FC
Cross paths with a regardless of timer.
GB
Exit the floor normally. Face the next mini-boss, two giant wizards. Defeating one of them will make the appear, and you have no choice but to pick it up.
AT
Defeat an enemy.
ATp
Complete the steps in the following order:
Collect the and open the .
Draw the sword repeatedly to make the appear.
Collect the . At that point, 10 will appear. Of the 10, only one of them will not be affected by the Pearl (it will not stand still when you come close.)
Defeat this . At that point, will appear.
You must let reach the and escape before you exit the floor or you will be zapped back to the previous floor.