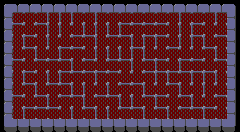
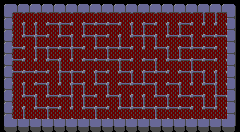
| Walk to point A, destroy the south wall, then walk to point B.
|
# Walk to point A.
# Destroy the south wall.
# Walk to point B.
|-
|-
! FC
! FC
Line 99:
Line 102:
|-
|-
! AC
! AC
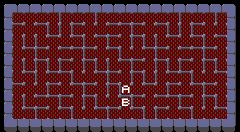
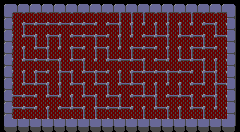
| Walk to point A and face south.
| Walk to point A facing south.
|-
|-
! FC
! FC
Line 121:
Line 124:
|-
|-
! ATp
! ATp
| In order to escape this level and move on to Floor 56, you must open the [[Image:Tower_of_Druaga_Door.png]] whose number corresponds to the 100's digit of your score. The numbers of the [[Image:Tower_of_Druaga_Door.png]] from left to right, are 5, 1, 4, 0, 7, 3, 9, 2. There are no [[Image:Tower_of_Druaga_Door.png]] for 6 and 8. Do '''''not''''' break any walls. If you break a wall, or choose the wrong [[Image:Tower_of_Druaga_Door.png]], you will be zapped back to the previous floor.
| In order to escape this floor and move on to Floor 56, open the [[Image:Tower_of_Druaga_Door.png]] whose number corresponds to the 100's digit of your score. The numbers of the [[Image:Tower_of_Druaga_Door.png]] from left to right, are 5, 1, 4, 0, 7, 3, 9, 2. There are no [[Image:Tower_of_Druaga_Door.png]] for 6 and 8. Do '''''not''''' break any walls. If you break a wall, or choose the wrong [[Image:Tower_of_Druaga_Door.png]], you will be zapped back to the previous floor.
|}
|}
{{-}}
{{-}}
Line 180:
Line 183:
|-
|-
! AC
! AC
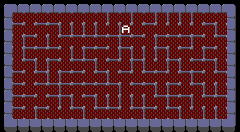
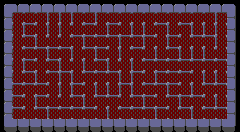
| Walk through the points in order: A B C.
| Walk through the points, in order, A B C.
|-
|-
! FC
! FC
Line 201:
Line 204:
! AC
! AC
|
|
# There are 3 [[Image:Tower_of_Druaga_Knight_High-Power.png|16px]]s, but one moves faster than the others. This is the one you must defeat. Four [[Image:Tower_of_Druaga_Wizard.png|16px]]s will then appear.
# There are 3 [[Image:Tower_of_Druaga_Knight_High-Power.png|16px]], but one moves faster than the others. This is the one you must defeat. Four [[Image:Tower_of_Druaga_Wizard.png|16px]] will then appear.
# Of the 4 [[Image:Tower_of_Druaga_Wizard.png|16px]]s, only one is the true [[Image:Tower_of_Druaga_Wizard.png|16px]]. He will not be invincible like all the others. Defeat the true [[Image:Tower_of_Druaga_Wizard.png|16px]], and a [[Image:Tower_of_Druaga_Quox.png|16px]] will appear.
# Of the 4 [[Image:Tower_of_Druaga_Wizard.png|16px]], only one is the true [[Image:Tower_of_Druaga_Wizard.png|16px]]. He will not be invincible like all the others. Defeat the true [[Image:Tower_of_Druaga_Wizard.png|16px]], and a [[Image:Tower_of_Druaga_Quox.png|16px]] will appear.
# Defeat the [[Image:Tower_of_Druaga_Quox.png|16px]]. Possession of the Ruby Mace makes this fight substantially easier.
# Defeat the [[Image:Tower_of_Druaga_Quox.png|16px]]. Possession of the Ruby Mace makes this fight substantially easier.
# [[Image:Tower_of_Druaga_Druaga.png|16px]] will appear. He is extremely fast, and can cast wizard spells at you. Try to wait for him to come to you and defeat him as quickly as possible. Be careful not to absorb a spell with the Hyper Armor, or you will be unable to defeat him. Make sure that you kill him ''before'' you exit through the [[Image:Tower_of_Druaga_Door.png]] to Floor 60, or you will be ''ZAPPED'' to a lower floor and most of your items will be lost.
# [[Image:Tower_of_Druaga_Druaga.png|16px]] will appear. He is extremely fast, and can cast wizard spells at you. Try to wait for him to come to you and defeat him as quickly as possible. Be careful not to absorb a spell with the Hyper Armor, or you will be unable to defeat him. Make sure that you kill him ''before'' you exit through the [[Image:Tower_of_Druaga_Door.png]] to Floor 60, or you will be zapped to a lower floor and most of your items will be lost.
|-
|-
! AT
! AT
Line 210:
Line 213:
|-
|-
! ATp
! ATp
| The solution here is similar to the one above, with the exception is after you defeat the [[Image:Tower_of_Druaga_Quox.png|16px]], two fake [[Image:Tower_of_Druaga_Gil.png|16px]] will appear. One will not be wearing the Hyper Helmet. That is the one you must defeat. Then proceed to defeat [[Image:Tower_of_Druaga_Druaga.png|16px]] before advancing to Floor 60.
| Same as AC, but with the exception is after you defeat the [[Image:Tower_of_Druaga_Quox.png|16px]], 2 fake [[Image:Tower_of_Druaga_Gil.png|16px]] will appear. One will not be wearing the Hyper Helmet. That is the one you must defeat. Then defeat [[Image:Tower_of_Druaga_Druaga.png|16px]] before advancing to Floor 60.
|}
|}
{{-}}
{{-}}
Line 221:
Line 224:
|-
|-
! AC
! AC
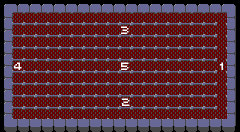
| To successfully finish the game, you must execute these steps in the following order. Failure to do so including trying to attack [[Image:Tower_of_Druaga_Ishtar.png|16px]] or [[Image:Tower_of_Druaga_Ki.png|16px]], break a wall with your Pickaxe, or run out of time, you will lose one Gil, be ''ZAPPED'' to a lower floor, and most of your items will be lost.
| To successfully finish the game, you must execute these steps in the following order. Failure to do so including trying to attack [[Image:Tower_of_Druaga_Ishtar.png|16px]] or [[Image:Tower_of_Druaga_Ki.png|16px]], break a wall with your pickaxe, or run out of time, you will lose one Gil, be zapped to a lower floor, and most of your items will be lost.
# Walk to point (1) and collect [[Image:Tower_of_Druaga_Ishtar.png|16px]]
# Walk to point (1) and collect [[Image:Tower_of_Druaga_Ishtar.png|16px]]
# Walk down to the second to last row near the bottom and 7 blocks to point (2) and push down to set the Green Crystal Rod.
# Walk down to the second to last row near the bottom and 7 blocks to point (2) and push down to set the Green Crystal Rod.
# Walk up to the second to last row near the top to point (3) and push down to set the Red Crystal Rod.
# Walk up to the second to last row near the top to point (3) and push down to set the Red Crystal Rod.
# Walk down to the center row to point (4) to turn the [[Image:Tower_of_Druaga_Stone.png|16px]] into [[Image:Tower_of_Druaga_Ki.png|16px]] and collect her.
# Walk down to the center row to point (4) to turn the [[Image:Tower_of_Druaga_Stone.png|16px]] into [[Image:Tower_of_Druaga_Ki.png|16px]] and collect her.
# Walk to point (5) to set Blue Crystal Rod, and simply push down to complete the game where Ki will reappear.
# Walk to point (5) to set Blue Crystal Rod, and push down to complete the game where Ki will reappear.
|-
|-
! FC
! FC
Line 232:
Line 235:
|-
|-
! AT
! AT
| The method is the same as AC (and FC), with the exception that your sword must be drawn whenever you push down.
| The method is the same as AC (and FC), with the exception that the sword must be drawn whenever you push down.
This is the last Balance that you are required to collect in order to prevent the powerful Hyper Armor from becoming the Evil Armor which will lower your defense.
AC
Press and hold any one direction for 9-10 seconds.
AT
Destroy 7 walls, then press .
ATp
Continue to walk with the sword drawn without hitting any walls for a distance of a column's length.
Floor 52
Floor 52
Enemies:
Treasure: Hyper Armor
This blue lined armor is so powerful that it will make Gil defend himself against the evil demon Druaga. It is also capable of absorbing one spell per floor without the shield and/or sword drawn. However, it will deplete Gil's energy, and cannot defeat most enemies except slimes, ghosts, and magicians. If you haven't collected the Balance, this will become the Evil Armor which will decrease your defense, meaning the treasure should be avoided. You can also lose it if you are zapped to a lower floor.
AC
Destroy 4 walls.
GB
Defeat every enemy.
AT
Defeat the .
ATp
Collect the without blocking any spells.
Floor 53
Floor 53
Enemies:
Treasure: Unlock Potion
This treasure is required for either the treasure on Floor 54 or on Floor 56. But seeing as the one on Floor 56 is empty, you should make sure to use it on Floor 54 instead.
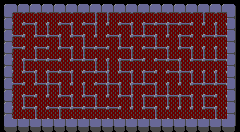
AC
Walk to point A.
Destroy the south wall.
Walk to point B.
FC
The solution is similar to the original, except the starting point is 8 columns from the left and 2 rows from the bottom.
GB
Defeat 3 knights without repeating the same color.
AT
Walk to the square 8 columns from the left and 5 rows from the top, then face south.
ATp
Absorb a spell with the Hyper Armor.
Collect the that was present from the start.
Absorb another spell with the Hyper Armor.
Collect the at the starting point.
Floor 54
Floor 54
Enemies:
Treasure: Blue Ring
After losing protection from the when you gave up the Green Ring, you are finally afforded protection from both and thanks to the possession of the Blue Ring.
AC
Walk to point A facing south.
FC
This floor is just like the last floor, except the starting point is 8 squares from the left and 2 rows from the top. Break the wall below and walk down.
GB
Walk to every corner facing south.
AT
Walk to the square 8 columns from the left and 1 row from the top, then face south.
ATp
Absorb a spell with the Hyper Armor. NOTE: The item on this floor and Floor 56 have been swapped! If you open this floor's , you will use up your Unlock Potion, and be unable to collect the Blue Ring on Floor 56!
Floor 55
Floor 55
Enemies:
Treasure: None
ATp
In order to escape this floor and move on to Floor 56, open the whose number corresponds to the 100's digit of your score. The numbers of the from left to right, are 5, 1, 4, 0, 7, 3, 9, 2. There are no for 6 and 8. Do not break any walls. If you break a wall, or choose the wrong , you will be zapped back to the previous floor.
Floor 56
Floor 56
Enemies:
Treasure: Empty Chest
You can reveal a on this floor, but alas, the contents of the are empty. You would only find this out if you, for some reason, did not use the Unlock Potion on Floor 54.
AC
Absorb a spell with the Hyper Armor.
AT
Same as AC, but the sword must be drawn.
ATp
Defeat every .
Destroy as many walls as the destroyed. (Walls that other enemies destroy count toward your destroyed walls as well.)
Floor 57
Floor 57
Enemies:
Treasure: Ruby Mace
By trading the Sapphire Mace for this Ruby Mace, you will possess the power to defeat the final that you will encounter on Floor 59 in one hit. Without it, you'll have a tough time.
AC
Pass through the to turn the into . She may resemble the goddess, but she is actually an evil disguised as Ishtar.
Defeat the . If you touch without the sword drawn, you will lose one Gil.
Defeat the .
AT
Pass through the to turn the fake into the Ishtar look-alike Succubus. Defeat the Succubus and return to the door. Repeat this process two more times (so that you kill the Succubus a total of three times). Do not kill the fake Ki. You must not collect the before the appears.
ATp
Break the Gold Pickaxe on an outer wall.
Collect the .
Defeat the .
Floor 58
Floor 58
Enemies:
Treasure: Blue Crystal Rod
This Crystal Rod is required to defeat Druaga. If you do not collect it, Druaga will not appear in your presence, and you will be unable to advance to Floor 60.
AC
Walk through the points, in order, A B C.
FC
The matching points are all 8 squares from the left. From the top wall, pass through the point 7 rows from the top, then 1 row from the top, and then 4 rows from the top. Also, another difference is that you will be able to defeat Druaga, advance to Floor 60, and complete the game without collecting the Blue Crystal Rod.
AT
Same as FC.
ATp
Stand inside of the 's fire and swing the sword.
Floor 59
Floor 59
Enemies:
Treasure: none
AC
There are 3 , but one moves faster than the others. This is the one you must defeat. Four will then appear.
Of the 4 , only one is the true . He will not be invincible like all the others. Defeat the true , and a will appear.
Defeat the . Possession of the Ruby Mace makes this fight substantially easier.
will appear. He is extremely fast, and can cast wizard spells at you. Try to wait for him to come to you and defeat him as quickly as possible. Be careful not to absorb a spell with the Hyper Armor, or you will be unable to defeat him. Make sure that you kill him before you exit through the to Floor 60, or you will be zapped to a lower floor and most of your items will be lost.
AT
Same as AC.
ATp
Same as AC, but with the exception is after you defeat the , 2 fake will appear. One will not be wearing the Hyper Helmet. That is the one you must defeat. Then defeat before advancing to Floor 60.
Floor 60
Floor 60
Enemies:none
Treasure: none
AC
To successfully finish the game, you must execute these steps in the following order. Failure to do so including trying to attack or , break a wall with your pickaxe, or run out of time, you will lose one Gil, be zapped to a lower floor, and most of your items will be lost.
Walk to point (1) and collect
Walk down to the second to last row near the bottom and 7 blocks to point (2) and push down to set the Green Crystal Rod.
Walk up to the second to last row near the top to point (3) and push down to set the Red Crystal Rod.
Walk down to the center row to point (4) to turn the into and collect her.
Walk to point (5) to set Blue Crystal Rod, and push down to complete the game where Ki will reappear.
FC
The method is the same as above, with the exception that if you draw your sword towards the , you will be zapped to a lower floor. If you run out of time, you will be forced to start this floor over, where you will have to complete some of the first steps if needed, all over again.
AT
The method is the same as AC (and FC), with the exception that the sword must be drawn whenever you push down.
ATp
Walk up to, and collect, Ishtar, who will be waiting on the left side.
Now you need to walk to a position that is 7 blocks from the left, and 6 rows from the top, and shake your sword. A crystal rod should appear.
Then walk 6 blocks to the right so that you are now 13 blocks from the left, and shake your sword.
Now climb up to the second row from the top and shake your sword in the square that is 10 blocks from the left. You should not have a triangle of crystal rods.
Finally, stand in the bottom of the cleared out vertical strip in the center of the stage, and face up (looking at Ki).