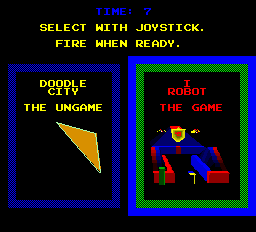
Once you have inserted your coin into the cabinet of Atari's 1983 arcade game I, Robot and pushed either Start Button, the game will proceed to the start screen shown above; you will have eight seconds to select either I, Robot "(The Game)" itself, or Doodle City ("The Ungame"), by pushing the hall-effect joystick either left or right, then pressing the Firing Button to confirm your choice.
There are several bonuses available in the game; the terrain wave of each level is timed and the best time will be displayed in the bottom-left corner of the screen. If the player manages to beat this time, he/she shall receive a 2500-point bonus. Also present is a 999-point bonus for shooting every Tetra in the space wave of a level, with a second 2500-point bonus for getting the best Space Score (which is also displayed in the bottom-left corner). However, the player will be disqualified to receive a Best Time bonus if the robot dies during the terrain wave of a level.
If you press and hold both Start Buttons simultaneously on entering a transporter (if one is present), you can warp as high as level 10, and if you press and hold the firing button as well as the start buttons, you can warp as high as level 20. If the arcade operators have set the "Demo Mode" dip switch setting to "ON", you can warp as high as level 79, and if you start a new game promptly after the old one ends, you can restart from the level you were last on (even up to level 126, the last unique level) - as after level 126 (or "26" as the game calls it), the game goes through a random sequence of previous levels.
If you get killed by something in one of the early levels one of the game's important "unwritten rules" will appear upon the screen:
- Getting hit by a Bird in mid-air while the robot is jumping from one side of the playfield to the other: "SHOOT BIRDS."
- Jumping while the Eye is fully open (the robot shall say "EYE OPEN. DONT JUMP."): "DO NOT JUMP IF EYE IS RED."
- Flying into a Meteor, Tanker, Tetra, or even a Bonus Letter, in a space wave: "REMEMBER: AVOID SOLID OBJECTS."
- Failing to shoot one of the Spiking Head's spikes in a space wave that is a multiple of four: "EVERY SPIKE MUST BE SHOT. SHOOT HEAD TO MAKE IT TURN AND STOP SPIKING."; if you are a novice player, you may see this one more than any other, as the Head can be quite difficult.
- Getting hit by a Tanker or Porcupine in a space wave (after shooting them, but if they reach you before you have shot them enough times to kill them): "TANKERS AND PORCUPINES GET MAD AND ATTACK WHEN SHOT."; again, novice players can also see this one frequently too.
- Failing to shoot a Tetra, on a later space wave: "TETRAS KILL IF NOT SHOT. SCRAPE THEM OFF BY FLYING NEXT TO OTHER OBJECTS."
The Eye opens every seven seconds unless stated otherwise, and changes colour from green to yellow to red as it does so; you can jump while it is the first two colours, but not the third, as it will fire a laser at the robot and scatter his parts all over the playfield. And if you run out of time, the text "BONUS TIMER EXPIRED" will appear on the screen four times (each new instance of it will be below the previous one), and the robot will fall over and explode.
Level 1[edit]
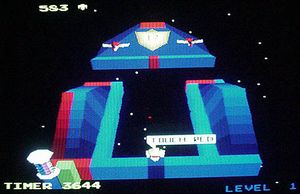
Welcome to the game. This level contains 45 reds, has a time of 4000, and a best time of 3000; the only enemies in it are Birds who can only be shot in mid-air. The transporter in the bottom-left will let you warp to higher levels when entered (as high as 79 if "Demo Mode" setting is set to "ON") - and the best score for this level's space wave is 800.
Level 2[edit]
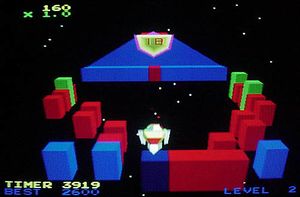
This level contains 19 reds, has a time of 4000, and a best time of 2600; Birds shall also appear once you get to the second half of the terrain, so you will have to jump carefully and be mindful of the Eye. The best score for the space wave is 400 - and this is the earliest point that "bonus letters" appear (which can be shot to spell out the game title).
Level 3[edit]
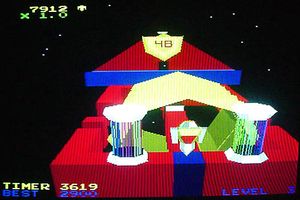
This level contains 49 reds, has a time of 4000 and a best time of 2900; the only "enemy" in it is the ring that moves up, down and to the sides in the centre so you should try not to get caught in it. This is also the first level where you shall have to go into the pyramid at the end (indicated by the robot saying: "LETS GO IN"), in order to collect jewels and destroy the Eye (before a Buzz Saw chews up the terrain) - but if the robot should get killed inside the pyramid, he shall immediately be thrust back into space, and it is also worth noting the best score for the space wave is 700.
Level 4[edit]
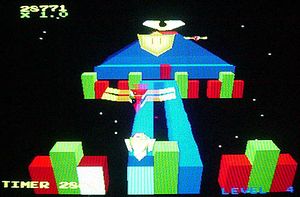
This level contains 14 reds, has a time of 4000 and a best time of 2100; there is also more Birds in it, so you should make sure to press the Firing Button when you jump in order to get past them. The best score for the space wave is 500 - and this is also the first space wave where you shall have to try and survive an assault from the Spiking Head.
Level 5[edit]
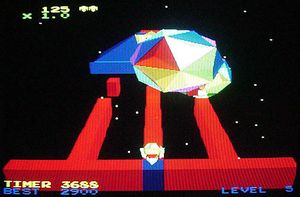
The level contains 60 reds, has a time of 4000 and a best time of 2900; there are also Beach Balls in it that roll over the terrain and shall crush the robot if he gets in their way, so you may have to move to the lower extremes to avoid them (but you must not go out of your way to do it if low on time). The best score for the level's space wave is 2000.
Level 6[edit]
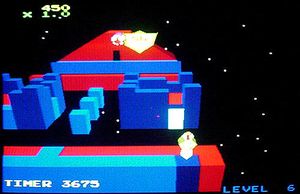
This level contains 70 reds, has a time of 4000, and a best time of 2300; there are also blue walls on it, which must be destroyed so you can jump over them and get the reds on the other side. The Eye fires Footballs at the robot so you must keep moving - and (because this level's number is a multiple of three), it again ends with collecting jewels inside the pyramid, but if the robot dies in it, he is thrust back into space. The best score for the space wave is 300.
Level 7[edit]
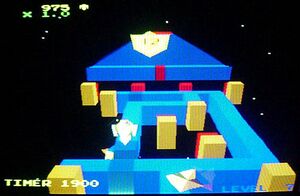
This level contains: 35 reds, has a time of 4000, and a best time of 1300; the yellow pillars on it move up and down, and can get in your way sometimes, but the real enemies on it are the stars, that circle around and home in on you. They move fairly slowly though so it is easy to avoid or shoot them - and the best score for the space wave is 1700.
Level 8[edit]
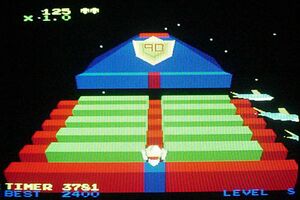
This level contains 91 reds, has a time of 4000, and a best time of 2400; there are also three Sharks "swimming" in between the green walls on it, which cannot be killed and can only be avoided. The best score for this level's space wave is again 2000 - as (because its number is a multiple of four) it will see you up against the Spiking Head again.
Level 9[edit]
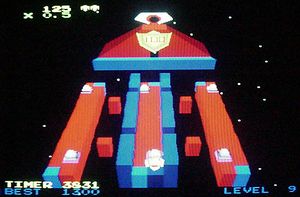
This level contains: 101 reds, has a time of 4000, and a best time of 1300; the Eye opens every three seconds on it, and the enemies in it are Pyramids that move up and down the terrain. They are fairly easy to avoid, but you should be careful when you jump - and the Pyramids cannot be killed (unless the robot touches one, which shall sadly take his current life, and the game if it happens to be his last one, with it). This level, for a third time, ends with collecting jewels inside the pyramid (as its number is again a multiple of three), and the best score for its space wave is 1975.
Level 10[edit]
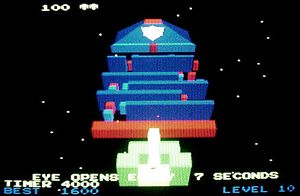
This level contains: 52 reds, has a time of 4000, and a best time of 1600; much like on level 6, you must destroy the blue walls and avoid all of the Footballs that are thrown at you by the Eye. The best score in the space wave is 930.
Level 11[edit]
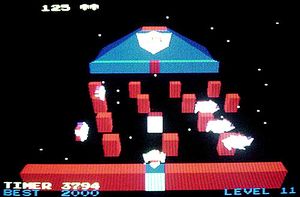
This level contains 30 reds, has a time of 4800, and a best time of 2000; there are also five Buzz Saws cutting the terrain away on it, which can kill the robot while he is in mid-air. You can kill the Buzz Saws, but you should not go out of your way to do so - and, the best score for this level's space wave is a rather unusually-chosen value, 1422.
Level 12[edit]
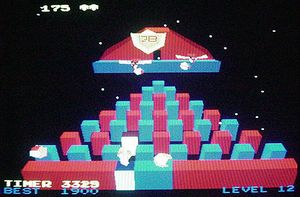
This level contains 31 reds, has a time of 4000, and a best time of 1900; there is a lot to jump to, and the Birds on it can drop balls which home in upon you (but they are not too hard to avoid if you keep jumping). This level yet again ends with collecting jewels inside the pyramid, because its number is, once again, a multiple of three - and the best score for the level's space wave is 1500, but because its number is also a multiple of four, it will see you up against the Spiking Head once again. By this point, the Tetras shall be able to kill as well (if they are not shot) so watch out.
Level 13[edit]
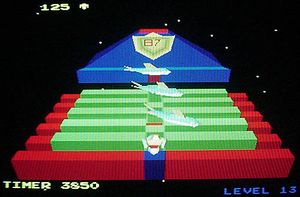
The level contains 88 reds, has a time of 4000, and a best time of 1700; this is similar to level 8, but there are green walls in the centre (and you cannot go all the way through which makes it much harder). There is not much jumping to do so you do not have to be concerned about the Eye and just watch out for the Sharks (which can jump over the green walls in the centre) - and, the best score in the space wave is the second rather unusually-chosen value, 444.
Level 14[edit]
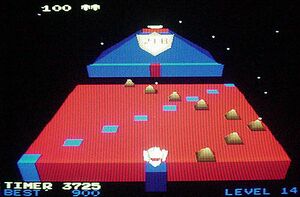
This level contains 218 reds, has a time of 4000, and a best time of 900; the Eye may open every three seconds on it, but you only have to make one jump at the end. There are also more Pyramids on it, and they are not too hard to navigate past - and, the best score for this level's space wave is the title's third rather unusually-chosen value, 758.
Level 15[edit]
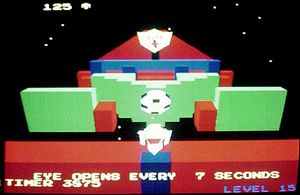
This level contains 70 reds, has a time of 4000 and a best time of 900; it can be hard to do because you have very limited movement and the Eye is firing Footballs at you. There are a couple of blue walls to shoot through, but you cannot shoot through green walls, and only the Footballs can break them - and this level, for a fifth time, ends with collecting jewels inside the pyramid (because the number is, yet again, a multiple of three). The best score for this level's space wave (if you can get to it!) also happens to be the game's fourth rather unusually-chosen value, 789.
Level 16[edit]
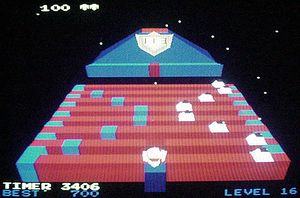
This level contains 113 reds, has a time of 3600 and a best time of 700; it is similar to level 14, but it is much harder to get past the Pyramids (more jumps will also have to be made on here). The best score for this level's space wave is 1800 - and because the level's number is a multiple of four it shall see you up against the Spiking Head yet again.
Level 17[edit]
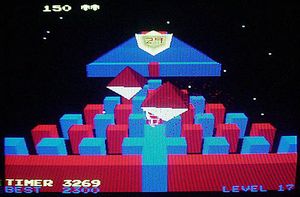
This level contains 31 reds, has a time of 4000, and a best time of 2300; it is similar to level 12, but instead of Birds, it has three enormous diamonds that shall home in on the robot and kill him when shot (so you must try not to shoot them). The best score for this level's space wave also happens to be the fifth rather unusually-chosen value, of 473.
Level 18[edit]
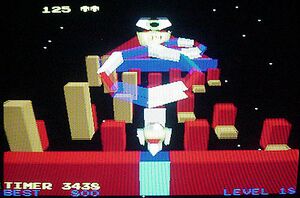
This level contains 35 reds, has a time of 4000 and a best time of 800; this is similar to level 7, but it has flying rings instead of stars. This level, for the sixth time, ends with collecting jewels inside the pyramid (because the number is, for a fifth time, a multiple of three) - and the best score for the space wave is a sixth unusually-chosen value of 418.
Level 19[edit]
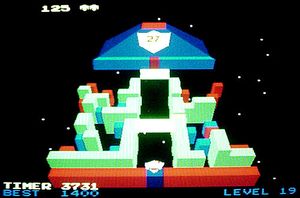
This level contains 28 reds, has a time of 4000, and a best time of 1400; it is quite hard, and you pretty much have to use a very high view (because the green walls block your view). The only things that can get in your way are the logs that roll down the centre (and you have to jump through their path twice) - and even though they can be killed, there is not really any reason to, as they will just keep on coming. The best score for the level's space wave is 900.
Level 20[edit]
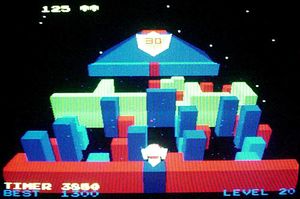
This level contains 31 reds, has a time of 4000, and a best time of 1300; it is similar to levels 6, 10, and 15, but this time, you'll have to use the Footballs to break through the green walls. This requires you to stand near the wall you want broken, and when a Football is thrown by the Eye, move away from it quickly - and there is not much to cover you from the Footballs in this level, so you will have to keep your finger on the Firing Button. The best score for the space wave is 500; because its number is a multiple of four it'll see you up against the Spiking Head for a fifth time.
Level 21[edit]
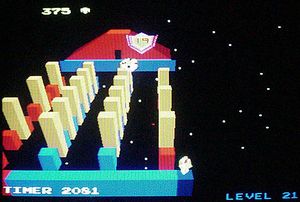
This level contains 30 reds, has a time of 2800, and a best time of 1000; it may look complicated, but you only have to get the reds on the edges of the level. The Eye throws Footballs at you, but if you are firing at them, there should not be a problem - however, the yellow pillars move up and down and can get in the way. The level, for the seventh time, ends with collecting jewels inside the pyramid (because its number is, for the sixth time, a multiple of three); it is also worth noting that the best score for the level's space wave if you can manage to reach it happens to be 770.
Level 22[edit]
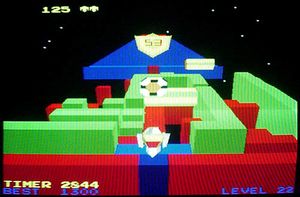
This level contains: 54 reds, has a time of 3600, and a best time of 1300; this is similar to level 19, but you'll have to deal with two rolling logs at a time, and Footballs from the Eye. You must press the Firing Button as fast as you can to get past those logs - and, the best score for this level's space wave is a seventh unusually-chosen value of 1729.
Level 23[edit]
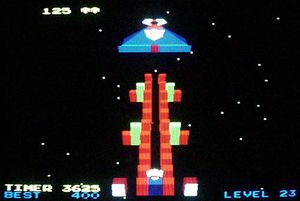
This level contains 38 reds, has a time of 4000, and a best time of 400; there are no enemies in it, so you shall just have to get all the reds (and time your jumps carefully, because the Eye opens every two seconds). It is also worth noting that the best score for this level's space wave (for a third time, if you can actually manage to reach it) is 460.
Level 24[edit]
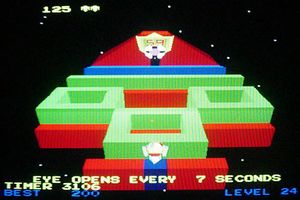
This level contains 60 reds, has a time of 3200, and a best time of 200; to get the reds inside the green walls, you'll have to make the Footballs break the walls like in level 20. This level, for an eighth time, ends with collecting jewels inside the pyramid, because its number is, for a seventh time, a multiple of three - and the best score for the level's space wave is 900, but because its number is also a multiple of four, it will see you up against the Spiking Head for a sixth (and last unique) time. The next time you meet him, he (like everything else) shall have had a palette-swap.
Level 25[edit]
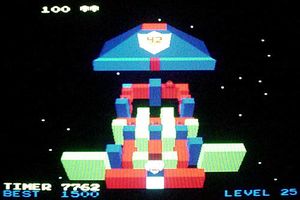
This level contains 42 reds, has a time of 8000, and a best time of 1500; it can be very hard, as you'll have to use a high view to see behind the green walls, and shoot the blue walls to get to the reds behind them. The main problem is that there are two more Pyramids hidden behind the green walls which appear after shooting the blue walls - and it is also worth noting that the best score for the space wave (for the fourth time, if you can actually reach it!) is 700.
Level 26[edit]
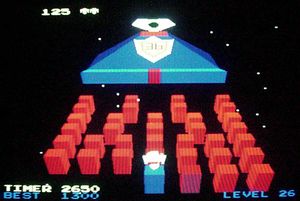
This level contains 37 reds, has a time of 4000, and a best time of 1300; there are no enemies in this, just the Eye, which opens every second. There are lots of reds to get too, so you must jump quickly and carefully - and the best score for the level's space wave, which is the game's last unique one, is the eighth unusually-chosen value of 488.
Levels 27-52[edit]
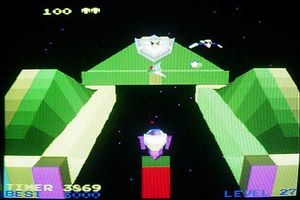
The levels start repeating themselves again from this point, and are exactly the same but with a few differences: the colours are different, all the Birds drop balls that home in on the robot, when inside the pyramids at the end of every third level the Buzz Saws move twice as fast, and there is a new type of enemy called the "Viewer Killer" which flies out of the pyramid straight at the player, not the robot; to avoid them, you will have to change the camera view, with the start buttons. The player should also note that with the different palette applied to this cycle, the robot must now move over the areas of the playfields that are colored yellow - for there is no red to be found starting from this point.
Levels 53-78[edit]
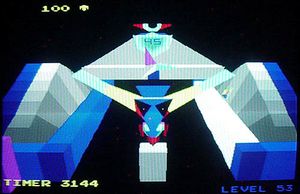
The levels repeat themselves for the second time at this point; this time, as well as the colours changing again, the Eye now opens every five seconds (instead of seven). The target color is: no longer red, or yellow - but rather blue.
Levels 79-104[edit]
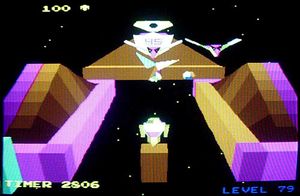
The levels repeat themselves for the third time; this time, as well as the colours changing again, the Eye shall open every three seconds. Note that once the player reaches Level 100, the level numbers shall no longer get displayed correctly, as the hundreds place is absent - so the level counter shall roll over to 0, and continue to work its way up from there. The target color for this (fourth) cycle of the levels is: no longer red, yellow, or blue, but rather magenta.
Levels 105-126[edit]
This will be the final time the levels will repeat before presenting a random sequence of levels already visited; these levels are called level 5-26 in game, due to the lack of a hundreds digit on the level counter. In this cycle, the Eye opens every four seconds and the target color is yellow (like Levels 27-52).