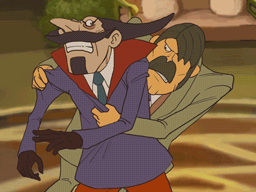

As soon as you try to move to another location, Constable Barton will come and tell you that Inspector Chelmey has asked everyone who arrived on the express to gather at the hotel. Once you reach the hotel, a cutscene will trigger. Inspector Chelmey, having examined everyone's alibis, accuses Sammy of the murder. However, a suspicious statement made by Flora prompts Layton to accuse her of being the theif, who turns out to be Don Paolo, Professor Layton's nemesis, in disguise! He had kidnapped the real Flora back in Dropstone, then followed Layton to Folsense while disguised as Flora. Don Paolo escapes while being pursued by Chelmey, but leaves the Elysian Box behind. Mystery The Box's Disappearance will be solved along with Beluga's Search.
Herzen Museum, revisited[edit]
Walk up the stairs to trigger another cutscene where Layton and Luke open the box, only to find that it contains nothing and that it didn't kill them. Back in the hotel room, you can now take a photo and complete a small minigame to reveal Puzzle 114. Exit the hotel and talk to Sammy for another ![]() Diary Key. Go to the West-Y Road and talk to Lila to trigger Puzzle 109, which will give you your final Tea Set ingredient, the
Diary Key. Go to the West-Y Road and talk to Lila to trigger Puzzle 109, which will give you your final Tea Set ingredient, the ![]() Cinder Horse, now you can brew the 4 last blends.
Cinder Horse, now you can brew the 4 last blends.

Return to the fountain outside the museum and check it to trigger Puzzle 090. Continue to the entrance and talk to Gregorio and serve him Clover Quencher if he's thirsty. After that talk to him for Puzzle 107 and Puzzle 108. After that, enter the museum and check the base of the leftmost pillar, the leftmost square tile and the right leg of the display stand for hint coins. Talk to Grinko, and check the display case and the statue in the back for more information about the Herzens. Go upstairs and check the sleeve of the leftmost exhibit, the right plate of the scaled and the top right of the map inside the large display case for hint coins. Then check both paintings in the room to hear more of the history of the Herzen family. You can take a photo of the scene and solve the minigame to reveal Puzzle 095.
Having checked all of the exhibits, you can talk to Grinko to receive another ![]() Diary Key. Now change the scene until Grinko is thirsty and serve him The Layton Elixir and he thanks you Puzzle 094. Leave the museum, move right and talk to Hopper for Puzzle 102 and receive
Diary Key. Now change the scene until Grinko is thirsty and serve him The Layton Elixir and he thanks you Puzzle 094. Leave the museum, move right and talk to Hopper for Puzzle 102 and receive ![]() Light Bulb hamster toy and serve The Layton Elixir if he is thirsty. Enter the alley and talk to Gertie for Puzzle 084. Return to the area outside the hotel and talk to Sammy for Puzzle 067 and serve Cinder Flower if he is thirsty. Then move in and out of the area until Opal is thirsty, then talk to her and serve her the Cinder Flower to receive Puzzle 091. Move to the station plaza and do the same thing until Rory is thirsty, then serve him the Sugar Smoke tea. Talk again with Rory to receive Puzzle 103. You receive a
Light Bulb hamster toy and serve The Layton Elixir if he is thirsty. Enter the alley and talk to Gertie for Puzzle 084. Return to the area outside the hotel and talk to Sammy for Puzzle 067 and serve Cinder Flower if he is thirsty. Then move in and out of the area until Opal is thirsty, then talk to her and serve her the Cinder Flower to receive Puzzle 091. Move to the station plaza and do the same thing until Rory is thirsty, then serve him the Sugar Smoke tea. Talk again with Rory to receive Puzzle 103. You receive a ![]() Jack-in-a-Box hamster toy for solving it.
Jack-in-a-Box hamster toy for solving it.
The abandoned mine[edit]
Move to the area north of the Cabaret and talk to Olsen for Puzzle 104. Enter the grocery store and check the pile of bottles to trigger Puzzle 099, which will net you a ![]() Trampoline hamster toy. You may try to give hamster a 64-step workout just for fun. Reenter the grocery shop until Garland is thirsty and serve him Sugar Smoke. Climb the watchtower and serve Clover Quencher to Geoff if he's thirsty. Now leave the town through the old gate. In the new area, check the leftmost pebble, one of the left clumps of grass and the lamp on the signpost for hint coins. Then, talk to Ray for Puzzle 087 and Puzzle 105. Serve him Cayenne Twilight and The Tea Master's House is now unlocked if you have served 26 thirsty people. Take the right fork of the road to what appears to be a locked gate. You can't do anything about the gate now, but you can check one of the left cracks on the road, one of the bottom right sections of the gate and the jutted square of the right gate post for hint coins.
Trampoline hamster toy. You may try to give hamster a 64-step workout just for fun. Reenter the grocery shop until Garland is thirsty and serve him Sugar Smoke. Climb the watchtower and serve Clover Quencher to Geoff if he's thirsty. Now leave the town through the old gate. In the new area, check the leftmost pebble, one of the left clumps of grass and the lamp on the signpost for hint coins. Then, talk to Ray for Puzzle 087 and Puzzle 105. Serve him Cayenne Twilight and The Tea Master's House is now unlocked if you have served 26 thirsty people. Take the right fork of the road to what appears to be a locked gate. You can't do anything about the gate now, but you can check one of the left cracks on the road, one of the bottom right sections of the gate and the jutted square of the right gate post for hint coins.

Now take the left fork on the road. In this new location, check the bottom left log attached to the entrance, the plant to the right of the entrance and the grass on the right hill for hint coins. Take a picture of the scene and solve the minigame to reveal the hidden Puzzle 066. Enter the mine and check the dirt inside the mine cart, the lamp and the hatch in the right machine connected to the pipe for hint coins. Check the door at the back for Puzzle 079. Go through the doorway.
Check the shovel, the broken lamp and the top of the dirt mound for hint coins. Check the picture on the wall for Puzzle 078, which will net you a ![]() Diary Key. Proceed to the left and check the dirt mound, the hole in the wall and the top of the pipe for hint coins. Try to go down using the elevator to trigger Puzzle 080. Press the elevator button to move down. Check the bottom left corner of the room, the lamp and the top of the elevator railing for hint coins. Then, check the safe on the wall to trigger Puzzle 081. Trying to go back up will trigger Puzzle 082.
Diary Key. Proceed to the left and check the dirt mound, the hole in the wall and the top of the pipe for hint coins. Try to go down using the elevator to trigger Puzzle 080. Press the elevator button to move down. Check the bottom left corner of the room, the lamp and the top of the elevator railing for hint coins. Then, check the safe on the wall to trigger Puzzle 081. Trying to go back up will trigger Puzzle 082.
Return to the surface and talk to Pavel for Puzzle 077, which will net you a ![]() Diary Key. Return to the fork on the road, where you will meet Joseph from the photo studio and he will explains some things and mystery The Goat Emblem will be solved. Take the path to the right. Move through the now open gate.
Diary Key. Return to the fork on the road, where you will meet Joseph from the photo studio and he will explains some things and mystery The Goat Emblem will be solved. Take the path to the right. Move through the now open gate.
Herzen Castle[edit]
In this area, check the left rock, the pebble next to the statue and the rightmost lamp for hint coins. Check the fallen lamp to trigger Puzzle 121 and the leftmost lamp for Puzzle 122. Continue forward and inspect the trio of small mushrooms, the tree stump and the rocks in the back for hint coins. Take a photo of the area and solve the minigame to reveal Puzzle 097. Check the mushroom to trigger Puzzle 125, then the fallen lamp laying where the mushroom stood for Puzzle 123.
Continue forward to reach an icy lake. Check the end of the left vines, the left patch of grass and the top right patch of land in the distance for hint coins. Inspect the middle of the lake three times for Puzzle 126, Puzzle 127 and Puzzle 128. Move forward and check the pebble just before the bridge, the rightmost tower and the rightmost wheel for hint coins. Try to move forward to trigger Puzzle 100. On the bridge, check the water wheel, the chimney closest to it and one of the right lamps for hint coins. Move forward.
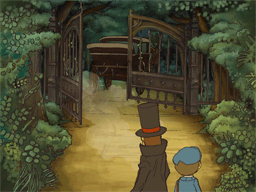
At the entrance to the imposing Herzen Castle, it is not hard to imagine what lies behind its door. Is there really a vampire living inside it? The truth will be revealed in Chapter 7.