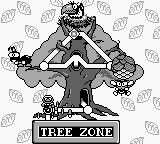
Tree Zone takes place in a humongous tree, which you will need to scale to reach the boss at the top, a nasty crow called Kurosu. You'll have to face a bunch of enemies just to reach the entrance to the tree, wade through the sticky sap in the tree's interior, scale tree branches that are crawling with ants and even trespass through a beehive just to get to the top. Climbing Tree Zone won't be an easy task, and this zone will prepare you for the challenges you will have to face later.
Level 1: Traversing the roots[edit]
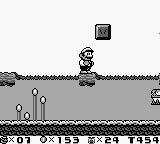
This level is primarily divided into two sections, the surface and the interior of the roots. Most of the enemies here are Bopping Toadies, simple enemies that jump around as a means of attack. You also have to watch out for Ragumo, moles that burrow out from the ground. As you jump atop the roots, there will be one thin platform early on. Jump up and to the right to bump into a hidden block. Jump on to the hidden block and jump up and left to reveal another hidden block. Keep doing this and you will create a staircase that will take you to a 1-Up perched high above the ground.
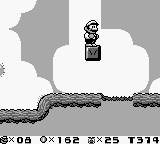
Continue along the roots, switching between the top and the inside of the roots to collect the coins scattered around. You will soon come across a small bump in the roots. The bump isn't very large, but it is enough to prevent you from jumping from within the root to the top. On the bump is a gap. Stand on the part of the root immediately to the left of the gap and jump up to reveal another hidden block. Repeat the process as before to create a staircase to another 1-Up. Across this bump is the first instance of a Spikey. Spikeys will attempt to harm you by rolling into you. You can still safely defeat them by jumping on top of them, despite their spiked backs.
The level continues with segments of root leading up to a higher bump. You will also encounter a Kyotonbo. These dragonflies will slowly home in on you, and you can easily defeat them by simply jumping on them. Past the second bump is the checkpoint bell. Past the checkpoint bell is a bump so large it's basically a small hill. If you fall into the roots at this point, you will have to go back to the gap below the checkpoint bell to return to the surface, but you can get quite a lot of coins if you fall down there. The interior of the roots are blocked off at this point, so you must jump to the top of the hill and cross it to the other side.
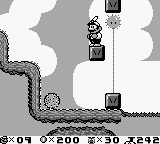
Another Spikey is located here. Get on to the block beside it, then jump up and left to reveal a hidden block. Continue jumping around the hidden blocks to form a ladder, this time leading to a path in the air lined with tons of coins, which also lets you skip a considerable number of enemies. Alternatively, jump to the right of the block from below to reveal a hidden block beside it containing a Star. Collect it and use your invincibility to plow through the enemies for the rest of the level. At the end, you must use the blocks to reach the goal bell. Before you do, jump right beside the goal door to reveal a hidden blocks, then jump up from the hidden block to reveal another block containing a 1-Up!
Level 2: The sap-filled interior[edit]
The main mechanic throughout this level will be the sticky tree sap that drips off the ceilings and hang from the walls of the tree. Enemies are scarce here, as there is a bigger focus on platforming. You will run into cow-fish hybrids called Mogyos that swim in sap and can be stomped like every other enemy. You will also encounter a deadlier cousin of the Buzzy Beetle, the Noko Bombette. These ordinary-looking creatures will actually turn into a bomb after you stomp them, attempting to harm you with a suicidal explosion. Be sure to steer clear of it after stomping it, or just ignore it completely.
You will be wading through sap very often throughout this whole level. The sap is a bit similar to water, in that your movement is slightly restricted when inside. Your speed will be halved and your jumps cover almost no height, though you can hold the ![]() button to keep moving upward. The sap can act as pseudo-platforms to let you jump off or even as a way to bypass spike pits, a feature you must exploit in order to make it to the end of the level.
button to keep moving upward. The sap can act as pseudo-platforms to let you jump off or even as a way to bypass spike pits, a feature you must exploit in order to make it to the end of the level.
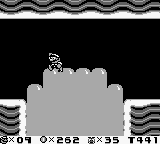
After the checkpoint bell, the level will split into two, but will ultimately reconverge near the exit. The top path focuses on more sap platforming, but the bottom path will introduce you to a new power-up, the carrot! Similar to the leaf from Super Mario Bros. 3, you can use it to fly or slow your fall. In fact, the bottom path has a huge valley of spikes without sap to help you bypass it, which means that you need the carrot's gliding abilities to make it across. Both paths contain a 1-Up, but the 1-Up in the bottom path is easier to get while the 1-Up in the top path needs you to precariously drop down from some sap on to a short platform above a spike bed. To reach the bell at the end of the level, you need to use the sap to get to it, but its wierd properties may mean that you will miss it for a few tries.
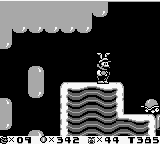
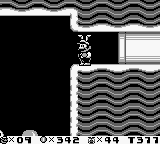
This level also contains a secret only available to keen adventurers. There is actually a alternate exit in the level that leads to the other side of the tree, unlocking a hidden bonus level. Read the spoiler below to find out where it is.
[edit]
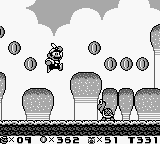
A hidden exit from inside the tree leads to an unseen side of Tree Zone, a path lined with huge mushrooms. There are only koopa troopas on this level and no challenging platforming sections, so think of this as a breather level where you can get more coins and power-ups. Completing the level will unlock a new background for the Tree Zone map, featuring blooming flowers.
Level 3: Branches with ants[edit]
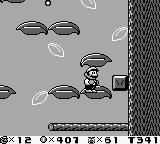
On the treacherous leaves and branches of the Tree Zone high above the ground, you must watch your step to avoid falling to your death. This level is infested with bugs and plants, primarily the Antotto, which are basically a reskin of a goomba. You will also encounter Battle Beetles that can move across ground and fly, but a single stomp will take them out. There's also the cowardly Be that will fly away when you approach them. They pose no harm to you, but can bait an overeager player into making a bad jump while trying to kill them. Other than pirahna plants, you will also meet another species of dangerous plant, the Venus Fire Trap, which will spit fireballs at you.
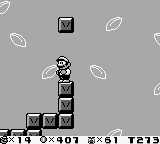
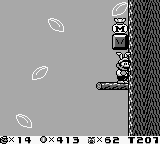
There are a couple of hidden blocks in this level. At the rightmost area of the lowest level, you can jump while huggging the wall to discover a hidden block containing a 1-Up. On top of the area where you had to race a 1-Up after bumping it out from a block, there is another hidden block that you can reveal from standing on the highest part of the platform. Also from this position, if you have a carrot power-up you can reach a ledge at the right which has a question mark block containing a money bag full of coins! Finally, at the two dropping platforms near the goal, jumping at the right side of the first platform will reveal a hidden block containing another 1-Up, but the falling platforms make it difficult to catch.
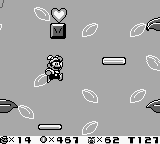
To reach the bell at the end of the level, use the two falling platforms to get to the top layer of leaves. Jump across these platforms on to a moving platform to get to the bell.
Level 4: Infiltrating a beehive[edit]
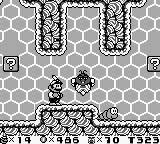
While choosing to pass through a beehive to reach the top of Tree Zone has less tricky platforming challenges than climbing the tree's branches, you will have to face the dangerous insects that guard this hive. You will encounter lots of Bibi and Skeleton Bees, both of which are immune to fireballs. They will attempt to ambush you from certain honeycombs and must be dispatched with a stomp, but you need a drill kick to be able to keep a Skeleton Bee down for good. You will also encounter the larvae that live in the hive, which are the Unera and the Grubby. These enemies move slowly and are easily defeated, though the Grubby has spiked back as a defense mechanism against stomps. Other than the previously mentioned enemies, there are also Buichi, which are the beehive's version of Thwomps, and the Tamara, wierd spinning eggs that appear out of the plant pods in one of the rooms.
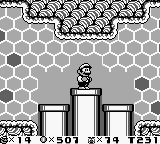
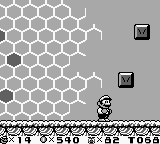
Overall, the level is quite straightforward, with few secrets to discover, so focus on survival against the bee enemies. There will a room with three warp pipes that lead into a lower chamber full of question mark blocks, which might seem a bit confusing at first. The trick with this is to take the center pipe to the lowest level, then work your way up, trying to kill the Uneras and Grubbies by bumping a block underneath them. At first glance, there might seem to be no way to reach the ending bell, but jumping a bit to the left of the visible platform will reveal a hidden block which will let you reach the second block and the bell.
Level 5: The nest of Kurosu[edit]
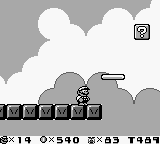
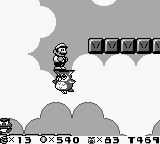
On the highest point of Tree Zone lies Kurosu, a holder of a golden coin. To reach it though, you'll need to make your way across a dangerous obstacles course, and one wrong step means instant death. You'll mainly be facing paragoombas, but you will also encounter bird enemies called Dondons. You will also meet a friendly owl called Heavy Zed, who will ferry you across the air if you stand on his head.
Be very careful as you go through the level, since there are few sections of solid ground and a lot of moving platforms. Having the carrot power-up will help you immensely, and luckily, one happens to be in a question mark block just after the checkpoint bell. You can afford to be patient as the timer is quite long, so don't rush across the level. Once you reach the horizontal warp pipe, you're ready to challenge Kurosu, whose nest is located on the other side.
Boss: Kurosu[edit]
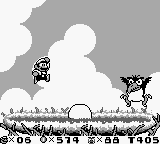
Kurosu has a simple attack pattern. It will hover on the top of one of two sides of the screen before swooping down at you, and you need to stomp it or throw fireballs at it when it is low enough. The swooping is easy enough to avoid, but landing on it while it is swooping can be a bit difficult due to its speed. The ideal time to stomp is when it is slowly descending just before the swoop. Alternatively, if you have kept a fire flower power-up, you can blast it with fireballs whenever it gets low enough, then jump to avoid it. It takes three stomps or six fireballs to take down this bird.
After Kurosu's defeat, you will get the golden coin of Tree Zone, which it hid in its egg. You have conquered your first area, and have partially unlocked the door to Wario's Castle! Your next destination will be the Space Zone, although it's whereabouts might not be immediately obvious.