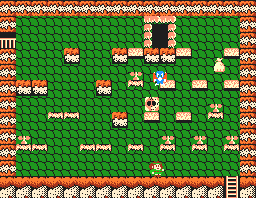
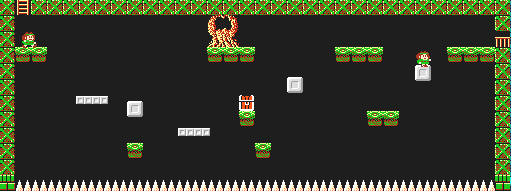
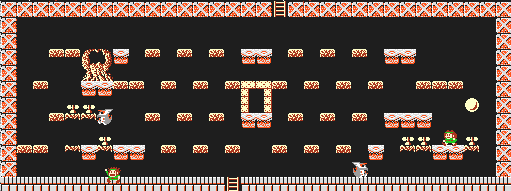
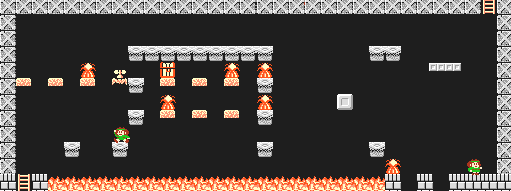
To get to Gauss Town from Ral Lake is a two step process. First, you must escape from Ral Lake and return to Gize Cave. To do this, walk to the west most tree above the lake entrance and face north. This will create a sandy path from one side of the lake to the other. Use it to return to the cave. To reach the town from here, you must walk across the path created by the two arrows to the left of the cave entrance (shown on the map on the walkthrough page). This will cause another tunnel to appear that will take you over to the town. A path from the tunnel to the town should be present after you clear Ral Lake.

Room 1[edit]

You will be thrown into the fire right away with a moderately challenging room consisting of quite a few single platforms and flying enemies. The right side of the screen is a bit more accommodating for attacks.
Room 2[edit]

More of the same as the previous room, but in a smaller space. Even though there is no Demon Seal to replenish your stock with, you may wish you use one up here to hurry the process along. The good news is, you won't be faced with single platforms again until room 12.
Room 3[edit]

A pile of gold worth 10 gold pieces is hidden at the top of the path of the left floating block, but it can be tricky to collect without getting squashed.
Room 4[edit]

This room is comparatively easy to complete, with plenty of platforms to attack from, a Demon Seal near the enemy generator, and no flying enemies. Look for the escape on the left.
Room 5[edit]

An extra life awaits you in the treasure chest of this room. Watch out for the rising fire and make your way to the lower left corner.
Room 6[edit]

This room is a different type of no-enemy room. It does not contain any fire, but the entire floor is filled with spikes. Avoid falling to your death and ride the various platforms and blocks to the right side. The treasure chest here contains parchment.
Room 7[edit]

Another piece of parchment can be found in the treasure chest here. Avoid hanging out in the lower left corner for too long as you can become trapped here.
Room 8[edit]

Grab the gold statue in the treasure chest if you're looking for something to sell in exchange for gold. Carefully hop along the platforms to reach the ladder in the lower left corner.
Room 9[edit]

You will find the very important Magic Key in the right side of this room. Do not miss it, or you will have to return here in order to escape the ruin. Other than this, the room contains no surprises or secrets.
Room 10[edit]

Room 10 is largely a mirror of room 7. Fight carefully and avoid the lower right corner until the escape appears.
Room 11[edit]

This room hides the entrance to the secret Aura Star piece chamber rather inconspicuously. It happens to be hidden in the lowest platform in the middle of the room. To reach it, you will have to climb to the top platform, walk to the right, and traverse back to the left along the middle platforms. The right chest contains parchment, but the left chest contains an extra life. If you are in possession of the crown, you can jump three times on the left side of the lowest central platform to make the entrance to the secret chamber appear. Be careful when climbing back out.
Secret Room[edit]

Again, thanks to the arrangement of the platforms, you won't have to deal with the demon on the floor of the room very much. You will just have to be careful when he spits fireballs at you. Jump up to the high platform on the right and exchange the crown for the Aura Star piece.
Room 12[edit]

The arrangement of this room makes it especially challenging. Between the numerous single platforms and the flying enemies, you will have your hands full. A Demon Seal hidden on the right side of the room can make things move a little quicker, but you'll still have to rely on your skills. You will be able to kill enemies more easily close to the floor.
Room 13[edit]

This is not one of the harder fire rooms to cross, as you can reach the top of the room and use the platforms there. The treasure chest on the right is of great importance, as it contains the Necklace sacred treasure, which is needed to enter the secret Aura Star chamber at King's Grave. Don't miss it.
Room 14[edit]

Although not shown on this map, there is a helmet that you can collect from one of the attack platforms to the right of the hut contained in this room. Collect it once a large number of enemies have appeared and then crash into as many of them as you can before the invincibility wears off.
Room 15[edit]

The final fire room for this ruin should present no problem for you.
Room 16[edit]

The final room is very generous with attack platforms. You can perform a majority of your kills close to the floor of the room. Make sure you collected the Magic Key from room 9 before coming here, and that you have collected the Necklace from room 13 before you leave.