(83 complete, plus 86 and 87.) |
(88 to 92.) |
||
| Line 78: | Line 78: | ||
* R D U 2D L R L D 2R 2L 3U L 3D R 3U L 3D L 3U 2L D 2R U (danger!) 2L D R D R D L U L D R L U 2L D R U D L 3U D, clearing the entire south area. | * R D U 2D L R L D 2R 2L 3U L 3D R 3U L 3D L 3U 2L D 2R U (danger!) 2L D R D R D L U L D R L U 2L D R U D L 3U D, clearing the entire south area. | ||
* 4U R L 2D R U R D L U R U R 2D R U R D L U R U R L 2D R U 3R D 3L U R D 2R ( center area gone) U L U L U 2R D R 3L U 2R U R 2U 2D 2L 2U 2D 2L U R D L U. Now you have all the chips, so get to that exit up there! | * 4U R L 2D R U R D L U R U R 2D R U R D L U R U R L 2D R U 3R D 3L U R D 2R (center area gone) U L U L U 2R D R 3L U 2R U R 2U 2D 2L 2U 2D 2L U R D L U. Now you have all the chips, so get to that exit up there! | ||
==Level 88: Don't Get Lost== | ==Level 88: ''Don't Get Lost''== | ||
[[Image:Chips Challenge Level Pack 2 Don't Get Lost.png|thumb|right|Level 88, time limit 400, 12 chips. ''Why'' do you need ''three'' hints, a level title and this guide to tell you not to get lost?]] | |||
Each of the ten sections of ''Don't Get Lost'' contain some chips guarded by pink ball clone machines and other obstacles. Don't get lost! | |||
Wait two moves to take the first chip, then wait two moves to join the ball stream. Teleport down to room 2 and wait two to join this stream, then drop to the bottom and take the chip in the corner. To get to the south of the teleport, move the block aside, then jump into it and move east to another ball stream. Wait two moves again, then take the flippers and chip to the west. With flippers, you can swim through the center shortcut, then go west to room 4. Continue to spiral through the water spaces and wait for the next clone, then teleport to room 5 and pass this stream to the south for another chip. Wait two moves, then cut across the stream again and take a "shortcut" to room 6 by sliding RL. | |||
Continue to hold the west key, then join this next stream in time, take the flippers and chip, and swim west to another chip. Take another teleport west, join this stream, and temporarily divert north to slide on the force floor and take the chip before going back to the stream. Wait two to join, then break north and get the fire boots to allow Chip to teleport west to room 8. First, take the chip at the top, then return to the center of the room and zigzag across to the teleport, waiting two moves for the stream at each turn. This is the one chip that is not required. | |||
Stop for one move before you run smack into the existing stream in room 9, then slide around the force floors, either dropping one move and boosting or not using the boosting, to another chip on the east. Circle again, then break off at the teleport to room 10. Approach the chip on the top from the right, then walk to the final chip and up to the exit. Your 317 seconds have been found again! | |||
==Level 89: ''The Ghetto Defender''== | |||
[[Image:Chips Challenge Level Pack 2 The Ghetto Defender.png|thumb|right|Level 89, time limit 450, 10 chips. So is the ghetto that water pool? ...well, I guess there ''is'' one glider in this level...]] | |||
Don't just stand there, move! Step 2U R 2U 4R to sneak past the teeth, using even step, then run all the way down to fire boots, east to a green key, and 2U 6L 4U to safety. | |||
Pass through the glider and balls, take the level's ten chips, and shove blocks 6, 5 and 3 into the water to reach the flippers. However, since they are not required anywhere else and will not reach the yellow key safely, ''don't take them!'' If you do, you lose some crucial time. Sneak past the walker and the two gravel spaces, and take the upper ice slide past some bouncing balls to reach one final important section. | |||
From the gravel, run 5L4U or any other route necessary to avoid the monsters without losing time, as there is a walker in this room. Sneak back out of the room, past the bouncing balls, and through the yellow lock, which leads to an exit with a trap in front of it. However, you can just ''barely'' make it off into the exit to score a time of 381. This was the first world record time I explicitly developed a route for; the previous record was 379 and took the unnecessary flippers, wasting enough time to not make it off the trap. | |||
Also note that the section to the west of the start is a trap because of the hidden wall; while there are ten chips there, Chip can collect the required ten faster on his normal route, and Chip can't escape this area due to the teeth. | |||
==Level 90: ''Marjolaine's Maze''== | |||
[[Image:Chips Challenge Level Pack 2 Marjolaine's Maze.png|thumb|right|Level 90, time limit 280, 13 chips. <Caption removed due to copyright claim by Marjolaine>]] | |||
''Marjolaine's Maze'' is a maze, although it is composed of several disparate sections with a couple of secret shortcuts. | |||
Pass the thief to the south, then teleport DUD to take a slightly shorter route through the maze, also collecting a blue key. Collect everything but the red key, then slide UDU through the teleport. Because the red lock blocks Chip, this slide takes Chip back to the blue key, where he can jump over the ice corner and unlock the fire boots. Wind back through the maze to 13 blocks; eight of them are actually clone blocks. Blocks 1, 10, 11, 12 and 13 are movable, but block 1 is unusable. | |||
Move block 13 out of the way, then shove block 12, or any of the other blocks, 3D 12L (11L, 10L) 6D, take the chip to the right, and then 5D2R further to bridge to another chip. Walk out onto the ice, take the remaining chip and now skate to the fire area. From the chip, walk 4D3RU [3] URU past the bugs, then take the chip and backtrack out the same way, then clamp down to the green key. To finish, slide LR through the teleport, take the three chips above you, and then slide LRL to take the one last chip on the way over to the exit...204 seconds await. | |||
==Level 91: ''Tutti-Frutti''== | |||
[[Image:Chips Challenge Level Pack 2 Tutti-Frutti.png|thumb|right|Level 91, time limit 750, 66 chips. Doesn't this seem similar to ''Smorgasbord''? ...Well, yes, it actually is.]] | |||
''Tutti-Frutti'' is one of the two levels credited to Christian Stahl, but which was actually made by Anders Pemer, according to Christian himself. Like ''Smorgasbord'', ''Tutti-Frutti'' has a slight Scandinavian design reflecting their origins, and it is one of the common ''itemswapper'' levels: trade X item for Y item. You'll be getting pretty much everything. This job is tediously long, with several shortcuts (atypical for levels of this type), but with this map, the level is much easier. | |||
Collect the fire boots first, then go to the red key, ice skates, blue key, flippers, 65 chips, and then the green button which is guarded by a thief. Fortunately, the toggle wall leads to the glider and exit section, which allows Chip to teleport back to civilization. Take the two keys, then go through, and note this for later. | |||
Continue with the suction boots, yellow key, yellow key two and fire boots, flippers, and now, with one yellow key, fire boots and flippers, chip 66. Move towards the fire boots, then turn east and open the chip socket to collect the green key. Now, Chip can either swim through the water and arrive at the exit safely, or use a daring shortcut through the teleport. As this teleport leads ''directly'' into the glider circle, luck and/or timing is required. Enter the teleport at ''471.2'', or as late as 470.6, and then open the green lock to exit. 468 different flavors! | |||
==Level 92: ''Abandoned Mines''== | |||
[[Image:Chips Challenge Level Pack 2 Abandoned Mines.png|thumb|right|Level 92, time limit 500, 38 chips. Let this be a warning: ''do not'' clash magnetic forces, teeth and blobs in places with mines in them!]] | |||
The route for this level required a ''long'' time to optimize to the limit, which was enough for me to raise the existing record of 456 to 457 and 458 with further refinements in the last section, until more diligent work in that very section from a team of two sent the record up to 459, where it stands. For any quick route, odd step is required. | |||
Get the suction boots, open the blue wall on the right to release half of the blobs, and meanwhile collect the chips. Move 6L 2U 3L 2D, then L or R and take the next one, then the chip in the back of the next bug, the two in the center, the chip in the back of the northern bug, and now 4R2D5R2U to trap the fourth bug. Collect the remaining chips and walk out to the blob area, where the blobs have hopefully cleared out. Get the flippers and now step L U L U 2R 3U past the blobs! | |||
If you're still here, keep swimming, jump onto the force floors, and override the west force floor at the top. Remove the four chips on the solid land, then move 2D to reach the next circle. (Note that you can move L instead, decreasing the strain on the boosting and using a move Chip has to expend anyways.) | |||
You arrive in a teeth room next. Waste one move on the north wall if you didn't use it, then take the first chip and run 6R 5D 6L D [1] 3RD, which will lead to the last and toughest section: the back-and-forth force floor room! The route through this? Step on the ice and then move as follows: | |||
L3R2D [1/2] R2DLDUL2D [1/2] R3L2U [1/2] L2URUDR2U [1/2] U, and then slide the ice strip to the left to the exit. It may be that as much as 459.8 could be possible, as the current "benchmark solution" is 459.4 and has two mistakes. | |||
L3R2D | |||
==Level 93: Exit Chip== | ==Level 93: Exit Chip== | ||
Revision as of 18:35, 31 July 2009
This is a continuation of the walkthrough for Chip's Challenge Level Pack 2. Levels 81 (Just Enough) through 100 (Torch) will be discussed on this page.
Level 81: Just Enough
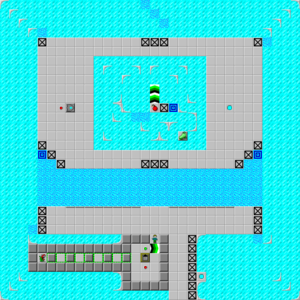
Only four blocks can be cloned before the teeth will escape from the line of toggle walls, which is why there are "just enough" blocks to do the job.
Move the first cloned block R2U5RD, then the second R2U6R2D onto the ice, and use the other block to stick it in the ice. As this area was not walled off, this ice rink will allow Chip to collect two of the blocks in this area instead of taking them one apiece, also cutting the return trips drastically. Collect a third block, move it R2U5RD as well, and lock a second block into the ice in the same way. Clone block four and use a spring step to push the block R, which alters the slide delay. To avoid another delay, do not touch the red button, which would release the teeth eventually onto the force floor.
Move the block onto the ice strip, wait 2.5 moves, and then follow it. Continue sliding R, which will pick up the first block, then move D and then R back to the original space, and R to collect the second sliding block. Go back to the start to collect the fourth block, then carry it all the way through to the teleport and step UL, and now move this block onto the suction boots with the thin wall under them.
As there are three tiles on the same square, the thin wall will disappear. This was a key development in the level's route, but eventually the bust erased much of the importance. Collect the suction boots, then step RDL to slide all the way to the west, and clone a glider and slide onto the force floors, awaiting the explosion. When the glider destroys the bomb, slide to the exit. 346 seconds are just enough.
Level 82: The Block Stops Here
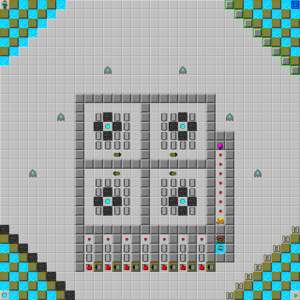
In The Block Stops Here, Chip's major challenge is to choose between seven areas with red buttons in them, six of which are deadly!
Run all the way to the southwest teleport and then circle alternately counterclockwise and clockwise through the four rooms, moving U into each teleport, to get the 11 chips in each of the four rooms. Once again, enter from the south to return to the southwest block pyramid, then run 8R to position the loose block.
Step on the entrance to all the chips once, revealing a bomb in each of them, in the order 1, 2, 3, 4, 5, 7, 6, and touch the red button in the sixth alcove, which will detonate all the bombs in turn. Run west and nudge the loose block L before collecting the remaining chips from left to right. From within alcove seven, get in the two-space gap between the gliders and run 5R U R 2D 3R L 2U L, which allows one of the gliders to touch the green button for you as you run straight up to the northeast corner with the exit. The clock stops here at 253.
Level 83: Warehouse I
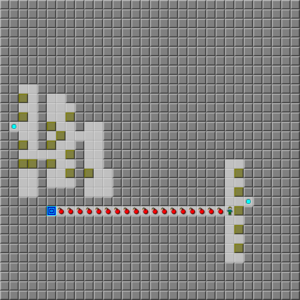
This Warehouse is both smaller and shorter than the behemoth successor located at slot 122. The very tight dimensions, however, make precise maneuvers mandatory to complete the level, and to get the 388 bold time, there must be no mistakes. The usual method of block numbering is divided into the four areas of Warehouse I; Chip starts in room 4.
Enter the teleport, run down, and move block 4 in room 1 2D. Move block 5 U3R to join in room 2, then block 6 in this room 2UR, and block 5 U, which allows for some room. In room 1, push blocks 3 and 2 D and 2D, allowing you to use block 2 in room 4 (D2R3DR) and block 3 (U2R). Now, in room 2, use block 2 on the bombs. With the path to the bombs open, the remainder of the level involves untangling the mess of blocks in the other rooms.
Start with blocks 3 and 4 in room 1, then the block between the warehouse rooms, and then move the block on the right wall of room 1 through and D, to get ready to explode it. First, collect block 1 here and teleport it through, and afterwards, follow with block 1 from room 1 in the same way, then using the remaining block in room 1. With room 1 cleared out entirely, move to room 2. Seven blocks are currently in here; use blocks 6, 5, 4, 2, and then 3, leaving only 1 and 7 which are currently unusable. To allow this, Chip must clear out room 3.
Knock the block lodged in the entrance 2R2D, then use what is now block 2 and then block 1. When moving block 1 out, Chip will be heading north towards block 1 in room 2; move this 2D before continuing with the push. Now, take block 1 out of room 2, then follow with block 4 from room 4, and similarly, move block 7 in room 2 4U across the east wall as you circle behind block 4. Now, simply take room 2's block and then room 4's remaining block into oblivion, and finish the level to fork-lift 388 seconds into your stock.
Level 84: Crypts of Aganorak
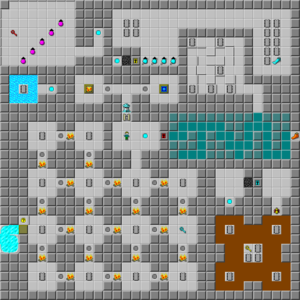
No, I don't know what AGANORAK is; only the level owner does, and I haven't been successful in finding out even from him. Based on the apparent fictional locations in the levelset, it's probably just made up.
Slide south through the teleport, then move up two rows and run west to pilfer the red key. Run to the very top of the level to escape the ball juggernaut, then slide UD through the teleport and enter the red lock to the east, which leads to a blue wall maze containing fire boots and a section of chips. Well? Take both!
When you emerge from this maze, slide LRL through the teleport (slightly faster than just walking) and run south into the fire maze. Move through the rooms L U L 3D R U R D R U L, then return to the teleport and step up into it to enter the bug area. With perfect boosting to date, including this one, you can bust directly through the blue lock and slip just past the bug. You can to take the goodies in most any order; you can dive into the center after getting 1, 2, 3, or even all 4 of the corner chips. Go back through the teleport, then zip east...and here's where you might need a bit of assistance from Lady Luck.
There are 4 chips on the left, and 9 chips and flippers on the right. You can afford to lose as many as four moves without loss of a second, but try to get back as soon as possible. Return to the start room, then circle around the teleport and enter from the east to swim to the last chip. Slide RL, pass the chip socket, and turn east (as said by the hint in the fire maze), which leads to a block with a buried exit, while the other block has fire under it! Inside the crypt? A treasure worth 426 seconds.
Level 85: Follow the Glacier Brick Road
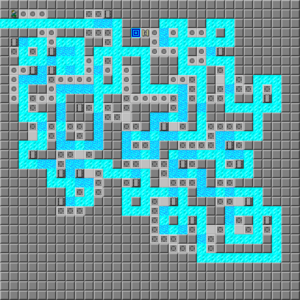
Like Mads' Rush II, which can take upwards of 1,000 attempts, you could be spending an entire week, or maybe a month, or your whole life, trying to collect this bold. It may be that a significant slice of the highest level of Chipsters will never collect this bold. At this writing, there were only four or five that did, me included.
This is the route:
- 3R D R 2D 2L U D R D 2L 3D R 4D U R U 2R 2D 2L 2D 2U 3R D L 2R 2D L D 2L U, then backtrack all the way to the chip close to the north-west corner.
- D 4R 2U R 2U 2L U 2R 2L D 2R 3D R 5D 2L U 2L 2R D 2R D R D R D 2L D R L U 4R 2D 3R U L R D 3L D R 2L 4D 2R D 3R (this is the toughest section) 2U L U D 5R U D 2L 2U R 3L U R U R L D L D 2R 2D 2L 2D. Continue to backtrack all the way to where you run out of visible recessed walls.
- U L U L 3U 5R 2D L 2R D 3R 2U 3R D L. Backtrack up to the visible pop-up walls, then continue U 2R 2D 2R 4U 2D R D 2R D U 2L U L 2D 2L 3U and follow the visible walls to the exit.
Now, the crunch? The top score of 306 requires 72 out of 72 boosts! That isn't hard except for the fact that several of the important sections require combination boosts with two spaces in between each ice square (such as the 5R move in the "toughest section" label), which are tough to do once, and with more than one in a row, it is a huge feat. And there's twelve of these double boosts in the level. Sometimes they even intersect to make a triple boost.
The more you play it, the easier it gets. All I can say is to move the interchangeable sections around a bit to your needs, and make sure you practice the southeast corner above all! {-}
Level 86: Creative One-Ways
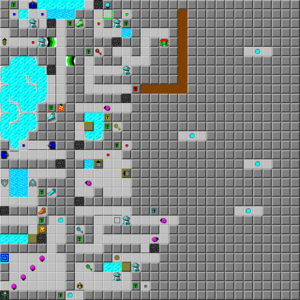
Yes, yes, Creative One-Ways deserves its name. While it is now a common format, this level was one of the first to use the one-way street. Your goal in this level is to reach the end of the one-ways and take the green key, then use that key to pass by the obstacles blocking the way back, and then finally to use it to get to the exit, which is inaccessible at this point. You'll want to use odd step to save an extra move.
Run past the balls, pass the safe block, and sneak past the gliders and tanks to an ice rink. Follow the fireball clones north to the blue button, then step LDLU2R to sneak past the tank. Although you probably don't wish to, you have to start cloning the walkers; escape that room and walk past the thief to the bouncing ball below. Wait, then take the longer slide to the south and run past the clone blocks to another thief, and turn left. Wait on this ball to bounce all the way west, then dive into the niche on the right and sneak past the ball as it bounces back west. The final obstacle is the bug below; after he hits the block, push and dodge it, then walk behind him to take the green key. Now it switches directions!
Wait for the bug to clear away from the green lock, as you can't open it quick enough to be released, then open it and wait to be released from the trap, at which point you go back to the west and take the blue key. Use this blue key to avoid the ball at the top, and then move to the block room in the center.
Open the lock at the top to clone a block, then shove the block DL [1] U2LU into the water, and approach the ice room. Take the yellow key, open its lock, shove the block L to the corner, and then step DR2U2RU to escape the room. Get the red key and use it to enter the passageway to the far right; touch all but the last dirt, then emerge back out, having trapped the teeth, and return to the walker room.
Unlock the green button and wait for the walkers to stop, then pass through the tank again and get the suction boots. The deadline for the bold is 270.0 at this point; this is unlikely but not uncommon. Use these to stand on the force floors, which avoids the fireballs, then either take the ice skates and skate to the blue button, touching it twice, or slide to the button and use a DR quick boost to escape the tanks; neither route is any quicker.
Wait for the bigger gap in the gliders, then jump down to get the flippers. Swim back to the start, get the fire boots, and push the hot block R, which will allow you to free the exit. Go to the bottom and teleport RLRLRL, which allows Chip to use the block against the last two balls, so that you can (finally!) get to that nagging exit. You score 249 if your luck is good enough; keep trying. Remember that odd step will be a help.
Level 87: The Walker Machine
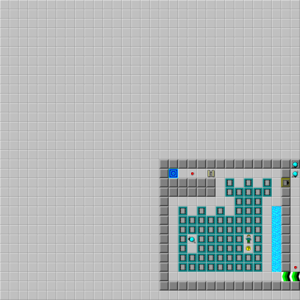
The Walker Machine is the spiritual sequel to Jumping Swarm from CC1. While the original has received a reputation for being extremely hard, that is because the majority of those players don't have a map, which causes them to spend more time looking for the chips and more walkers come into the level. However, The Walker Machine is a lot smaller, there is water in play, and the chips under blue walls format allows for many routes just like Jumping Swarm. This is just one of many routes through the level that will achieve 20.8:
- R D U 2D L R L D 2R 2L 3U L 3D R 3U L 3D L 3U 2L D 2R U (danger!) 2L D R D R D L U L D R L U 2L D R U D L 3U D, clearing the entire south area.
- 4U R L 2D R U R D L U R U R 2D R U R D L U R U R L 2D R U 3R D 3L U R D 2R (center area gone) U L U L U 2R D R 3L U 2R U R 2U 2D 2L 2U 2D 2L U R D L U. Now you have all the chips, so get to that exit up there!
Level 88: Don't Get Lost
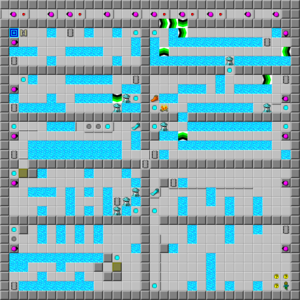
Each of the ten sections of Don't Get Lost contain some chips guarded by pink ball clone machines and other obstacles. Don't get lost!
Wait two moves to take the first chip, then wait two moves to join the ball stream. Teleport down to room 2 and wait two to join this stream, then drop to the bottom and take the chip in the corner. To get to the south of the teleport, move the block aside, then jump into it and move east to another ball stream. Wait two moves again, then take the flippers and chip to the west. With flippers, you can swim through the center shortcut, then go west to room 4. Continue to spiral through the water spaces and wait for the next clone, then teleport to room 5 and pass this stream to the south for another chip. Wait two moves, then cut across the stream again and take a "shortcut" to room 6 by sliding RL.
Continue to hold the west key, then join this next stream in time, take the flippers and chip, and swim west to another chip. Take another teleport west, join this stream, and temporarily divert north to slide on the force floor and take the chip before going back to the stream. Wait two to join, then break north and get the fire boots to allow Chip to teleport west to room 8. First, take the chip at the top, then return to the center of the room and zigzag across to the teleport, waiting two moves for the stream at each turn. This is the one chip that is not required.
Stop for one move before you run smack into the existing stream in room 9, then slide around the force floors, either dropping one move and boosting or not using the boosting, to another chip on the east. Circle again, then break off at the teleport to room 10. Approach the chip on the top from the right, then walk to the final chip and up to the exit. Your 317 seconds have been found again!
Level 89: The Ghetto Defender
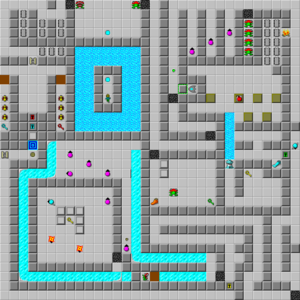
Don't just stand there, move! Step 2U R 2U 4R to sneak past the teeth, using even step, then run all the way down to fire boots, east to a green key, and 2U 6L 4U to safety.
Pass through the glider and balls, take the level's ten chips, and shove blocks 6, 5 and 3 into the water to reach the flippers. However, since they are not required anywhere else and will not reach the yellow key safely, don't take them! If you do, you lose some crucial time. Sneak past the walker and the two gravel spaces, and take the upper ice slide past some bouncing balls to reach one final important section.
From the gravel, run 5L4U or any other route necessary to avoid the monsters without losing time, as there is a walker in this room. Sneak back out of the room, past the bouncing balls, and through the yellow lock, which leads to an exit with a trap in front of it. However, you can just barely make it off into the exit to score a time of 381. This was the first world record time I explicitly developed a route for; the previous record was 379 and took the unnecessary flippers, wasting enough time to not make it off the trap.
Also note that the section to the west of the start is a trap because of the hidden wall; while there are ten chips there, Chip can collect the required ten faster on his normal route, and Chip can't escape this area due to the teeth.
Level 90: Marjolaine's Maze
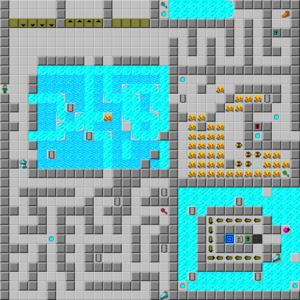
Marjolaine's Maze is a maze, although it is composed of several disparate sections with a couple of secret shortcuts.
Pass the thief to the south, then teleport DUD to take a slightly shorter route through the maze, also collecting a blue key. Collect everything but the red key, then slide UDU through the teleport. Because the red lock blocks Chip, this slide takes Chip back to the blue key, where he can jump over the ice corner and unlock the fire boots. Wind back through the maze to 13 blocks; eight of them are actually clone blocks. Blocks 1, 10, 11, 12 and 13 are movable, but block 1 is unusable.
Move block 13 out of the way, then shove block 12, or any of the other blocks, 3D 12L (11L, 10L) 6D, take the chip to the right, and then 5D2R further to bridge to another chip. Walk out onto the ice, take the remaining chip and now skate to the fire area. From the chip, walk 4D3RU [3] URU past the bugs, then take the chip and backtrack out the same way, then clamp down to the green key. To finish, slide LR through the teleport, take the three chips above you, and then slide LRL to take the one last chip on the way over to the exit...204 seconds await.
Level 91: Tutti-Frutti

Tutti-Frutti is one of the two levels credited to Christian Stahl, but which was actually made by Anders Pemer, according to Christian himself. Like Smorgasbord, Tutti-Frutti has a slight Scandinavian design reflecting their origins, and it is one of the common itemswapper levels: trade X item for Y item. You'll be getting pretty much everything. This job is tediously long, with several shortcuts (atypical for levels of this type), but with this map, the level is much easier.
Collect the fire boots first, then go to the red key, ice skates, blue key, flippers, 65 chips, and then the green button which is guarded by a thief. Fortunately, the toggle wall leads to the glider and exit section, which allows Chip to teleport back to civilization. Take the two keys, then go through, and note this for later.
Continue with the suction boots, yellow key, yellow key two and fire boots, flippers, and now, with one yellow key, fire boots and flippers, chip 66. Move towards the fire boots, then turn east and open the chip socket to collect the green key. Now, Chip can either swim through the water and arrive at the exit safely, or use a daring shortcut through the teleport. As this teleport leads directly into the glider circle, luck and/or timing is required. Enter the teleport at 471.2, or as late as 470.6, and then open the green lock to exit. 468 different flavors!
Level 92: Abandoned Mines
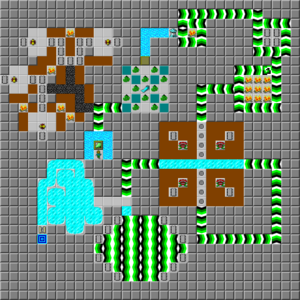
The route for this level required a long time to optimize to the limit, which was enough for me to raise the existing record of 456 to 457 and 458 with further refinements in the last section, until more diligent work in that very section from a team of two sent the record up to 459, where it stands. For any quick route, odd step is required.
Get the suction boots, open the blue wall on the right to release half of the blobs, and meanwhile collect the chips. Move 6L 2U 3L 2D, then L or R and take the next one, then the chip in the back of the next bug, the two in the center, the chip in the back of the northern bug, and now 4R2D5R2U to trap the fourth bug. Collect the remaining chips and walk out to the blob area, where the blobs have hopefully cleared out. Get the flippers and now step L U L U 2R 3U past the blobs!
If you're still here, keep swimming, jump onto the force floors, and override the west force floor at the top. Remove the four chips on the solid land, then move 2D to reach the next circle. (Note that you can move L instead, decreasing the strain on the boosting and using a move Chip has to expend anyways.)
You arrive in a teeth room next. Waste one move on the north wall if you didn't use it, then take the first chip and run 6R 5D 6L D [1] 3RD, which will lead to the last and toughest section: the back-and-forth force floor room! The route through this? Step on the ice and then move as follows:
L3R2D [1/2] R2DLDUL2D [1/2] R3L2U [1/2] L2URUDR2U [1/2] U, and then slide the ice strip to the left to the exit. It may be that as much as 459.8 could be possible, as the current "benchmark solution" is 459.4 and has two mistakes.
Level 93: Exit Chip
The owner of this level boasts that you will never be able to complete Exit Chip, where it's located in the set where it is taken from. That may be because nothing is how it seems here..
The chip up there is inaccessible; instead step L2D, which will reveal a hidden chip, run all the way east to reveal another chip, and sprint all the way to the north-west corner, which has the last chip. Keep walking east, which reveals a pair of flippers, and then walk into the open passageway in the center of the level. This reveals a bomb and four doors, a chip socket, water, and a block. Keep pushing the block all the way right until you can run north, because another space east is a hidden wall which will make it impossible to move the block west. Move north, then west, and then turn to the east, making sure to stay on the top while moving east due to a bouncing ball. Keep moving down, walk around the bomb, and enter a dodge-ball arena.
Hang to the top all the way to the left (except one space), then walk down, wait, and sneak through. Move to the east, where there is a short thin-wall maze. Don't economize too much - the short way is mined, so walk around the entire maze. Wait one move to avoid being smashed, then slide to the top and get the suction boots in the upper right corner. Backtrack all the way to the lower ball section, uncover a block hidden under the top part of the alcove to the left, and push it east and north to the bomb. Go through the hidden wall to the east of the block and get the four keys past the force floors to the left, then resume pushing the block to the water and open the four doors to clear the way for....what? No more blocks.
How about trying the water space to the left of the bouncing balls? Ta-da! Use that block to explode the bomb, then return to the start and uncover the hidden exit (!) inside the passageway to exit Chip with 388 seconds.
Level 94: Checkerboard II
Video solution.
There are four distinct sections of this level to each side, as well as the checkerboard in the center. Thankfully, this level is much simpler than its predecessor, especially when you use the synchronized balls to speed the process up.
South section: Move six steps to the right, break the wall below you, and hit one of the buttons to free the checkerboard. Shove the second block from the bottom on the far east row D, then resume L2DUL6D and drop the nearest block on top of this block. Shove the lower block 6R and the upper block L, then get the block in the corner of the checkerboard and move it next to the upper block. Move LD3R and return to the checkerboard, where the far southwest block goes left one space, followed by moving 2RURU3R2L. Take this block down next to the block already on the bottom row, then take the block on the bottom row of the checkerboard down to the center row and shove it R. Divert north until you are in front of a block and turn 3RU3R to begin the next phase.
East section: Get the block in direct range to the west and the block hanging to the south, move them to the far eastern column, and shove them respectively 10U and 7U. Follow with the two blocks remaining in the diagonal line at 4U and U, then get on top of the north-east block and step 2DUL2D6RDRU. Now, take the rightmost block remaining on the top row of the checkerboard, move it 2U, then move L3U into another fake wall.
North section: Take the block just moved and stuff it up into the toggle doors, then return to the top row and shove the second block R, followed by D3R2L7URU9L (which places the block at 9L). Exit the upper section due south, shove the block you meet 2D, and then step LDRL3ULULURDRDR. This block belongs at 6L; retreat to the checkerboard and take the loose block on the top row (not the one in the north-west corner), which goes at L on the middle row. Move towards the L formation at the left of the checkerboard, push the block touching its corner one to the left, then move down and left into yet another open wall.
West section: From that wall, move 2R2DRURU and move the accessible block into the middle column, then 12D (2 spaces short of the button) and east one space. Clone one ball (which will oscillate between two spaces due to the block's interference) then go back to the checkerboard and move the nearest loose block up until you can push another loose block right. This block belongs at 3L on the top row.
Now, start collecting the chips; go underneath the block stuffed up and shove it onto the trap button, retrieve the loose block in the north-west corner, away from the checkerboard, and position it on the top row with no side movement. Continue 3L, shove the block upwards onto the trap button and repeat this with the next block. Shove the remaining block 3L once more, get under it and wait a move, then step U2L, which will synchronize the two cloned balls. Open the last trap, then hold to the north wall and take all the chips from the open traps. One trap is still shut; use the block sitting conveniently to the right to open this, take the chip, and exit the north section permanently.
You will now be collecting the chips in a clockwise circle and going to the exit in the west section (there's four of them, but this one is recommended.)
Take the loose block on the right of the checkerboard and move it into the east section, leaving it in front of the flashing toggle doors. Push the block above you up, but stop to stuff the first and third blocks into the toggle doors. Stop the block one space away from the clone button, step LURU to fully synchronize the three balls to change once every move, and clean the chips out from top to bottom. (Step on a toggle button on the way out.)
Now, step two rows down and west to a block perfectly aligned to go south; throw this block all the way down, and then move L and drop this block to the bottom row. Emerge with U3RUR and push this block all the way south, then continue 5U and right to the next fireball cloner and stop this one. Continue to move the remaining block 5R, then block off the cloner below, take the chip, and walk left, removing the chips from the second and third cloners you run past. At the fourth cloner, step on the button to begin a stream of fireballs, then move 4U2L2URLRD, and hold south to block off the stream. Take the chip from it when it's safe to move east, then throw the block above you 8R and down to this cloner for another chip. Run all the way to the left and block out the last cloner to get the last chip in this room. At this point, the fireballs are starting to explode the bombs in the west section. Run directly north, touching the toggle button, then finish the level as follows:
2R2U5L4URU5LUL3D2R2L7DU4DR, hold west for two chips, then move U [2] 2U to the third, [2] 2U [2] U to the fourth, and now take the last two at normal speed. The exit is a bit further north.
This route will yield 776; this is an embarrassing 12 seconds under the current record time. Although 779 has been confirmed, this route is also unknown.
Level 95: Learn
Another very easy level after an epic..Use even-step, please.
Step right and run to the gravel, then east all the way into the teleport. Step on the trap, which will be released shortly, then take the chips and return to the bombed-off room with the teeth in it. Once it kills itself, take the four chips, then go back through the teleport and enter the bug stream. Five spaces down on the right, you can walk directly west to take the eight chips, rather than taking the entire circle. Further to the east is a pair of balls with a yorkhouse to the north; do a little hoping, take the chips, then hang to the west and to the south to escape these balls. Only two simple barriers of balls remain; pass these to learn a new lesson and score 314 seconds.
Level 96: Glider and Fire
Start by dropping the block onto the fire in the corner to redirect gliders north, then sprint all the way north and take the fire boots when the gliders free them. To the east are six blocks all lined up and ready; shove the top one 2L, the second one 8L3D, the fourth one L, and the third one 7L. The gliders are now directed north; move the block UL to allow them to explode the bombs, then continue RD2LULU [1] R, take these chips, and finally move the block 2RD before taking the chips in the east shaft.
The north section is now complete; start directing the gliders south. Continue to move the block 4D2L, which will cause the stream to turn south, and move R2DLDRUR2D to place the first block, and UL3DRDL to direct this stream to the right side, exploding a key bomb to the east. Reopen the path downwards with a R shove, then continue the block 9D [1] and take the two chips. Pick the block up again and continue 4R, then walk directly north and take the chips in the central shaft before you take the last block in the level 10D2R, whereupon you can take the two chips in this shaft.
Continue to throw the bottom and top blocks 5R, taking the chips, until you reach the end of the shafts. When you see no more shafts to the east, continue moving the top block one space further east, then continue 2LD2RURUR and use this block to explode one of the bombs blocking the mass of chips. Go back to the last shaft and take the chips, then sidle the block east a space and run all the way to the north to collect a bundle of chips on the west side. Enter the east room when the bomb explodes and take another 16 chips, then wait for the approaching glider to slip north and sneak past it.
Finish the level by using the last remaining block to access the chips on the far right, then divert to the east, open the socket, and slide U [1] U to reach the exit at 398.
Level 97: Roller Coaster
This level is full of many different obstacles which will take you on a wild ride. Get ready!
Begin by riding the "roller coaster" all the way to the bottom, then take the flippers on the west side and duck underneath the chip socket to get a green key. Go to the very top rung and unlock the door, then stomp on the green button at the very end of the mess of blobs. Travel to the very bottom rung and walk to the extreme south of the level, then swim (you have flippers, so use them!) upwards to the red key behind the now-open toggle door.
Go back to the roller coaster, open the red door, and walk to the second red key. In order to pass this section, you have to open the right doors that will let you recover the keys. Do this by moving 4L2D, which frees another key, then from there 3LU4L2DRD4R2D3L, which swaps for one last key. The clone button is now available; open one last door on the way out, then return to the south-east corner and use the block cloned to blow the bomb guarding the blue key.
Use this key to enter the walker section of the coaster, do a little praying, then run to the tank button and dash out! Perfection isn't required, fortunately. If you're alive, retrieve the yellow key from the southeast, then use it to teleport to a fire maze.
U-turn back north, then U-turn south, and take the first passageway back to the north, which leads to a teleport that shoves you into a little fireball room. (If the clock shows anything less than 303.4 when you step into the teleport, you won't be able to beat the fireball to the block, and you're not getting 265.) Knock the block south, which will divert the fireball into a key bomb, then teleport back to the fire maze, walk all the way back to the other teleport, and return to the south-east corner. As you approach this, you will find that you can now take the chip and slide back out intact. Once you have this, pass the chip socket on the coaster to swim to the exit. This level is worth 265 seconds if anything less than twelve moves were expended waiting for random elements.
Level 98: Loop
Run right and hit the toggle button to release the teeth, then lure them below to the fire. (You can use odd-step, but the extra move will be expended later anyways.) Take that red key, let the teeth die, then take the ice skates from his den. On the right is a red door guarding a blue key, then to the left is a blue door guarding a yellow key. When you have the yellow key, touch the button twice, steal all the chips from the pool, then walk south to a zoo of teeth and a yellow door to the east. Keep pressing to the east, wait for the very last ball, and run onto the random force floors, aiming for the toggle button. Once you're there, exit to the east and step into the open toggle door, then check the clock. If it says anything less than 70, you won't make 37.
If it doesn't or just want to get the 36, take the two keys, open the green door, and take the yellow key. Past the toggle buttons is a blue key up to the top; walk back to the buttons and touch exactly two of them, then open the blue door and walk south and west to take some fire boots. Beyond the socket and the fire is a hidden exit; this is worth 37 optimally.
Level 99: One-Block Sokoban
Blast through the teleport and ram the block on the wall, then walk to the south and hang to the very bottom of the level until the red key is visible above. Take this, pick the block back up, and corner it against the red door at the very top of the level. Step 2DR2UR2L3UR2DLD and move the block all the way east onto the blue key, which nullifies the water space underneath (see level 81 for more details), allowing you to use the block for other purposes. Therefore, do it again!
Return the block to the start, turn it east, and eventually you'll run into a blue door. Move the block to either side, open the door, and destroy the water to take the yellow key. However, you won't be able to move the block out to the side at the yellow door/green key portion, so stow the block to the unused side of the room above the yellow key, go unlock the door, and then push the block onto the green key.
To finish, take the block to the center, collect the remaining chips to the east, and shove the block back to the west to access the exit. 269 seconds for 1 block: good deal!
Level 100: Torch
This may just be one of the easiest three-digit levels in the set. Almost no tricks are necessary to win.
Follow the path of the chips, waiting as needed, except with 54 remaining, whereupon you wait four moves before following the path all the way to the last chip. (This pays off later!) Now, turn back to the start, take the fire boots, and wedge into the exit just to the west. It's that easy! Without the four-move wait, you would be stuck with 344; this route is good for 345.