From StrategyWiki, the video game walkthrough and strategy guide wiki
Jump to navigation Jump to search
(Added table key)
 
(47 intermediate revisions by 21 users not shown)
Line 1: Line 1:
{{stub|add descriptions for all enemies}}
{{Header Nav|game=The Legend of Zelda: A Link to the Past}}
'''''Table Key:'''''
==Table key==
* HP = Hit Points
* '''HP''': Hit Points
* # = Damage (amount of hit points removed)
* '''#''': Damage (amount of hit points removed)
* KO = Knock Out (one-hit kill)
* '''KO''': Knock Out (one-hit kill)
* STN = Stun (temporarily immobilize)
* '''STN''': Stun (temporarily immobilize)
* BRN = Burn (incremental fire damage)
* '''BRN''': Burn (incremental fire damage)
* FRZ = Freeze (permanently immobilize)
* '''FRZ''': Freeze (permanently immobilize)
* SLM = Slime (transform into a Slime Monster)
* '''SLM''': Slime (transform into a Slime Monster)
* shirts = The amount of hearts Link will lose if attacked, based upon which color Mail he is wearing.
* '''Shirts''': The amount of hearts Link will lose if attacked, based upon which color Mail he is wearing.
<div class="toclimit-3">__TOC__</div>
 
= Light World =
==Soldiers==
== Soldiers ==
===Hyrule Soldiers===
=== Hyrule Soldiers ===
{{Zelda3Enemy|LttP Hyrule Soldier.png|STN|2|KO|KO|KO|KO|STN|KO|KO|SLM|BRN|FRZ|BRN|FRZ|SLM|4|½|½|½}}
{{Zelda3Enemy|LttP_Hyrule_Soldier.png|STN|2|KO|KO|KO|KO|STN|KO|KO|SLM|BRN|FRZ|BRN|FRZ|SLM|4|½|½|½}}
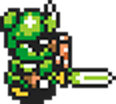
These are the first enemies that you see in the game, and some of the easiest to kill. Just swipe at them with your sword, and they'll usually be hit. However, sometimes you'll find your blow blocked by the daggers that all of soldiers have. To avoid this, just stun them by hitting them with a boomerang. This will neutralize any threat they might present, as well as stopping them from defending themselves. However, if you've just started out, you might not have your boomerang yet. To get around this, you can imitate their defensive stance by holding down your sword button. This will not only protect you, but will also charge your sword for a spin attack, which you can unleash as soon as it's charged. In the GBA version, you will also have the opportunity to attack them with magic by using your lamp. This is because in the GBA version of this game, your magic meter automatically fills when you get the lamp. In the SNES version, you may run out of magic and find yourself suddenly being hurt.
=== Sword Soldiers ===
{{-}}
{| border="0"
===Sword Soldiers===
| {{Zelda3Enemy|LttP_Sword_Soldier_Green.png|STN|2|KO|KO|KO|KO|STN|KO|KO|SLM|BRN|FRZ|BRN|FRZ|SLM|4|½|½|½}}
{{Zelda3Enemy|LttP Sword Soldier Green.png|STN|2|KO|KO|KO|KO|STN|KO|KO|SLM|BRN|FRZ|BRN|FRZ|SLM|4|½|½|½}}
| {{Zelda3Enemy|LttP_Sword_Soldier_Blue.png|STN|2|4|KO|KO|4|STN|4|KO|-|BRN|KO|BRN|FRZ|SLM|6|½|½|½}}
{{Zelda3Enemy|LttP Sword Soldier Blue.png|STN|2|4|KO|KO|4|STN|4|KO|-|BRN|KO|BRN|FRZ|SLM|6|½|½|½}}
|}
{{-}}
=== Dashing Sword Soldiers ===
===Dashing Sword Soldiers===
{{Zelda3Enemy|LttP_Sword_Soldier_Dash.png|STN|2|4|KO|KO|4|STN|4|KO|-|BRN|-|BRN|FRZ|SLM|6|½|½|½}}
{{Zelda3Enemy|LttP Sword Soldier Dash.png|STN|2|4|KO|KO|4|STN|4|KO|-|BRN|-|BRN|FRZ|SLM|6|½|½|½}}
=== Spear Soldiers ===
{{-}}
{| border="0"
===Spear Soldiers===
| {{Zelda3Enemy|LttP_Spear_Soldier_Green.png|STN|2|3|4|KO|4|STN|4|KO|-|BRN|-|BRN|FRZ|SLM|8|1|½|¼}}
{{Zelda3Enemy|LttP Spear Soldier Green.png|STN|2|3|4|KO|4|STN|4|KO|-|BRN|-|BRN|FRZ|SLM|8|1|½|¼}}
| {{Zelda3Enemy|LttP_Spear_Soldier_Dash.png|STN|2|3|4|KO|4|STN|4|KO|-|BRN|-|BRN|FRZ|SLM|8|1|½|¼}}
{{Zelda3Enemy|LttP Spear Soldier Dash.png|STN|2|3|4|KO|4|STN|4|KO|-|BRN|-|BRN|FRZ|SLM|8|1|½|¼}}
|}
{{-}}
=== Spear Throwing Soldiers ===
===Spear Throwing Soldiers===
{{Zelda3Enemy|LttP_Spear_Soldier_Throw.png|STN|2|3|4|KO|4|STN|4|KO|-|BRN|-|BRN|FRZ|SLM|8|1|½|¼}}
{{Zelda3Enemy|LttP Spear Soldier Throw.png|STN|2|3|4|KO|4|STN|4|KO|-|BRN|-|BRN|FRZ|SLM|8|1|½|¼}}
=== Grass-hiding Spear Soldiers ===
{{-}}
{{Zelda3Enemy|LttP_Spear_Soldier_Grass.png|STN|2|3|4|KO|4|STN|4|KO|-|BRN|-|BRN|KO|SLM|8|1|½|¼}}
===Grass-hiding Spear Soldiers===
=== Archer Soliders ===
They pop up in patches of grass. They will always pop up from the same place.
{{Zelda3Enemy|LttP_Bow_Soldier_Blue.png|STN|2|4|KO|KO|4|STN|4|KO|-|BRN|FRZ|BRN|FRZ|SLM|6|½|½|½}}
{{Zelda3Enemy|LttP Spear Soldier Grass.png|STN|2|3|4|KO|4|STN|4|KO|-|BRN|-|BRN|KO|SLM|8|1|½|¼}}
=== Grass-hiding Archer Soldiers ===
{{-}}
{{Zelda3Enemy|LttP_Bow_Soldier_Grass.png|STN|2|KO|KO|KO|KO|STN|KO|KO|-|BRN|KO|BRN|KO|SLM|4|½|½|½}}
 
=== Bomb Soldiers ===
===Archer Soldiers===
{{Zelda3Enemy|LttP_Bomb_Soldier.png|STN|2|3|4|KO|4|STN|4|KO|-|BRN|FRZ|BRN|FRZ|SLM|8|1|½|¼}}
{{Zelda3Enemy|LttP Bow Soldier Blue.png|STN|2|4|KO|KO|4|STN|4|KO|-|BRN|FRZ|BRN|FRZ|SLM|6|½|½|½}}
=== Ball & Chain Soldiers ===
{{-}}
{| border="0"
 
| {{Zelda3Enemy|LttP_Chain_Soldier_Black.png|STN|2|2|8|KO|4|STN|4|KO|-|BRN|-|BRN|FRZ|SLM|16|1|½|¼}}
===Grass-hiding Archer Soldiers===
| {{Zelda3Enemy|LttP_Chain_Soldier_Gold.png|STN|2|2|8|KO|4|STN|4|KO|-|BRN|-|BRN|FRZ|SLM|16|1|½|¼}}
{{Zelda3Enemy|LttP Bow Soldier Grass.png|STN|2|KO|KO|KO|KO|STN|KO|KO|-|BRN|KO|BRN|KO|SLM|4|½|½|½}}
|}
{{-}}
== Overworld ==
===Bomb Soldiers===
=== Armos ===
{{Zelda3Enemy|LttP Bomb Soldier.png|STN|2|3|4|KO|4|STN|4|KO|-|BRN|FRZ|BRN|FRZ|SLM|8|1|½|¼}}
{{Zelda3Enemy|ALttP_enemies_Armos.gif|STN|2|4|KO|KO|KO|STN|4|KO|-|KO|FRZ|BRN|KO|STN|8|½|½|½}}
{{-}}
=== Buzzblob ===
===Ball & Chain Soldiers===
{{Zelda3Enemy|LttP_enemies_Buzzblob.gif|STN|*|*|*|KO|KO|STN|KO|KO|?|BRN|FRZ|BRN|FRN|STN|3|½|½|½}}
They use their ball and chain against you. They are vulnerable when they recharge.
'''Description:''' The buzzblob produces an electric field that will sting Link if he strikes it with anything less then the level 4 sword.  A stone, if thrown however, will kill the Buzzblob.  The Buzzblob has a very unique reaction to Magic Powder.
{{Zelda3Enemy|LttP Chain Soldier Black.png|STN|2|2|8|KO|4|STN|4|KO|-|BRN|-|BRN|FRZ|SLM|16|1|½|¼}}
=== Crowl (crow) ===
{{Zelda3Enemy|LttP Chain Soldier Gold.png|STN|2|2|8|KO|4|STN|4|KO|-|BRN|-|BRN|FRZ|SLM|16|1|½|¼}}
{{Zelda3Enemy|LttP_enemies_Crowl.gif|1|2|KO|KO|KO|KO|KO|KO|KO|-|BRN|KO|BRN|FRZ|KO|4|½|½|¼}}
{{-}}
=== Deadrock ===
 
{{Zelda3Enemy|LttP_enemies_Deadrock.gif|*|*|*|*|*|*|*|*|*|SLM|*|*|-|-|SLM|-|1|½|¼}}
==Overworld==
'''Description:''' A Deadrock is quite literally a living rock, and therefore impervious to every attack at Link's disposal except the most powerful magic. Attacking it turns it back into an ordinary and immobile rock.  The only way to make this invulnerable enemy vulnerable is to turn it into a slime first.
===Armos===
=== Derudoman ===
{{Zelda3Enemy|ALttP enemies Armos.gif|STN|2|4|KO|KO|KO|STN|4|KO|-|KO|FRZ|BRN|KO|STN|8|½|½|½}}
{{Zelda3Enemy|LttP_enemies_Derudoman.gif|1|2|KO|KO|KO|KO|STN|KO|KO|-|KO|KO|BRN|KO|STN|4|1|½|¼}}
The Armos first appear to be harmless statues, but if you come to close, they will suddenly come to life and begin to chase you. However, because of their slow speed and nonexistent defense, they can be easily killed with almost any weapon.
=== Hachi (bee) ===
{{-}}
{{Zelda3Enemy|ALttP_enemies_Hachi.gif|-|KO|KO|KO|KO|KO|-|KO|KO|-|KO|KO|KO|KO|-|1|¼||}}
 
'''Description:''' Hachi bees are, for the most part, a minor nuisanceThey can appear when you cut down a bush or grass.  They will fly around and sting you until you leave a portion of the world, or kill themHowever, you can catch them with your net and hold them in a bottle. Then you can release them to attack nearby enemies.
===Buzzblob===
=== Hedge ===
{{Zelda3Enemy|LttP enemies Buzzblob.gif|STN|*|*|*|KO|KO|STN|KO|KO|[[Image:Zelda ALttP Cukeman.png]]|BRN|FRZ|BRN|FRZ|STN|3|½|½|½}}
{{Zelda3Enemy|ALttP_enemies_Hedge.gif|1|KO|KO|KO|KO|KO|STN|KO|KO|SLM|KO|KO|KO|KO|SLM|2|0|0|0}}
The buzzblob produces an electric field that will sting Link if he strikes it with anything less than the level 4 sword.  Once the buzzblob is stunned, its electric field is neutralized and a single hit from any sword will kill itThrowing a stone will kill the buzzblob, whether or not it is stunnedThe Buzzblob has a very unique reaction to Magic Powder.
'''Description:''' This harmless insect is easy to kill, and can't even hurt you, but it can help you. If you lift the hedge (or rock) from off of it's back, it will start dropping Rupees in an attempt to shake you off it's trail.  If you collect five green Rupees before he disappears, if will drop a red Rupee.
It becomes a Cukeman, which will give hints if talked to.
=== Octobaloon ===
{{-}}
{{Zelda3Enemy|ALttP_enemies_Octoballoon.gif|1|*|*|*|*|*|*|*|*|-|BRN|*|BRN|*|-|2|0|0|0}}
 
'''Description:''' The Octoballoon is a special floating variety of Octorok.  It is sensitive to all but the hottest of attacksAny attempt to kill it will result in 6 smaller Octo creatures bursting out of it's top to attack before disappearing.
===Crowl (crow)===
=== Octorok ===
{{Zelda3Enemy|LttP enemies Crowl.gif|1|2|KO|KO|KO|KO|KO|KO|KO|-|BRN|KO|BRN|FRZ|KO|4|½|½|¼}}
{{Zelda3Enemy|LttP_enemies_Octorok.gif|STN|KO|KO|KO|KO|KO|STN|KO|KO|SLM|BRN|FRZ|BRN|FRZ|SLM|2|1|1|1}}
The Crowl is an enemy that comes in two forms. One form will stay in a tree until it spots you, when it will pop out and come toward you. However, there is a more dangerous form, which will keep attacking you until you kill it.
=== Peese (crab) ===
{{-}}
{{Zelda3Enemy|LttP_enemies_Peese.gif|STN|KO|KO|KO|KO|KO|STN|KO|KO|SLM|KO|FRZ|BRN|FRZ|SLM|2|2|1|½}}
 
=== Poe (soul) ===
===Deadrock===
{{Zelda3Enemy|ALttP_enemies_Poe.gif|1|2|4|KO|KO|4|KO|4|KO|-|KO|KO|BRN|KO|-|8|2|1|½}}
{{Zelda3Enemy|LttP enemies Deadrock.gif|*|*|*|*|*|*|*|*|*|SLM|*|*|-|-|SLM|-|1|½|¼}}
=== Slime ===
A Deadrock is quite literally a living rock, and therefore impervious to every attack at Link's disposal except the most powerful magicAttacking it turns it back into an ordinary and immobile rock.  The only way to make this invulnerable enemy vulnerable is to turn it into a slime first.
{{Zelda3Enemy|ALttP_enemies_Slime.gif|STN|KO|KO|KO|KO|KO|KO|KO|KO|-|BRN|FRZ|BRN|FRZ|KO|2|½|½|½}}
{{-}}
'''Description:''' Slimes are defenseless creatures that typically appear as the result of sprinkling Magic Powder on a more dangerous enemy, or using the magic of the Quake medallionIn this form, any enemy can be quickly defeated.
===Derudoman===
=== Tektite ===
{{Zelda3Enemy|LttP enemies Derudoman.gif|1|2|KO|KO|KO|KO|STN|KO|KO|-|KO|KO|BRN|KO|STN|4|1|½|¼}}
{| border="0"
The Derudomen are often annoying to players, due to their tendency to pop out of the ground right next to Link without warning. They generally live in desert areas, where the sand is soft enough to burrow in. One way to avoid them is to walk cautiously, then immediately begin attacking it when it pops out of the ground, removing its chance to get a free hit on you.
| {{Zelda3Enemy|LttP_enemies_Tektite_Blue.gif|STN|2|4|KO|KO|4|-|KO|KO|-|BRN|FRZ|KO|KO|KO|8|1|1|½}}
{{-}}
| {{Zelda3Enemy|LttP_enemies_Tektite_Red.gif|STN|2|4|8|KO|4|-|KO|KO|-|BRN|FRZ|KO|KO|KO|12|2|2|1}}
 
|}
===Hachi (bee)===
=== Tendol (vulture) ===
{{Zelda3Enemy|ALttP enemies Hachi.gif|-|KO|KO|KO|KO|KO|-|KO|KO|-|KO|KO|KO|KO|-|1|¼|?|?}}
{{Zelda3Enemy|LttP_enemies_Tendol.gif|1|2|4|KO|KO|4|KO|4|KO|-|BRN|KO|BRN|FRZ|KO|6|1|½|¼}}
Hachi bees are, for the most part, a minor nuisance. They can appear when you cut down a bush or grass.  They will fly around and sting you until you leave a portion of the world, or kill them.  However, you can catch them with your net and hold them in a bottleThen you can release them to attack nearby enemies.
=== Thief ===
{{-}}
{{Zelda3Enemy|ALttP_enemies_Theif.gif|-|-|-|-|-|-|-|-|-|-|-|-|-|-|-|-|-|-|-}}
===Hedge===
'''Description:''' Using special defensive techniques, the Thieves of the Lost Woods are impervious to all forms of attack, physical or magical.  They cannot be harmed, nor can they harm you. But if they collide with you in the woods, expect to drop some supplies and Rupees that Thieves will be quick to collect from you.
{{Zelda3Enemy|ALttP enemies Hedge.gif|1|KO|KO|KO|KO|KO|STN|KO|KO|SLM|KO|KO|KO|KO|SLM|2|0|0|0}}
=== Toppi (rabbit) ===
This harmless insect is easy to kill, and can't even hurt you, but it can help you.  If you lift the hedge (or rock) from off its back, it will start dropping Rupees in an attempt to shake you off its trail.  If you collect five green Rupees before he disappears, it will drop a red Rupee.
{{Zelda3Enemy|ALttP_enemies_Topi.gif|1|KO|KO|KO|KO|KO|STN|KO|KO|-|BRN|KO|BRN|KO|STN|2|½|½|½}}
{{-}}
'''Description:''' This rabbit hops out from thick grass. He is easy to kill, but you can play a trick on it to earn Rupees. Instead of attacking the Toppi, destroy the grass that he jumped from. He will land helplessly on his back.  Approach him and he will call you a thief, and give you a Rupee to leave him alone.
 
=== Zora ===
===Octoballoon===
{| border="0"
{{Zelda3Enemy|ALttP enemies Octoballoon.gif|1|*|*|*|*|*|*|*|*|-|BRN|*|BRN|*|-|2|0|0|0}}
| {{Zelda3Enemy|LttP_enemies_Zora.gif|1|2|4|KO|KO|4|STN|4|KO|-|BRN|KO|BRN|KO|KO|8|½|½|½}}
The Octoballoon is a special floating variety of Octorok.  It is sensitive to all but the hottest of attacks.  Any attempt to kill it will result in 6 smaller Octo creatures bursting out of its top to attack before disappearing.
| {{Zelda3Enemy|LttP_enemies_Zorawalk.gif|STN|2|4|KO|KO|4|STN|4|KO|-|BRN|KO|BRN|KO|KO|8|½|½|½}}
{{-}}
|}
===Octorok===
== Dungeons ==
{{Zelda3Enemy|LttP enemies Octorok.gif|STN|KO|KO|KO|KO|KO|STN|KO|KO|SLM|BRN|FRZ|BRN|FRZ|SLM|2|1|1|1}}
=== Devilant ===
These creatures are back from the first Zelda game. Although they can be dispatched with almost any attack, they can still be dangerous because of their ability to fire rocks from their snouts. Luckily, these missiles can be blocked by any shield, as long as you are facing the rock without attacking. This is why Octarocks have taken to traveling in numbers. When there are several rocks whizzing around at once, they can be a bit more formiddable. However, defeating will often earn blue or occasionally even red rupees.
{{Zelda3Enemy|LttP_enemies_Devilant.gif|1|2|KO|KO|KO|KO|STN|KO|KO|-|KO|KO|BRN|KO|STN|4|1|½}}
{{-}}
=== Eyegore ===
 
{| border="0"
===Peese (crab)===
| {{Zelda3Enemy|LttP_enemies_Eyegore_Green.gif|-|2|4|KO|KO|KO|-|4|KO|-|-|-|-|-|-|16|1|1|1}}
These little crabs are found near The Waterfall Of Wishing, And where you found the Ice Rod.
| {{Zelda3Enemy|LttP_enemies_Eyegore_Red.gif|-|-|-|-|-|4|-|-|KO|-|-|-|-|-|-|8|1|1|1}}
{{Zelda3Enemy|LttP enemies Peese.gif|STN|KO|KO|KO|KO|KO|STN|KO|KO|SLM|KO|FRZ|BRN|FRZ|SLM|2|2|1|½}}
|}
{{-}}
'''Description:''' Eyegores are magical statues that normally sleep. They only wake up when you get close enough to them.  Then their single eye opens up and they begin to chase youYou can only hurt them when they are awakeFurthermore, Red Eyegores can only be damaged by bow and arrow attacks.
 
=== Goozu (rat) ===
===Poe (soul)===
{{Zelda3Enemy|LttP_enemies_Goozu.gif|STN|KO|KO|KO|KO|KO|KO|KO|KO|SLM|BRN|FRZ|BRN|FRZ|SLM|2|¼||}}
Poes are like Hues in the Light World. Basically all they have is a lantern, and they fly around.
=== Keese (bat) ===
{{Zelda3Enemy|ALttP enemies Poe.gif|1|2|4|KO|KO|4|KO|4|KO|-|KO|KO|BRN|KO|-|8|2|1|½}}
{{Zelda3Enemy|LttP_enemies_Keese.gif|KO|KO|KO|KO|KO|KO|KO|KO|KO|-|BRN|FRZ|BRN|FRZ|STN|1|¼|⅛|⅛}}
{{-}}
=== Kodongo ===
 
{{Zelda3Enemy|LttP_enemies_Kodongo.gif|-|KO|KO|KO|KO|KO|-|-|KO|-|KO|FRZ|BRN|FRZ|SLM|2|1|1|1}}
===Slime===
=== Leevers ===
{{Zelda3Enemy|ALttP enemies Slime.gif|STN|KO|KO|KO|KO|KO|KO|KO|KO|-|BRN|FRZ|BRN|FRZ|KO|2|½|½|½}}
{| border="0"
Slimes are defenseless creatures that typically appear as the result of sprinkling Magic Powder on a more dangerous enemy, or using the magic of the Quake medallion.  In this form, any enemy can be quickly defeated.
| {{Zelda3Enemy|LttP_enemies_Leever_Green.gif|STN|2|KO|KO|KO|KO|STN|KO|KO|-|BRN|FRZ|BRN|FRZ|STN|4|½|½|½}}
{{-}}
| {{Zelda3Enemy|LttP_enemies_Leever_Red.gif|STN|2|KO|KO|KO|KO|STN|KO|KO|-|BRN|FRZ|BRN|FRZ|STN|4|½|½|½}}
===Tektite===
|}
They are back from the original game. They hop from one location to another.
=== Popo ===
{{Zelda3Enemy|LttP enemies Tektite Blue.gif|STN|2|4|KO|KO|4|-|KO|KO|-|BRN|FRZ|KO|KO|KO|8|1|1|½}}
{{Zelda3Enemy|LttP_enemies_Popo.gif|STN|KO|KO|KO|KO|KO|KO|KO|KO|SLM|BRN|FRZ|BRN|FRZ|SLM|2|½|½|½}}
{{Zelda3Enemy|LttP enemies Tektite Red.gif|STN|2|4|8|KO|4|-|KO|KO|-|BRN|FRZ|KO|KO|KO|12|2|2|1}}
=== Rope (snake) ===
{{-}}
{{Zelda3Enemy|LttP_enemies_Rope.gif|STN|2|KO|KO|KO|KO|KO|KO|KO|SLM|BRN|FRZ|BRN|FRZ|SLM|4|½|½|½}}
 
=== Stalfos (skeleton) ===
===Tendol (vulture)===
{| border="0"
These birds fly around you in circles when you walk through the desert.
| {{Zelda3Enemy|LttP_enemies_Stalfos.gif|1|2|KO|KO|KO|KO|STN|KO|KO|SLM|KO|KO|BRN|KO|SLM|4|½|½|½}}
{{Zelda3Enemy|LttP enemies Tendol.gif|1|2|4|KO|KO|4|KO|4|KO|-|BRN|KO|BRN|FRZ|KO|6|1|½|¼}}
| {{Zelda3Enemy|LttP_enemies_Stalfos_Red.gif|1|2|KO|KO|KO|KO|STN|KO|KO|SLM|KO|KO|BRN|KO|SLM|4|½|½|½}}
{{-}}
|}
 
=== Stalfos Skull ===
===Thief===
{{Zelda3Enemy|LttP_enemies_Stalfos_Head.gif|1|2|4|KO|KO|3|STN|4|KO|-|KO|4|BRN|KO|STN|8|½|½|½}}
{{Zelda3Enemy|ALttP enemies Theif.gif|-|-|-|-|-|-|-|-|-|-|-|-|-|-|-|-|-|-|-}}
'''Description:''' Skull Stalfos drop down from the ceiling, only stopping long enough to deliver their floating skulls.  The body floats back up to the ceiling, leaving the head behind to attack you.
Using special defensive techniques, the Thieves of the Lost Woods are impervious to all forms of attack, physical or magicalThey cannot be harmed, nor can they harm youBut if they collide with you in the woods, expect to drop some supplies and Rupees that Thieves will be quick to collect from you.
=== Tail worm ===
{{-}}
{{Zelda3Enemy|LttP_enemies_Tail.gif|-|2|KO|KO|KO|KO|KO|KO|KO|SLM|BRN|KO|BRN|KO|SLM|3|1|½|¼}}
===Toppi (rabbit)===
= Dark World =
{{Zelda3Enemy|ALttP enemies Topi.gif|1|KO|KO|KO|KO|KO|STN|KO|KO|-|BRN|KO|BRN|KO|STN|2|½|½|½}}
== Overworld ==
This rabbit hops out from thick grass. He is easy to kill, but you can play a trick on it to earn Rupees.  Instead of attacking the Toppi, destroy the grass that he jumped from. He will land helplessly on his back.  Approach him and he will call you a thief, and give you Rupees, Bombs, Arrows or whatnot to leave him alone.
=== Creepy ===
{{-}}
{| border="0"
 
| {{Zelda3Enemy|ALttP_enemies_Creepy_Green.gif|-|2|KO|KO|KO|KO|KO|KO|KO|-|BRN|FRZ|BRN|FRZ|-|4|2|1|½}}
===Zora===
| {{Zelda3Enemy|ALttP_enemies_Creepy_Blue.gif|-|2|4|KO|KO|4|KO|4|KO|-|BRN|FRZ|BRN|FRZ|-|8|1|½|¼}}
They live in water bodies and pop out of their whirlpools. They fire magic attacks at you. To block a magic attack you need to have a Magic Shield or Mirror Shield.
|}
{{Zelda3Enemy|LttP enemies Zora.gif|1|2|4|KO|KO|4|STN|4|KO|-|BRN|KO|BRN|KO|KO|8|½|½|½}}
'''Description:''' Despite being the weaker of the two, defensively, the green Creepy is slightly more dangerous, due to it's ability to spit rocks at Link.  The blue Creepy can take more damage, but it must touch you in order to attack.
{{Zelda3Enemy|LttP enemies Zorawalk.gif|STN|2|4|KO|KO|4|STN|4|KO|-|BRN|KO|BRN|KO|KO|8|½|½|½}}
=== Gapra ===
{{-}}
{{Zelda3Enemy|ALttP_enemies_Gapra.gif|STN|2|4|8|KO|4|STN|4|KO|SLM|BRN|FRZ|BRN|KO|SLM|12|3|2|1}}
 
=== Hinox ===
==Dungeons==
{{Zelda3Enemy|ALttP_enemies_Hinox.gif|STN|2|4|8|16|4|-|KO|KO|-|8|FRZ|BRN|FRZ|SLM|20|3|2|1}}
===Devilant===
=== Hue ===
Devilants are only found in the Desert Palace. Red Devilants shoot 3 fireballs, Blue Devilants Just pop up, And do no damage to Link.
{{Zelda3Enemy|ALttP_enemies_Hue.gif|1|2|4|KO|KO|4|KO|4|KO|-|KO|KO|BRN|KO|-|8|2|1|½}}
{{Zelda3Enemy|LttP enemies Devilant.gif|1|2|KO|KO|KO|KO|STN|KO|KO|-|KO|KO|BRN|KO|STN|4|1|½|¼}}
=== Kuu ===
{{-}}
{{Zelda3Enemy|ALttP_enemies_Kuu.gif|1|2|4|KO|KO|4|STN|4|KO|-|BRN|KO|BRN|KO|KO|8|½|½|½}}
 
=== Kyune ===
===Eyegore===
{{Zelda3Enemy|ALttP_enemies_Kyune.gif|1|2|4|KO|KO|4|KO|4|KO|-|BRN|KO|BRN|FRZ|KO|8|3|1|½}}
{{Zelda3Enemy|LttP enemies Eyegore Green.gif|-|2|4|KO|KO|KO|-|4|KO|-|-|-|-|-|-|16|1|1|1}}
=== Like Like ===
{{Zelda3Enemy|LttP enemies Eyegore Red.gif|-|-|-|-|-|4|-|-|KO|-|-|-|-|-|-|8|1|1|1}}
{{Zelda3Enemy|ALttP_enemies_Likelike.gif|1|2|4|8|KO|4|STN|4|KO|-|BRN|8|BRN|FRZ|STN|12|2|1|½}}
Eyegores are magical statues that normally sleep. They only wake up when you get close enough to them.  Then their single eye opens up and they begin to chase you.  You can only hurt them when they are awake.  Furthermore, Red Eyegores can only be damaged by bow and arrow attacks.
'''Description:''' Like Likes hang out in the Skull Woods of the Dark WorldThey have a fondness for metal, and will eat your blue or red shield if you let them get too close, and you will have to purchase another shield to replace the one that you lost.  They cannot eat the Mirror Shield, it is too big for their mouth.
{{-}}
=== Lynel ===
===Goozu (rat)===
{{Zelda3Enemy|ALttP_enemies_Lynel.gif|-|-|-|8|16|-|-|-|KO|-|-|-|-|-|-|24|4|2|1}}
{{Zelda3Enemy|LttP enemies Goozu.gif|STN|KO|KO|KO|KO|KO|KO|KO|KO|SLM|BRN|FRZ|BRN|FRZ|SLM|2|¼|?|?}}
'''Description:''' Ganon bestowed these half man, half lion guardians of the Dark World's Death Mountain with inhuman strength.  You can only hope to harm these creatures with the strongest weapons available in Hyrule.
{{-}}
=== Moblin ===
===Keese (bat)===
{{Zelda3Enemy|ALttP_enemies_Moblin.gif|STN|2|KO|KO|KO|KO|STN|KO|KO|SLM|BRN|FRZ|BRN|FRZ|SLM|4|2|1|½}}
They can be killed with a strike from the Boomerang.
=== Pikku ===
{{Zelda3Enemy|LttP enemies Keese.gif|KO|KO|KO|KO|KO|KO|KO|KO|KO|-|BRN|FRZ|BRN|FRZ|STN|1|¼|?|?}}
{{Zelda3Enemy|ALttP_enemies_Pikku.gif|-|-|-|-|-|-|-|-|-|-|-|-|-|-|-|-|-|-|-}}
{{-}}
'''Description:''' Pikkus are transformed Thieves from the Light World.  They are no longer human, but they retain they ability to avoid harm, and steal from you by colliding with you and making you drop supplies.
 
=== Roper ===
===Kodongo===
{{Zelda3Enemy|ALttP_enemies_Roper.gif|STN|2|4|KO|KO|4|STN|4|KO|SLM|BRN|FRZ|BRN|KO|SLM|8|2|1|½}}
{{Zelda3Enemy|LttP enemies Kodongo.gif|-|KO|KO|KO|KO|KO|-|-|KO|-|KO|FRZ|BRN|FRZ|SLM|2|1|1|1}}
=== Slarock ===
{{-}}
{{Zelda3Enemy|ALttP_enemies_Slarock.gif|STN|2|KO|KO|KO|KO|STN|KO|KO|SLM|BRN|FRZ|BRN|FRZ|SLM|4|2|1|½}}
===Leevers===
=== Stal ===
{{Zelda3Enemy|LttP enemies Leever Green.gif|STN|2|KO|KO|KO|KO|STN|KO|KO|-|BRN|FRZ|BRN|FRZ|STN|4|½|½|½}}
{{Zelda3Enemy|ALttP_enemies_Stal.gif|1|2|KO|KO|KO|KO|STN|KO|KO|KO|KO|KO|KO|KO|SLM|4|1|1|1}}
{{Zelda3Enemy|LttP enemies Leever Red.gif|STN|2|KO|KO|KO|KO|STN|KO|KO|-|BRN|FRZ|BRN|FRZ|STN|4|½|½|½}}
=== Swamola ===
{{-}}
{{Zelda3Enemy|ALttP_enemies_Swamola.gif|1|2|4|8|KO|4|KO|4|KO|-|8|8|KO|KO|KO|16|4|3|2}}
===Popo===
=== Tauros ===
{{Zelda3Enemy|LttP enemies Popo.gif|STN|KO|KO|KO|KO|KO|KO|KO|KO|SLM|BRN|FRZ|BRN|FRZ|SLM|2|½|½|½}}
{| border="0"
{{-}}
| {{Zelda3Enemy|ALttP_enemies_Tauros.gif|STN|2|4|KO|KO|4|STN|4|KO|-|BRN|KO|BRN|FRZ|SLM|6|½|½|½}}
===Rope (snake)===
| {{Zelda3Enemy|ALttP_enemies_Tauros_Blue.gif|STN|2|3|4|KO|4|STN|4|KO|-|BRN|-|BRN|FRZ|SLM|8|1|½|¼}}
They charge at you when you're in front of them.
|}
{{Zelda3Enemy|LttP enemies Rope.gif|STN|2|KO|KO|KO|KO|KO|KO|KO|SLM|BRN|FRZ|BRN|FRZ|SLM|4|½|½|½}}
== Dungeons ==
{{-}}
=== Babuusu ===
 
{{Zelda3Enemy|LttP_enemies_Babuusu.gif|-|2|KO|KO|KO|KO|KO|KO|KO|-|BRN|KO|BRN|KO|KO|4|2|1|½}}
===Stalfos (skeleton)===
=== Bari ===
{{Zelda3Enemy|LttP enemies Stalfos.gif|1|2|KO|KO|KO|KO|STN|KO|KO|SLM|KO|KO|BRN|KO|SLM|4|½|½|½}}
{| border="0"
{{Zelda3Enemy|LttP enemies Stalfos Red.gif|1|2|KO|KO|KO|KO|STN|KO|KO|SLM|KO|KO|BRN|KO|SLM|4|½|½|½}}
| {{Zelda3Enemy|LttP_enemies_Bari_Blue.gif|-|KO|KO|KO|KO|KO|KO|KO|KO|-|BRN|KO|BRN|KO|-|2|½|½|½}}
The blue skeletons are mostly harmless and easily killed. The red skeletons will back away when attacked (so you do no damage) and then throw a bone at you.  To kill these skeletons, you must back them into a corner where they cannot back out any further. 
| {{Zelda3Enemy|LttP_enemies_Bari_Red.gif|-|2|KO|KO|KO|KO|KO|KO|KO|-|BRN|KO|BRN|KO|-|2|1|½|¼}}
{{-}}
|}
===Stalfos Skull===
'''Description:''' Bari's hover in the air utilizing a special form of electromagnetic repulsion.  Occasionally they build up an abaundance of electricity and they must release it.  If you strike during this time, you will get shocked and take damage instead of hurting them.  Red Baris split apart into two smaller Baris which possess the same ability to shock.  The Hookshot is a great weapon to use against them: it doesn't conduct electricity.
{{Zelda3Enemy|LttP enemies Stalfos Head.gif|1|2|4|KO|KO|3|STN|4|KO|-|KO|4|BRN|KO|STN|8|½|½|½}}
=== Buzz ===
Skull Stalfos drop down from the ceiling, only stopping long enough to deliver their floating skullsThe body floats back up to the ceiling, leaving the head behind to attack you.
{{Zelda3Enemy|LttP_enemies_Buzz.gif|STN|KO|KO|KO|KO|KO|KO|KO|KO|SLM|BRN|FRZ|BRN|FRZ|SLM|2|¼|⅛|⅛}}
{{-}}
=== Chyasupa ===
===Mini Moldorm===
{{Zelda3Enemy|LttP_enemies_Chyasupa.gif|KO|KO|KO|KO|KO|KO|KO|KO|KO|-|BRN|FRZ|BRN|FRZ|STN|1|¼|⅛|⅛}}
They can be killed by attacking them with the Hookshot.
=== Gibdo (mummy) ===
{{Zelda3Enemy|LttP enemies Tail.gif|-|2|KO|KO|KO|KO|KO|KO|KO|SLM|BRN|KO|BRN|KO|SLM|3|1|½|¼}}
{{Zelda3Enemy|LttP_enemies_Gibdo.gif|STN|2|4|8|16|-|-|4|KO|-|BRN|FRZ|BRN|KO|STN|32|2|1|½}}
 
=== Giibo ===
{{Footer Nav|game=The Legend of Zelda: A Link to the Past|prevpage=Characters|nextpage=Dark World Enemies}}
{{Zelda3Enemy|LttP_enemies_Giibo.gif|-|2|4|KO|KO|KO|-|4|KO|-|-|-|-|-|-|8|1|½|¼}}
'''Description:''' Giibos are strange floating creatures that have a central corporal body surrounded by a magical barrier.  In order to move around, the body must move to a new location.  Only when the body stops moving does the barrier follow.  The Giibo is only vulnerable when its body exists outside of the barrier.
=== Goriya ===
{| border="0"
| {{Zelda3Enemy|LttP_enemies_Goriya_Green.gif|-|2|4|KO|KO|KO|-|4|KO|-|-|-|-|-|-|16|1|1|1}}
| {{Zelda3Enemy|LttP_enemies_Goriya_Red.gif|-|-|-|-|-|4|-|-|KO|-|-|-|-|-|-|8|1|1|1}}
|}
'''Description:''' The Goriya (known as Copy in Japan) are simple creatures who utilize a confusing behavior to attack their enemies.  They mimic the movements of their opponent in the opposite direction.  When you go left, they go right.  If you move up, they move down.  If you line up face to face with a Red Goriya, it will spit a fireball at you.  The Green Goriyas are vulnerable to many typical attacks, but the Red Goriya can only be struck by arrows.
=== Helmasaur ===
{{Zelda3Enemy|LttP_enemies_Helmasaur.gif|-|2|KO|KO|KO|KO|STN|KO|KO|SLM|-|-|BRN|KO|SLM|4|1|½|¼}}
'''Description:''' The thick hard growth on their forehead makes them invulnerable to attacks from the front.  You must hit them on the side or from behind to damage them.
=== Hoba ===
{{Zelda3Enemy|LttP_enemies_Hoba.gif|-|2|KO|KO|KO|KO|KO|KO|KO|-|BRN|FRZ|KO|KO|KO|4|1|½|¼}}
=== Hokuboku ===
{{Zelda3Enemy|LttP_enemies_Hokuboku.gif|-|2|4|8|16|4|-|4|24|-|BRN|8|BRN|FRZ|STN|32|4|2|1}}
'''Description:''' Hokubokus have a number of body segments stacks on top of one another, with the head on top.  They like to bounce around in rooms.  When you strike them, you knock a body segment off which will bounce around for a bit before disappearing.  The segments can damage you if they bounce in to you.  Eventually, you will be left with just the head, which you must defeat.
=== Kyameron ===
{{Zelda3Enemy|LttP_enemies_Kyameron.gif|KO|KO|KO|KO|KO|KO|KO|KO|KO|-|KO|FRZ|KO|FRZ|KO|1|1|½|¼}}
=== Nuranull ===
{{Zelda3Enemy|LttP_enemies_Nuranull.gif|STN|2|4|KO|KO|4|STN|-|KO|SLM|BRN|FRZ|BRN|FRZ|SLM|8|4|2|1}}
'''Description:''' Nuranulls are a type of slug with the ability to produce explosive material.  As they wander around a room, they leave bombs behind that will detonate on their own in time, or whenever you carelessly strike them with a weapon.
=== Pentagator ===
{{Zelda3Enemy|LttP_enemies_Pentagator.gif|1|2|4|8|KO|4|KO|KO|KO|-|8|-|BRN|FRZ|KO|16|2|1|½}}
=== Pirogoose ===
{{Zelda3Enemy|LttP_enemies_Pirogoose.gif|1|KO|KO|KO|KO|KO|KO|KO|KO|-|BRN|KO|BRN|KO|STN|2|2|1|½}}
=== Pometto ===
{{Zelda3Enemy|LttP_enemies_Pametto.gif|1|2|4|KO|KO|4|STN|KO|KO|-|KO|FRZ|KO|KO|STN|8|1|½|¼}}
'''Description:''' Pomettos appear to be headless turtles; no matter which way they face, they always look the same.  Their thick hard shell makes them impervious to sharp attacks.  The only way to expose their soft under-belly is to pound the nearby ground with the Magic Hammer, which knocks them off their feet and on to their backs.  Be careful however.  After a while, they get back up on their feet, and chase you even faster.
=== Pon ===
{| border="0"
| {{Zelda3Enemy|LttP_enemies_Pon_Blue.gif|-|2|4|KO|KO|-|STN|STN|KO|-|-|-|BRN|FRZ|STN|6|1|½|¼}}
| {{Zelda3Enemy|LttP_enemies_Pon_Red.gif|-|2|4|8|16|-|STN|STN|KO|-|-|-|BRN|FRZ|STN|32|2|1|½}}
|}
'''Description:''' Pons have a thick rubbery shell on top of their heads.  While they can be attacked normally, the impact with the shell will send Link flying backwards.  Pons like to occupy floors with a lot of pits, where fighting them can lead to your falling off the edge.  Pons are protected against many unconventional attacks, and Red Pons are especially strong.
=== Skull Rope ===
{{Zelda3Enemy|LttP_enemies_Skull_Rope.gif|STN|2|KO|KO|KO|KO|KO|KO|KO|SLM|BRN|FRZ|BRN|FRZ|SLM|4|½|½|½}}
=== Stalfos Knight===
{{Zelda3Enemy|LttP_enemies_Stalfos_Knight.gif|-|-|-|-|?|-|-|-|-|-|-|-|-|-|-|?|2|1|½}}
'''Description:''' The magic that animates the great Stalfos Knights is a lot stronger than the usual Stalfos magic.  Only tremendous force can separate the bones, and only for a little while.  A bomb can produce that force.  Once the bones have fallen into a pile, you must attack it quickly before it rises back up to attack.  Bomb it again if you must, and attack the pile until it is defeated.
=== Tainon ===
{{Zelda3Enemy|LttP_enemies_Tainon.gif|-|-|-|-|-|-|-|-|-|-|KO|-|KO|-|-|24|4|2|1}}
'''Description:''' Tainon's are magical ice sculptures that only come to life when you get close enough to them.  They leap out of the wall from which they are carved to attack you.  Their one and only vulnerability is to heat.
=== Terubean ===
{{Zelda3Enemy|LttP_enemies_Terubean.gif|STN|-|-|-|-|-|-|-|-|-|-|-|-|-|-|5|4|3|2}}
'''Description:''' As an animated ball and chain, Terubeans are invulnerable to every form of attack.  The only weapon that will have any effect on them is the Boomerang, which only stuns them momentarily.
=== Wallmaster ===
{{Zelda3Enemy|LttP_enemies_Wallmaster.gif|1|2|4|KO|KO|4|-|4|KO|-|KO|KO|BRN|KO|KO|8|-|-|-}}
'''Description:''' Wallmasters drop from the ceiling over your current location.  If they manage to grab you, they will lift you back up to the ceiling, and you will be transported back to wherever you most recetly entered a dungeon from.  They cannot damage you, and even if you kill one, they will continue to appear.
=== Wizzrobe ===
{| border="0"
| {{Zelda3Enemy|LttP_enemies_Wizzrobe.gif|-|KO|KO|KO|KO|KO|-|-|KO|-|KO|KO|KO|KO|KO|2|4|2|1}}
| {{Zelda3Enemy|LttP_enemies_Wizzrobe_Purple.gif|-|KO|KO|KO|KO|KO|-|-|KO|-|KO|KO|KO|KO|KO|2|4|2|1}}
|}
=== Zahzak ===
{| border="0"
| {{Zelda3Enemy|LttP_enemies_Zahzak_Blue.gif|STN|2|KO|KO|KO|KO|KO|KO|KO|-|BRN|FRZ|BRN|FRZ|STN|4|2|1|½}}
| {{Zelda3Enemy|LttP_enemies_Zahzak_Red.gif|STN|2|4|KO|KO|4|KO|KO|KO|-|BRN|FRZ|BRN|FRZ|STN|8|2|1|½}}
|}
=== Zol ===
{{Zelda3Enemy|LttP_enemies_Zol.gif|STN|2|KO|KO|KO|KO|KO|KO|KO|-|BRN|FRZ|BRN|FRZ|KO|4|2|1|½}}
=== Zoro ===
{{Zelda3Enemy|LttP_enemies_Zoros.gif|STN|2|KO|KO|KO|KO|KO|KO|KO|-|BRN|FRZ|BRN|FRZ|KO|4|2|1|½}}
'''Description:''' Zoros are small magical dust mites that live inside of dungeon walls.  If you blast a hole in a wall, they may be startled and stream out of the hole in small groups.

Latest revision as of 22:15, 18 March 2021

stub
stub

This page is a stub. Help us expand it, and you get a cookie.

Table key[edit]

  • HP: Hit Points
  • #: Damage (amount of hit points removed)
  • KO: Knock Out (one-hit kill)
  • STN: Stun (temporarily immobilize)
  • BRN: Burn (incremental fire damage)
  • FRZ: Freeze (permanently immobilize)
  • SLM: Slime (transform into a Slime Monster)
  • Shirts: The amount of hearts Link will lose if attacked, based upon which color Mail he is wearing.

Soldiers[edit]

Hyrule Soldiers[edit]

LttP Hyrule Soldier.png HP 4 Zelda ALttP item Wooden Arrow.png KO Zelda ALttP item Magic Powder.png SLM Zelda ALttP item Green Mail.png ½
Zelda ALttP item L-1 Sword.png 2 Zelda ALttP item Silver Arrows.png KO Zelda ALttP item Fire Rod.png BRN
BS Zelda AST item L-2 Sword.png KO Zelda ALttP item Bombs.png KO Zelda ALttP item Ice Rod.png FRZ Zelda ALttP item Blue Mail.png ½
BS Zelda AST item L-3 Sword.png KO Zelda ALttP item Boomerang.png STN Zelda ALttP item Bombos.png BRN
BS Zelda AST item L-4 Sword.png KO Zelda ALttP item Hookshot.png STN Zelda ALttP item Ether.png FRZ Zelda ALttP item Red Mail.png ½
Zelda ALttP item Magic Hammer.png KO Zelda ALttP item Stone.png KO Zelda ALttP item Quake.png SLM

These are the first enemies that you see in the game, and some of the easiest to kill. Just swipe at them with your sword, and they'll usually be hit. However, sometimes you'll find your blow blocked by the daggers that all of soldiers have. To avoid this, just stun them by hitting them with a boomerang. This will neutralize any threat they might present, as well as stopping them from defending themselves. However, if you've just started out, you might not have your boomerang yet. To get around this, you can imitate their defensive stance by holding down your sword button. This will not only protect you, but will also charge your sword for a spin attack, which you can unleash as soon as it's charged. In the GBA version, you will also have the opportunity to attack them with magic by using your lamp. This is because in the GBA version of this game, your magic meter automatically fills when you get the lamp. In the SNES version, you may run out of magic and find yourself suddenly being hurt.

Sword Soldiers[edit]

LttP Sword Soldier Green.png HP 4 Zelda ALttP item Wooden Arrow.png KO Zelda ALttP item Magic Powder.png SLM Zelda ALttP item Green Mail.png ½
Zelda ALttP item L-1 Sword.png 2 Zelda ALttP item Silver Arrows.png KO Zelda ALttP item Fire Rod.png BRN
BS Zelda AST item L-2 Sword.png KO Zelda ALttP item Bombs.png KO Zelda ALttP item Ice Rod.png FRZ Zelda ALttP item Blue Mail.png ½
BS Zelda AST item L-3 Sword.png KO Zelda ALttP item Boomerang.png STN Zelda ALttP item Bombos.png BRN
BS Zelda AST item L-4 Sword.png KO Zelda ALttP item Hookshot.png STN Zelda ALttP item Ether.png FRZ Zelda ALttP item Red Mail.png ½
Zelda ALttP item Magic Hammer.png KO Zelda ALttP item Stone.png KO Zelda ALttP item Quake.png SLM
LttP Sword Soldier Blue.png HP 6 Zelda ALttP item Wooden Arrow.png 4 Zelda ALttP item Magic Powder.png - Zelda ALttP item Green Mail.png ½
Zelda ALttP item L-1 Sword.png 2 Zelda ALttP item Silver Arrows.png KO Zelda ALttP item Fire Rod.png BRN
BS Zelda AST item L-2 Sword.png 4 Zelda ALttP item Bombs.png 4 Zelda ALttP item Ice Rod.png KO Zelda ALttP item Blue Mail.png ½
BS Zelda AST item L-3 Sword.png KO Zelda ALttP item Boomerang.png STN Zelda ALttP item Bombos.png BRN
BS Zelda AST item L-4 Sword.png KO Zelda ALttP item Hookshot.png STN Zelda ALttP item Ether.png FRZ Zelda ALttP item Red Mail.png ½
Zelda ALttP item Magic Hammer.png KO Zelda ALttP item Stone.png KO Zelda ALttP item Quake.png SLM

Dashing Sword Soldiers[edit]

LttP Sword Soldier Dash.png HP 6 Zelda ALttP item Wooden Arrow.png 4 Zelda ALttP item Magic Powder.png - Zelda ALttP item Green Mail.png ½
Zelda ALttP item L-1 Sword.png 2 Zelda ALttP item Silver Arrows.png KO Zelda ALttP item Fire Rod.png BRN
BS Zelda AST item L-2 Sword.png 4 Zelda ALttP item Bombs.png 4 Zelda ALttP item Ice Rod.png - Zelda ALttP item Blue Mail.png ½
BS Zelda AST item L-3 Sword.png KO Zelda ALttP item Boomerang.png STN Zelda ALttP item Bombos.png BRN
BS Zelda AST item L-4 Sword.png KO Zelda ALttP item Hookshot.png STN Zelda ALttP item Ether.png FRZ Zelda ALttP item Red Mail.png ½
Zelda ALttP item Magic Hammer.png KO Zelda ALttP item Stone.png KO Zelda ALttP item Quake.png SLM

Spear Soldiers[edit]

LttP Spear Soldier Green.png HP 8 Zelda ALttP item Wooden Arrow.png 4 Zelda ALttP item Magic Powder.png - Zelda ALttP item Green Mail.png 1
Zelda ALttP item L-1 Sword.png 2 Zelda ALttP item Silver Arrows.png KO Zelda ALttP item Fire Rod.png BRN
BS Zelda AST item L-2 Sword.png 3 Zelda ALttP item Bombs.png 4 Zelda ALttP item Ice Rod.png - Zelda ALttP item Blue Mail.png ½
BS Zelda AST item L-3 Sword.png 4 Zelda ALttP item Boomerang.png STN Zelda ALttP item Bombos.png BRN
BS Zelda AST item L-4 Sword.png KO Zelda ALttP item Hookshot.png STN Zelda ALttP item Ether.png FRZ Zelda ALttP item Red Mail.png ¼
Zelda ALttP item Magic Hammer.png 4 Zelda ALttP item Stone.png 4 Zelda ALttP item Quake.png SLM
LttP Spear Soldier Dash.png HP 8 Zelda ALttP item Wooden Arrow.png 4 Zelda ALttP item Magic Powder.png - Zelda ALttP item Green Mail.png 1
Zelda ALttP item L-1 Sword.png 2 Zelda ALttP item Silver Arrows.png KO Zelda ALttP item Fire Rod.png BRN
BS Zelda AST item L-2 Sword.png 3 Zelda ALttP item Bombs.png 4 Zelda ALttP item Ice Rod.png - Zelda ALttP item Blue Mail.png ½
BS Zelda AST item L-3 Sword.png 4 Zelda ALttP item Boomerang.png STN Zelda ALttP item Bombos.png BRN
BS Zelda AST item L-4 Sword.png KO Zelda ALttP item Hookshot.png STN Zelda ALttP item Ether.png FRZ Zelda ALttP item Red Mail.png ¼
Zelda ALttP item Magic Hammer.png 4 Zelda ALttP item Stone.png 4 Zelda ALttP item Quake.png SLM

Spear Throwing Soldiers[edit]

LttP Spear Soldier Throw.png HP 8 Zelda ALttP item Wooden Arrow.png 4 Zelda ALttP item Magic Powder.png - Zelda ALttP item Green Mail.png 1
Zelda ALttP item L-1 Sword.png 2 Zelda ALttP item Silver Arrows.png KO Zelda ALttP item Fire Rod.png BRN
BS Zelda AST item L-2 Sword.png 3 Zelda ALttP item Bombs.png 4 Zelda ALttP item Ice Rod.png - Zelda ALttP item Blue Mail.png ½
BS Zelda AST item L-3 Sword.png 4 Zelda ALttP item Boomerang.png STN Zelda ALttP item Bombos.png BRN
BS Zelda AST item L-4 Sword.png KO Zelda ALttP item Hookshot.png STN Zelda ALttP item Ether.png FRZ Zelda ALttP item Red Mail.png ¼
Zelda ALttP item Magic Hammer.png 4 Zelda ALttP item Stone.png 4 Zelda ALttP item Quake.png SLM

Grass-hiding Spear Soldiers[edit]

They pop up in patches of grass. They will always pop up from the same place.

LttP Spear Soldier Grass.png HP 8 Zelda ALttP item Wooden Arrow.png 4 Zelda ALttP item Magic Powder.png - Zelda ALttP item Green Mail.png 1
Zelda ALttP item L-1 Sword.png 2 Zelda ALttP item Silver Arrows.png KO Zelda ALttP item Fire Rod.png BRN
BS Zelda AST item L-2 Sword.png 3 Zelda ALttP item Bombs.png 4 Zelda ALttP item Ice Rod.png - Zelda ALttP item Blue Mail.png ½
BS Zelda AST item L-3 Sword.png 4 Zelda ALttP item Boomerang.png STN Zelda ALttP item Bombos.png BRN
BS Zelda AST item L-4 Sword.png KO Zelda ALttP item Hookshot.png STN Zelda ALttP item Ether.png KO Zelda ALttP item Red Mail.png ¼
Zelda ALttP item Magic Hammer.png 4 Zelda ALttP item Stone.png 4 Zelda ALttP item Quake.png SLM

Archer Soldiers[edit]

LttP Bow Soldier Blue.png HP 6 Zelda ALttP item Wooden Arrow.png 4 Zelda ALttP item Magic Powder.png - Zelda ALttP item Green Mail.png ½
Zelda ALttP item L-1 Sword.png 2 Zelda ALttP item Silver Arrows.png KO Zelda ALttP item Fire Rod.png BRN
BS Zelda AST item L-2 Sword.png 4 Zelda ALttP item Bombs.png 4 Zelda ALttP item Ice Rod.png FRZ Zelda ALttP item Blue Mail.png ½
BS Zelda AST item L-3 Sword.png KO Zelda ALttP item Boomerang.png STN Zelda ALttP item Bombos.png BRN
BS Zelda AST item L-4 Sword.png KO Zelda ALttP item Hookshot.png STN Zelda ALttP item Ether.png FRZ Zelda ALttP item Red Mail.png ½
Zelda ALttP item Magic Hammer.png KO Zelda ALttP item Stone.png KO Zelda ALttP item Quake.png SLM

Grass-hiding Archer Soldiers[edit]

LttP Bow Soldier Grass.png HP 4 Zelda ALttP item Wooden Arrow.png KO Zelda ALttP item Magic Powder.png - Zelda ALttP item Green Mail.png ½
Zelda ALttP item L-1 Sword.png 2 Zelda ALttP item Silver Arrows.png KO Zelda ALttP item Fire Rod.png BRN
BS Zelda AST item L-2 Sword.png KO Zelda ALttP item Bombs.png KO Zelda ALttP item Ice Rod.png KO Zelda ALttP item Blue Mail.png ½
BS Zelda AST item L-3 Sword.png KO Zelda ALttP item Boomerang.png STN Zelda ALttP item Bombos.png BRN
BS Zelda AST item L-4 Sword.png KO Zelda ALttP item Hookshot.png STN Zelda ALttP item Ether.png KO Zelda ALttP item Red Mail.png ½
Zelda ALttP item Magic Hammer.png KO Zelda ALttP item Stone.png KO Zelda ALttP item Quake.png SLM

Bomb Soldiers[edit]

LttP Bomb Soldier.png HP 8 Zelda ALttP item Wooden Arrow.png 4 Zelda ALttP item Magic Powder.png - Zelda ALttP item Green Mail.png 1
Zelda ALttP item L-1 Sword.png 2 Zelda ALttP item Silver Arrows.png KO Zelda ALttP item Fire Rod.png BRN
BS Zelda AST item L-2 Sword.png 3 Zelda ALttP item Bombs.png 4 Zelda ALttP item Ice Rod.png FRZ Zelda ALttP item Blue Mail.png ½
BS Zelda AST item L-3 Sword.png 4 Zelda ALttP item Boomerang.png STN Zelda ALttP item Bombos.png BRN
BS Zelda AST item L-4 Sword.png KO Zelda ALttP item Hookshot.png STN Zelda ALttP item Ether.png FRZ Zelda ALttP item Red Mail.png ¼
Zelda ALttP item Magic Hammer.png 4 Zelda ALttP item Stone.png 4 Zelda ALttP item Quake.png SLM

Ball & Chain Soldiers[edit]

They use their ball and chain against you. They are vulnerable when they recharge.
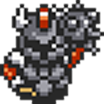
LttP Chain Soldier Black.png HP 16 Zelda ALttP item Wooden Arrow.png 4 Zelda ALttP item Magic Powder.png - Zelda ALttP item Green Mail.png 1
Zelda ALttP item L-1 Sword.png 2 Zelda ALttP item Silver Arrows.png KO Zelda ALttP item Fire Rod.png BRN
BS Zelda AST item L-2 Sword.png 2 Zelda ALttP item Bombs.png 4 Zelda ALttP item Ice Rod.png - Zelda ALttP item Blue Mail.png ½
BS Zelda AST item L-3 Sword.png 8 Zelda ALttP item Boomerang.png STN Zelda ALttP item Bombos.png BRN
BS Zelda AST item L-4 Sword.png KO Zelda ALttP item Hookshot.png STN Zelda ALttP item Ether.png FRZ Zelda ALttP item Red Mail.png ¼
Zelda ALttP item Magic Hammer.png 8 Zelda ALttP item Stone.png 8 Zelda ALttP item Quake.png SLM
LttP Chain Soldier Gold.png HP 16 Zelda ALttP item Wooden Arrow.png 4 Zelda ALttP item Magic Powder.png - Zelda ALttP item Green Mail.png 1
Zelda ALttP item L-1 Sword.png 2 Zelda ALttP item Silver Arrows.png KO Zelda ALttP item Fire Rod.png BRN
BS Zelda AST item L-2 Sword.png 2 Zelda ALttP item Bombs.png 4 Zelda ALttP item Ice Rod.png - Zelda ALttP item Blue Mail.png ½
BS Zelda AST item L-3 Sword.png 8 Zelda ALttP item Boomerang.png STN Zelda ALttP item Bombos.png BRN
BS Zelda AST item L-4 Sword.png KO Zelda ALttP item Hookshot.png STN Zelda ALttP item Ether.png FRZ Zelda ALttP item Red Mail.png ¼
Zelda ALttP item Magic Hammer.png 8 Zelda ALttP item Stone.png 8 Zelda ALttP item Quake.png SLM

Overworld[edit]

Armos[edit]

ALttP enemies Armos.gif HP 8 Zelda ALttP item Wooden Arrow.png KO Zelda ALttP item Magic Powder.png - Zelda ALttP item Green Mail.png ½
Zelda ALttP item L-1 Sword.png 2 Zelda ALttP item Silver Arrows.png KO Zelda ALttP item Fire Rod.png KO
BS Zelda AST item L-2 Sword.png 4 Zelda ALttP item Bombs.png 4 Zelda ALttP item Ice Rod.png FRZ Zelda ALttP item Blue Mail.png ½
BS Zelda AST item L-3 Sword.png KO Zelda ALttP item Boomerang.png STN Zelda ALttP item Bombos.png BRN
BS Zelda AST item L-4 Sword.png KO Zelda ALttP item Hookshot.png STN Zelda ALttP item Ether.png KO Zelda ALttP item Red Mail.png ½
Zelda ALttP item Magic Hammer.png KO Zelda ALttP item Stone.png KO Zelda ALttP item Quake.png STN

The Armos first appear to be harmless statues, but if you come to close, they will suddenly come to life and begin to chase you. However, because of their slow speed and nonexistent defense, they can be easily killed with almost any weapon.

Buzzblob[edit]

LttP enemies Buzzblob.gif HP 3 Zelda ALttP item Wooden Arrow.png KO Zelda ALttP item Magic Powder.png Zelda ALttP Cukeman.png Zelda ALttP item Green Mail.png ½
Zelda ALttP item L-1 Sword.png * Zelda ALttP item Silver Arrows.png KO Zelda ALttP item Fire Rod.png BRN
BS Zelda AST item L-2 Sword.png * Zelda ALttP item Bombs.png KO Zelda ALttP item Ice Rod.png FRZ Zelda ALttP item Blue Mail.png ½
BS Zelda AST item L-3 Sword.png * Zelda ALttP item Boomerang.png STN Zelda ALttP item Bombos.png BRN
BS Zelda AST item L-4 Sword.png KO Zelda ALttP item Hookshot.png STN Zelda ALttP item Ether.png FRZ Zelda ALttP item Red Mail.png ½
Zelda ALttP item Magic Hammer.png * Zelda ALttP item Stone.png * Zelda ALttP item Quake.png STN

The buzzblob produces an electric field that will sting Link if he strikes it with anything less than the level 4 sword. Once the buzzblob is stunned, its electric field is neutralized and a single hit from any sword will kill it. Throwing a stone will kill the buzzblob, whether or not it is stunned. The Buzzblob has a very unique reaction to Magic Powder. It becomes a Cukeman, which will give hints if talked to.

Crowl (crow)[edit]

LttP enemies Crowl.gif HP 4 Zelda ALttP item Wooden Arrow.png KO Zelda ALttP item Magic Powder.png - Zelda ALttP item Green Mail.png ½
Zelda ALttP item L-1 Sword.png 2 Zelda ALttP item Silver Arrows.png KO Zelda ALttP item Fire Rod.png BRN
BS Zelda AST item L-2 Sword.png KO Zelda ALttP item Bombs.png KO Zelda ALttP item Ice Rod.png KO Zelda ALttP item Blue Mail.png ½
BS Zelda AST item L-3 Sword.png KO Zelda ALttP item Boomerang.png 1 Zelda ALttP item Bombos.png BRN
BS Zelda AST item L-4 Sword.png KO Zelda ALttP item Hookshot.png KO Zelda ALttP item Ether.png FRZ Zelda ALttP item Red Mail.png ¼
Zelda ALttP item Magic Hammer.png KO Zelda ALttP item Stone.png KO Zelda ALttP item Quake.png KO

The Crowl is an enemy that comes in two forms. One form will stay in a tree until it spots you, when it will pop out and come toward you. However, there is a more dangerous form, which will keep attacking you until you kill it.

Deadrock[edit]

LttP enemies Deadrock.gif HP - Zelda ALttP item Wooden Arrow.png * Zelda ALttP item Magic Powder.png SLM Zelda ALttP item Green Mail.png 1
Zelda ALttP item L-1 Sword.png * Zelda ALttP item Silver Arrows.png * Zelda ALttP item Fire Rod.png *
BS Zelda AST item L-2 Sword.png * Zelda ALttP item Bombs.png * Zelda ALttP item Ice Rod.png * Zelda ALttP item Blue Mail.png ½
BS Zelda AST item L-3 Sword.png * Zelda ALttP item Boomerang.png * Zelda ALttP item Bombos.png -
BS Zelda AST item L-4 Sword.png * Zelda ALttP item Hookshot.png * Zelda ALttP item Ether.png - Zelda ALttP item Red Mail.png ¼
Zelda ALttP item Magic Hammer.png * Zelda ALttP item Stone.png * Zelda ALttP item Quake.png SLM

A Deadrock is quite literally a living rock, and therefore impervious to every attack at Link's disposal except the most powerful magic. Attacking it turns it back into an ordinary and immobile rock. The only way to make this invulnerable enemy vulnerable is to turn it into a slime first.

Derudoman[edit]

LttP enemies Derudoman.gif HP 4 Zelda ALttP item Wooden Arrow.png KO Zelda ALttP item Magic Powder.png - Zelda ALttP item Green Mail.png 1
Zelda ALttP item L-1 Sword.png 2 Zelda ALttP item Silver Arrows.png KO Zelda ALttP item Fire Rod.png KO
BS Zelda AST item L-2 Sword.png KO Zelda ALttP item Bombs.png KO Zelda ALttP item Ice Rod.png KO Zelda ALttP item Blue Mail.png ½
BS Zelda AST item L-3 Sword.png KO Zelda ALttP item Boomerang.png 1 Zelda ALttP item Bombos.png BRN
BS Zelda AST item L-4 Sword.png KO Zelda ALttP item Hookshot.png STN Zelda ALttP item Ether.png KO Zelda ALttP item Red Mail.png ¼
Zelda ALttP item Magic Hammer.png KO Zelda ALttP item Stone.png KO Zelda ALttP item Quake.png STN

The Derudomen are often annoying to players, due to their tendency to pop out of the ground right next to Link without warning. They generally live in desert areas, where the sand is soft enough to burrow in. One way to avoid them is to walk cautiously, then immediately begin attacking it when it pops out of the ground, removing its chance to get a free hit on you.

Hachi (bee)[edit]

ALttP enemies Hachi.gif HP 1 Zelda ALttP item Wooden Arrow.png KO Zelda ALttP item Magic Powder.png - Zelda ALttP item Green Mail.png ¼
Zelda ALttP item L-1 Sword.png KO Zelda ALttP item Silver Arrows.png KO Zelda ALttP item Fire Rod.png KO
BS Zelda AST item L-2 Sword.png KO Zelda ALttP item Bombs.png KO Zelda ALttP item Ice Rod.png KO Zelda ALttP item Blue Mail.png ?
BS Zelda AST item L-3 Sword.png KO Zelda ALttP item Boomerang.png - Zelda ALttP item Bombos.png KO
BS Zelda AST item L-4 Sword.png KO Zelda ALttP item Hookshot.png - Zelda ALttP item Ether.png KO Zelda ALttP item Red Mail.png ?
Zelda ALttP item Magic Hammer.png KO Zelda ALttP item Stone.png KO Zelda ALttP item Quake.png -

Hachi bees are, for the most part, a minor nuisance. They can appear when you cut down a bush or grass. They will fly around and sting you until you leave a portion of the world, or kill them. However, you can catch them with your net and hold them in a bottle. Then you can release them to attack nearby enemies.

Hedge[edit]

ALttP enemies Hedge.gif HP 2 Zelda ALttP item Wooden Arrow.png KO Zelda ALttP item Magic Powder.png SLM Zelda ALttP item Green Mail.png 0
Zelda ALttP item L-1 Sword.png KO Zelda ALttP item Silver Arrows.png KO Zelda ALttP item Fire Rod.png KO
BS Zelda AST item L-2 Sword.png KO Zelda ALttP item Bombs.png KO Zelda ALttP item Ice Rod.png KO Zelda ALttP item Blue Mail.png 0
BS Zelda AST item L-3 Sword.png KO Zelda ALttP item Boomerang.png 1 Zelda ALttP item Bombos.png KO
BS Zelda AST item L-4 Sword.png KO Zelda ALttP item Hookshot.png STN Zelda ALttP item Ether.png KO Zelda ALttP item Red Mail.png 0
Zelda ALttP item Magic Hammer.png KO Zelda ALttP item Stone.png KO Zelda ALttP item Quake.png SLM

This harmless insect is easy to kill, and can't even hurt you, but it can help you. If you lift the hedge (or rock) from off its back, it will start dropping Rupees in an attempt to shake you off its trail. If you collect five green Rupees before he disappears, it will drop a red Rupee.

Octoballoon[edit]

ALttP enemies Octoballoon.gif HP 2 Zelda ALttP item Wooden Arrow.png * Zelda ALttP item Magic Powder.png - Zelda ALttP item Green Mail.png 0
Zelda ALttP item L-1 Sword.png * Zelda ALttP item Silver Arrows.png * Zelda ALttP item Fire Rod.png BRN
BS Zelda AST item L-2 Sword.png * Zelda ALttP item Bombs.png * Zelda ALttP item Ice Rod.png * Zelda ALttP item Blue Mail.png 0
BS Zelda AST item L-3 Sword.png * Zelda ALttP item Boomerang.png 1 Zelda ALttP item Bombos.png BRN
BS Zelda AST item L-4 Sword.png * Zelda ALttP item Hookshot.png * Zelda ALttP item Ether.png * Zelda ALttP item Red Mail.png 0
Zelda ALttP item Magic Hammer.png * Zelda ALttP item Stone.png * Zelda ALttP item Quake.png -

The Octoballoon is a special floating variety of Octorok. It is sensitive to all but the hottest of attacks. Any attempt to kill it will result in 6 smaller Octo creatures bursting out of its top to attack before disappearing.

Octorok[edit]

LttP enemies Octorok.gif HP 2 Zelda ALttP item Wooden Arrow.png KO Zelda ALttP item Magic Powder.png SLM Zelda ALttP item Green Mail.png 1
Zelda ALttP item L-1 Sword.png KO Zelda ALttP item Silver Arrows.png KO Zelda ALttP item Fire Rod.png BRN
BS Zelda AST item L-2 Sword.png KO Zelda ALttP item Bombs.png KO Zelda ALttP item Ice Rod.png FRZ Zelda ALttP item Blue Mail.png 1
BS Zelda AST item L-3 Sword.png KO Zelda ALttP item Boomerang.png STN Zelda ALttP item Bombos.png BRN
BS Zelda AST item L-4 Sword.png KO Zelda ALttP item Hookshot.png STN Zelda ALttP item Ether.png FRZ Zelda ALttP item Red Mail.png 1
Zelda ALttP item Magic Hammer.png KO Zelda ALttP item Stone.png KO Zelda ALttP item Quake.png SLM

These creatures are back from the first Zelda game. Although they can be dispatched with almost any attack, they can still be dangerous because of their ability to fire rocks from their snouts. Luckily, these missiles can be blocked by any shield, as long as you are facing the rock without attacking. This is why Octarocks have taken to traveling in numbers. When there are several rocks whizzing around at once, they can be a bit more formiddable. However, defeating will often earn blue or occasionally even red rupees.

Peese (crab)[edit]

These little crabs are found near The Waterfall Of Wishing, And where you found the Ice Rod.

LttP enemies Peese.gif HP 2 Zelda ALttP item Wooden Arrow.png KO Zelda ALttP item Magic Powder.png SLM Zelda ALttP item Green Mail.png 2
Zelda ALttP item L-1 Sword.png KO Zelda ALttP item Silver Arrows.png KO Zelda ALttP item Fire Rod.png KO
BS Zelda AST item L-2 Sword.png KO Zelda ALttP item Bombs.png KO Zelda ALttP item Ice Rod.png FRZ Zelda ALttP item Blue Mail.png 1
BS Zelda AST item L-3 Sword.png KO Zelda ALttP item Boomerang.png STN Zelda ALttP item Bombos.png BRN
BS Zelda AST item L-4 Sword.png KO Zelda ALttP item Hookshot.png STN Zelda ALttP item Ether.png FRZ Zelda ALttP item Red Mail.png ½
Zelda ALttP item Magic Hammer.png KO Zelda ALttP item Stone.png KO Zelda ALttP item Quake.png SLM

Poe (soul)[edit]

Poes are like Hues in the Light World. Basically all they have is a lantern, and they fly around.

ALttP enemies Poe.gif HP 8 Zelda ALttP item Wooden Arrow.png 4 Zelda ALttP item Magic Powder.png - Zelda ALttP item Green Mail.png 2
Zelda ALttP item L-1 Sword.png 2 Zelda ALttP item Silver Arrows.png KO Zelda ALttP item Fire Rod.png KO
BS Zelda AST item L-2 Sword.png 4 Zelda ALttP item Bombs.png 4 Zelda ALttP item Ice Rod.png KO Zelda ALttP item Blue Mail.png 1
BS Zelda AST item L-3 Sword.png KO Zelda ALttP item Boomerang.png 1 Zelda ALttP item Bombos.png BRN
BS Zelda AST item L-4 Sword.png KO Zelda ALttP item Hookshot.png KO Zelda ALttP item Ether.png KO Zelda ALttP item Red Mail.png ½
Zelda ALttP item Magic Hammer.png KO Zelda ALttP item Stone.png KO Zelda ALttP item Quake.png -

Slime[edit]

ALttP enemies Slime.gif HP 2 Zelda ALttP item Wooden Arrow.png KO Zelda ALttP item Magic Powder.png - Zelda ALttP item Green Mail.png ½
Zelda ALttP item L-1 Sword.png KO Zelda ALttP item Silver Arrows.png KO Zelda ALttP item Fire Rod.png BRN
BS Zelda AST item L-2 Sword.png KO Zelda ALttP item Bombs.png KO Zelda ALttP item Ice Rod.png FRZ Zelda ALttP item Blue Mail.png ½
BS Zelda AST item L-3 Sword.png KO Zelda ALttP item Boomerang.png STN Zelda ALttP item Bombos.png BRN
BS Zelda AST item L-4 Sword.png KO Zelda ALttP item Hookshot.png KO Zelda ALttP item Ether.png FRZ Zelda ALttP item Red Mail.png ½
Zelda ALttP item Magic Hammer.png KO Zelda ALttP item Stone.png KO Zelda ALttP item Quake.png KO

Slimes are defenseless creatures that typically appear as the result of sprinkling Magic Powder on a more dangerous enemy, or using the magic of the Quake medallion. In this form, any enemy can be quickly defeated.

Tektite[edit]

They are back from the original game. They hop from one location to another.

LttP enemies Tektite Blue.gif HP 8 Zelda ALttP item Wooden Arrow.png 4 Zelda ALttP item Magic Powder.png - Zelda ALttP item Green Mail.png 1
Zelda ALttP item L-1 Sword.png 2 Zelda ALttP item Silver Arrows.png KO Zelda ALttP item Fire Rod.png BRN
BS Zelda AST item L-2 Sword.png 4 Zelda ALttP item Bombs.png KO Zelda ALttP item Ice Rod.png FRZ Zelda ALttP item Blue Mail.png 1
BS Zelda AST item L-3 Sword.png KO Zelda ALttP item Boomerang.png STN Zelda ALttP item Bombos.png KO
BS Zelda AST item L-4 Sword.png KO Zelda ALttP item Hookshot.png - Zelda ALttP item Ether.png KO Zelda ALttP item Red Mail.png ½
Zelda ALttP item Magic Hammer.png KO Zelda ALttP item Stone.png KO Zelda ALttP item Quake.png KO
LttP enemies Tektite Red.gif HP 12 Zelda ALttP item Wooden Arrow.png 4 Zelda ALttP item Magic Powder.png - Zelda ALttP item Green Mail.png 2
Zelda ALttP item L-1 Sword.png 2 Zelda ALttP item Silver Arrows.png KO Zelda ALttP item Fire Rod.png BRN
BS Zelda AST item L-2 Sword.png 4 Zelda ALttP item Bombs.png KO Zelda ALttP item Ice Rod.png FRZ Zelda ALttP item Blue Mail.png 2
BS Zelda AST item L-3 Sword.png 8 Zelda ALttP item Boomerang.png STN Zelda ALttP item Bombos.png KO
BS Zelda AST item L-4 Sword.png KO Zelda ALttP item Hookshot.png - Zelda ALttP item Ether.png KO Zelda ALttP item Red Mail.png 1
Zelda ALttP item Magic Hammer.png 8 Zelda ALttP item Stone.png 8 Zelda ALttP item Quake.png KO

Tendol (vulture)[edit]

These birds fly around you in circles when you walk through the desert.

LttP enemies Tendol.gif HP 6 Zelda ALttP item Wooden Arrow.png 4 Zelda ALttP item Magic Powder.png - Zelda ALttP item Green Mail.png 1
Zelda ALttP item L-1 Sword.png 2 Zelda ALttP item Silver Arrows.png KO Zelda ALttP item Fire Rod.png BRN
BS Zelda AST item L-2 Sword.png 4 Zelda ALttP item Bombs.png 4 Zelda ALttP item Ice Rod.png KO Zelda ALttP item Blue Mail.png ½
BS Zelda AST item L-3 Sword.png KO Zelda ALttP item Boomerang.png 1 Zelda ALttP item Bombos.png BRN
BS Zelda AST item L-4 Sword.png KO Zelda ALttP item Hookshot.png KO Zelda ALttP item Ether.png FRZ Zelda ALttP item Red Mail.png ¼
Zelda ALttP item Magic Hammer.png KO Zelda ALttP item Stone.png KO Zelda ALttP item Quake.png KO

Thief[edit]

ALttP enemies Theif.gif HP - Zelda ALttP item Wooden Arrow.png - Zelda ALttP item Magic Powder.png - Zelda ALttP item Green Mail.png -
Zelda ALttP item L-1 Sword.png - Zelda ALttP item Silver Arrows.png - Zelda ALttP item Fire Rod.png -
BS Zelda AST item L-2 Sword.png - Zelda ALttP item Bombs.png - Zelda ALttP item Ice Rod.png - Zelda ALttP item Blue Mail.png -
BS Zelda AST item L-3 Sword.png - Zelda ALttP item Boomerang.png - Zelda ALttP item Bombos.png -
BS Zelda AST item L-4 Sword.png - Zelda ALttP item Hookshot.png - Zelda ALttP item Ether.png - Zelda ALttP item Red Mail.png -
Zelda ALttP item Magic Hammer.png - Zelda ALttP item Stone.png - Zelda ALttP item Quake.png -

Using special defensive techniques, the Thieves of the Lost Woods are impervious to all forms of attack, physical or magical. They cannot be harmed, nor can they harm you. But if they collide with you in the woods, expect to drop some supplies and Rupees that Thieves will be quick to collect from you.

Toppi (rabbit)[edit]

ALttP enemies Topi.gif HP 2 Zelda ALttP item Wooden Arrow.png KO Zelda ALttP item Magic Powder.png - Zelda ALttP item Green Mail.png ½
Zelda ALttP item L-1 Sword.png KO Zelda ALttP item Silver Arrows.png KO Zelda ALttP item Fire Rod.png BRN
BS Zelda AST item L-2 Sword.png KO Zelda ALttP item Bombs.png KO Zelda ALttP item Ice Rod.png KO Zelda ALttP item Blue Mail.png ½
BS Zelda AST item L-3 Sword.png KO Zelda ALttP item Boomerang.png 1 Zelda ALttP item Bombos.png BRN
BS Zelda AST item L-4 Sword.png KO Zelda ALttP item Hookshot.png STN Zelda ALttP item Ether.png KO Zelda ALttP item Red Mail.png ½
Zelda ALttP item Magic Hammer.png KO Zelda ALttP item Stone.png KO Zelda ALttP item Quake.png STN

This rabbit hops out from thick grass. He is easy to kill, but you can play a trick on it to earn Rupees. Instead of attacking the Toppi, destroy the grass that he jumped from. He will land helplessly on his back. Approach him and he will call you a thief, and give you Rupees, Bombs, Arrows or whatnot to leave him alone.

Zora[edit]

They live in water bodies and pop out of their whirlpools. They fire magic attacks at you. To block a magic attack you need to have a Magic Shield or Mirror Shield.

LttP enemies Zora.gif HP 8 Zelda ALttP item Wooden Arrow.png 4 Zelda ALttP item Magic Powder.png - Zelda ALttP item Green Mail.png ½
Zelda ALttP item L-1 Sword.png 2 Zelda ALttP item Silver Arrows.png KO Zelda ALttP item Fire Rod.png BRN
BS Zelda AST item L-2 Sword.png 4 Zelda ALttP item Bombs.png 4 Zelda ALttP item Ice Rod.png KO Zelda ALttP item Blue Mail.png ½
BS Zelda AST item L-3 Sword.png KO Zelda ALttP item Boomerang.png 1 Zelda ALttP item Bombos.png BRN
BS Zelda AST item L-4 Sword.png KO Zelda ALttP item Hookshot.png STN Zelda ALttP item Ether.png KO Zelda ALttP item Red Mail.png ½
Zelda ALttP item Magic Hammer.png KO Zelda ALttP item Stone.png KO Zelda ALttP item Quake.png KO
LttP enemies Zorawalk.gif HP 8 Zelda ALttP item Wooden Arrow.png 4 Zelda ALttP item Magic Powder.png - Zelda ALttP item Green Mail.png ½
Zelda ALttP item L-1 Sword.png 2 Zelda ALttP item Silver Arrows.png KO Zelda ALttP item Fire Rod.png BRN
BS Zelda AST item L-2 Sword.png 4 Zelda ALttP item Bombs.png 4 Zelda ALttP item Ice Rod.png KO Zelda ALttP item Blue Mail.png ½
BS Zelda AST item L-3 Sword.png KO Zelda ALttP item Boomerang.png STN Zelda ALttP item Bombos.png BRN
BS Zelda AST item L-4 Sword.png KO Zelda ALttP item Hookshot.png STN Zelda ALttP item Ether.png KO Zelda ALttP item Red Mail.png ½
Zelda ALttP item Magic Hammer.png KO Zelda ALttP item Stone.png KO Zelda ALttP item Quake.png KO

Dungeons[edit]

Devilant[edit]

Devilants are only found in the Desert Palace. Red Devilants shoot 3 fireballs, Blue Devilants Just pop up, And do no damage to Link.
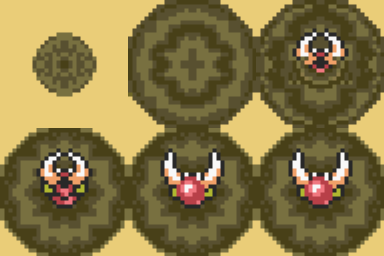
LttP enemies Devilant.gif HP 4 Zelda ALttP item Wooden Arrow.png KO Zelda ALttP item Magic Powder.png - Zelda ALttP item Green Mail.png 1
Zelda ALttP item L-1 Sword.png 2 Zelda ALttP item Silver Arrows.png KO Zelda ALttP item Fire Rod.png KO
BS Zelda AST item L-2 Sword.png KO Zelda ALttP item Bombs.png KO Zelda ALttP item Ice Rod.png KO Zelda ALttP item Blue Mail.png ½
BS Zelda AST item L-3 Sword.png KO Zelda ALttP item Boomerang.png 1 Zelda ALttP item Bombos.png BRN
BS Zelda AST item L-4 Sword.png KO Zelda ALttP item Hookshot.png STN Zelda ALttP item Ether.png KO Zelda ALttP item Red Mail.png ¼
Zelda ALttP item Magic Hammer.png KO Zelda ALttP item Stone.png KO Zelda ALttP item Quake.png STN

Eyegore[edit]

LttP enemies Eyegore Green.gif HP 16 Zelda ALttP item Wooden Arrow.png KO Zelda ALttP item Magic Powder.png - Zelda ALttP item Green Mail.png 1
Zelda ALttP item L-1 Sword.png 2 Zelda ALttP item Silver Arrows.png KO Zelda ALttP item Fire Rod.png -
BS Zelda AST item L-2 Sword.png 4 Zelda ALttP item Bombs.png 4 Zelda ALttP item Ice Rod.png - Zelda ALttP item Blue Mail.png 1
BS Zelda AST item L-3 Sword.png KO Zelda ALttP item Boomerang.png - Zelda ALttP item Bombos.png -
BS Zelda AST item L-4 Sword.png KO Zelda ALttP item Hookshot.png - Zelda ALttP item Ether.png - Zelda ALttP item Red Mail.png 1
Zelda ALttP item Magic Hammer.png KO Zelda ALttP item Stone.png KO Zelda ALttP item Quake.png -
LttP enemies Eyegore Red.gif HP 8 Zelda ALttP item Wooden Arrow.png 4 Zelda ALttP item Magic Powder.png - Zelda ALttP item Green Mail.png 1
Zelda ALttP item L-1 Sword.png - Zelda ALttP item Silver Arrows.png KO Zelda ALttP item Fire Rod.png -
BS Zelda AST item L-2 Sword.png - Zelda ALttP item Bombs.png - Zelda ALttP item Ice Rod.png - Zelda ALttP item Blue Mail.png 1
BS Zelda AST item L-3 Sword.png - Zelda ALttP item Boomerang.png - Zelda ALttP item Bombos.png -
BS Zelda AST item L-4 Sword.png - Zelda ALttP item Hookshot.png - Zelda ALttP item Ether.png - Zelda ALttP item Red Mail.png 1
Zelda ALttP item Magic Hammer.png - Zelda ALttP item Stone.png - Zelda ALttP item Quake.png -

Eyegores are magical statues that normally sleep. They only wake up when you get close enough to them. Then their single eye opens up and they begin to chase you. You can only hurt them when they are awake. Furthermore, Red Eyegores can only be damaged by bow and arrow attacks.

Goozu (rat)[edit]

LttP enemies Goozu.gif HP 2 Zelda ALttP item Wooden Arrow.png KO Zelda ALttP item Magic Powder.png SLM Zelda ALttP item Green Mail.png ¼
Zelda ALttP item L-1 Sword.png KO Zelda ALttP item Silver Arrows.png KO Zelda ALttP item Fire Rod.png BRN
BS Zelda AST item L-2 Sword.png KO Zelda ALttP item Bombs.png KO Zelda ALttP item Ice Rod.png FRZ Zelda ALttP item Blue Mail.png ?
BS Zelda AST item L-3 Sword.png KO Zelda ALttP item Boomerang.png STN Zelda ALttP item Bombos.png BRN
BS Zelda AST item L-4 Sword.png KO Zelda ALttP item Hookshot.png KO Zelda ALttP item Ether.png FRZ Zelda ALttP item Red Mail.png ?
Zelda ALttP item Magic Hammer.png KO Zelda ALttP item Stone.png KO Zelda ALttP item Quake.png SLM

Keese (bat)[edit]

They can be killed with a strike from the Boomerang.

LttP enemies Keese.gif HP 1 Zelda ALttP item Wooden Arrow.png KO Zelda ALttP item Magic Powder.png - Zelda ALttP item Green Mail.png ¼
Zelda ALttP item L-1 Sword.png KO Zelda ALttP item Silver Arrows.png KO Zelda ALttP item Fire Rod.png BRN
BS Zelda AST item L-2 Sword.png KO Zelda ALttP item Bombs.png KO Zelda ALttP item Ice Rod.png FRZ Zelda ALttP item Blue Mail.png ?
BS Zelda AST item L-3 Sword.png KO Zelda ALttP item Boomerang.png KO Zelda ALttP item Bombos.png BRN
BS Zelda AST item L-4 Sword.png KO Zelda ALttP item Hookshot.png KO Zelda ALttP item Ether.png FRZ Zelda ALttP item Red Mail.png ?
Zelda ALttP item Magic Hammer.png KO Zelda ALttP item Stone.png KO Zelda ALttP item Quake.png STN

Kodongo[edit]

LttP enemies Kodongo.gif HP 2 Zelda ALttP item Wooden Arrow.png KO Zelda ALttP item Magic Powder.png - Zelda ALttP item Green Mail.png 1
Zelda ALttP item L-1 Sword.png KO Zelda ALttP item Silver Arrows.png KO Zelda ALttP item Fire Rod.png KO
BS Zelda AST item L-2 Sword.png KO Zelda ALttP item Bombs.png - Zelda ALttP item Ice Rod.png FRZ Zelda ALttP item Blue Mail.png 1
BS Zelda AST item L-3 Sword.png KO Zelda ALttP item Boomerang.png - Zelda ALttP item Bombos.png BRN
BS Zelda AST item L-4 Sword.png KO Zelda ALttP item Hookshot.png - Zelda ALttP item Ether.png FRZ Zelda ALttP item Red Mail.png 1
Zelda ALttP item Magic Hammer.png KO Zelda ALttP item Stone.png KO Zelda ALttP item Quake.png SLM

Leevers[edit]

LttP enemies Leever Green.gif HP 4 Zelda ALttP item Wooden Arrow.png KO Zelda ALttP item Magic Powder.png - Zelda ALttP item Green Mail.png ½
Zelda ALttP item L-1 Sword.png 2 Zelda ALttP item Silver Arrows.png KO Zelda ALttP item Fire Rod.png BRN
BS Zelda AST item L-2 Sword.png KO Zelda ALttP item Bombs.png KO Zelda ALttP item Ice Rod.png FRZ Zelda ALttP item Blue Mail.png ½
BS Zelda AST item L-3 Sword.png KO Zelda ALttP item Boomerang.png STN Zelda ALttP item Bombos.png BRN
BS Zelda AST item L-4 Sword.png KO Zelda ALttP item Hookshot.png STN Zelda ALttP item Ether.png FRZ Zelda ALttP item Red Mail.png ½
Zelda ALttP item Magic Hammer.png KO Zelda ALttP item Stone.png KO Zelda ALttP item Quake.png STN
LttP enemies Leever Red.gif HP 4 Zelda ALttP item Wooden Arrow.png KO Zelda ALttP item Magic Powder.png - Zelda ALttP item Green Mail.png ½
Zelda ALttP item L-1 Sword.png 2 Zelda ALttP item Silver Arrows.png KO Zelda ALttP item Fire Rod.png BRN
BS Zelda AST item L-2 Sword.png KO Zelda ALttP item Bombs.png KO Zelda ALttP item Ice Rod.png FRZ Zelda ALttP item Blue Mail.png ½
BS Zelda AST item L-3 Sword.png KO Zelda ALttP item Boomerang.png STN Zelda ALttP item Bombos.png BRN
BS Zelda AST item L-4 Sword.png KO Zelda ALttP item Hookshot.png STN Zelda ALttP item Ether.png FRZ Zelda ALttP item Red Mail.png ½
Zelda ALttP item Magic Hammer.png KO Zelda ALttP item Stone.png KO Zelda ALttP item Quake.png STN

Popo[edit]

LttP enemies Popo.gif HP 2 Zelda ALttP item Wooden Arrow.png KO Zelda ALttP item Magic Powder.png SLM Zelda ALttP item Green Mail.png ½
Zelda ALttP item L-1 Sword.png KO Zelda ALttP item Silver Arrows.png KO Zelda ALttP item Fire Rod.png BRN
BS Zelda AST item L-2 Sword.png KO Zelda ALttP item Bombs.png KO Zelda ALttP item Ice Rod.png FRZ Zelda ALttP item Blue Mail.png ½
BS Zelda AST item L-3 Sword.png KO Zelda ALttP item Boomerang.png STN Zelda ALttP item Bombos.png BRN
BS Zelda AST item L-4 Sword.png KO Zelda ALttP item Hookshot.png KO Zelda ALttP item Ether.png FRZ Zelda ALttP item Red Mail.png ½
Zelda ALttP item Magic Hammer.png KO Zelda ALttP item Stone.png KO Zelda ALttP item Quake.png SLM

Rope (snake)[edit]

They charge at you when you're in front of them.

LttP enemies Rope.gif HP 4 Zelda ALttP item Wooden Arrow.png KO Zelda ALttP item Magic Powder.png SLM Zelda ALttP item Green Mail.png ½
Zelda ALttP item L-1 Sword.png 2 Zelda ALttP item Silver Arrows.png KO Zelda ALttP item Fire Rod.png BRN
BS Zelda AST item L-2 Sword.png KO Zelda ALttP item Bombs.png KO Zelda ALttP item Ice Rod.png FRZ Zelda ALttP item Blue Mail.png ½
BS Zelda AST item L-3 Sword.png KO Zelda ALttP item Boomerang.png STN Zelda ALttP item Bombos.png BRN
BS Zelda AST item L-4 Sword.png KO Zelda ALttP item Hookshot.png KO Zelda ALttP item Ether.png FRZ Zelda ALttP item Red Mail.png ½
Zelda ALttP item Magic Hammer.png KO Zelda ALttP item Stone.png KO Zelda ALttP item Quake.png SLM

Stalfos (skeleton)[edit]

LttP enemies Stalfos.gif HP 4 Zelda ALttP item Wooden Arrow.png KO Zelda ALttP item Magic Powder.png SLM Zelda ALttP item Green Mail.png ½
Zelda ALttP item L-1 Sword.png 2 Zelda ALttP item Silver Arrows.png KO Zelda ALttP item Fire Rod.png KO
BS Zelda AST item L-2 Sword.png KO Zelda ALttP item Bombs.png KO Zelda ALttP item Ice Rod.png KO Zelda ALttP item Blue Mail.png ½
BS Zelda AST item L-3 Sword.png KO Zelda ALttP item Boomerang.png 1 Zelda ALttP item Bombos.png BRN
BS Zelda AST item L-4 Sword.png KO Zelda ALttP item Hookshot.png STN Zelda ALttP item Ether.png KO Zelda ALttP item Red Mail.png ½
Zelda ALttP item Magic Hammer.png KO Zelda ALttP item Stone.png KO Zelda ALttP item Quake.png SLM
LttP enemies Stalfos Red.gif HP 4 Zelda ALttP item Wooden Arrow.png KO Zelda ALttP item Magic Powder.png SLM Zelda ALttP item Green Mail.png ½
Zelda ALttP item L-1 Sword.png 2 Zelda ALttP item Silver Arrows.png KO Zelda ALttP item Fire Rod.png KO
BS Zelda AST item L-2 Sword.png KO Zelda ALttP item Bombs.png KO Zelda ALttP item Ice Rod.png KO Zelda ALttP item Blue Mail.png ½
BS Zelda AST item L-3 Sword.png KO Zelda ALttP item Boomerang.png 1 Zelda ALttP item Bombos.png BRN
BS Zelda AST item L-4 Sword.png KO Zelda ALttP item Hookshot.png STN Zelda ALttP item Ether.png KO Zelda ALttP item Red Mail.png ½
Zelda ALttP item Magic Hammer.png KO Zelda ALttP item Stone.png KO Zelda ALttP item Quake.png SLM

The blue skeletons are mostly harmless and easily killed. The red skeletons will back away when attacked (so you do no damage) and then throw a bone at you. To kill these skeletons, you must back them into a corner where they cannot back out any further.

Stalfos Skull[edit]

LttP enemies Stalfos Head.gif HP 8 Zelda ALttP item Wooden Arrow.png 3 Zelda ALttP item Magic Powder.png - Zelda ALttP item Green Mail.png ½
Zelda ALttP item L-1 Sword.png 2 Zelda ALttP item Silver Arrows.png KO Zelda ALttP item Fire Rod.png KO
BS Zelda AST item L-2 Sword.png 4 Zelda ALttP item Bombs.png 4 Zelda ALttP item Ice Rod.png 4 Zelda ALttP item Blue Mail.png ½
BS Zelda AST item L-3 Sword.png KO Zelda ALttP item Boomerang.png 1 Zelda ALttP item Bombos.png BRN
BS Zelda AST item L-4 Sword.png KO Zelda ALttP item Hookshot.png STN Zelda ALttP item Ether.png KO Zelda ALttP item Red Mail.png ½
Zelda ALttP item Magic Hammer.png KO Zelda ALttP item Stone.png KO Zelda ALttP item Quake.png STN

Skull Stalfos drop down from the ceiling, only stopping long enough to deliver their floating skulls. The body floats back up to the ceiling, leaving the head behind to attack you.

Mini Moldorm[edit]

They can be killed by attacking them with the Hookshot.

LttP enemies Tail.gif HP 3 Zelda ALttP item Wooden Arrow.png KO Zelda ALttP item Magic Powder.png SLM Zelda ALttP item Green Mail.png 1
Zelda ALttP item L-1 Sword.png 2 Zelda ALttP item Silver Arrows.png KO Zelda ALttP item Fire Rod.png BRN
BS Zelda AST item L-2 Sword.png KO Zelda ALttP item Bombs.png KO Zelda ALttP item Ice Rod.png KO Zelda ALttP item Blue Mail.png ½
BS Zelda AST item L-3 Sword.png KO Zelda ALttP item Boomerang.png - Zelda ALttP item Bombos.png BRN
BS Zelda AST item L-4 Sword.png KO Zelda ALttP item Hookshot.png KO Zelda ALttP item Ether.png KO Zelda ALttP item Red Mail.png ¼
Zelda ALttP item Magic Hammer.png KO Zelda ALttP item Stone.png KO Zelda ALttP item Quake.png SLM