| (77 intermediate revisions by 36 users not shown) | |||
| Line 1: | Line 1: | ||
{{Header Nav|game=The Legend of Zelda: Ocarina of Time}} | |||
{{Control selector|Nintendo 64, GameCube, Virtual Console, 3DS, Switch}} | |||
Once you enter '''Kakariko Village''', you'll find it a busy place. A construction project is under way. Up the hill to your left is the gate to [[../Goron City|Death Mountain Trail]], and to the right of the windmill is the path to the [[#Kakariko Village graveyard|Kakariko Village graveyard]]. | |||
[[File:OoT Kakariko Village.jpg|thumb|right|200px|Impa's hometown, Kakariko Village.]] | |||
==The gate to Death Mountain== | |||
[[File:OoT Death Mountain Gate Opens.jpg|left|thumb|Show Zelda's letter to the guard]] | |||
In order to get to Death Mountain, you need to open the gate. Speak to the guard at the gate. He won't let you through unless you have royal permission, but when you show him {{im/oot|Items|Zelda's Letter}}, he opens the gate for you. However, he suggests that you have a "proper shield". According to him, you can buy this shield in the [[../Hyrule Castle#Bazaar|Bazaar]] in the [[../Hyrule Castle#Hyrule Market|Hyrule Castle Town Market]]. After you talk to the guard, you can go to the Market to find the Bazaar shop. He'll take off a random amount off the price (as much as 40 rupees off) for the {{im/oot|Equipment|Hylian Shield}}. Though you may want to wait just a moment before deciding to head all the way back there right now, as there is an even better deal available to you. | |||
Additionally, the guard makes a request that you pick up a popular mask from the [[../The Happy Mask Shop|Happy Mask Shop]] for his son. It seems that his son really wants the {{im/oot|The Happy Mask Shop|Keaton Mask}} from Hyrule Market but he can't leave his post to get it. If you want you can run back to the Hyrule Market and get the mask from the mask shop. Bring this mask to the guard to sell it to him for a 5 rupee profit. While it's not much, you will get access to other masks later in the game which can bring you much bigger profits and upgrades. | |||
Before heading up through [[../Goron City|Death Mountain Trail]], go to the graveyard and enter the grave second from the left on the first row. It will have three tiny flowers on the ground in front of it. If you already have the Hylian Shield the chest will instead contain {{im/oot|Consumables|Blue Rupee}}. Return later with {{im/oot|Items|Bomb|display=bombs}} to uncover a Fairy's Fountain behind the chest. You can heal from these {{im/oot|Items|Fairy's Spirit|display=fairies}} or capture them, but you need an {{im/oot|Items|Empty Bottle}} to carry them in. | |||
{{-}} | |||
===The Gorons' problem=== | |||
As you move up Death Mountain Trail, you'll meet several {{im/oot|Enemies|Red Tektite|display=Red Tektites}}. Beyond them is a large boulder with a smaller boulder to the right. Surprise! When you approach the smaller boulder, it turns out to be a Goron. He explains the problem the Gorons are having. They feed on rocks, and the best rocks come from [[../Dodongo's Cavern|Dodongo's Cavern]], but recently a Gerudo came and sealed up the cavern with this giant boulder. Additionally, the cavern has filled with monsters. After speaking with him, continue up the mountain. | |||
==Sidequests== | ==Sidequests== | ||
There may be a few things to do here before [[#The gate to Death Mountain|continuing up Death Mountain Trail]]. | |||
{{OoT Skulltula|width=100%|title=[[../Gold Skulltulas#Kakariko Village|Many Gold Skulltulas]]|contents=There are five Gold Skulltulas you can find in Kakariko Village. | |||
{{-}} | |||
[[File:LoZ OOT Skulltula 22.png|150px|left]] | |||
The large tree near the entrance to Kakariko has a {{im/oot|Enemies|Gold Skulltula}} in its branches. Roll into it to dislodge it. | |||
{{-}} | |||
[[File:LoZ OOT Skulltula 23.png|150px|right]] | |||
You will find a {{im/oot|Enemies|Gold Skulltula}} lurking on the side of the House of Skulltula. | |||
{{-}} | |||
[[File:LoZ OOT Skulltula 24.png|150px|left]] | |||
Look on the center pile of bricks of the building currently under construction to spot another {{im/oot|Enemies|Gold Skulltula}}. | |||
{{-}} | |||
[[File:LoZ OOT Skulltula 25.png|150px|right]] | |||
The house to the left of the gate leading to Death Mountain has a {{im/oot|Enemies|Gold Skulltula}} on its side. | |||
{{-}} | |||
[[File:LoZ OOT Skulltula 26.png|150px|left]] | |||
Use your {{im/oot|Items|Fairy Slingshot}} or {{im/oot|Items|Bombchu|display=Bombchus}} to kill a {{im/oot|Enemies|Gold Skulltula}} on the ladder of the tall lookout tower, then climb up to grab the token. | |||
{{-}}}} | |||
{{-}} | |||
===The House of Skulltula=== | ===The House of Skulltula=== | ||
{{Zelda PoH|title=[[../Heart Containers#Kakariko Village|A Heart Piece Reward]] | {{details|../Gold Skulltulas|the Gold Skulltula sidequest|Gold Skulltulas}} | ||
The first house on the right is the House of Skulltula. | {{Zelda PoH|title=[[../Heart Containers#Kakariko Village|A Heart Piece Reward]]|contents=Fifty Gold Skulltula Tokens is a milestone amount that gets you a {{im/oot|Upgrades|Piece of Heart}}, a decent reward for killing half of the cursed spiders! | ||
The | [[File:Oot hos.jpg|175px|center]]}} | ||
The first house on the right is the House of Skulltula. Don't get startled by its inhabitants; you will find Skulltulas inside, but they can talk and look like people! The one who drops down in the center of the room explains the Skulltula curse that has befallen his family. He promises to make you "very rich" if the curse is broken. The breaking of the curse requires that you kill all 100 of the Gold Skulltula and obtain their tokens. For every 10 {{im/oot|Enemies|Gold Skulltula|display=Gold Skulltulas}} you kill, a child is relieved of the curse, and you can return to this house for a reward. However, after you kill 50, you will need to kill the other remaining 50 to get the final reward from their father. | |||
{{-}} | |||
===Cucco round-up=== | |||
[[File:OoT Kakariko Village Get a Bottle.jpg|thumb|right|Round up all the cuccos to get this handy bottle!]] | |||
If you talk to Anju, the woman by Impa's house, you'll learn that her cuccos have ran away. If you find all seven and bring them back to the pen, you'll be rewarded with an {{im/oot|Items|Empty Bottle}}. | |||
The first cucco is right near her. Simply pick it up and throw it into the pen. | |||
The second one is near the gate to Death Mountain. Pick it up, run across the rooftop of the house by the watchtower, jump right off the end, and use it to fly over to the high fence near the Skulltula House to reach the third cucco. You can also simply throw a {{im/oot|Items|Deku Nut}} at the cucco from the other side of this fence. This will upset it, and it will run off of the ledge. Just don't hit it again, or you will make it very angry. You can now run down the stairs and grab it. Throw both cuccos off the ledge and take them to their pen. | |||
The fourth cucco is near the entrance to Kakariko Village, and the fifth is in a crate near the steps that are left of the village entrance. Roll into the crate to smash it and grab the cucco inside. Keep the cucco with you and go up the stairs by the graveyard entrance where the carpenter jogs. | |||
[[File:OoT Kakariko Village Flying Chickens.jpg|thumb|left|You can fly over the tall fence with a cucco.]] | |||
With the cucco in hand, jump off the ledge diagonally towards the rust colored house with the small fence in front of it - this is how you circumvent the tall gate. After landing, throw the cucco back over the fence to the area you came in from. There is a secret hole in this area which leads to a chest with Rupees inside if you need them, otherwise toss the sixth cucco running around here over the fence like before, then climb the tall ladder to collect the seventh and last cucco. Grab him, glide down, throw him in the pen, then round up the two cuccos you threw over the fence. | |||
Once all seven cuccos are back in the pen, talk to Anju to get the {{im/oot|Items|Empty Bottle}}. After this, you'll get a {{im/oot|Consumables|Purple Rupee}} each time you round them up again, but you'll lose Rupees, for throwing cuccos out of the pen. | |||
There is one important thing you should remember about cuccos: never attack them. If you strike one enough times, it will call its buddies and they will swarm on you! If that happens, run for your life! | |||
{{-}} | {{-}} | ||
===Kakariko Village graveyard=== | |||
{{OoT Skulltula|title=[[../Gold Skulltulas#Graveyard|A Gold Skulltula]]|contents=There are two Gold Skulltulas in the graveyard, but you can only reach one right now. Use some bugs on the soft soil patch on the southwest corner of the graveyard. If you did this correctly a {{im/oot|Enemies|Gold Skulltula}} will appear in a few seconds. | |||
[[File:LoZ OOT Skulltula 29.png|175px|center]] | |||
Later in the game, you'll get the Boomerang, which will reach the other one.}} | |||
From Kakariko village proper, you can enter the graveyard through the opening to the right of the windmill. In the graveyard, there are many graves, some which hold strange secrets. If you look far back to the end of the graveyard, you'll see an unreachable entrance that seems peculiar. This place will be a later part in your quest, and you'll learn a song to reach this mysterious area behind all the graves. | |||
[[ | There is a little boy who monitors the graves during the daytime, so you can't fool with any until night time. At night, during 18:00 to 21:00 game hours, Dampe will be awake and will run the [[#The Heart-Pounding Gravedigging Tour|Heart-Pounding Gravedigging Tour]]. If you want, you can pull graves to find things at night, but you may disturb {{im/oot|Enemies|Poe|jpg|display=Poes}}, ghosts that will attack you if you provoke them. If you kill one, you can capture it, but it has a random effect if you are daring enough to drink one, or nothing may happen. If you uncover the second grave from the left, the one with three flowers in front of it, and fall down the hole there is a {{im/oot|Equipment|Hylian Shield}} waiting for you. | ||
If you go up to the tombs in the far back, a storm will occur. The graves beside the large tomb are the ones of the Composer Brothers Sharp the Elder and Flat the Younger. Reading their graves will summon them, and they will attack you! Defeat them to hear their stories about studying a song that can control day and night. | |||
[[File:LOZ OOT Royal Tomb Opens.PNG|thumb|right|200px|The grave will open in a flash.]] | |||
At the back of the graveyard is the Royal Family Tomb. The Triforce symbol is on the ground in front. Play {{im/oot|Ocarina Songs|Zelda's Lullaby}} on your ocarina. This will cause the storm to grow more violent, and a lightning bolt will destroy the royal family's tombstone, leaving a hole in the ground. Jump in the hole. | |||
{{-}} | |||
====The Royal Family Tomb==== | |||
[[File:LOZ OOT Sun's Song Inscription.PNG|thumb|left|200px|It's the secret song of the Composer Brothers.]] | |||
At first glance, this place looks harmless, but danger lurks in the dark. | |||
In the first room is a locked door. The chamber holds several {{im/oot|Enemies|Keese}}, which are weak and easy to kill. The locked door opens after you've killed them all. If you light the torches near the door with {{im/oot|Items|Din's Fire}} later in the game, you can find a chest with {{im/oot|Items|Bomb|display=bombs}} inside. Before you move on, investigate the bones littered on the floor. Navi will fly to certain ones and tell you what they say. One gives you a warning, while the other gives advice, and you had best listen, because in the next room is a group of {{im/oot|Enemies|ReDead|display=ReDeads}}, and poison on the floor that hurts on contact. Avoid fighting the ReDead. They're slow, but they freeze you with their screams. | |||
{{-}} | {{-}} | ||
{{Zelda PoH|title=[[../Heart Containers#Kakariko Village|Tomb Raiding]]|contents=Back in the graveyard, enter the grave on the top row (fourth from the right). Kill the {{im/oot|Enemies|ReDead}} inside and play the {{im/oot|Ocarina Songs|Sun's Song}}. A chest will appear containing a {{im/oot|Upgrades|Piece of Heart}}. (NOTE: You may only enter the grave at night.) | |||
[[File:LoZ OOT Redead garding the chest.jpg|175px|center]]}} | |||
Beyond them is an inscription with a poem. Read it and you'll learn a new tune, the {{im/oot|Ocarina Songs|Sun's Song}}. | |||
'''<font color="Gold">Sun's Song</font> ''' | |||
{{Control|{{N64|Right|C}}{{N64|Down|C}}{{N64|Up|C}}{{N64|Right|C}}{{N64|Down|C}}{{N64|Up|C}}|{{gc|right|cstick}}{{gc|down|cstick}}{{gc|up|cstick}}{{gc|right|cstick}}{{gc|down|cstick}}{{gc|up|cstick}}|{{wii-cc|right|rstick}}{{wii-cc|down|rstick}}{{wii-cc|up|rstick}}{{wii-cc|right|rstick}}{{wii-cc|down|rstick}}{{wii-cc|up|rstick}}|{{3ds|Y}}{{3ds|r}}{{3ds|A}}{{3ds|Y}}{{3ds|r}}{{3ds|A}}|{{Switch|right|rstick}}{{Switch|down|rstick}}{{Switch|up|rstick}}{{Switch|right|rstick}}{{Switch|down|rstick}}{{Switch|up|rstick}}}} | |||
This song can be used to calm the dead. It can also be used to turn night to day or day to night, which is very handy when you don't want to wait. It even can summon Big Fairies, which instantly heal all your health and restore your magic if you call them. This song will freeze Re-Dead and {{im/oot|Enemies|Gibdo}}, a enemy you'll encounter later in your quest. | |||
{{-}} | {{-}} | ||
[[ | ====The Heart-Pounding Gravedigging Tour==== | ||
{{Zelda PoH|float=left|title=[[../Heart Containers#Kakariko Village| A Hidden Heart Piece]]|contents=A {{im/oot|Upgrades|Piece of Heart}} is randomly hidden in one of the spots that Dampé can dig. | |||
[[File:LoZ OOT Dampé's heart-pounding gravedigging tour.jpg|175px|center]]}} | |||
When you go to the graveyard at night between 18:00 and 21:00 you'll find Dampé the Gravekeeper outside his shack. This is a short time immediately after the wolf howls in a place where time passes normally. Using the {{im/oot|Ocarina Songs|Sun's Song}} in an area where time doesn't pass will change the time to 00:00 which is too late, so the best way to get the correct time of day is by playing the Sun's Song in Hyrule Field and walk back into Kakariko Village after you hear the wolf howl. | |||
Speak to Dampé and he'll explain his tour. He'll dig anywhere you want him to along his rectangular path, but you have to pay him 10 rupees each time. You'll usually get a {{im/oot|Consumables|Green Rupee|display=green}} or {{im/oot|Consumables|Blue Rupee|display=blue rupee}}, but sometimes you can get a {{im/oot|Consumables|Red Rupee|display=red rupee}} worth 20. See the [[../Minigames#Dampe's Gravedigging Tour|Minigames section]] for further details. | |||
{{-}} | {{-}} | ||
{{Footer Nav|game=The Legend of Zelda: Ocarina of Time|prevpage=Hyrule Castle|nextpage=Goron City}} | {{Footer Nav|game=The Legend of Zelda: Ocarina of Time|prevpage=Hyrule Castle|nextpage=Goron City}} | ||
Latest revision as of 12:51, 8 January 2023
Once you enter Kakariko Village, you'll find it a busy place. A construction project is under way. Up the hill to your left is the gate to Death Mountain Trail, and to the right of the windmill is the path to the Kakariko Village graveyard.
The gate to Death Mountain[edit]
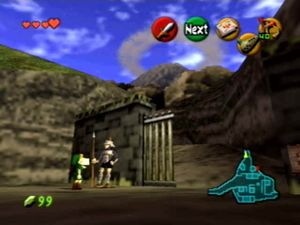
In order to get to Death Mountain, you need to open the gate. Speak to the guard at the gate. He won't let you through unless you have royal permission, but when you show him Zelda's Letter ![]() , he opens the gate for you. However, he suggests that you have a "proper shield". According to him, you can buy this shield in the Bazaar in the Hyrule Castle Town Market. After you talk to the guard, you can go to the Market to find the Bazaar shop. He'll take off a random amount off the price (as much as 40 rupees off) for the Hylian Shield
, he opens the gate for you. However, he suggests that you have a "proper shield". According to him, you can buy this shield in the Bazaar in the Hyrule Castle Town Market. After you talk to the guard, you can go to the Market to find the Bazaar shop. He'll take off a random amount off the price (as much as 40 rupees off) for the Hylian Shield ![]() . Though you may want to wait just a moment before deciding to head all the way back there right now, as there is an even better deal available to you.
. Though you may want to wait just a moment before deciding to head all the way back there right now, as there is an even better deal available to you.
Additionally, the guard makes a request that you pick up a popular mask from the Happy Mask Shop for his son. It seems that his son really wants the Keaton Mask ![]() from Hyrule Market but he can't leave his post to get it. If you want you can run back to the Hyrule Market and get the mask from the mask shop. Bring this mask to the guard to sell it to him for a 5 rupee profit. While it's not much, you will get access to other masks later in the game which can bring you much bigger profits and upgrades.
from Hyrule Market but he can't leave his post to get it. If you want you can run back to the Hyrule Market and get the mask from the mask shop. Bring this mask to the guard to sell it to him for a 5 rupee profit. While it's not much, you will get access to other masks later in the game which can bring you much bigger profits and upgrades.
Before heading up through Death Mountain Trail, go to the graveyard and enter the grave second from the left on the first row. It will have three tiny flowers on the ground in front of it. If you already have the Hylian Shield the chest will instead contain Blue Rupee ![]() . Return later with bombs
. Return later with bombs ![]() to uncover a Fairy's Fountain behind the chest. You can heal from these fairies
to uncover a Fairy's Fountain behind the chest. You can heal from these fairies ![]() or capture them, but you need an Empty Bottle
or capture them, but you need an Empty Bottle ![]() to carry them in.
to carry them in.
The Gorons' problem[edit]
As you move up Death Mountain Trail, you'll meet several Red Tektites ![]() . Beyond them is a large boulder with a smaller boulder to the right. Surprise! When you approach the smaller boulder, it turns out to be a Goron. He explains the problem the Gorons are having. They feed on rocks, and the best rocks come from Dodongo's Cavern, but recently a Gerudo came and sealed up the cavern with this giant boulder. Additionally, the cavern has filled with monsters. After speaking with him, continue up the mountain.
. Beyond them is a large boulder with a smaller boulder to the right. Surprise! When you approach the smaller boulder, it turns out to be a Goron. He explains the problem the Gorons are having. They feed on rocks, and the best rocks come from Dodongo's Cavern, but recently a Gerudo came and sealed up the cavern with this giant boulder. Additionally, the cavern has filled with monsters. After speaking with him, continue up the mountain.
Sidequests[edit]
There may be a few things to do here before continuing up Death Mountain Trail.
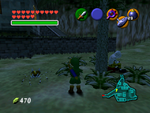
The large tree near the entrance to Kakariko has a Gold Skulltula ![]() in its branches. Roll into it to dislodge it.
in its branches. Roll into it to dislodge it.
You will find a Gold Skulltula ![]() lurking on the side of the House of Skulltula.
lurking on the side of the House of Skulltula.
Look on the center pile of bricks of the building currently under construction to spot another Gold Skulltula ![]() .
.
The house to the left of the gate leading to Death Mountain has a Gold Skulltula ![]() on its side.
on its side.
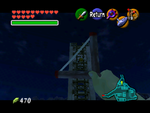
Use your Fairy Slingshot ![]() or Bombchus
or Bombchus ![]() to kill a Gold Skulltula
to kill a Gold Skulltula ![]() on the ladder of the tall lookout tower, then climb up to grab the token.
on the ladder of the tall lookout tower, then climb up to grab the token.
The House of Skulltula[edit]
- For more details on the Gold Skulltula sidequest, see Gold Skulltulas.
The first house on the right is the House of Skulltula. Don't get startled by its inhabitants; you will find Skulltulas inside, but they can talk and look like people! The one who drops down in the center of the room explains the Skulltula curse that has befallen his family. He promises to make you "very rich" if the curse is broken. The breaking of the curse requires that you kill all 100 of the Gold Skulltula and obtain their tokens. For every 10 Gold Skulltulas ![]() you kill, a child is relieved of the curse, and you can return to this house for a reward. However, after you kill 50, you will need to kill the other remaining 50 to get the final reward from their father.
you kill, a child is relieved of the curse, and you can return to this house for a reward. However, after you kill 50, you will need to kill the other remaining 50 to get the final reward from their father.
Cucco round-up[edit]
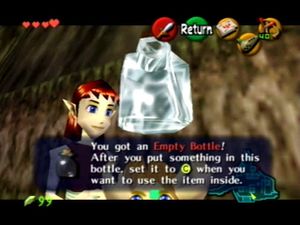
If you talk to Anju, the woman by Impa's house, you'll learn that her cuccos have ran away. If you find all seven and bring them back to the pen, you'll be rewarded with an Empty Bottle ![]() .
.
The first cucco is right near her. Simply pick it up and throw it into the pen.
The second one is near the gate to Death Mountain. Pick it up, run across the rooftop of the house by the watchtower, jump right off the end, and use it to fly over to the high fence near the Skulltula House to reach the third cucco. You can also simply throw a Deku Nut ![]() at the cucco from the other side of this fence. This will upset it, and it will run off of the ledge. Just don't hit it again, or you will make it very angry. You can now run down the stairs and grab it. Throw both cuccos off the ledge and take them to their pen.
at the cucco from the other side of this fence. This will upset it, and it will run off of the ledge. Just don't hit it again, or you will make it very angry. You can now run down the stairs and grab it. Throw both cuccos off the ledge and take them to their pen.
The fourth cucco is near the entrance to Kakariko Village, and the fifth is in a crate near the steps that are left of the village entrance. Roll into the crate to smash it and grab the cucco inside. Keep the cucco with you and go up the stairs by the graveyard entrance where the carpenter jogs.
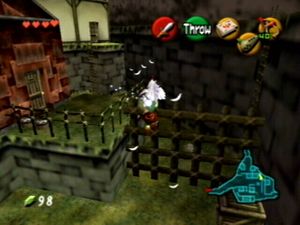
With the cucco in hand, jump off the ledge diagonally towards the rust colored house with the small fence in front of it - this is how you circumvent the tall gate. After landing, throw the cucco back over the fence to the area you came in from. There is a secret hole in this area which leads to a chest with Rupees inside if you need them, otherwise toss the sixth cucco running around here over the fence like before, then climb the tall ladder to collect the seventh and last cucco. Grab him, glide down, throw him in the pen, then round up the two cuccos you threw over the fence.
Once all seven cuccos are back in the pen, talk to Anju to get the Empty Bottle ![]() . After this, you'll get a Purple Rupee
. After this, you'll get a Purple Rupee ![]() each time you round them up again, but you'll lose Rupees, for throwing cuccos out of the pen.
each time you round them up again, but you'll lose Rupees, for throwing cuccos out of the pen.
There is one important thing you should remember about cuccos: never attack them. If you strike one enough times, it will call its buddies and they will swarm on you! If that happens, run for your life!
Kakariko Village graveyard[edit]
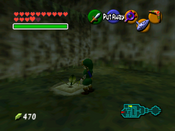
From Kakariko village proper, you can enter the graveyard through the opening to the right of the windmill. In the graveyard, there are many graves, some which hold strange secrets. If you look far back to the end of the graveyard, you'll see an unreachable entrance that seems peculiar. This place will be a later part in your quest, and you'll learn a song to reach this mysterious area behind all the graves.
There is a little boy who monitors the graves during the daytime, so you can't fool with any until night time. At night, during 18:00 to 21:00 game hours, Dampe will be awake and will run the Heart-Pounding Gravedigging Tour. If you want, you can pull graves to find things at night, but you may disturb Poes ![]() , ghosts that will attack you if you provoke them. If you kill one, you can capture it, but it has a random effect if you are daring enough to drink one, or nothing may happen. If you uncover the second grave from the left, the one with three flowers in front of it, and fall down the hole there is a Hylian Shield
, ghosts that will attack you if you provoke them. If you kill one, you can capture it, but it has a random effect if you are daring enough to drink one, or nothing may happen. If you uncover the second grave from the left, the one with three flowers in front of it, and fall down the hole there is a Hylian Shield ![]() waiting for you.
waiting for you.
If you go up to the tombs in the far back, a storm will occur. The graves beside the large tomb are the ones of the Composer Brothers Sharp the Elder and Flat the Younger. Reading their graves will summon them, and they will attack you! Defeat them to hear their stories about studying a song that can control day and night.
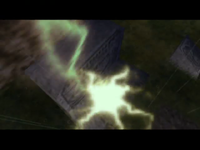
At the back of the graveyard is the Royal Family Tomb. The Triforce symbol is on the ground in front. Play Zelda's Lullaby ![]() on your ocarina. This will cause the storm to grow more violent, and a lightning bolt will destroy the royal family's tombstone, leaving a hole in the ground. Jump in the hole.
on your ocarina. This will cause the storm to grow more violent, and a lightning bolt will destroy the royal family's tombstone, leaving a hole in the ground. Jump in the hole.
The Royal Family Tomb[edit]
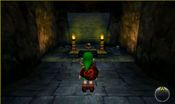
At first glance, this place looks harmless, but danger lurks in the dark.
In the first room is a locked door. The chamber holds several Keese ![]() , which are weak and easy to kill. The locked door opens after you've killed them all. If you light the torches near the door with Din's Fire
, which are weak and easy to kill. The locked door opens after you've killed them all. If you light the torches near the door with Din's Fire ![]() later in the game, you can find a chest with bombs
later in the game, you can find a chest with bombs ![]() inside. Before you move on, investigate the bones littered on the floor. Navi will fly to certain ones and tell you what they say. One gives you a warning, while the other gives advice, and you had best listen, because in the next room is a group of ReDeads
inside. Before you move on, investigate the bones littered on the floor. Navi will fly to certain ones and tell you what they say. One gives you a warning, while the other gives advice, and you had best listen, because in the next room is a group of ReDeads ![]() , and poison on the floor that hurts on contact. Avoid fighting the ReDead. They're slow, but they freeze you with their screams.
, and poison on the floor that hurts on contact. Avoid fighting the ReDead. They're slow, but they freeze you with their screams.
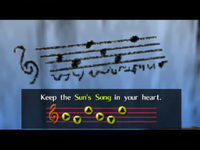
Beyond them is an inscription with a poem. Read it and you'll learn a new tune, the Sun's Song ![]() .
.
Sun's Song
This song can be used to calm the dead. It can also be used to turn night to day or day to night, which is very handy when you don't want to wait. It even can summon Big Fairies, which instantly heal all your health and restore your magic if you call them. This song will freeze Re-Dead and Gibdo ![]() , a enemy you'll encounter later in your quest.
, a enemy you'll encounter later in your quest.
The Heart-Pounding Gravedigging Tour[edit]
When you go to the graveyard at night between 18:00 and 21:00 you'll find Dampé the Gravekeeper outside his shack. This is a short time immediately after the wolf howls in a place where time passes normally. Using the Sun's Song ![]() in an area where time doesn't pass will change the time to 00:00 which is too late, so the best way to get the correct time of day is by playing the Sun's Song in Hyrule Field and walk back into Kakariko Village after you hear the wolf howl.
in an area where time doesn't pass will change the time to 00:00 which is too late, so the best way to get the correct time of day is by playing the Sun's Song in Hyrule Field and walk back into Kakariko Village after you hear the wolf howl.
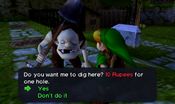
Speak to Dampé and he'll explain his tour. He'll dig anywhere you want him to along his rectangular path, but you have to pay him 10 rupees each time. You'll usually get a green ![]() or blue rupee
or blue rupee ![]() , but sometimes you can get a red rupee
, but sometimes you can get a red rupee ![]() worth 20. See the Minigames section for further details.
worth 20. See the Minigames section for further details.


