| Same as AC, however, the Jet Boots will be lost if you are zapped to an earlier floor.
|-
|-
! AT
! AT
| You must defeat a [[File:Tower_of_Druaga_Slime_Black.png|16px]] from above.
| Defeat a [[File:Tower_of_Druaga_Slime_Black.png|16px]] facing down.
|-
|-
! ATp
! ATp
| Defeat a [[File:Tower_of_Druaga_Slime_Black.png|16px]] without killing a [[File:Tower_of_Druaga_Slime_Green.png|16px]].
| Defeat a [[File:Tower_of_Druaga_Slime_Black.png|16px]] without defeating a [[File:Tower_of_Druaga_Slime_Green.png|16px]].
|}
|}
{{-}}
{{-}}
Line 72:
Line 75:
|-
|-
! AC
! AC
| You must defeat a particular [[File:Tower_of_Druaga_Knight_Blue.png|16px]]. The correct one is chosen at random. Both [[File:Tower_of_Druaga_Knight_Blue.png|16px]]s may also be killed.
| Defeat one of the [[File:Tower_of_Druaga_Knight_Blue.png|16px]]. The correct one is chosen at random. Both may need to be defeated.
|-
|-
! AT
! AT
| You must defeat every [[File:Tower_of_Druaga_Slime_Green.png|16px]], but do not touch any [[File:Tower_of_Druaga_Knight_Blue.png|16px]].
| Defeat every [[File:Tower_of_Druaga_Slime_Green.png|16px]], but do not touch any [[File:Tower_of_Druaga_Knight_Blue.png|16px]].
|-
|-
! ATp
! ATp
| You must defeat a [[File:Tower_of_Druaga_Slime_Green.png|16px]] while shaking your sword (tap the sword button). This can be very difficult; try edging up extremely close to a slime while it is between movement cycles. You must be close enough so that when you draw your sword the [[File:Tower_of_Druaga_Slime_Green.png|16px]] is killed.
| Defeat a [[File:Tower_of_Druaga_Slime_Green.png|16px]] while swinging the sword. This can be very difficult; try edging up extremely close to a [[File:Tower_of_Druaga_Slime_Green.png|16px]] while it is between movement cycles. You must be close enough so that when you draw the sword the [[File:Tower_of_Druaga_Slime_Green.png|16px]] is defeated.
|}
|}
{{-}}
{{-}}
Line 91:
Line 94:
|-
|-
! AC
! AC
| Step on the [[File:Tower_of_Druaga_Door.png]] before collecting the [[File:Tower_of_Druaga_Key.png]].
| Pass through the [[File:Tower_of_Druaga_Door.png]].
|-
|-
! GB
! GB
Line 97:
Line 100:
|-
|-
! AT
! AT
| Draw your sword such that you are pointing it at the [[File:Tower_of_Druaga_Door.png]], in any direction.
| Draw the sword such that you are pointing it at the [[File:Tower_of_Druaga_Door.png]] in any direction.
|-
|-
! ATp
! ATp
| Defeat at least one [[File:Tower_of_Druaga_Slime_Black.png|16px]], then kill the [[File:Tower_of_Druaga_Mage.png|16px]].
| Defeat at least one [[File:Tower_of_Druaga_Slime_Black.png|16px]], then defeat the [[File:Tower_of_Druaga_Mage.png|16px]].
|}
|}
{{-}}
{{-}}
Line 110:
Line 113:
! colspan="2" | Treasure: White Sword
! colspan="2" | Treasure: White Sword
|-
|-
| style="background:black" |[[File:Tower_of_Druaga_White_sword.png]]||The swords that are collected in this game don't necessarily make Gil stronger. But their collection is vital in order to obtain the most powerful sword in the game. Without this sword, none of the other swords will be available to the player.
| style="background:black" |[[File:Tower_of_Druaga_White_sword.png]]||The swords that are collected in this game don't necessarily make Gil stronger. But their collection is vital in order to obtain the most powerful sword in the game. Without this sword, none of the other swords will be available to the player.
|-
|-
! AC
! AC
| Block the spells of a [[File:Tower_of_Druaga_Mage.png|16px]] with your shield three times ''while walking'' (not standing still).
| Block 3 spells from a [[File:Tower_of_Druaga_Mage.png|16px]] while walking. Movement is not necessary, however, all that is required is to be holding the joystick in one direction. You can be walking into a wall while you block the spell (with the sword drawn and the shield to the side, or you would not be blocking anything).
|-
|-
! AT
! AT
| You must block the spells of a [[File:Tower_of_Druaga_Mage.png|16px]] with your shield five times ''without ever moving''. This is quite difficult to do. Try to position yourself somewhere where you can only be attacked from one direction. What's more, the [[File:Tower_of_Druaga_Mage.png|16px]] will not reappear unless you are standing in the exact center of the square that you occupy.
| Block 5 spells from a [[File:Tower_of_Druaga_Mage.png|16px]] ''without ever pressing anything''. This is quite difficult to do. Try to position yourself somewhere where you can only be attacked from one direction. What's more, the [[File:Tower_of_Druaga_Mage.png|16px]] will not reappear unless you are standing in the exact center of the square that you occupy. It is even worse that you cannot block from the left with the sword out.
|-
|-
! ATp
! ATp
| You must collect the [[File:Tower_of_Druaga_Key.png]] without receiving any of the [[File:Tower_of_Druaga_Mage.png|16px]] spells while walking. You may only be hit by the spells if you are standing still. You may kill the mages to make the task easier.
| Collect the [[File:Tower_of_Druaga_Key.png]] without receiving any of the [[File:Tower_of_Druaga_Mage.png|16px]] spells while walking. You may only be hit by the spells if you are standing still. You may defeat the mages to make the task easier.
|}
|}
{{-}}
{{-}}
Line 129:
Line 132:
! colspan="2" | Treasure: Candle
! colspan="2" | Treasure: Candle
|-
|-
| style="background:black" |[[File:Tower_of_Druaga_Candle.png]]||Possession of this Candle grants the ability to see the ghosts that roam the next few floors, up to floor 10.
| style="background:black" |[[File:Tower_of_Druaga_Candle.png]]||Possession of this Candle grants the ability to see the ghosts that roam the next few floors, up to Floor 10.
|-
|-
! AC
! AC
| Touch the north (top) portion of the outer wall of this floor, then face south.
| Touch the top outer wall.
|-
|-
! AT
! AT
Line 138:
Line 141:
|-
|-
! ATp
! ATp
| A [[File:Tower_of_Druaga_Sorcerer.png|16px]] must appear on top of the [[File:Tower_of_Druaga_Door.png]].
| Make a [[File:Tower_of_Druaga_Sorcerer.png|16px]] appear on top of the [[File:Tower_of_Druaga_Door.png]].
|}
|}
{{-}}
{{-}}
Line 148:
Line 151:
! colspan="2" | Treasure: Silver Pickaxe
! colspan="2" | Treasure: Silver Pickaxe
|-
|-
| style="background:black" |[[File:Tower_of_Druaga_Silver_pickax.png]]||This pickaxe is stronger than the Copper Pickaxe. It can be used up 2-4 times without breaking it (3-5 times after you touch the [[File:Tower of Druaga Treasure.png]].) As with all pickaxes, it will be instanly lost when used on an outer wall. The number of times it can be used before it breaks is chosen randomly for each floor. It can be used once before and twice after collecting the [[File:Tower of Druaga Treasure.png]] without any risk of breaking.
| style="background:black" |[[File:Tower_of_Druaga_Silver_pickax.png]]||This pickaxe is stronger than the Copper Pickaxe. It can be used up 2-4 times without breaking it (3-5 times after you touch the [[File:Tower of Druaga Treasure.png]].) As with all pickaxes, it will be instantly lost when used on an outer wall. The number of times it can be used before it breaks is chosen randomly for each floor (always four in Famicom version). It can be used once before and twice after collecting the [[File:Tower of Druaga Treasure.png]] without any risk of breaking.
|-
|-
! AC
! AC
| Break (use twice or use on outer wall) the Copper Pickaxe. Another way, although wasteful, is to purposely die at the point you start with the copper pickaxe still in your inventory.
| Break the Copper Pickaxe. Alternately, albeit wasteful, Gil can deliberately die with the Copper Pickaxe still in the inventory. However, the treasure cannot be collected from the latter.
|-
|-
! AT
! AT
| Wait until the Timer turns red, then use the Copper Pickaxe.
| Wait until the timer turns red, then break the Copper Pickaxe.
|-
|-
! ATp
! ATp
| The following criteria must be met:
|
# The Copper Pickaxe must not be in your inventory (This means if you lost it previously you can still obtain the silver pickaxe).
# Break the Copper Pickaxe. (If you lost it previously, skip this step)
# The [[File:Tower_of_Druaga_Door.png]] must be open.
# Open the [[File:Tower_of_Druaga_Door.png]].
# The timer must be red and below 60 (the slower countdown, where the Will O' Wisps start appearing).
# Wait until the timer turns red.
|}
|}
{{-}}
{{-}}
Line 173:
Line 176:
|-
|-
! AC
! AC
| Move to a row and a column that is different from your starting point, and draw or swing your sword.
| Move to a row and a column that is different from the starting point, then draw or swing the sword.
|-
|-
! AT
! AT
| Once you have collected the [[File:Tower_of_Druaga_Key.png]], simply draw your sword.
| Collect the [[File:Tower_of_Druaga_Key.png]], then draw the sword.
|-
|-
! ATp
! ATp
| Stand in any direction on top of the [[File:Tower_of_Druaga_Door.png]] and draw your sword.
| Stand in any direction on top of the [[File:Tower_of_Druaga_Door.png]] and draw the sword.
|}
|}
{{-}}
{{-}}
Line 192:
Line 195:
|-
|-
! AC
! AC
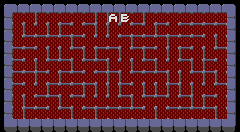
| Step on the position marked A or B on the map.
| Pass through points A and B.
|-
|-
! FC
! FC
| The positions on the map are similar with both triggers at the top of the stage; the first being seven blocks from the left, and the second being eight blocks from the left
| The positions on the map are similar with both triggers at the top of the stage; the first being seven blocks from the left, and the second being eight blocks from the left.
|-
|-
! GB
! GB
| Walk down the entire extent of the right side of the outer wall, and then all the way back up.
| Walk down the entire extent of the right side of the outer wall, then walk all the way back up.
|-
|-
! AT
! AT
Line 204:
Line 207:
|-
|-
! ATp
! ATp
| Any hardcore [[Namco]] fan will recognize the layout of this stage as a slightly altered [[Pac-Man]] maze (The slimes play the role of the ghosts). There are four locations where the power pills would reside. You must pass through all of them.
| Any hardcore [[Namco]] fan will recognize the layout of this stage as a slightly altered [[Pac-Man]] maze (The slimes play the role of the ghosts). There are four locations where the power pills would reside. Pass through all of them.
|}
|}
{{-}}
{{-}}
Line 217:
Line 220:
|-
|-
! AC
! AC
| Block the spell of a [[File:Tower_of_Druaga_Slime_Red.png|16px]] with your shield.
| Block a spell from a [[File:Tower_of_Druaga_Slime_Red.png|16px]].
|-
|-
! GB
! GB
| Exit the stage normally. You will face the first mini-boss fight, two giant-sized slimes. Defeat one of them to collect the Gauntlet.
| Exit the floor normally. You will face the first mini-boss fight, two giant-sized slimes. Defeat one of them to collect the Gauntlet.
|-
|-
! AT
! AT
| Block the spell of a [[File:Tower_of_Druaga_Slime_Red.png|16px]] with your shield, but your sword must be drawn, so you must block the spell on your left.
| Same as AC, but the sword must be drawn.
|-
|-
! ATp
! ATp
| You must defeat all of the [[File:Tower_of_Druaga_Slime_Red.png|16px]] without being hit by ''any'' spells (including those of the [[File:Tower_of_Druaga_Ghost_Mage.png|16px]]).
| Defeat both [[File:Tower_of_Druaga_Slime_Red.png|16px]] without blocking any spells.
|}
|}
{{Footer Nav|game=The Tower of Druaga|prevpage=Walkthrough|nextpage=Floor 11-20|nextname=Floors 11 - 20}}
{{Footer Nav|game=The Tower of Druaga|prevpage=Walkthrough|nextpage=Floor 11-20|nextname=Floors 11 - 20}}
Press the action button when standing still in front of an inner wall to break that wall. The player can use it twice per floor before it breaks and it's lost for good. However, when the player collects the for that level, you can use the Copper Pickaxe one more time without it breaking. The player will also lose it if they try to break an outside wall. The player must not lose it in order to get the Silver Pickaxe.
This healing potion will grant an extra life. Upon dying, this potion will be consumed instead of one of Gil's lives. Gil will still "die" in the sense that you will start over on the floor that he died on. Note that this potion can only be used once. Even if you die on this floor and re-obtain it, it will not work again.
AC
Defeat one of the . The correct one is chosen at random. Both may need to be defeated.
AT
Defeat every , but do not touch any .
ATp
Defeat a while swinging the sword. This can be very difficult; try edging up extremely close to a while it is between movement cycles. You must be close enough so that when you draw the sword the is defeated.
The swords that are collected in this game don't necessarily make Gil stronger. But their collection is vital in order to obtain the most powerful sword in the game. Without this sword, none of the other swords will be available to the player.
AC
Block 3 spells from a while walking. Movement is not necessary, however, all that is required is to be holding the joystick in one direction. You can be walking into a wall while you block the spell (with the sword drawn and the shield to the side, or you would not be blocking anything).
AT
Block 5 spells from a without ever pressing anything. This is quite difficult to do. Try to position yourself somewhere where you can only be attacked from one direction. What's more, the will not reappear unless you are standing in the exact center of the square that you occupy. It is even worse that you cannot block from the left with the sword out.
ATp
Collect the without receiving any of the spells while walking. You may only be hit by the spells if you are standing still. You may defeat the mages to make the task easier.
This pickaxe is stronger than the Copper Pickaxe. It can be used up 2-4 times without breaking it (3-5 times after you touch the .) As with all pickaxes, it will be instantly lost when used on an outer wall. The number of times it can be used before it breaks is chosen randomly for each floor (always four in Famicom version). It can be used once before and twice after collecting the without any risk of breaking.
AC
Break the Copper Pickaxe. Alternately, albeit wasteful, Gil can deliberately die with the Copper Pickaxe still in the inventory. However, the treasure cannot be collected from the latter.
AT
Wait until the timer turns red, then break the Copper Pickaxe.
ATp
Break the Copper Pickaxe. (If you lost it previously, skip this step)
The Power Potion increases Gil's energy for the remainder of the floor it was collected on. This allows Gil to take more hits while fighting knights. It is usually not worth the effort of collecting.
AC
Move to a row and a column that is different from the starting point, then draw or swing the sword.
AT
Collect the , then draw the sword.
ATp
Stand in any direction on top of the and draw the sword.
Not every treasure that you find is a treasure that you will want to obtain. This potion has the opposite effect from the Potion of Power, so avoid it.
AC
Pass through points A and B.
FC
The positions on the map are similar with both triggers at the top of the stage; the first being seven blocks from the left, and the second being eight blocks from the left.
GB
Walk down the entire extent of the right side of the outer wall, then walk all the way back up.
AT
Cross paths with the .
ATp
Any hardcore Namco fan will recognize the layout of this stage as a slightly altered Pac-Man maze (The slimes play the role of the ghosts). There are four locations where the power pills would reside. Pass through all of them.