Once you reach the fantasy realm, you can (almost) freely travel between this zone, the ruins, and other zones like the jungle, the ice world, and the underground. You can collect the first sword upgrade within seconds of arriving at the ruins. Both the Cape and the location of the boss are hidden from view on the map due to the placement of holes in the map parchment, so they aren't shown in the marked up map below. You'll have to search carefully in order to find them and not get lost. Do not attempt to enter the desert region to the east without the Cape.
Obtaining the map[edit]
- First, do yourself a favor and collect the High Beam Sword from the first open door to the right from where you arrive.
- Then return to the starting point and head left. Take the first opportunity to push up.
- Run to the right, and watch carefully for every opportunity to push down. Take the second one.
- Run to the right, and take the first opportunity to push up.
- Run to the left and enter the second building to obtain the map.
Walkthrough[edit]
Stage map[edit]
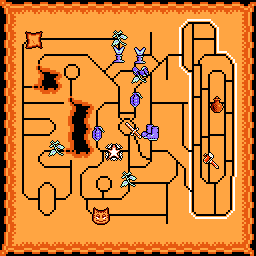
|
Map | |
|---|---|---|
| High Beam Sword | ||
| Flower | ||
| Float | ||
| Hammer | ||
| Jar (requires boomerang) | ||
| Boomerang | ||
| Bomb | ||
| Barrier | ||
| Herb | ||
| Cat |
- You can obtain a Barrier from the Map house after you receive the Map.
- You can obtain a Bomb from the Hammer house after you receive the Hammer.
Obtaining the cape[edit]
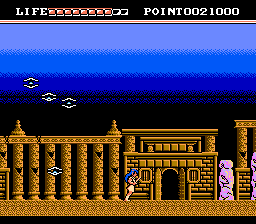
From the location where you obtained the map, step outside and walk to the left. Take the second opportunity that you find to push down (the right most of two very close exits). If done correctly, you will be on the right edge of a new area, and small green star shaped enemies will approach you from the left. Once again, you want to count two down arrows (this time, the left most of two close exits), and take the second one that you find. You should now be on the left end of a new passage with enemies dropping from the sky. Advance a short distance to the right and enter the first building that you come to in order to collect the Cape.
Collecting more items[edit]
- Carefully retrace your steps back to the map house. Then head all the way to the right, and then all the way to the left. Walk a short distance to the left and push down at the next down arrow. Head to the right and enter the third door you come to in order to collect the Flower. It won't help you here, but it is needed in the Jungle.
- Exit the house, and continue all the way to the right. In the next zone, walk a short distance to the right, and push down at the next down arrow. As you head to the right, be careful of the large flying skeleton monsters that attack. Avoid them, and enter the third door you reach to collect the Float shoes needed in the Jungle zone.
- At this point, if you need health, you are close to an Herb house. Just walk all the way to the right, and enter the second door on your right. As long as you are down to three units of health or below, the man inside will completely restore your health.
- From where you collected the Float shoes, return to the left, and push up against the black space between the buildings. Head to the right, again watching out for the flying skeleton monsters. When you reach the next area, walk only a short distance to the left and push down when you see the arrow. Cross this area to the left, and then almost as soon as you arrive in the next area, you will see another down arrow. Take it, and enter the house that you see to collect the Hammer. Re-enter the same house to fill up on Bombs.
- From that house, walk a short distance to the right. You will see two down arrows very close to one another. Take the second (right-most), and enter the door you arrive at. Be sure to bring at least one Boomerang with you so that you can trade it for the first Jar.
The stone voice event[edit]
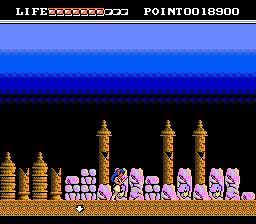
Now that you have the Hammer and can talk to the stone, return to the very beginning of the stage (the small circle in the middle of the map) and head left from the original starting point. Take the very first chance you get to push up (between the castle and an open house.) Start running to right, and very carefully count the number of down arrows you pass. You want to take the 6th one (just before a stone face). In this section, the stone faces that you meet won't tell you the distance to the boss, but rather the story of Valis. Read the spoiler below to find out what they say.
Note: The original 2007 release of the translated version contains a few bugs that can cause the game to crash if you enter this area with the Hammer enabled. The hacker involved with the translation has created updated patches that fixes this in both Valis and Valis++. See the front page for links to these updates.
Only Valia can call back Valis. I've given Valis to all dimensions. But now… The end is near. No one can save Valia. Fear not death, and be not deterred… And awaken to your new form.
Rogles hides in dimension rifts. He destroyed the jewelry to obtain Valis. Valis vanished to the ends of the dimension. Soon the dimension will warp and all life will be destroyed. Find the Jewelry and go to the sky castle at once!
Finding the boss[edit]
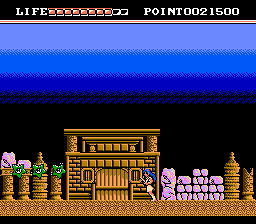
To reach the boss of the ruins, first return to the building where you obtained the map (and enter the building to receive the benefit of the barrier.) This is easy to do from the stone voice event, simply head left out of the stone voice area, then walk to the left a shot distance and push up against the blank spot past the stone face. Walk to the left across this single screen section, and the map house will be the open building to your right when you arrive.
From the map house, run to the left past the first down arrow, and up to the second. Push down here, and you will arrive in front of a small building with a closed door. If you have the High Beam Sword, push up against this door, and it will open. Run to the right to face the boss.
Fighting the boss[edit]
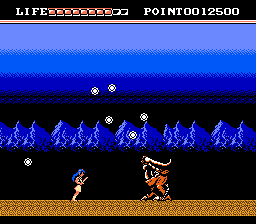
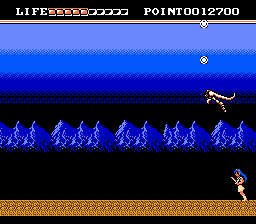
The boss of the ruins has two forms. At first, he approaches from the right side of the screen, walking slowly to the left. As he walks, he sprays the air with particles that launch forward and fall to the ground. You are actually safest from attack by standing a short distance in front of him as he advances. Pelt him with projectiles from your sword. Occasionally, he will stop and fire an arrow like projectile at Yuko's head, which she much crouch to dodge. Then he may continue to walk forward or walk backward. You should be able to hit him frequently enough to defeat him before he stops a second time. At this point, his body explodes and his head drops to the ground.
When his head drops, it's not a bad idea to activate bombs, and pelt his head with grenades while it lies stationary on the ground. It won't stay there for long. Soon it will float up to one side of the screen at a height that is too far above the ground for you to hit. While up there, it will spray the air with more projectiles. The one direction it can't spray is behind him, so you can stand on the far side of the same end of the screen as the head and avoid all damage. It will then dip down and move in a "W" wave to the opposite side of the screen. While it is crossing, this is your chance to hit it from behind. It has a high number of hit points, so you'll likely have to cross back and forth quite a lot before it is defeated. Be patient and you'll take it down with minimal loss to your own health. When it's destroyed, the first jewel will drop from the sky for you to collect.