Creature Cave[edit]

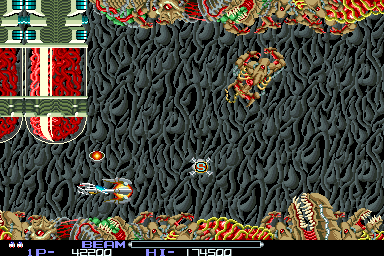
When you begin this stage, you will need to fly low under a domed structure hanging from the ceiling. As you fly beneath it, you may notice an enemy lying among the debris along the bottom. If you get close to it, it will climb out and crawl along the wall to the top, but you can take it out long before you get close to it. These enemies will line the floor and ceiling throughout a majority of the beginning of the stage. A power-up transport will appear, carrying a Speed-up inside. Continue to shoot the creatures which crawl out of the floor and ceiling. If you let any slip by, they can become a danger when they climb out and attack from behind.

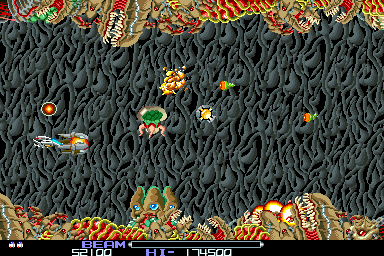
Mid-way through the stage, a stream of small green enemies will start flying at you along the middle of the screen, from the right. They aren’t a huge threat, although some will occasionally leave the formation and dive toward you. At the same time, a new plant enemy will appear on the bottom of the screen. It will open up and release pods that hover around the screen, but don’t attack you directly. The pods are easy to destroy, but the plant takes more effort. A second plant will appear at the top of the screen not much farther along. By the time you destroy the first plant, another power-up transport will appear. This one will contain the first instance of the Counter Ground Laser. Collecting it will make it easier to strike at the enemies hiding above and below, but it will lower your offense against enemies straight ahead. Only take the ground laser if you’re comfortable with the switch.

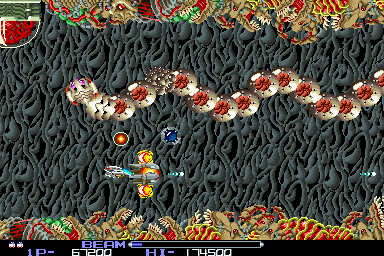
After you fly beneath another set of domes, you will encounter a power-up transport with the Reflection Laser. Again, you must decide if the switch is worthwhile. If you collected the Ground laser, it would be a good idea to switch. At the same time the power-up transport arrives, a giant snake-like creature known as Outslay will appear and practically fill the screen. It will travel throughout the area on a set pattern which it always follows. It loops around at various points in an effort to trap you inside. If Outslay loops around you, hold still until it completes its revolution and allows you to move again. You can shoot at various segments along its body to prevent it from sending pods in eight directions. Be aware that a few ground and ceiling creatures will still appear. When you reach the boss, Outslay will continue to fly along the top until the boss is fully into view, and then it will dive into one of the shafts that enter the boss. Stay in the lower left corner until the screen stops moving.
Boss: Gomander[edit]

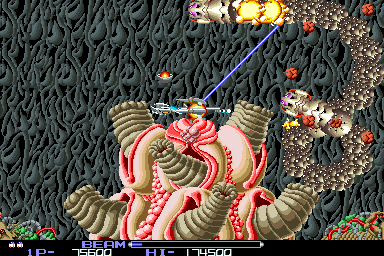
The boss of this stage has no direct defense. Instead, Outslay will leave from one of the shafts and fly around the screen in an effort to protect the main body of the boss. While Outslay is flying about, it will attack you by popping one of its segments in eight directions. Just as when you encountered it the first time, you can remove this threat by shooting the segments. Each time the snake reappears, however, all of the segments will be restored. The only weak point on the boss is the blue orb which appears in the very center along the top. When it is exposed, you can shoot it, and it will cover the orb momentarily. Then you must wait for the orb to be exposed again. If you aren’t traveling too quickly, you can attempt to park yourself immediately to the right of the upper left shaft so that the orb is stuck by your Force every time it gets exposed. However, you must be sufficiently low enough so that you don’t collide with the snake when it flies overhead.
The most efficient weapon to kill the boss is the Helix (red). If you sit just above the second shaft, it takes just two hits from the Helix to kill it and you only need to move a small distance to avoid any red segments launched by the snake.
To get maximum score and time out Gomander, you can position yourself at the entry/exit points where Outslay moves. The sequence is (out,in) :
- 1 → 2 (leaves shaft 1, goes back into shaft 2)
- 4 → 1
- 3 → 1
- 2 → 4
- 4 → 1
- 1 → 2
- 2 → 4
- 3 → 1
Loop 2[edit]
Enemy take more hits to destroy. Try to shoot the plants that launch the pods as quickly as possible - they are very difficult to destroy once launched and will follow you round the screen. If you shoot them they will immediately drop vertically to the bottom of the screen. Careful you don't get one above you as it will dive through you if hit.
Outslay has fast firing red segments - careful you don't get caught by one.
Gomander:
Outslay moves faster and the red segments fire very quickly - look out for them! If you have the air laser, sit just above the second shaft and hit the blue orb twice to destroy it, same as loop 1.