Enemy camp[edit]
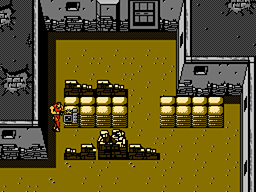
You will now find yourself in the enemy camp. Your rank should have risen to 3. There are no enemies in this area, but there are many mines on the ground to compensate, so you would do well to keep your mine detector equipped at all times to avoid them. Go north for two screens. You will receive a call on the transceiver, but if you try to answer it, you will find that the battery is dead. You will therefore have to find another one. There is also a door on this screen, which you cannot open with any Pass Card, so ignore it. Go north again and open the door on the right with Pass Card 3. Inside you can stock up on grenades and you'll find a new battery. Then return to the previous screen to answer the call. The pilot will tell you that there is a secret entrance somewhere in the ground. Then go north for two screens. Open the door on the left with Pass Card 1 to stock up on rations and guided missiles. By opening the door to the north with the same Pass Card you can free a prisoner, who will tell you to beware of John. Then go right and open the door to the north with Pass Card 2 to fill up on oxygen tanks. Finally go south and open the door on the right with Pass Card 2 to stock up on plastic explosives.

At this point, you have explored the whole area and you must find the secret entrance. You will find that the yellow sandbags on the various screens can be destroyed with plastic explosives or with a missile. If you destroy them, an enemy will appear in a hole and attack you with a rocket launcher. Kill him quickly, preferably using a powerful weapon, such as guided missiles or grenades. The only essential to destroy, however, is located in the screen to the north, where there is the door that leads into the room with the oxygen tanks. You will have to destroy the sandbags further to the right. Quickly kill the enemy with the rocket launcher and a hole will appear when he dies. Enter inside to continue.
Side scrolling area 2[edit]
Once inside, you will have the option to go left or right. If you go left, you will return to the enemy camp, through the door that you could not open before: do it if you have forgotten to take something. Go right to continue. You will now have to go through a long flooded tunnel, better if you have a good supply of oxygen tanks. Along the way you will have to break down two barriers. Select the gun as a weapon and press ![]() when you are against the barrier, to place the plastic explosive. Get away before it explodes and move on. You will then have to overcome a pool of water, avoiding being seen by the surveillance cameras (when necessary, dive) and jumping over the mines on the bottom. In the next stretch of water you will find another pitfall. There is a metal sensor that moves on the surface of the water. Avoid these sensors absolutely by diving. In fact, if you touch them, the alarm will sound and bombs will start falling from the ceiling. In addition, those sensors will electrify the water, making you lose some vital energy at every moment. Once you have passed the stretches of water, you will have to eliminate a single enemy, then you will have reached the end of this area.
when you are against the barrier, to place the plastic explosive. Get away before it explodes and move on. You will then have to overcome a pool of water, avoiding being seen by the surveillance cameras (when necessary, dive) and jumping over the mines on the bottom. In the next stretch of water you will find another pitfall. There is a metal sensor that moves on the surface of the water. Avoid these sensors absolutely by diving. In fact, if you touch them, the alarm will sound and bombs will start falling from the ceiling. In addition, those sensors will electrify the water, making you lose some vital energy at every moment. Once you have passed the stretches of water, you will have to eliminate a single enemy, then you will have reached the end of this area.
On the train[edit]
As soon as you exit the side scrolling area, you will arrive in a room where you can fill up with oxygen tanks. Then exit north and use the elevator to go up to the upper level and go outside. You will get a call from John, who will tell you that he is prisoner on the train. Then go north and kill the enemies you encounter. Entering the train on the right is useless, you will only find enemy soldiers. Instead, go up the one on the left. A moment later, the train will start moving.

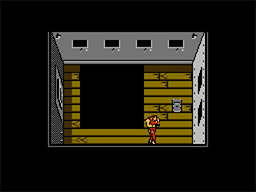
You will get a call from John, who will tell you that there are no traps on the train. Then reach the door to the north, open it with Pass Card 3 and enter. You will immediately notice that John lied to you: in this screen there are spikes sticking out of the floor. You will therefore have to move carefully to avoid them and not be injured. Go north. Here, too, you'll have to avoid the spikes sticking out of the floor. Better to move quickly and jerky. Exit north. You will have to be very careful while moving from one car to another. If you fall off the rickety catwalk, it will be immediate game over. The ideal is to always cross it exactly in the center, without ever stopping. In the next car, John will call you again, saying he is in the third car and that there are no enemies there. Open the door on the right with Pass Card 1 to fill up on grenades. Then go north. You can open the next door with Pass Card 2, but inside you will find only one enemy who will attack you with claymore mines. Take it out quickly with guided missiles. If you want, you can also skip this room, however. Then open the northern door with Pass Card 1. You can fill up on ammunition. However, there is a very sneaky trap in this room. A large portion of the floor will collapse if you climb on it and if you are not very quick to move away, you will die instantly. To avoid this trap, always stay close to the north wall of the room before getting ammo. Then go north. Again, it is not advisable to open the door on the right with the Pass Card 2: you will find only an enemy inside. Open the north door and carefully reach the third car. Open the door on the right with Pass Card 3 to find an X-Ray Camera. Go north again. You will notice that the enemies are here instead: it seems that John is making fun of you. Go north again. You won't be able to open the next door with any of your Pass Cards, so ignore it for now and head north to the next car. Here too, you'll need to avoid the spikes sticking out of the floor. Go north and open the door on the right with Pass Card 3 to free a prisoner, who will tell you to jump off the catwalk when the train stops. Go back and go north. Open the next door with the same Pass Card to find Pass Card 4. Be careful though! Here too there is a trap in the floor. To avoid it, pass close to the lower edge of the room. Take the new Pass Card and go back. In the last door (which can be opened with Pass Card 1) you will finally find an enemy hostage who will tell you he doesn't know anything. This one is not lying: even if you use truth gas you will not get any information. At this point, go back to the third car and reach the door that you could not open before and open it with the Pass Card 4.
Boss fight - The Impostor[edit]

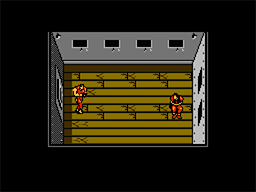
It appears that John is being held captive in this room. Here too, however, there is a trap in the floor: walk along the upper edge of the room to avoid it. When you try to free John, you will be injured and that man, as you may have suspected from his communications, will turn out to be a spy, who will attack you. Immediately return next to the door, avoiding the hole in the floor. The boss will attack you by placing claymore mines, which will explode releasing a range of shards, which you must avoid. For this battle, you should use guided missiles, as the hole in the center of the room will prevent you from hitting the boss with grenades. So, between one boss attack and the next, try to hit him with your missiles. While controlling a missile you will not be able to move, so avoiding the boss attacks is not that easy. Keep your rations handy and use one if your life energy starts running low. Hit the boss with 9 missiles to kill him. When he dies, you can collect his power armor, which you will need shortly.
When you leave the room, the train will stop. Go north to reach the junction point between the two cars and jump off the walkway to leave the train.