South Barona Highroad[edit]
After having exited the cave, open a nearby chest for a Red Ribbon. Head up the path for the Puffpetal Down Discovery and Skit #052A Place to Belong. A little further up is a chest containing a Feather. Backtrack and take the path to the left of the cave to find a cottage, which will trigger a scene followed by a battle with two Royal Soldiers and a Royal Bowman. Go for the bowman first, as he can be pesky while handling the other enemies. Let your party members distract the swordsmen and join them after dealing with the bowman; as long as you split targets, this fight should be easily manageable. After another scene, approach the cottage for Skit #053Class Dismissed, and look to the left of it for a handy Paralysis Charm. There should also be a sparkle nearby, which may give you Magic Carta No. 5. Inside is Pasta x3. Take not that entering the cottage will reset the sparkle if you have not received the Carta card. Once you've collected everything here, continue down the path (to the left of where you exited the cave).
After a scene, open a chest for a Rusted Nail. Head down the narrow path off the road for another scene, after which you can view Skit #054Bilateral Alliance and open a chest for 658 Gald. Afterward, step on the platform and press ![]() to warp.
to warp.
Wallbridge Ruins[edit]
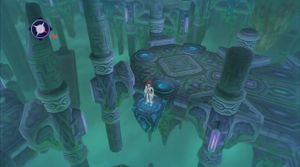
Upon entering, take the left path onto a floating platform. Stepping on this will take you across to another part of the ruins; be prepared to utilize plenty of these to make your way through. In this next area will be only one other platform, so take it to some enemies. Feel free to test out your new party member on these enemies (both Pascal's A-Artes and B-Artes are long-range, giving her a greater advantage at a distance compared to the close-range melee fighters that make up the rest of the party) before taking the next platform to the right (for now, the platform to the left leads to a dead end). Afterward, take the next platform and then the next to a fork. Take the platform on the left to a green one, then descend. This leads to another fork with a save point in the center. Take the platform on the right to push a yellow platform up.
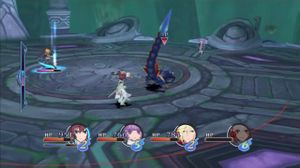
For some items that can now be reached on the level above, return to the green platform and ascend. Backtrack to the first fork and take the other platform to reach Scarlet Aroma and 258 units of eleth, then return to the save point. Take the platform to the left and approach the mechanism at the center of this area for a boss fight against Mercurius. This reptile isn't too tough as long as the party maintains a combo. Occasionally, it will turn around and whip anyone close by with its long tail, so just make sure to dodge and guard when you see it prepare to do so. After the battle, approach the mechanism for the Projection Device Discovery and Skit #055Takes One to Know One. Take the platform on the left and then use a green one to ascend to continue to the next area.
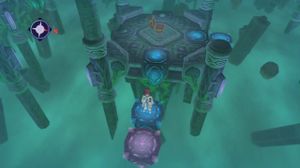
Use the platform on the left to reach a Hyperdense Crystal, then take the next platform to push a purple one. Take the only usable platform back to where you were before, then take the other platform here. This will lead you to another platform, which itself leads to the purple platform you pushed previously. Keep taking the only platforms you can to reach a Floral Anklet for Sophie and, afterward, a fork. Two green platforms lead to a level below; start by taking the left one for a Book of Maintenance, then the right. Take the platform here to a Steel Tunic, then continue to another fork. Take the platform further from you to push an orange platform up, then head back to the other one and take it to find a green platform that will take you back up a level.
As soon as you've ascended, you can open a chest for Life Bottle x3. Walk along the path formed by some old rock and the orange platform to another path formed by the red platform. Use the green platform at the end of this path to descend once again. Take the only platform here to the Silent Stone Discovery and Skit #056Gut Archaeology. To the left of this is another platform. This leads to a save point and a green platform that can be taken to a warp pad. Use it to finally get to Gralesyde Highroad, but after the scene, head right back down for Skit #057Touched in the Head, which can be viewed upon re-entering, and some collectibles (if those don't matter to you, feel free to skip to the next section). Take the blue platform across from the warp to a fork. Take the platform to the right, then at the next fork, the one further from you (the closer one is a shortcut to the Barona warp pad). At yet another fork, take the platform to the right to push a purple platform. Take the other platform here and continue on the path to reach that purple platform. The chest here holds Panacea Battle x2. Finally, take the platform to the right here and continue along this path to reach a Burn Charm. Backtrack to the warp to get back to Gralesyde Highroad.
Gralesyde[edit]
Look around for sparkles in this area, as one of them may give you Magic Carta No. 6. Head down the hill, past the soldiers, save point, and Turtlez. After another scene, head towards the screen for the Potatoes Discovery, Skit #058Risk Management, and Skit #059Settling for Number Two. Along the wall from the potato patch is a chest holding 1920 Gald. Back on the road, take a left at the fork for a Moist Crystal. Head the other way to find a chest holding Peach Gel x2 on a cliff, then continue down the road into town.
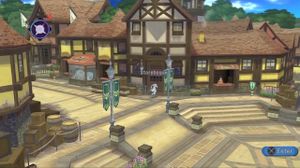
To the right of the square is the port, where you can find Pasta x3 and a cat that can be satisfied with some fish. To the left, in a storehouse past the item shop, is Magic Carta No. 31. A little further down, past the equipment shop, is the inn, which you can enter for Skit #060Who You Are and Best Princess Stories down the hall to the left. Exit through the inn's back door to find the Bells of Glory Discovery and Skit #061That Would Explain a Lot to the right. Further down right, in a flowerbed across the path, is a sparkle that will give you Canola Seeds, as well as an Imp Plushie hidden around a corner further up and a man that can sell you the Book of Dissolution for 3,000 Gald. Before moving down the center of the square along the path to the manor, head back on the path to the left of the square. This should lead you to Old Gralesyde Highroad, where you can find some collectibles, skits, and an all-important Mystic Arte for Pascal.
Along the road are some chests containing 1300 Gald and, behind a tree, an Overgrown Crystal. Approach the man with the face icon above his head to begin a sidequest that will give you the Wind Summoner title, which you can equip for Pascal to learn her first Mystic Arte. Simply talk to him three times to trigger a battle, after which you will obtain the title and Green Cryas, which you can bring back to the inn to clear Sidequest #22. Further along this path is a carrot patch which will give you the Carrots Discovery and Skit #064Weird Science upon examination. You should also come across a Mariner's Mask and a Slow Charm before coming across the exit, which will take you to East Lhant Highroad. Here is one more skit that can be viewed, Skit #065Overdue Maintenance, before returning to Gralesyde and heading down the center path to the manor.
After entering Duke Dalen's manor, Asbel will get a title for his own Mystic Arte. Re-enter the manor and head upstairs to open a chest locked behind a password, "4," for the Book of Wealth. Back on the main floor, exit through the door on the right and speak to the girl on this path for Magic Carta No. 22, Magic Carta No. 23, Magic Carta No. 26, and Magic Carta No. 27. Further down is the beach, where you can find the Message in a Bottle Discovery and Skit #062Jealous Much?. Now exit Gralesyde and make your way back to the warp pad leading to the Wallbridge Ruins. Make sure to stop by the save point on the way for Skit #063The Ruins Entrance.
Wallbridge[edit]
After warping back into the ruins, take the blue platform deeper in. This should trigger Skit #066Inside the Ruins. At the fork, take the left platform and then use the green one to ascend. After the scene, take the warp into Wallbridge.
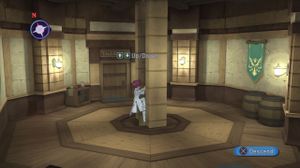
Now inside the fortress, make your way through the door in front of you. Walk down the hall and through the door on the other side. In this next room, open the chest for an Elven Cloak and climb up the ladder to reach the next floor, then keep climbing to the next. In this room, descend off the ladder with ![]() and head through the door behind you (toward the screen). Walk on the bridge connecting the two sides of the fortress for a save point and Skit #067Sword of Salvation, then backtrack to the inside of the tower and head through the door on the opposite side. Walk across this outside area and into another tower (Main Tower NW). Take the ladder here down to the bottom floor, where you can pull a lever. Once that's done, exit through the door in front of you and walk down the hall to the next tower.
and head through the door behind you (toward the screen). Walk on the bridge connecting the two sides of the fortress for a save point and Skit #067Sword of Salvation, then backtrack to the inside of the tower and head through the door on the opposite side. Walk across this outside area and into another tower (Main Tower NW). Take the ladder here down to the bottom floor, where you can pull a lever. Once that's done, exit through the door in front of you and walk down the hall to the next tower.
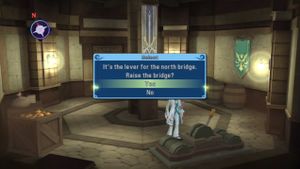
In Perimeter Tower NW B1, the 300 Year-Old Barrel and Skit #068Windor Rising can be found. Otherwise, this is a dead end, so return to Main Tower NW, where the lever was found, and climb back up two floors. From here, take the door in front of you and cross the outside into the next tower (Perimeter Tower NW) for a Darkshine Crystal, then climb up and cross over into the other tower to find a Book of Talent. Take the door behind you (toward the screen) back out and into the tower across from here. Climb down the ladder to the bottom floor to find a Turtlez and 285 units of eleth, then climb back up those two floors. Take the door behind you to another outer area of the fortress. There should be a room to the left of here that you can enter for a scene.
Before exiting the Central Tower, open a chest for a Titanium Scabbard for Asbel. After exiting, take the door behind you (toward the screen) to Main Tower SE, and climb down to the bottom floor of this tower to find the lever for the south bridge. You can take the door toward the screen here for Apple Gel x4, but there's nothing else here, so climb back up two floors. Take the door toward the screen, and walk across the bridge here to the other side, then into the tower toward the screen. Pull the lever here and exit for a potentially tough battle. Fortunately, you have strength in numbers. Keep Malik distracted while the rest of the party handles the foot soldiers or vice versa. Afterward, walk forward into the tower in front of you and climb down a level to find the exit to Wallbridge. Exiting and walking down a bit will trigger a scene.
Enter the tower on the far right to make your way to a skit and then possibly back to the Wallbridge Ruins. Climb up one floor and exit toward the screen, after which you can re-enter the room to the left (where the Fortress Key was retrieved earlier) for Skit #070The Price of Violence. You can either climb up the stairs here to find Richard and progress the story, or exit and re-enter the tower ahead, then climb down a floor. Take the door ahead here and follow the path to the warp.
Return to Wallbridge Ruins (optional)[edit]
Chances are you haven't missed this place much, but there are some valuable treasures here if you take the time to look for them. Take the blue platform to the left and then use the green one to descend. Take the blue platform here and then the one furthest from you to push a yellow platform up, then take the other platform here to a fork; the blue platform leads to Grape Gel x2 and the green leads to 2320 Gald. Backtrack (left, left, ascend), and this time take the blue platform to the left. This will take you to the yellow platform which you pushed up; take another blue platform to Peach Gel x3, then backtrack again (left, right) so you end up back at the warp pad.
This time, take the blue platform on the right, then take the blue platform on the right again and subsequently use the green platform to ascend. Take the blue platform on the left, then another blue, and another, until finally you push a yellow platform down. Backtrack to a fork between a green and a blue, and use the green to descend to a Mastery Tonic C. Ascend and continue to backtrack, after which you can take the blue platform on the right to 2160 Gald and another yellow platform that can be pushed. Backtrack to the green platform and descend. You can use another green platform here to descend, which will let you push some more platforms up. At the first fork, take the blue platform on the right to a yellow platform that can be pushed up, then the left to yet another fork. The blue platform on the right leads to Eleth Bottle C and a green platform that can be ascended to reach the Book of Precedence, while the green on the left leads to a Drop Bottle. Backtrack (descend, left, ascend) and then backtrack further (blue, blue) back to the warp.
To return to the Central Tower, take the only exit to another tower and climb up a floor. Exit toward the screen and enter the Central Tower to the left.
Barona Catacombs and Secret Passage[edit]
After the scene, exit through the door and enter the tower ahead, then the next tower. Climb down a floor and exit to the left, then head down the road for a scene. Continue forward toward South Barona Highroad. Skit #071Hard to Justify is by the save. By the cottage are some soldiers that can be approached for Skit #072Going Commando? and spoken to for helpful consumables. Afterward, approach the save by the entrance to the Catacombs on the beach for Skit #073A Seven-Year Blur and enter.
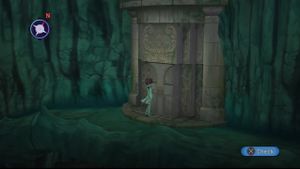
In the Barona Catacombs, walk past the Massive Skeleton and through the entryway you pushed open previously. At the end of the bridge is a Book of Perfection, and down the winding path to the right is a Mysterious Liquid and Core Dust. Up the winding path to the left is Panacea Bottle x2. At the next fork, take the higher path to find 240 units of eleth at the end and the exit, another door that can be pushed, midway through. Push it and then walk down the newly-revealed path to find an exit. Down on the right wall of this path is another door that you can push to find 1800 Gald, the Graves of the Unsung Discovery, and Skit #069Burial Plans. Back on the main path, keep going to find the exit to the Secret Passage. Through here is a scene.
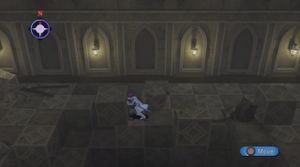
Up the stairs and to the left is Peach Gel x2, and down to the right is a block that can be pushed out of your way with ![]() +
+ ![]() . Head upstairs and again, push the block in your way, this time to fill in the gap and cross over to the other side. Up the next set of stairs are a couple more blocks that must be pushed and pulled to fill in a gap, this time longer. Crossing over this time will trigger another scene. Continue up the stairs afterward and then up another set of stairs to find a Mastery Tonic C, then back down. To the left is the Twin Vases Discovery and Skit #074Separate Worlds, and past that is another save point.
. Head upstairs and again, push the block in your way, this time to fill in the gap and cross over to the other side. Up the next set of stairs are a couple more blocks that must be pushed and pulled to fill in a gap, this time longer. Crossing over this time will trigger another scene. Continue up the stairs afterward and then up another set of stairs to find a Mastery Tonic C, then back down. To the left is the Twin Vases Discovery and Skit #074Separate Worlds, and past that is another save point.
Head down the stairs toward the screen and push/pull around some more blocks to fill an even bigger gap. On the other side, head down the stairs toward the screen first to find a Wriggler Crystal, then up the stairs for yet another puzzle. Push the blocks to make a straight line across and pick up the Book of Suppression, then backtrack to the save point (right and down the stairs, then right and up the stairs). From the save, head up the final set of stairs to enter Barona Castle.
Barona Castle[edit]
Go through the passage to the right and down a hall to another passage. Head toward the screen here, then left and left again to find a save, the First Flag Discovery, and Skit #075Friends Close, Enemies Closer. Further left is a boss battle.
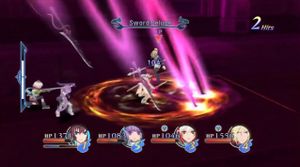
Victoria is definitely no pushover, and by this point should be the toughest boss yet. Try to keep her trapped in combos with A-Artes, as she'll most likely go after your casters if she isn't being kept busy. This is especially true for the healers of the party, who will be jabbed at with a powerful attack before they can complete a spell. When Eleth Break comes around, there's nothing you can do to stagger her, so have the party focus on dodging and guarding if necessary (and use items to heal if you happen to be desperate). She has a lot of health to chip away at, but as long as you stay aggressive and the healers heal, you should be able to move on.
After defeating Victoria, head through the doorway to the left and if the Eleth Mixer needs filling, enter the third room here for 315 units of eleth. On the other end of the hall is a save point and Skit #076Slay the Usurper!, and upstairs is the final boss fight of the area.
Cedric offers combos just as heavy and damaging as Victoria's if you happen to get caught in them, but the most dangerous thing about him is his Mystic Arte; keep your distance from him when an Eleth Break is activated and prepare to go into damage control with all necessary healing and items afterward.
Following the battle, exit the room you find yourself in and and go left, then upstairs to the Throne Room. After another scene, backtrack to the room where you left your party and then return once more to the save point in front of the Throne Room for Skit #077A Touching Moment. You can now exit the castle and head for the port, but make sure to stop by the inn for Skit #078Eye to Eye on the way.
Lhant[edit]
Enter the cottage along the road and speak to the man inside for a quick sidequest, and approach the save point outside the cottage for Skit #079The Orlen Report. Approach Lhant for a scene, then head down the hill toward the canal. Walk to the gate dividing the canal from Lhant and enter the town from here. This should take you to the area outside the manor, but first, get started on Sidequest #56, Sophie's Seed Collection, by planting the seeds you've found up until now in the flowerbed in front of Cheria's house. Inside the manor, you may want to save your game before entering the study to speak with Hubert. This will lead into the boss battle with Richard.
If this is your first playthrough, don't worry too much about the trophy; it becomes much more attainable on a New Game+ file with some bonuses from the Grade Shop. Instead, just focus on surviving, using Lightning Strike to dispel Richard's Nova and healing whenever necessary. It may take a bit of practice dodging his attacks, but you should be familiar with them by now having fought alongside him for a while. Hubert should also make for a helpful ally; have the two brothers keep Richard distracted while Sophie heals to avoid finding yourself in a tough spot.
