Jump to navigation
Jump to search
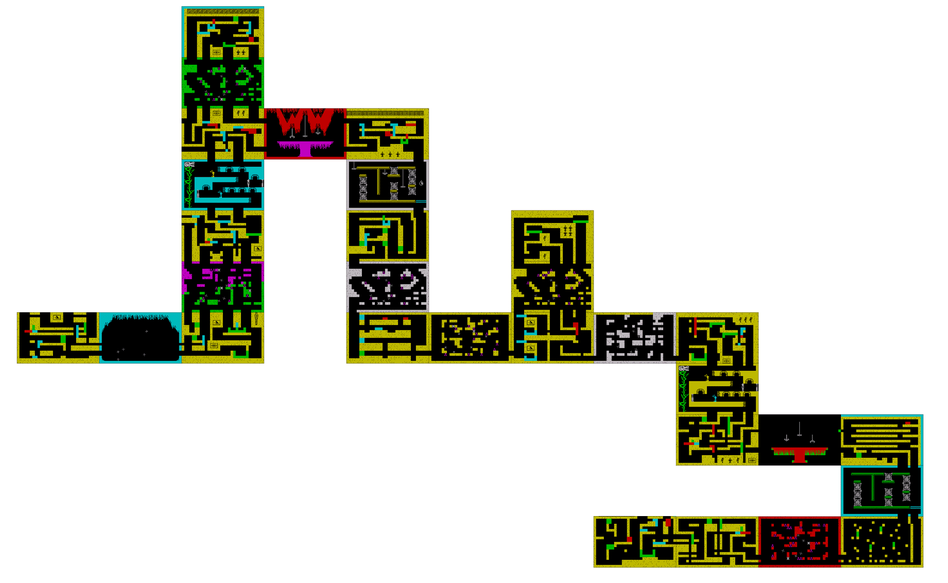

Note: In the Commodore 64 version of the game, red blocks are colored yellow. If you are playing that version, read "yellow" for red. Additionally, you can change the color scheme by pressing , intended to help with monochrome monitors at the time.
| Room | Features | Notes |
|---|---|---|
| 55 | 4 blue blocks, 3 green blocks and 1 red block | Once T1 has entered the room from the top of the screen, you will have to move it down, left (pushing the first blue block into a hole as you do so), back right and back up; once you have done so, you will have to switch back to T2 (which is still in Room 53 on Map 2) and move it left and down off the bottom of the screen to Room 54. Once T2 has entered Room 54 from the top of the screen, you will have to move it right, down, right, down, right, down, left, down, left, down, left, down, right, down, left and down off the bottom of the screen to this room (while again watching out for the five shurikens which are all still flying around the room) - and once it has entered this room from the top of the screen, you will have to move it down, right (pushing the first green block into a hole as you do so), back left and back up. You will then have to switch back to T1 and move it back down, back left (pushing the second blue block and causing the red block to fall into a hole as you do so), back right, back up, left, up, left, down, right, down, left (pushing the third blue block, and pushing that red block again as you do so), back right, back up, back left, back up, right, down, left (pushing the fourth blue block into a hole as you do so), back up, back left, back down, back right, down and right; once you have done so, you will have to switch back to T2 and move it back down, left and back up off the top of the screen to Room 54. Once T2 has entered Room 54 from the bottom of the screen, you will have to retrace your steps back up to Room 53 (while once again watching out for the shurikens which are all still flying around the room) - and once it has entered Room 53 from the bottom of the screen, you will have to move it up, left and back down off the bottom of the screen to Room 54 again. Once T2 has entered Room 54 from the top of the screen, you will have to retrace your steps back down to this room again (while yet again watching out for the shurikens which are all still flying around the room); once it has entered this room from the top of the screen, you will have to move it down, right, down and off the right side of the screen to Room 56. |
| 56 | 5 shurikens | Once T2 has entered the room from the left side of the screen, you will have to move it off the right side of the screen to Room 57 (while watching out for the five shurikens which are all flying randomly around the room). |
| 57 | 2 blue blocks and 4 green blocks | Once T2 has entered the room from the left side of the screen, you will have to move it right, up, down, right (pushing the first green block as you do so), up, right, up and left; once you have done so, you will have to switch back to T1 (which is still in Room 55) and move it up and off the right side of the screen to Room 56. Once T1 has entered Room 56 from the left side of the screen, you will have to move it off the right side of the screen to this room (while, again, watching out for the shurikens which are all still flying around the room) - and once it has entered this room from the left side of the screen, you will have to move it right, up and right (pushing the first blue block into a hole as you do so). You will then have to switch back to T2 and move it up, right (pushing the second green block and causing the second blue block to fall onto it as you do so) and up off the top of the screen to Room 58 (the sixth one where the lights go out). |
| 58 | 3 fuel pickups, 10 loads of treasure and 5 shurikens | Once T2 has entered the room from the bottom of the screen, the lights will go out for a nineteenth time; for the eighth time, if you selected Acme Cave Sonar at the start of the game, the parts of any walls in the immediate vicinity of T2 will be lit up as it moves around the room, but if you did not, they will not. Either way, you will have to move T2 up, right, up and right to collect both the first and second loads of treasure (while watching out for the five shurikens which are all flying randomly around the room) - and once you have done so, you will have to move it up and left to collect the first fuel pickup (while again watching out for the shurikens). You will then have to move it back right, up, left, down and right to collect the third load of treasure (while once again watching out for the shurikens); once you have done so, you will have to move it down and right to collect the fourth load of treasure (while yet again watching out for the shurikens). You will then have to move it down and right to collect both the fifth and sixth loads of treasure (while for a fifth time watching out for the shurikens) - and once you have done so, you will have to move it up to collect the seventh load of treasure (while for a sixth time watching out for the shurikens). You will then have to move it back down, back left, down and left to collect the second fuel pickup (while for a seventh time watching out for the shurikens); once you have done so, you will have to move it back right and up to collect the eighth load of treasure (while for an eighth time watching out for the shurikens). You will then have to forgo collecting the remaining fuel pickup and loads of treasure (which will also disappear after you leave the room for the first time, so you will not have another chance to collect them) and move it back down, right, up, left and up off the top of the screen to Room 59 (where the lights will come back on again, but for a fifth time not for long). |
| 59 | 5 blue blocks, 2 green blocks and 1 red block | Once T2 has entered the room from the bottom of the screen, you will have to move it up, left and back down off the bottom of the screen to Room 58 (where the lights will go out for a twentieth time); you will then have to retrace your steps back down to Room 57 (while, again, watching out for the shurikens which are all still flying around the room). Once T2 has entered Room 57 from the top of the screen, you will have to move it down, left (pushing the third green block into a hole as you do so), back right, down, left (pushing the fourth green block into a hole as you do so), back right and back up - and once you have done so, you will have to switch back to T1 and move it back left, up, right, up, left and up off the top of the screen to Room 58 (where the lights will go out for a twenty-first time). You will then have to move T1 up, right, up, right, up, right, up, left and up off the top of the screen to this room (while, once again, watching out for the shurikens which are all still flying around the room); once it has entered this room from the bottom of the screen, you will have to move it up, right (pushing the first blue block into a hole as you do so), down, right (pushing the red block and causing the second blue block to fall into a hole as you do so), back left, back up, right, down, right (pushing the third blue block into a hole as you do so), back left, back up, back left and back down off the bottom of the screen to Room 58 (where the lights will go out for a twenty-second time). You will then have to retrace your steps back down to Room 57 (while, yet again, watching out for the shurikens which are all still flying around the room) - and once T1 has entered Room 57 from the top of the screen, you will have to move it down and right. You will then have to switch back to T2 and move it back up off the top of the screen to Room 58 again (where the lights will go out for a twenty-third time) - and once you have done so, you will have to retrace your steps back up to this room again (while, for a fifth time, watching out for the shurikens which are all still flying around the room). Once T2 has entered this room from the bottom of the screen, you will have to move it back up, back right, up, right and up. You will then have to switch back to T1 (which is still in Room 57) and move it back up off the top of the screen to Room 58 again (where the lights will go out for a twenty-fourth time); you will then have to retrace your steps back up to this room again (while, for a sixth time, watching out for the shurikens which are all still flying around the room). Once T1 has entered this room from the bottom of the screen, you will have to move it up, right, up and right - and once you have done so, you will have to switch back to T2 and move it up (lifting up the green block as you do so) and left (dropping that green block back into place again as you do so). You will then have to switch back to T1 and move it up, left, up (lifting up the fourth blue block as you do so) and left (dropping that fourth blue block back into place again as you do so); once you have done so, you will have to switch back to T2 and move it up off the top of the screen to Room 60. |
| 60 | 2 jackal gods, 1 mummy and 1 carnivorous plant | Once T2 has entered the room (which is identical to Room 43 on Map 2, but for its colours) from the bottom of the screen, it will (if you selected Weedkiller at the start of the game) fire three shots of Weedkiller at the carnivorous plant, causing it to recede into the ground; you will then have to move it left, up, right and up off the top of the screen to Room 61. However, if you did not select Weedkiller at the start of the game, T2 cannot fire anything at the carnivorous plant to kill it, and you will have to move it right, up, left (when the blue jackal god is walking away from it), up, right (when the mummy is walking away from it), up, left (when the yellow jackal god is walking away from it), up, left, up, right and up off the top of the screen to Room 61 instead. |
| 61 | 4 blue blocks and 2 red blocks | Once T2 has entered the room from the bottom of the screen, you will have to move it up; once you have done so, you will have to switch back to T1 (which is still in Room 59) and move it up off the top of the screen to Room 60. Once T1 has entered Room 60 from the top of the screen, you will have to move it either left, up, right and up off the top of the screen (if you selected Weedkiller at the start of the game and T2 fired three shots of it at the carnivorous plant to kill it) or right, up, left (again, when the blue jackal god is walking away from it), up, right (again, when the mummy is walking away from it), up, left (again, when the yellow jackal god is walking away from it), up, right and up off the top of the screen (if you did not select Weedkiller at the start of the game and T2 could not fire three shots of it at the carnivorous plant to kill it) to this room - and once it has entered this room from the bottom of the screen, you will have to move it up, right (pushing the first blue block as you do so), back left, up, right (pushing the second blue block into a hole as you do so) and back left. You will then have to switch back to T2 and move it left, down and off the left side of the screen to Room 62. |
| 62 | 2 blue blocks, 2 green blocks and 1 red block | Once T2 has entered the room from the right side of the screen, you will have to move it up, left (pushing the first green block into a hole as you do so), back right, back down and back off the right side of the screen to Room 61; once it has entered Room 61 from the right side of the screen, you will have to move it back right, back up and back right. You will then have to switch back to T1 and move it back down and off the left side of the screen to this room - and once it has entered this room from the left side of the screen, you will have to move it up, left (pushing the first blue block into a hole as you do so), up, right (pushing the second blue block into a hole as you do so), back left, back down, back right, down, left (pushing that second blue block into another hole as you do so), back up, back left, down, right (pushing the red block and pushing that second blue block into a third hole as you do so), back left, back up and back off the right side of the screen to Room 61. Once T1 has entered Room 61 from the left side of the screen, you will have to move it right, down, right, up, right (pushing the first red block and pushing the third blue block into a hole as you do so), back left (pushing that third blue block into another hole as you do so) and up; once you have done so, you will have to switch back to T2 and move it back left, back down and back off the left side of the screen to Room 62 again. Once T2 has entered Room 62 from the left side of the screen, you will have to move it up, left (pushing the second green block and pushing both that red block and that second green block into another hole as you do so), up and back off the right side of the screen to Room 61 - and once it has entered Room 61 from the left side of the screen, you will have to move it right and up. You will then have to switch back to T1 and move it up off the top of the screen to Room 63 (the seventh one where the lights go out). |
| 63 | 2 fuel pickups, 11 loads of treasure and 5 shurikens | Once T1 has entered the room from the bottom of the screen, the lights will go out for a twenty-fifth time; for the ninth time, if you selected Acme Cave Sonar at the start of the game, the parts of any walls in the immediate vicinity of T1 will be lit up as it moves around the room, but if you did not, they will not (you will also not have to forgo collecting any fuel pickups or loads of treasure in this room). Either way, you will have to move T1 up, left, up and right to collect the first fuel pickup and the first load of treasure (while watching out for the five shurikens which are all flying randomly around the room) - and once you have done so, you will have to move it back left, up, left, up, left, up, right, up and right to collect the second load of treasure (while again watching out for the shurikens). You will then have to move it up, right and down to collect both the third and fourth loads of treasure (while once again watching out for the shurikens); once you have done so, you will have to move it right, down, right and down to collect the fifth and sixth loads of treasure (while yet again watching out for the shurikens). You will then have to move it right, down, left, down and left to collect the seventh load of treasure (while for a fifth time watching out for the shurikens) - and once you have done so, you will have to move it up to collect the second fuel pickup (while for a sixth time watching out for the shurikens). You will then have to move it back down to collect the eighth load of treasure (while for a seventh time watching out for the shurikens); once you have done so, you will have to move it left, up, left, up and right to collect the ninth load of treasure (while for an eighth time watching out for the shurikens). You will then have to move it back left, back down, back left and back down to collect the tenth load of treasure (while for a ninth time watching out for the shurikens) - and once you have done so, you will have to move it right and down to collect the eleventh load of treasure (while for a tenth time watching out for the shurikens). You will then have to move it back left, up, left, up, left and up off the top of the screen to Room 64 (where the lights will come back on again, but for a sixth time not for long). |
| 64 | 3 blue blocks, 2 green blocks and 2 red blocks | Once T1 has entered the room from the bottom of the screen, you will have to move it up; once you have done so, you will have to switch back to T2 (which is still in Room 62) and move it up off the top of the screen to Room 63 (where the lights will go out for a twenty-sixth time). You will then have to move T2 up, right, up, right, up, left, up, left and up off the top of the screen to this room (while, again, watching out for the five shurikens which are all still flying around the room) - and once it has entered this room from the bottom of the screen, you will have to move it up and right. You will then have to switch back to T1 and move it right, up, left (pushing the first blue block as you do so), up, right (pushing the second blue block and causing the first red block to fall onto it as you do so), back left, back down, back right, back down, right (pushing the second red block as you do so), back left, up, right (pushing the third blue block into a hole as you do so), back left, back down and back left; once you have done so, you will have to switch back to T2 and move it right (pushing the first green block into a hole as you do so), down, left (pushing that first green block into another hole as you do so), down, left, down, right (pushing the second green block as you do so) and back down off the bottom of the screen to Room 63 (where the lights will go out for a twenty-seventh time). You will then have to retrace your steps back down to Room 62 (while once again watching out for the five shurikens which are all still flying around the room) - and once T2 has entered Room 62 from the top of the screen, you will have to move it down and off the right side of the screen to Room 65. |
| 65 | 3 spiders | Once T2 has entered the room from the left side of the screen, you will have to move it down, right (when all three of the spiders are rising, but you may have to pause if one of them starts falling), up and off the right side of the screen to Room 66. |
| 66 | 2 blue blocks, 1 green block and 3 red blocks | Once T2 has entered the room from the left side of the screen, you will have to move it right and down; once you have done so, you will have to switch back to T1 (which is still in Room 64) and move it back right and back down off the bottom of the screen to Room 63 (where the lights will go out for a twenty-eighth time). You will then have to retrace your steps back down to Room 62 (while yet again watching out for the five shurikens which are all still flying around the room) - and once T1 has entered Room 62 from the top of the screen, you will have to move it down and off the right side of the screen to Room 65. Once T1 has entered Room 65 from the left side of the screen, you will have to move it down, right (again, when all three of the spiders are rising, but you may again have to pause if one of them starts falling), up and off the right side of the screen to this room; once it has entered this room from the left side of the screen, you will have to move it right, down, right and up (lifting up the first blue block as you do so). You will then have to switch back to T2 and move it right - and once you have done so, you will have to switch back to T1 and move it left (dropping that first blue block back into place as you do so, and trapping T2 in the process), back right, down, right and up (lifting up the second blue block as you do so) - and once you have done so, you will have to switch back to T2 and move it right (pushing the first red block as you do so). You will then have to switch back to T1 and move it back left, back up, right, down, left and up (lifting up that second blue block again as you do so, and indirectly freeing T2 again in the process); once you have done so, you will have to switch back to T2 and move it right (pushing that first red block again as you do so), down and right (pushing the green block into a hole and causing the second red block to fall onto it as you do so). You will then have to switch back to T1 and move it back right, back up, right, down, left (pushing the third red block as you do so), back right, down, left (pushing that first red block once again, causing that second blue block to fall onto it and pushing that first red block into a hole as you do so), down and right. You will then have to switch back to T2 and move it right and down off the bottom of the screen to Room 67. |
| 67 | 3 spiders | Once T2 has entered the room (which is identical to Room 49 on Map 2, but for the colours) from the top of the screen, you will have to move it right (if you selected Heavy Duty Acid at the start of the game, it will drop two drops of it onto a platform below it, causing it to evaporate), down, left and down off the bottom of the screen to Room 68; however, if you did not select Heavy Duty Acid at the start of the game, T2 cannot drop anything on the platform to make it evaporate, and you will have to move it right, down, left, up (when the first spider is rising), left, down (when the second spider is rising), left, up, left (when the third spider is rising), down, right and down off the bottom of the screen to Room 68 instead. |
| 68 | 2 blue blocks and 5 green blocks | Once T2 has entered the room from the top of the screen, you will have to move it down, right and down; once you have done so, you will have to switch back to T1 (which is still in Room 66) and move it right and down off the bottom of the screen to Room 67. Once T1 has entered Room 67 from the top of the screen, you will have to move it either down, left and down off the bottom of the screen (if you selected Heavy Duty Acid at the start of the game and T2 dropped two drops of it onto the platform to make it evaporate) or right, down, left, up (when the first spider is rising), left, down (when the second spider is rising), left, up, left, down (when the third spider is rising), right and down off the bottom of the screen (if you did not select Heavy Duty Acid at the start of the game and T2 could not drop anything on the platform to make it evaporate) to this room - and once it has entered this room from the top of the screen, you will have to move it down, right and down. You will then have to switch back to T2 and move it left and up; once you have done so, you will have to switch back to T1 and move it down and left. You will then have to switch back to T2 and move it right (pushing the first green block into a hole as you do so) - and once you have done so, you will have to switch back to T1 and move it up and left (pushing the first blue block and causing the second green block to fall onto it as you do so). You will then have to switch back to T2 and move it back left, up, left (pushing the third green block into a hole as you do so), back right, back down, back right, up, left, up, left and down; once you have done so, you will have to switch back to T1 and move it back right, back down, left, down and up (lifting up the second blue block as you do so). You will then have to switch back to T2 and move it right (pushing the fourth green block into a hole and pushing the fifth green block into a hole as you do so), back left and down - and once you have done so, you will have to switch back to T1 and move it back right (dropping the second blue block back into place as you do so), back up and back right. You will then have to switch back to T2 and move it back up, back right, back down and back right; once you have done so, you will have to switch back to T1 and move it back down, left, down, left and off the bottom of the screen to Room 69 (the eighth one where the lights go out). |
| 69 | 2 fuel pickups, 12 loads of treasure and 5 shurikens | Once T1 has entered the room from the top of the screen, the lights will go out for a twenty-ninth time; for the eleventh time, if you selected Acme Cave Sonar at the start of the game, the parts of any walls in the immediate vicinity of T1 will be lit up as it moves around the room, but if you did not, they will not (you will also not have to forgo collecting any fuel pickups or loads of treasure in this room). Either way, you will have to move T1 down, right, down, right, down and right to collect both the first and second loads of treasure (while watching out for the five shurikens which are all flying randomly around the room) - and once you have done so, you will have to move it up, left, up and left to collect the third load of treasure (while again watching out for the shurikens). You will then have to move it back right, up, left and up to collect the fourth load of treasure (while once again watching out for the shurikens); once you have done so, you will have to move it right, up, left, up, left, up, left, up, left and down to collect the fifth load of treasure (while yet again watching out for the shurikens). You will then have to move it left and down to collect the sixth load of treasure (while for a fifth time watching out for the shurikens) - and once you have done so, you will have to move it back up, back right, down, right, down, right and up to collect the seventh and eighth loads of treasure and the first fuel pickup (while for a sixth time watching out for the shurikens). You will then have to move it back down, back left, back up and right to collect the ninth load of treasure (while for a seventh time watching out for the shurikens); once you have done so, you will have to move it back left, down and left to collect the second fuel pickup (while for an eighth time watching out for the shurikens). You will then have to move it down to collect the tenth load of treasure (while for a ninth time watching out for the shurikens) - and once you have done so, you will have to move it right and down to collect the eleventh load of treasure (while for a tenth time watching out for the shurikens). You will then have to move it left to collect the twelfth load of treasure (while for an eleventh time watching out for the shurikens); once you have done so, you will have to move it back right, down, left and down off the bottom of the screen to Room 70 (where the lights will come back on again, but for a seventh time not for long). |
| 70 | 3 blue blocks, 1 green block and 2 red blocks | Once T1 has entered the room from the top of the screen, you will have to move it down, right, up, left, down, right (pushing the first red block into a hole as you do so), back up, back right, back down, back left (pushing that first red block into another hole as you do so), back up, back left, back down, back right (pushing that first blue block into a hole as you do so), back up, back left, back down, back right (pushing the second red block into a hole as you do so), back down, left (pushing that second red block into another hole as you do so), back right, back up, back left, down and right (pushing the second blue block as you do so, but not so far that you push it into a hole); once you have done so, you will have to switch back to T2 (which is still in Room 68) and move it back left, back up, back left, back down, left and down off the bottom of the screen to Room 69 (where the lights will go out for a thirtieth time). You will then have to move T2 down, right, down, left, down, right, down, right, down, right, down, left and down off the bottom of the screen to this room (while, again, watching out for the shurikens which are all still flying around it) - and once T2 has entered this room from the top of the screen, you will have to move it down, right (pushing the green block into a hole as you do so), back left and back up. You will then have to switch back to T1 and move it back left, back down and off the right side of the screen to Room 71. |
| 71 | 2 fuel pickups, 13 loads of treasure and 5 shurikens | Once T1 has entered the room from the left side of the screen, you will have to move it right, up and right to collect the first load of treasure (while watching out for the five shurikens which are all flying randomly around the room); once you have done so, you will have to move it down to collect the second load of treasure (while again watching out for the shurikens). You will then have to move it back up, back left, back down, right and down to collect the third load of treasure (while once again watching out for the shurikens) - and once you have done so, you will have to move it up to collect the fourth load of treasure (while yet again watching out for the shurikens). You will then have to move it left to collect the fifth load of treasure (while for a fifth time watching out for the shurikens); once you have done so, you will have to move it back right, back down and right to collect the sixth load of treasure, the first fuel pickup and the seventh load of treasure (while for a sixth time watching out for the shurikens). You will then have to move it down and right to collect the eighth load of treasure (while for a seventh time watching out for the shurikens) - and once you have done so, you will have to move it down, right, up, left and down to collect the ninth load of treasure (while for an eighth time watching out for the shurikens). You will then have to move it back up and left to collect the second fuel pickup (while for a ninth time watching out for the shurikens); once you have done so, you will have to move it up to collect the tenth load of treasure (while for a tenth time watching out for the shurikens). You will then have to move it back right, up and left to collect the eleventh load of treasure (while for an eleventh time watching out for the shurikens) - and once you have done so, you will have to move it back right, back down, back left, up, left, up, right and down to collect both the twelfth and thirteenth loads of treasure (while for a twelfth time watching out for the shurikens). You will then have to move it back up, right, down and off the right side of the screen to Room 72. |
| 72 | 4 blue blocks and 1 red block | Once T1 has entered the room from the left side of the screen, you will have to move it right, down, right (pushing the first blue block as you do so), up, left (pushing the second blue block into a hole as you do so), up, right, down, right (pushing the third blue block as you do so), up, right and left; once you have done so, you will have to switch back to T2 (which is still in Room 70) and move it down and off the right side of the screen to Room 71. Once T2 has entered Room 71 from the left side of the screen, you will have to move it right, down, right, up and off the right side of the screen to this room (while, again, watching out for the shurikens which are all still flying around the room) - and once it has entered this room from the left side of the screen, you will have to move it up and right. You will then have to switch back to T1 and move it left (pushing the fourth blue block into a hole as you do so) and up off the top of the screen to Room 73 (the ninth one where the lights go out). |
| 73 | 13 loads of treasure and 5 shurikens | Once T1 has entered the room from the bottom of the screen, the lights will go out for a thirty-first time; for the twelfth time, if you selected Acme Cave Sonar at the start of the game, the parts of any walls in the immediate vicinity of T1 will be lit up as it moves around the room, but if you did not, they will not (you will also not have to forgo collecting any loads of treasure in this room). Either way, you will have to move T1 up, right and up to collect the first load of treasure (while watching out for the five shurikens which are all flying randomly around the room) - and once you have done so, you will have to move it right to collect the second load of treasure (while again watching out for the shurikens). You will then have to move it back down and right to collect the third load of treasure (while once again watching out for the shurikens); once you have done so, you will have to move it up to collect the fourth load of treasure (while yet again watching out for the shurikens). You will then have to move it right, up and left to collect the fifth load of treasure (while for a fifth time watching out for the shurikens) - and once you have done so, you will have to move it up, right, up, right, up, right, up, right, up, left, up and left to collect the sixth load of treasure (while for a sixth time watching out for the shurikens). You will then have to move it up and left to collect the seventh load of treasure (while for a seventh time watching out for the shurikens); once you have done so, you will have to move it down, left, down and right to collect the eighth load of treasure (while for an eighth time watching out for the shurikens). You will then have to move it back left to collect both the ninth and tenth loads of treasure (while for a ninth time watching out for the shurikens) - and once you have done so, you will have to move it down, left and down to collect the eleventh load of treasure (while for a tenth time watching out for the shurikens). You will then have to move it left, up, left, up, left, up, left, down and right to collect the twelfth load of treasure (while for an eleventh time watching out for the shurikens); once you have done so, you will have to move it back left, back up, back right, back up and right to collect the thirteenth load of treasure (while for a twelfth time watching out for the shurikens). You will then have to move it up, left and up off the top of the screen to Room 74 (where the lights will come back on again, but for an eighth time not for long). |
| 74 | 3 green blocks | Once T1 has entered the room from the bottom of the screen, you will have to move it up and right; once you have done so, you will have to switch back to T2 (which is still in Room 72), and move it back left and up off the top of the screen to Room 73 (where the lights will go out for a thirty-second time). You will then have to move T2 up, right, up, left, up, left, up, left, up, right, up, left and up off the top of the screen to this room (while, again, watching out for the shurikens which are all still flying around the room) - and once it has entered this room from the bottom of the screen, you will have to move it up, right, up (lifting up the first green block as you do so), right (dropping that first green block back into place again as you do so), down, right and back down off the bottom of the screen to Room 73 (where the lights will go out for a thirty-third time). You will then have to retrace your steps back down to Room 72 (while, once again, watching out for the shurikens which are all still flying around the room); once it has entered Room 72 from the top of the screen, you will have to move it down, right (pushing the red block into a hole as you do so) and back up off the top of the screen to Room 73 again (where the lights will go out for a thirty-fourth time). You will then have to retrace your steps back up to this room again (while, yet again, watching out for the shurikens which are all still flying around the room); once T2 has entered this room from the bottom of the screen, you will have to move it up (lifting up the second green block as you do so) and left (dropping that second green block back into place again as you do so). You will then have to switch back to T1 and move it back left and back down - and once you have done so, you will have to switch back to T2 and move it down, right, up (lifting up that first green block again as you do so) and right (dropping that first green block back into place for a second time as you do so). You will then have to switch back to T1 and move it down off the bottom of the screen to Room 73 (where the lights will go out for a thirty-fifth time); you will then have to retrace your steps back down to Room 72 (while, yet again, watching out for the shurikens which are all still flying around the room). Once T1 has entered Room 72 from the top of the screen, you will have to move it down, right, left (pushing the fourth blue block as you do so, but not so far that you push it into a hole), up, left, back up, back right, back down, right, down, left, up, left, down and off the right side of the screen to Room 75 (the tenth one where the lights go out). |
| 75 | 13 loads of treasure and 5 shurikens | Once T1 has entered the room from the left side of the screen, the lights will go out for a thirty-sixth time; for the thirteenth time, if you selected Acme Cave Sonar at the start of the game, the parts of any walls in the immediate vicinity of T1 will be lit up as it moves around the room, but if you did not, they will not (you will also not have to forgo collecting any loads of treasure in this room). Either way, you will have to move T1 right, up and right to collect the fourth load of treasure (while watching out for the five shurikens which are all flying randomly around the room) - and once you have done so, you will have to move it back left, back down, right and up to collect the second load of treasure (while again watching out for the shurikens). You will then have to move it right and down to collect the third load of treasure (while once again watching out for the shurikens); once you have done so, you will have to move it back up, back left, back up, right, up, right and down to collect the fourth load of treasure (while yet again watching out for the shurikens). You will then have to move it right, down, right, down and left to collect the fifth load of treasure (while for a fifth time watching out for the shurikens) - and once you have done so, you will have to move it back right, down and left to collect both the sixth and seventh loads of treasure (while for a sixth time watching out for the shurikens). You will then have to move it back right, down, left and up to collect the eighth load of treasure (while for a seventh time watching out for the shurikens) - and once you have done so, you will have to move it right to collect the ninth load of treasure (while for an eighth time watching out for the shurikens). You will then have to move it back left, back down, left, down and left to collect both the tenth and the eleventh loads of treasure (while for a ninth time watching out for the shurikens) - and once you have done so, you will have to move it back right and back up to collect the twelfth load of treasure (while for a tenth time watching out for the shurikens). You will then have to move it left and up to collect the thirteenth load of treasure (while for an eleventh time watching out for the shurikens); once you have done so, you will have to move it back down, back right, back down, back right, up, right, down, right, up, right, down and off the right side of the screen to Room 76 (where the lights will come back on again, but for a ninth time not for long). |
| 76 | 2 blue blocks, 3 green blocks and 2 red blocks | Once T1 has entered the room from the left side of the screen, you will have to move it right and up; once you have done so, you will have to switch back to T2 (which is still in Room 74), and move it back down off the bottom of the screen to Room 73 once again (where the lights will go out for a thirty-seventh time). You will then have to retrace your steps back down to Room 72 once again (while, for a fifth time, watching out for the shurikens which are all still flying around the room) - and once T2 has entered Room 72 from the top of the screen, you will have to move it back down, back right, down, left, down and off the right side of the screen to Room 75 (where the lights will go out for a thirty-eighth time). You will then have to move T2 right, up, right, up, right, up, right, up, right, down, right, down and off the right side of the screen to this room (while, again, watching out for the shurikens which are all still flying around the room); once T2 has entered this room from the left side of the screen, you will have to move it right, up, right, down, right (pushing the first green block as you do so), up, left, up, left (pushing the first red block into a hole as you do so), back right, back down, back left (pushing that first green block again as you do so), back up, back left and up. You will then have to switch back to T1 and move it right, down, right, down, left (pushing the first blue block as you do so), back right, back up, left (pushing the second red block into a hole as you do so), back right, back up, left (pushing the second blue block into a hole as you do so), back right and down - and once you have done so, you will have to switch back to T2 and move it right (pushing the second green block as you do so), down, right (pushing the third green block as you do so), down, right and down off the bottom of the screen to Room 77. |
| 77 | 2 jackal gods, 1 mummy and 1 carnivorous plant | Once T2 has entered the room (which is identical to both the aforementioned Room 43 on Map 2 and Room 60, but for its colours) from the top of the screen, it will (if you selected Weedkiller at the start of the game) fire three shots of Weedkiller at the carnivorous plant, causing it to recede into the ground; you will then have to move it left, down, right and down off the top of the screen to Room 78. However, if you did not select Weedkiller at the start of the game, T2 cannot fire anything at the carnivorous plant to kill it, and you will have to move it left, down (when the yellow jackal god is walking away from it), right, down (when the mummy is walking away from it), left, down (when the blue jackal god is walking away from it), right, down, left and down off the bottom of the screen to Room 78 instead. |
| 78 | 1 blue block, 3 green blocks and 3 red blocks | Once T2 has entered the room from the top of the screen, you will have to move it down; once you have done so, you will have to switch back to T1 (which is still in Room 76) and move it down off the bottom of the screen to Room 77. Once T1 has entered Room 77 from the top of the screen, you will have to move it either left, down, right and down off the bottom of the screen (if you selected Weedkiller at the start of the game and T2 fired three shots of it at the carnivorous plant to kill it) or left, down (again, when the yellow jackal god is walking away from it), right, down (again, when the mummy is walking away from it), left, down (again, when the blue jackal god is walking away from it), right, down, left and off the bottom of the screen (if you did not select Weedkiller at the start of the game and T2 could not fire three shots of it at the carnivorous plant to kill it) to this room - and once it has entered this room from the top of the screen, you will have to move it down, left, down, left, down, right (pushing the first red block into a hole as you do so), back left, back up, left (pushing the blue block and pushing the second red block into a hole as you do so), back right, up, right (pushing the third red block into a hole as you do so), back left, back down and back right. You will then have to switch back to T2 and move it left (pushing the first green block into a hole, and trapping T1 in the process), down, left, down, left, down, right, up, right, up and right (pushing the second green block into a hole, and freeing T1 again in the process); once you have done so, you will have to switch back to T1 and move it right, up and off the right side of the screen to Room 79. |
| 79 | 3 spiders | Once T1 has entered the room (which is identical to Room 65, but for the colours) from the left side of the screen, you will have to move it down, right (when all three of the spiders are rising, but you may have to pause if one of them starts falling), up and off the right side of the screen to Room 80. |
| 80 | 1 green block and 1 red block | Once T1 has entered the room from the left side of the screen, you will have to move it right, up, right, down, back left (pushing the red block into a hole as you do so), back down, right, up, left (pushing that red block into another hole as you do so), back down, back right (pushing that red block into a third hole as you do so), back left, back down, right, up, left (pushing that red block into a fourth hole as you do so), back down, back right (pushing that red block into a fifth hole as you do so), down, left (pushing that red block into a sixth hole as you do so), back right and down; once you have done so, you will have to switch back to T2 (which is still in Room 78) and move it off the right side of the screen to Room 79. Once T2 has entered Room 79 from the left side of the screen, you will have to move it down, right (again, when all three of the spiders are rising, but you may again have to pause if one of them starts falling), up and off the right side of the screen to this room - and once it has entered this room from the left side of the screen, you will have to move it right, down, right (pushing the green block, and pushing that red block into a seventh hole, and pushing the green block into a hole as you do so) and down off the bottom of the screen to Room 81. |
| 81 | 3 spiders | Once T2 has entered this room (which is identical to both Room 49 on Map 2 and Room 67, but for its colours) from the top of the screen, you will have to move it right (if you selected Heavy Duty Acid at the start of the game, it will drop two drops of it onto a platform below it, causing it to evaporate); however, if you did not select Heavy Duty Acid at the start of the game, T2 cannot drop anything on the platform to make it evaporate. You will then have to move back left, switch back to T1 (which is still in Room 80) and move it down off the bottom of the screen to this room - and once T1 has entered this room from the top of the screen, you will have to move it either right, down, left and down off the bottom of the screen (if you selected Heavy Duty Acid at the start of the game and T2 dropped two drops of it onto the platform to make it evaporate) or right, down, left, up (when the first spider is rising), left, down (when the second spider is rising), left, up, left, down (when the third spider is rising), right and down off the bottom of the screen (if you did not select Heavy Duty Acid at the start of the game and T2 could not drop anything on the platform to make it evaporate) to Room 82. |
| 82 | 4 green blocks | Once T1 has entered this room from the top of the screen, you will have to move it down, right, down and left; once you have done so, you will have to switch back to T2 (which is still in Room 81) and move it either back right, down, left and down off the bottom of the screen (if you selected Heavy Duty Acid at the start of the game and it had dropped two drops of it onto the platform to make it evaporate) or back right, down, left, up (when the first spider is rising), left, down (when the second spider is rising), left, up, left, down (when the third spider is rising), right and down off the bottom of the screen (if you did not select Heavy Duty Acid at the start of the game and it could not have dropped anything on the platform to make it evaporate) to this room. Once T2 has entered this room from the top of the screen, you will have to move it down, left, down, left (pushing the first green block into a hole as you do so), up, left, up, left, down, right (pushing the second green block into a hole as you do so), down, right (pushing the third green block into a hole as you do so), down, right, down, left, up, left, up, left (pushing the fourth green block into a hole as you do so), down, left, down and left - and once you have done so, you will have to switch back to T1 and move it off the left side of the screen to Room 83 (the eleventh and final one where the lights go out). |
| 83 | 2 fuel pickups, 18 loads of treasure and 5 shurikens | Once T1 has entered the room from the left side of the screen, the lights will go out for a thirty-ninth time; for the fourteenth time, if you selected Acme Cave Sonar at the start of the game, the parts of any walls in the immediate vicinity of T1 will be lit up as it moves around the room, but if you did not, they will not (you will also not have to forgo collecting any fuel pickups or loads of treasure in this room). Either way, you will have to move T1 left, up, left and up to collect both the first and second loads of treasure (while watching out for the five shurikens which are all flying randomly around the room) - and once you have done so, you will have to move it back down to collect the third load of treasure (while again watching out for the shurikens). You will then have to move it back right, back down and back left to collect both the fourth and fifth loads of treasure (while once again watching out for the shurikens); once you have done so, you will have to move it down, left and up to collect the first fuel pickup (while yet again watching out for the shurikens). You will then have to move it left, up and right to collect the second, and final, fuel pickup (while for a fifth time watching out for the shurikens) - and once you have done so, you will have to move it up and right to collect the sixth load of treasure (while for a sixth time watching out for the shurikens). You will then have to move it up and right to collect both the seventh and eighth loads of treasure (while for a seventh time watching out for the shurikens); once you have done so, you will have to move it back left, back down, right and down to collect the ninth load of treasure (while for an eighth time watching out for the shurikens). You will then have to move it back up and right to collect the tenth load of treasure (while for a ninth time watching out for the shurikens) - and once you have done so, you will have to move it up and left to collect the eleventh load of treasure (while for a tenth time watching out for the shurikens). You will then have to move it right to collect the twelfth load of treasure (while for an eleventh time watching out for the shurikens); once you have done so, you will have to move it down and right to collect both the thirteenth and fourteenth loads of treasure (while for a twelfth time watching out for the shurikens). You will then have to move it up to collect the fifteenth load of treasure (while for a thirteenth time watching out for the shurikens) - and once you have done so, you will have to move it left to collect the sixteenth load of treasure (while for a fourteenth time watching out for the shurikens). You will then have to move it back right, up, left, up, left and down to collect the seventeenth load of treasure (while for a fifteenth time watching out for the shurikens); once you have done so, you will have to move it back up, back right, back down and left to collect the eighteenth, and final, load of treasure (while for a sixteenth, and final for T1, time watching out for the shurikens). You will then have to move it back right, back down and off the left side of the screen to Room 84 (where the lights will come back on again, but for a tenth and final time not for long). |
| 84 | 1 blue block, 4 green blocks and 1 red block | Once T1 has entered the room from the right side of the screen, you will have to move it left, up, left, up, right (pushing the blue block and pushing the red block into a hole as you do so), back left, back down, back right, down, left, up, right, up and left; once you have done so, you will have to switch back to T2 (which is still in Room 82) and move it off the left side of the screen to Room 83 (where the lights will go out for a fortieth time). You will then have to move T2 left, down, left, up and off the left side of the screen to this room (while, again, watching out for the shurikens which are all still flying around the room) - and once T2 has entered this room from the right side of the screen, you will have to move it left, up, left, up, right, up and left (pushing the first green block into a hole as you do so). You will then have to switch back to T1 and move it back right, back down and left; once you have done so, you will have to switch back to T2 and move it left (pushing the second green block into a hole as you do so) and down. You will then have to switch back to T1 and move it back right, back up and left - and once you have done so, you will have to switch back to T2 and move it right (pushing the third green block into a hole as you do so), down and off the left side of the screen to Room 85. |
| 85 | 1 spider, 1 mummy and 1 pool | Once T2 has entered the room (which is identical to both Rooms 45 and 52 on Map 2, but for its colours) from the right side of the screen, it will (if you selected Thunderbird 4 at the start of the game) drop T4 into the pool below it; Gordon Tracy will then pilot it across to the left side of the pool and back to the right again, before Virgil automatically brings T2 down and beams it back up again (something it was, yet again, incapable of doing in the show). The pool will then drain, and the spider will start lowering on its string as the mummy starts walking to the right on its platform - but because the pool has now been drained, all you will have to do is move T2 down, right, up and off the left side of the screen to Room 86. However, if you did not select Thunderbird 4 at the start of the game, T2 cannot drop anything into the pool that can drain it, and because it cannot do it itself, you will have to move it down, right (when the mummy is walking away from it and the spider is rising), up (when the mummy is walking back towards it), back down, right, up and off the left side of the screen to Room 86 instead. |
| 86 | 3 blue blocks, 3 green blocks and 2 red blocks | Once T2 has entered the room (which is also, once again, the last one of this map) from the right side of the screen, you will have to move it left, down, right (pushing the first green block into a hole as you do so), up, back left, back down, left and down; once you have done so, you will have to switch back to T1 (which is still in Room 84) and move it off the left side of the screen to Room 85. Once T1 has entered Room 85 from the right side of the screen, you will have to move it either down, right, up and off the left side of the screen (if you selected Thunderbird 4 at the start of the game), or down, right (again, when the mummy is walking away from it and the spider is rising), up (again, when the mummy is walking back towards it), back down, right, up and off the left side of the screen to this room - and once it has entered this room from the right side of the screen, you will have to move it left (pushing the first blue block as you do so), up and left. You will then have to switch back to T2 and move it left, down, left, up, right (pushing the first red block as you do so), up and right (pushing that first red block into a hole as you do so). You will then have to switch back to T1 and move it back right, up, left (pushing the second blue block into a hole as you do so), up, right (pushing the third blue block and the second red block into a hole as you do so) and up off the top of the screen to Room 1 on Map 1; once T1 has entered Room 1 from the bottom of the screen, you will have to move it up and off the right side of the screen. You will then have to switch back to T2 (which is still in this room) and move it right, up, right and up off the top of the screen to Room 1 - and once T2 has entered Room 1 from the bottom of the screen, you will have to move it up, right, up and off the right side of the screen. The text "WELL DONE! YOU HAVE COMPLETED THE SIMULATION." will then appear on the screen as the text "PRESS ANY KEY FOR NEW GAME." flashes up below it; however, it is your choice if you want to play again, and if you choose not to press any key for a new game, it will return to the start screen. The International Rescue team will also later return to home computer screens for another Thunderbirds game in 1988. |