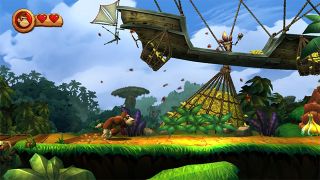
After shaking the Wii Remote to get rid of a pesky Tiki, you'll be in the game's first level, Jungle Hijinxs. This level is a great place to learn the controls, as there are very few bottomless pits and only the weakest enemies stand in your way.
After shaking the Wii Remote to get rid of a pesky Tiki, you'll be in the game's first level, Jungle Hijinxs. This level is a great place to learn the controls, as there are very few bottomless pits and only the weakest enemies stand in your way.
After shaking the Wii Remote to get rid of a pesky Tiki, you'll be in the game's first level, Jungle Hijinxs. This level is a great place to learn the controls, as there are very few bottomless pits and only the weakest enemies stand in your way.
Points of interest
From where you start, get back to your hut and go inside for a balloon.
Sometime past the first checkpoint, you'll have to pound a DK switch to make platforms appear in the background. Jump into the barrel that appears to shoot yourself off to the background. Grab puzzle piece #6 to your left, and the N block to your right. Climb the platforms to a barrel and jump in to return to the foreground.
KONG letters
K: The first KONG letter is on a treetop, but it's too high for you to jump on. Instead, hop on the stone block to the right of the treetop, then jump to the left to grab the letter.
O: After puzzle piece #5, you will come to the O block, suspended above a bottomless pit. From the left edge, roll to the right to collect the O block, and jump in midair to the right edge so you don't fall down the pit.
N: The N block is hard to miss. It's on a platform in the background after you hit the DK switch past the checkpoint.
G: Keep going right after puzzle piece #7 and jump on a crooked treetop. The G block is floating in the air after the platform to the right; use a hover-jump or a rolling jump to easily grab it.
Puzzle pieces
At the very start, go left into a cave to find the first piece.
After collecting the K block, keep moving to the left, jumping from treetop to treetop. Blow on the dandelion on the last treetop to reveal a puzzle piece.
Go right, past the spot where you collected the K block. Carefully dodge statues as they fall, then jump over them. The third statue will leave two stone blocks instead of one; pound on them to reveal the third piece.
When you run across three yellow gourds, pound the second one to get a puzzle piece.
Jump on a flower platform between two giant stone statues. Bananas will start to fly overhead for a limited time. Use the bouncy platform to collect all the bananas before time runs out and you'll receive a puzzle piece.
Once you've shot off into the background, hover-jump to the left to a separate platform. Blow on the dandelion to reveal the next piece.
Shortly after returning to the foreground, you'll see a trapdoor on an elevated platform. Ground-pound the trapdoor to drop down to a bonus stage. Use the barrel to collect everything within 30 seconds. If you succeed, you'll be rewarded with a puzzle piece.
Keep going right after puzzle piece #7 and jump on a crooked treetop. Keep jumping to the left until you reach a platform with the puzzle piece.
Once you reach the end barrel, hop down to the ground and go all the way right to reveal the final piece.