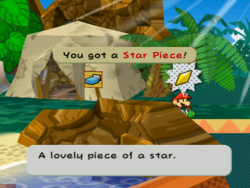
Like in the previous game, the Star Pieces in Paper Mario: The Thousand-Year Door are mainly found through flippable panels, in hidden areas, or by completing side-quests. The panels can be flipped by Spin Jumping (possible after Mario finds the Super Boots in Chapter 2) near them. Mario can also find panels by swinging his Hammer against the ground. There are 100 Star Pieces total. Mrs. Mowz is capable of telling Mario if there is one in the area with her field ability, and Merlee in Rogueport Sewers can give Mario clues as to where they are. A character named Dazzle in Rogueport Sewers trades Badges for Star Pieces.
| Location
|
Description
|
Image
|
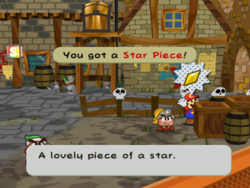
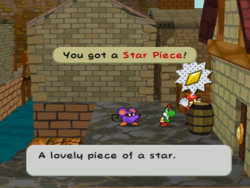
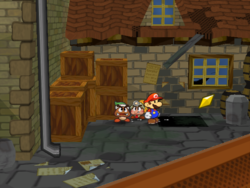
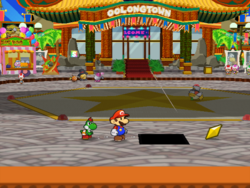
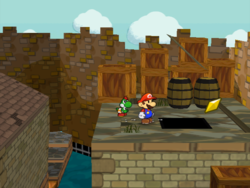
| Rogueport |
Behind some crates in the main square, just south of the exit to East Rogueport. |
|
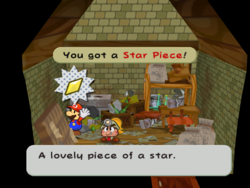
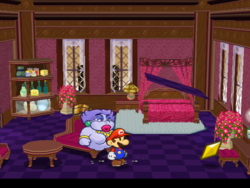
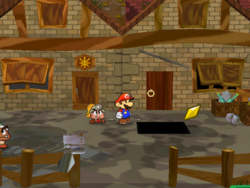
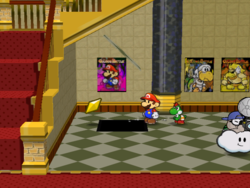
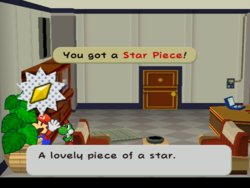
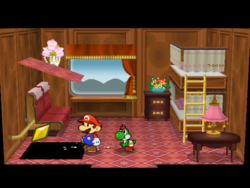
| Rogueport |
In the house behind the main square, behind the mattress against the wall. |
|
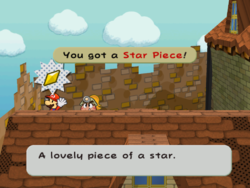
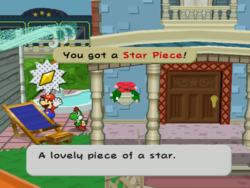
| Rogueport |
On top of Zess T.'s house, to the far left. |
|
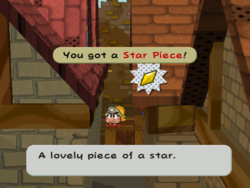
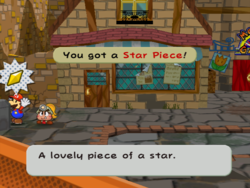
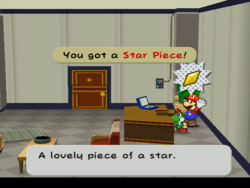
| Rogueport |
On top of a crate behind Professor Frankly's house, accessible by moving between the walls next to Merlon's house. |
|
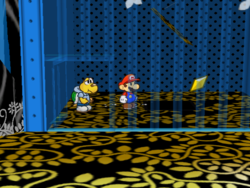
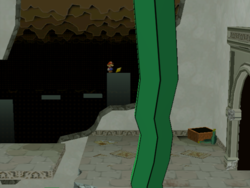
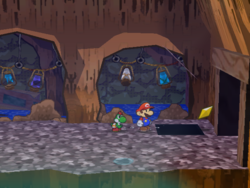
| Rogueport Sewers |
Behind a pillar to the right of the main square ruins area, which is behind Dazzle. |
|
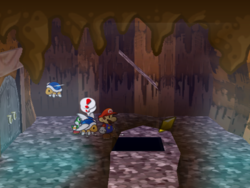
| Rogueport Sewers |
Between the large yellow block and the Warp Pipe on the lowest level of the sewers, just before the room to the Thousand-Year Door. |
|
| Location
|
Description
|
Image
|
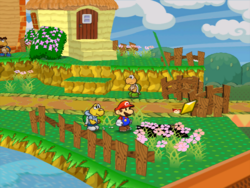
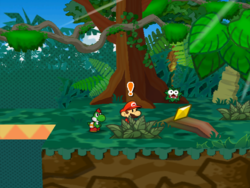
| Petal Meadows |
In the tree to the left of the Save Block in the first area. Hammering the tree will cause the Star Piece to fall. |

|
| Petal Meadows |
In the background of the area where the bridge to Petalburg can be created, past the ! Switch. |
|
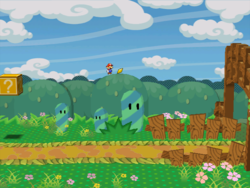
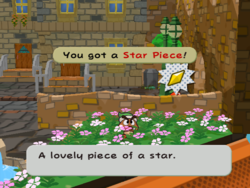
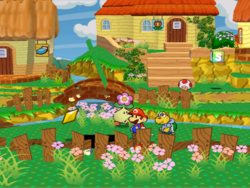
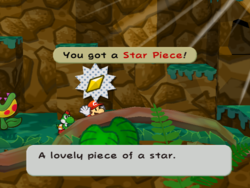
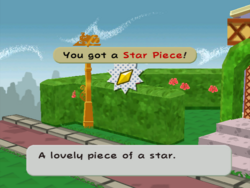
| Petal Meadows |
In the first clump of grass after leaving Petalburg to the east. |

|
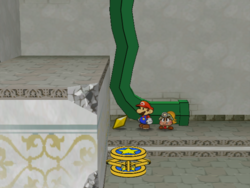
| Hooktail Castle |
On the ledge to the left of the flippable stairs. Accessible by falling from above or by using the yellow block. |
|
| Hooktail Castle |
On a ledge above the flippable stairs through a doorway. Accessible by using the purple block to rise up. |

|
| Hooktail Castle |
Behind the window to the right of the area where Mario can jump onto an outside ledge. |

|
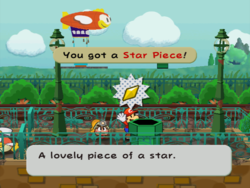
| Hooktail Castle |
On the far end of the back ledge in the Airplane Mode room. |
|
| Rogueport |
Between the crates and barrel behind Admiral Bobbery's house, accessible by using Paper Mode to slip between the houses. |
|
| Rogueport |
Next to the wall in West Rogueport, just south of the entrance. |
|
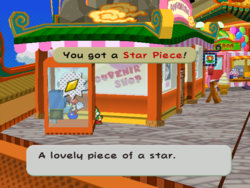
| Rogueport |
Behind the trash can next to the shop in West Rogueport. |
|
| Rogueport |
Behind the tall Warp Pipe in the garden of West Rogueport. |
|
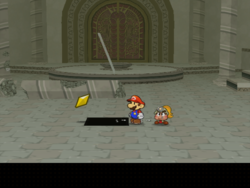
| Rogueport Sewers |
In the rubble of the fallen pillar in the main square. |
|
| Rogueport Sewers |
Behind the pillar to the left in the main square. |
|
| Rogueport Sewers |
Behind the stairs in the Pit of 100 Trials room. |
|
| Rogueport Sewers |
In the nook of the platform Mario lands on when falling from West Rogueport. |
|
| Location
|
Description
|
Image
|
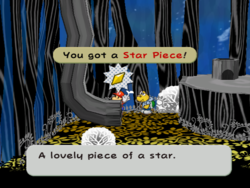
| Boggly Woods |
At the far end of the raised path in the Airplane Panel area. |
|
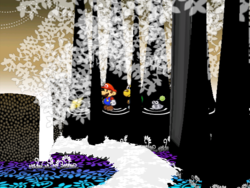
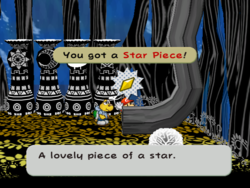
| Boggly Woods |
In the third tree from the entrance into the area with Flurrie's house. |
|
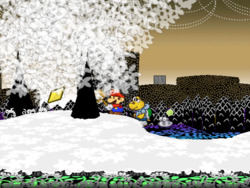
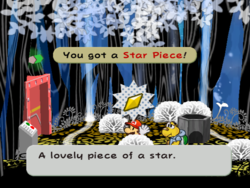
| Boggly Woods |
To the left of the Warp Pipe that leads to Flurrie's house. |

|
| The Great Tree |
In the bush to the right of the Save Block below the twisting path. |
|
| The Great Tree |
Behind a Warp Pipe to the left of the room with a cage trap. |
|
| The Great Tree |
Behind the Warp Pipe below the room with a cage trap. |
|
| The Great Tree |
In the bush to the bottom-right of the Warp Pipe in the shortcut room. |
|
| The Great Tree |
Under a flippable panel in the room above the entrance. |
|
| The Great Tree |
Under a flippable panel in the blue cell. |
|
| Flurrie's House |
Under a flippable panel south of Flurrie's bed. |
|
| Rogueport Sewers |
Under a flippable panel just ahead of the Warp Pipe into Boggly Woods. |
|
| Rogueport Sewers |
Under a flippable panel in front of the Black Chest. |
|
| Rogueport Sewers |
Under a flippable panel south of the Thousand-Year Door. |
|
| Rogueport Sewers |
Under a flippable panel in the area where Mario first fought some Goombas. |
|
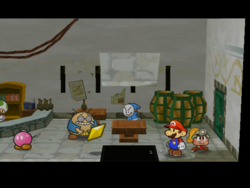
| Rogueport Sewers |
Under a flippable panel south of the table in Wonky's bar. |
|
| Petalburg |
Under a flippable panel in the area with the Bulb-Orb. |
|
| Petalburg |
Under a flippable panel to the south of the east gate. |
|
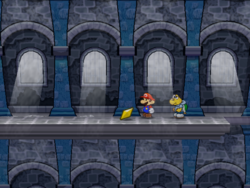
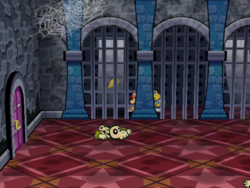
| Hooktail Castle |
Under a flippable panel to the left of the first jail cell. |
|
| Rogueport |
Under a flippable panel in front of Professor Frankly's house. |
|
| Rogueport |
Under a flippable panel behind Zess T.'s house. |
|
| Rogueport |
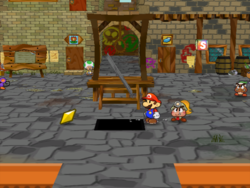
Under a flippable panel in front of the gallows in the main square. |
|
| Rogueport |
Under a flippable panel next to the stairs in the harbor. |
|
| Rogueport |
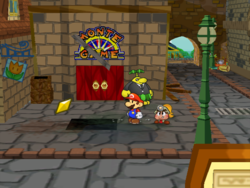
Under a flippable panel in front of the Pianta Parlor. |
|
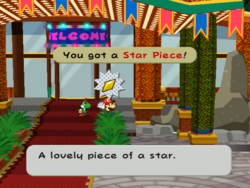
| Rogueport |
Under a flippable panel in front of the Excess Express. |
|
| Rogueport |
Behind the Warp Pipe that leads to the blimp. |
|
| Location
|
Description
|
Image
|
| Glitzville |
Behind the counter of the juice bar. |

|
| Glitzville |
Behind the telephone booth. |
|
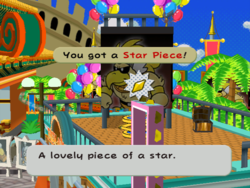
| Glitzville |
Behind the plants on the right leading up to the Glitz Pit. |
|
| Glitzville |
Under the Rawk Hawk poster on top of the juice bar, which requires Koops or Tube Mode to collect. |
|
| Glitzville |
Under a flippable panel south of the landing pad. |
|
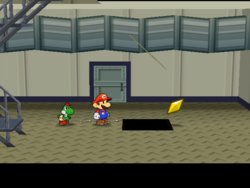
| Glitz Pit |
Under a flippable panel on the left side of the lobby. |
|
| Glitz Pit |
Under a flippable panel in the first floor storage room. |
|
| Glitz Pit |
Behind the crates against the wall in the second floor storage room. |
|
| Glitz Pit |
Behind the plant in Grubba's office. |
|
| Glitz Pit |
In a drawer in Grubba's desk. |
|
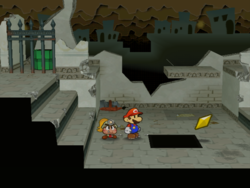
| Rogueport Sewers |
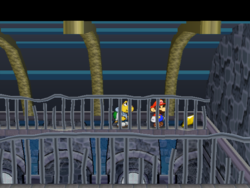
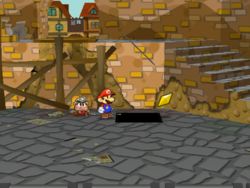
In the background of the area underneath West Rogueport. |
|
| Rogueport |
Under a flippable panel on top of the house to the far-right side of East Rogueport. |
|
| Rogueport |
Behind the chimney of Admiral Bobbery's house. |
|
| Location
|
Description
|
Image
|
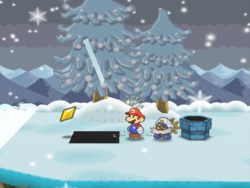
| Twilight Town |
In the bottom-left-most clump of grass next to a tree in the south of the first area. |

|
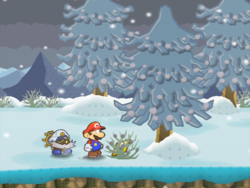
| Twilight Town |
Behind the west house in the first area. |
|
| Twilight Town |
Behind the fence next to the tree in the south of the second area. |
|
| Twilight Trail |
Behind the fallen tree. |
|
| Twilight Trail |
Behind the Warp Pipe to the woods. |
|
| Creepy Steeple |
Behind the wall to the left of the gate, behind the Save Block. |
|
| Creepy Steeple |
Behind the table in the secret room. |
|
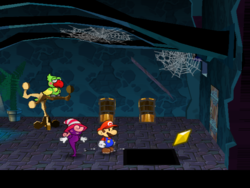
| Creepy Steeple |
Under a flippable panel to the right of the stairs in the east room. |

|
| Creepy Steeple |
Behind the two rightmost windows on the passage beneath the main room in Creepy Steeple. Accessible from the pipe entrance outside the steeple. |
|
| Creepy Steeple |
Under a flippable panel in the parrot's room. |
|
| Location
|
Description
|
Image
|
| Keelhaul Key |
Under a flippable panel against the east rocks in the first area. |
|
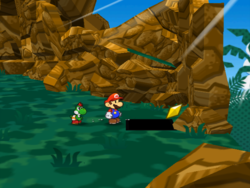
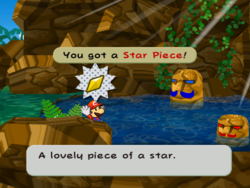
| Keelhaul Key |
In the water south of the camp. |
|
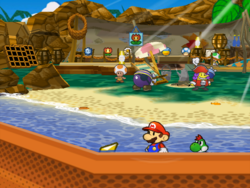
| Keelhaul Key |
Behind the rock before the east exit of camp. |
|
| Keelhaul Key |
In the first bush of the jungle. |
|
| Keelhaul Key |
Behind a large root in the climbing area of the jungle. |
|
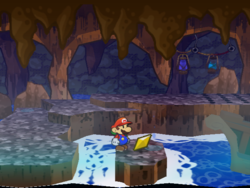
| Keelhaul Key |
In the water and behind a rock in the area that leads to Pirate's Grotto. |
|
| Pirate's Grotto |
On a small platform in the first area with water. |
|
| Pirate's Grotto |
Under a flippable panel in the northeast corner of the room above the big waterfall. |
|
| Pirate's Grotto |
In a barrel high above the storage room. |
|
| Pirate's Grotto |
Under a flippable panel in the center of the room with the Parabuzzies. |
|
| Rogueport |
Behind the barrels in an area to the west of the harbor that can be reached with Boat Mario. |
|
| Location
|
Description
|
Image
|
| Excess Express |
Under a flippable panel in cabin 004. |
|
| Excess Express |
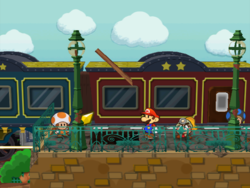
Under a flippable panel in front of the instruments of the engine. |
|
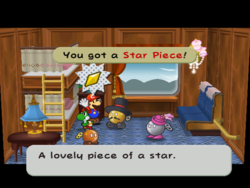
| Excess Express |
In the drawer of cabin 008. |
|
| Excess Express |
Given by Chef Shimi upon returning his pot. |
|
| Excess Express |
Given by the waitress upon returning her earrings. |
|
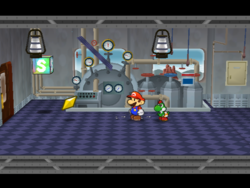
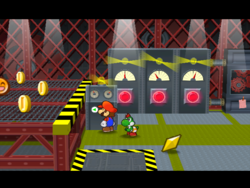
| Riverside Station |
Behind the far-right gear in the gear room. |
|
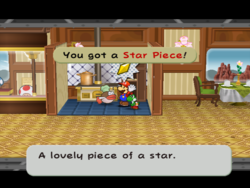
| Poshley Heights |
Inside the hedge next to Toodles's home. |
|
| Poshley Heights |
Under a flippable panel in the circle in front of the station. |
|
| Poshley Heights |
Behind the chair next to Goldbob's house. |
|
| Poshley Heights |
Within the corner of the hedge in the second area. |
|
| Rogueport Sewers |
In the house in the background of the area that leads to Petal Meadows, across the water that requires the Spring Boots to cross. |

|
| Location
|
Description
|
Image
|
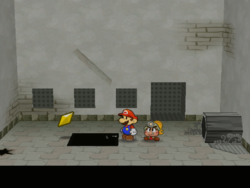
| Fahr Outpost |
Under a flippable panel directly to the left of the Warp Pipe Mario enters from. |
|
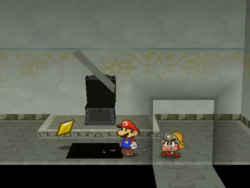
| Fahr Outpost |
Behind a clump of grass in the first area. |
|
| Fahr Outpost |
Behind a wall just before the entrance to the village. |
|
| Fahr Outpost |
Behind a wall to the southwest in the area with the cannon controls. |
|
| Fahr Outpost |
Behind a box in General White's house. |
|
| Fahr Outpost |
Under a flippable panel directly to the left of the cannon statue. |
|
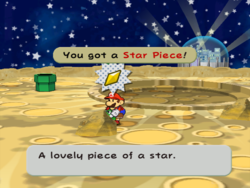
| The Moon |
Behind a small rock in the area that leads to the X-Naut Fortress. |
|
| X-Naut Fortress |
On the platform with the crane Mario can use to collect items. |
|
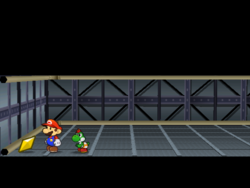
| X-Naut Fortress |
In the southwest corner of the air vent of sublevel 2. |
|
Star Pieces can only be spent to Dazzle, a trader found in the sewers of Rogueport after Chapter 1 is completed. Dazzle has many badges, many of which can only be found here and are extremely powerful tools.
| Badge name
|
Cost
|
Badge description
|
| Attack FX Y
|
1
|
Changes sound effects of Mario's hammer.
|
| Chill Out
|
2
|
Mario is not impacted by a First Strike from enemies.
|
| Pretty Lucky
|
3
|
Sometimes attacks will miss Mario.
|
| Happy Flower
|
4
|
At the end of each turn, there is a 50% chance to heal 1 FP.
|
| Happy Heart
|
4
|
At the end of each turn, Mario has a 33% chance to heal 1 HP.
|
| Happy Heart P
|
4
|
At the end of each turn, the active Partner has a 33% chance to heal 1 HP.
|
| Item Hog
|
5
|
Raises the chance that enemies will drop items after battle.
|
| Heart Finder
|
6
|
Raises the chance that enemies will drop HP after battle.
|
| Flower Finder
|
6
|
Raises the chance that enemies will drop FP after battle.
|
| Peekaboo
|
7
|
Enemy HP will always be revealed, regardless if they have been Tattled.
|
| Quick Change
|
8
|
Swapping a partner in battle does not cost a turn.
|
| Flower Saver
|
10
|
All of Mario's attacks cost 1 fewer FP, but not less than 1.
|
| Flower Saver P
|
10
|
All of the Partners' attacks cost 1 fewer FP, but not less than 1.
|
| Power Plus
|
15
|
All of Mario's attacks deal 1 extra damage.
|
| Power Plus P
|
15
|
All of the Partners' attacks deal 1 extra damage.
|
Each of these badges have significant benefits and drawbacks, but generally Peekaboo, Chill Out, and Flower Saver P will be among some of the most useful to acquire. Peekaboo's health revealing mechanic helps manage and prioritize in battle significantly, while Chill Out prevents excessive damage towards the heroes. Flower Saver P will help keep Mario's Partners' attacks from draining FP too quickly, allowing for their more damaging or protective moves to be used more often. Some strategies for boss fights will also utilize Quick Change.


