The Legend of Zelda: Ocarina of Time/Fire Temple
Beneath the roaring flames of Death Mountain resides the Fire Temple. It is a symbol of strength and courage, fueled by a burning heart. Many old heroes are remembered in its wake.
Goron City
Since you've traveled through time and changed into an adult, the cloud around Death Mountain has turned red and flared up. The sky near the mountain is blurred with smoke and ashes, and the summit is very violent and active. It's time to find out the source of its strange activity.
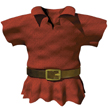
Make your way to Goron City. You should find that it is deserted, except for one small, rolling Goron. Use your bombs to stop him (you can do this anywhere, unlike the "Hot-Rodder" Goron seen as a child). The Goron tells you his name, and it's the same as Link's! He is Darunia's son. He explains that Ganondorf has captured all the Gorons and has imprisoned them in the Fire Temple. Darunia's son also reveals that his father is a descendant of an old Goron hero who killed Volvagia using a "Legendary Hammer." Darunia's son gives you a Goron Tunic to protect you from the intense heat of the temple and tells you of a secret passage to the temple from his father's room. Once you talk to him, he opens up the Goron Shop and Darunia's room.
The Frail Giant's Knife
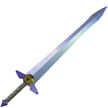
Inside one of the several chambers blocked with rocks, on the same floor as Darunia's son, you'll find Medigoron, a very large Goron who has crafted a sword that took him seven years. You can buy it for 200 Rupees, but it is very frail and will shatter after a few strikes. Because of this, you're allowed to buy replacements at the same price over and over, but it's really not worth it. The weapon causes more damage than the Master Sword, but since there's a permanent option, it's best to go for that if you want to handle more power. Biggoron, a Goron the size of a small mountain, can forge you the blade, but you need to complete a trading quest if you want him to be in prime condition to work.
Death Mountain Crater
Move the statue centered on the wall in Darunia's room to reveal a passage to the Death Mountain Crater. Look to your left and you should see a bridge with a broken section near you. Use your Hookshot on the wooden post above the working section of the bridge to get across. Sheik will appear at this time to teach you the "Bolero of Fire", the melody that will lead you to the Fire Temple.
- The Bolero of Fire
Head down the bridge and turn left onto the path that leads into the side of the mountain. If you decide to drop all the way down the hole with the ladder you'll take some damage from the massive fall, so either climb from the top or jump down to the ladder from the opposite side. Turn around and you'll be facing the temple entrance.
The Fire Temple
Darunia
Once you enter the temple, head forward and climb the stairs. Watch out for the Fire Keese as you run to the left and go through the unlocked door. You will see Darunia straight ahead. He tells you a short story about how Ganondorf locked up all the Gorons to feed to the legendary dragon Volvagia. He goes to seal the dragon even though he doesn't have the "Legendary Hammer" (or the Boss Key!).
Freeing the Gorons
Goron #1
After talking to Darunia, turn left and make your way across the three platforms - you'll land near a switch. Step on it to open the cell, then speak to the Goron - he will tell you the pillar in the ceiling of the main room must be manipulated in order for you to follow Darunia's path. When he finishes talking, open the chest to collect a Small Key. Jump back across the platforms the way you came in and go back to the main entrance room - now that you have a key you can go through the locked door to the east.
Its worth noting that every cell opens with a switch, and all the cells contain chests with Small Keys. Also, be sure and to talk to the Gorons as you free them - each one will tell you about switches in the temple, destructible walls, fake doors, strange dancing enemies, and even reveal secrets in the temple.
Goron #2
In this next room, run straight forward across the bridge - there is a gap near the end, but if you keep running you'll have enough momentum to jump across. Be wary of the Fire Keese that lurk here - kill or avoid them. After crossing the bridge, turn right and cross the wooden plank. Run along the wall (you will have to step through the lava but don't worry, a brief encounter won't harm you), and go straight to the golden brick platform. There is a small brick area on the wall in the shape of a door - if you strike it with your sword you'll notice a slightly different sound instead of the usual clang. This sound is a cue to Bomb the wall - enter the opening to find another Goron. Talk to the Goron, the retrieve another Small Key from the chest.
Goron #3
Now retrace your steps to the other side of the bridge (the fastest way is to jump across the platforms near you). Along the left wall you'll see another small path. Follow it down to the lava and skirt along the wall until you reach another golden brick area (you'll notice the Time Block up above). Inside the door down below you will find another switch and locked Goron. Free him, talk to him, and then get another key.
Two puzzles
Head back to the eastern side of the room (across the bridge one more time) and unlock the door. Cross the small lava river by sliding down the plank, then turn to your right and climb the fence to the top. Climb up on the platform, then kill the Keese from a distance with the Hookshot. Hop down to the left and push the block off the edge onto the erupting lava that is burning below. Immediately jump down on top of the block (as you jump off, press backwards to stop your forward motion) because it will be propelled up to the second floor. Inside the small room, unlock the door and move on to the next large room.
There is a trapped Goron here. Ignore him for now because you can't do anything at this moment. Go to your left and climb the ledges on the side (the ones with the moving fire on them). The fires are actually being produced by slow moving enemies called Torch Slugs. Kill the Torch Slugs if they are giving you problems. They take two hits to kill; one to extinguish them, one to kill them (hit them once with your sword, wait a second, then hit them while they are white to finish them off). Climb up to the top of the ledge and jump to the other ledge on the right. You will see a new type of switch, the crystal switch, but don't bother hitting it yet. Push the block on the ledge down and then jump down and pull it as far that it can go. Make your way around it and then jump onto it and then onto either the fence or the nearby platform. Climb up the fence to one of the two platforms. Up here, there is a fire preventing you from climbing any higher. Go to the level right above the crystal switch (the bottom of the two platforms) and drop a bomb on the switch or hit it with the Hookshot. Quickly climb up the fence. When the bomb goes off or the Hookshot makes contact with the switch, it should trigger the crystal switch and make the fire go away for a limited time. Enter the door at the top.
Gorons #4 and #5
There are two Gorons in this large room. There are boulders rolling around this room to keep you at bay. First turn left (up, as the camera will turn) and stay along the outer wall until you reach an alcove with a door. Go through it to to find the first Goron. Free him, take the key, then exit the room and head back to where the boulders are. Keep going around the perimeter of this room and you will find the second Goron (look for the nearby switch!). Make sure to get the key! From the second Goron, head to the right along the perimeter until you find the locked door (it will be hidden to the left unless you are running from the other direction) where you will exit the room southward.
Dungeon Map
Go through the door and in the next room do not fall off the narrow ledge! If you do, you will fall back into the first room you unlocked to the east of the entrance to the temple. To your right is a barred door. Look for an eye switch and shoot it with an arrow to open the door. Go to the door carefully. Inside the room behind it is a chest with the Dungeon Map. Go back to the narrow walkway and enter the locked door. Cross the narrow beam to the other side. Once you step on the metal grate at the end of the beam fire starts forming behind you and forces you to go forward. Cross until you are at the other side (if the fire catches up to you, you can hop onto the columns with the hearts, located about halfway across, for safety), then enter the door.
Goron #6
You are now once again in the room with the rolling boulders, but now you are on top of one of the walls. Try not to fall, or you'll have to go around again. Jump to the platform straight ahead with a crack in the ground and a Torch Slug. Kill the Torch Slug, then stand on top of the crack. Navi will tell you she hears Goron voices below. Use a bomb and blow up the crack, then either jump down (you will lose one heart) or climb the fence and you will be in the room where you once saw a Goron but couldn't reach him. However, now you can free the Goron and get the key. Go back to where you just dropped down and climb back up.
Goron #7
Once you are at the top jump to the platform that has a switch. Avoid jumping when boulders are passing by because they can knock you back to the floor below. Step on the switch to open a Goron's cell. Go to the gate that just opened. Free the Goron and get the key. If you fall, the Goron will leave but the key will still be there.
Go back through the door that brought you to the upper level in this room. There is a door on the western, middle side of this room. Jump from the metal grates to the platform (it looks like its too high, but you can make it) and open the locked door. Hurry, because the fire will now form and sweep by from behind you. You'll now be in a small hallway; simply run through the door on the other side.
A hot maze
Be careful in this room, it's a large maze. If you get too close to some places, walls of fire appear. You'll get used to it after a while. There are some fake doors in this room, so before trying to open a door use a bomb on the door if it looks odd (fake doors stand out from the wall, real doors are inset). Head to the right and go through the door to the northeast to grab the Compass. Then go back into the maze room. Carefully navigate this room to the locked door (the door exits northward) on the south side of the central area (stick to the left side and the outer wall to get around easily). Watch out for the statues/totem poles that spurt flames; some are timed, and some shoot out based on proximity like the flame walls. Go into the locked door and pass through the hallway, past the Goron for now and straight out the other door.
You are now on the other side of the maze room. There is a switch that will extinguish the fire at the end of the maze. Stepping on the switch will trigger a timed event that will let you exit through the door to the west. Scout out a path to the platform with constant flames, then head back to the switch and step on it. Run towards the door, and remember to be careful since fire walls are everywhere. This may take you a few tries to get the correct path down if you don't figure it out before hand. Once you get up the ledge at the end of the maze, don't go in the door right away. Use a bomb first because the real door is hidden by a fake one that will damage you if you open it. Head into the real door when you are able.
The Flare Dancer
The mini-boss will appear here. It is a Flare Dancer. The Flare Dancer is not difficult to defeat but it may be hard at times to fight.
When it is spinning around in one spot or running around the room, throw or place a bomb next to him or ahead of him. After it explodes, it will knock its body out of its fire clothes. Alternatively, stand on the platform in the middle of the room and shoot the Flare Dancer with your Hookshot whenever it spins in place. The small body will run around in circles after it loses its clothing. Chase it down and attack it with your sword or hookshot. The spin attack works best as it has more power than just your sword alone, but the timing may be difficult to get right.
The Flare Dancer will respawn its clothing from the fire in the center of the room, recovering health if it didn't receive enough damage. The color of the clothes represents the amount of damage it has received: red means undamaged, blue means moderately damaged, and green means its on the verge of dying. When it dies, hop onto the elevator in the middle of the room to reach the top floor.
The Megaton Hammer
Once at the top, take the door and turn to your right. Climb the fence. Then throw a bomb at the crystal switch or hit with the Hookshot to trigger the switch to make the flames disappear briefly; climb up when you can and enter the next room. This next room is in the shape of an octagonal doughnut.
Climb up the steps to the left, but don't hit the switch. Use your bow to pick off the three Fire Keese located around the room. When you hit the switch, you'll have about 15 seconds to run along the tight path in the middle of the room to the top where the fires are and open the large treasure chest. The next part is tricky, and if you mess up you will have to spend a long time running back; because of this it's advised that you use Farore's Wind a little ways away from the switch. Hit the switch when ready, then run and jump onto the platform and quickly run up to the treasure chest and open it. You have to hurry or the fire will go re-ignite. When running, it's possible to never have to slow down, but if you're not confident don't push yourself or you may fall off anyways. The main thing to remember is "do not fall down the hole!" If you do, you'll fall back to the narrow ledge, or worse, even further to the room you unlocked first! If you need to, use Farore's Wind in here to make getting here easier if you fall. When you get to the top, open the chest to get the Megaton Hammer.
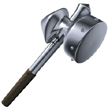
This is the Legendary Hammer. It takes both hands to hold since it's so heavy, but it can smash things and send a shock wave radially across the floor. Go back down the stairs and look for a block with a tiki face on it. It's by the switch and the door you entered this room in; smash it with the Megaton Hammer and it will fall down. Drop down the hole and hit the statue with the hammer in this room to get rid of it (once strike per block). Enter the door behind it.
Watch out for the Fire Keese in this room. At the edge of the empty pool area there's a lone block that sticks up from the edge with one of those smiley faces on it; hit block with the hammer. This makes the floor turn into a stairway. Grab one of the small boxes behind you, then hop down the stairs and put it on the blue switch at the bottom of the staircase to unbar the door.
In this next room step onto and hammer the tiki block and it will drop down and become a block that leads to both the pillar you need to hit and a barred door. Don't hit the pillar yet. Instead, hop up to the barred door. There is a switch to open it, but it is rusted and won't budge. Hit the switch with the Megaton Hammer to press it and the door will unlock.
Goron #8
In this next room is a Time Block on a ledge on the other side of the room. Play the Song of Time while still across from the Time Block. It now serves as a platform in the gap between the two sides of the room. Jump down onto the blue block and then onto the other side of the room. Pound the rusted switch down with your hammer. This will open the gate that holds a Goron. Jump down to where the Goron is and go and talk to him. Get the key and then leave from the same way you came in this room (you should be able to get up by using the Time Block).
Back in the fire maze room, jump over the tiki stone you dropped and land on the roof of the temple-like structure in front of you. Hit the tiki block in the middle with the hammer. This is actually the pillar you needed to hit. You will fall down with the pillar and land in the middle of the lava pool between the 2 doors in the room where you met Darunia. Exit this room through the normal door so you are once again in the first room of the whole temple.
There is a statue to the right of the stairs when you are first walking into the temple. Use your Megaton Hammer to eliminate the statue. Enter the locked door. In this next room simply kill all the Fire Keese and Torch Slugs to unlock the next door. In this room, avoid the Like-Like and the tiles and run straight to the exit. The Like-Like will suck you in and take your shield and tunic. If it does, simply kill it and get your items back, but remember, do not leave the room or it will digest your items permanently; forcing you to buy new ones (280 Rupees in total).
Flare Dancer's Encore
In this next room is another Flare Dancer. This time, take your trusty Megaton Hammer and slam it right by the Flare Dancer to knock it from its clothing and then chase and strike it. Do this until it is defeated and explodes. A small chest will appear. There are bombs in the chest if you want them. Enter the next room.
Boss Key
There is another rusted switch in this room. Hit it with the hammer and free the last Goron and get the Boss Key from the intricate chest. Go back to the room where you met Darunia and jump straight over onto the pillar in the middle and then to the Boss Door. If you want, stock up on Fairies in the room. There are two Fairies in jars on a platform to the far right. Use your Hookshot to get there. There are also bombs you can stock up on. Open the boss door to enter into the final room.
Boss: Volvagia
In this room, hop onto the platform in the middle (the large, dirt covered platform with nine lava holes). Suddenly, the middle platform collapses and the middle hole of lava erupts... and out of it pops none other than the Fire Temple boss.
The boss of the Fire Temple is: Subterranean Lava Dragon: Volvagia. This boss can be really hard to beat at times. After the short scene with Volvagia flying around, he will go back in the ground. Then he will stick his head out of the ground. Run up and hit him with the hammer. This will stun him and allow you to strike him with your sword. At times, he will come out and fly around and shoot fire at you. If you Z-target him and shoot an arrow and hit him, he will go underground. He will also start throwing rocks at you while in the air. Instead of shooting him with an arrow and moving about to try to avoid the rocks, it is easiest to just weather the storm by slowly walking off the platform. This will leave you hanging off the side but you will not be hurt while doing this. When Volvagia goes back down a hole, you can get back on the platform and start looking for his head to come up again.
As you start beating him, he will only stick his head out there for a couple of seconds. He also goes and tries to trick you by blowing fire out of one lava hole and coming out of another. If you keep far enough to the side of the platform, you should be able to keep all the holes in view and thus see which hole he is coming out of. He may take a couple of tries to beat.
If you're going after him with just three hearts, you're going to want to beat him as efficiently as possible. This means only striking him with leap attacks with the Biggoron Sword (three hits and he's dead!), and hanging off the edge when he begins dropping rocks.
After you defeat him he will go back into the lava, emerge one last time, and then disintegrate into bones, falling apart to the ground. His head will fall right by you and burn away, leaving a Heart Container. Get it and leave.
Another Medallion
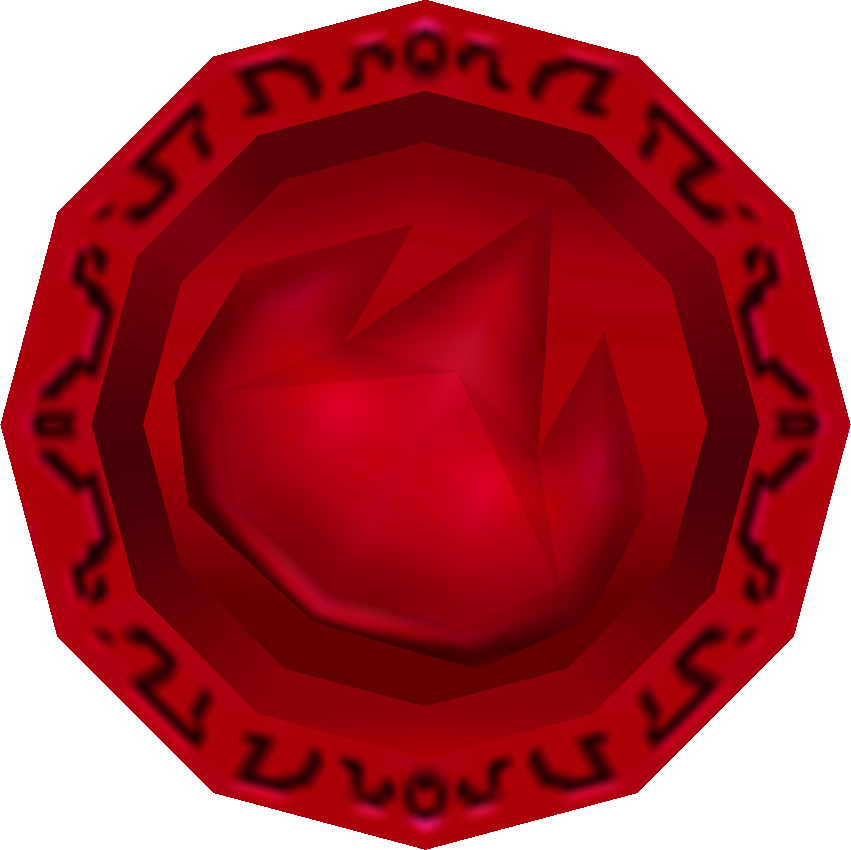
With Volvagia gone and the Gorons freed, the fiery cloud orbiting Death Mountain returns to normal in a giant eruption. As a result, the ashy skies near the mountain and in Kakariko Village clear up. You will be transported once more to the Chamber of the Sages where Darunia will appear and speak to you. He has become the Sage of Fire and the guardian of the Fire Temple. He gives you his thanks, then gives you the Fire Medallion which, contains his power. Now you and he are true brothers!
After this, you will be transported back to Death Mountain Crater. The bridge back to Goron City is still out so you will have to cross it with the Hookshot, or you can play one of the Ocarina songs to transport out.
Sidequests
Double your Magic Power
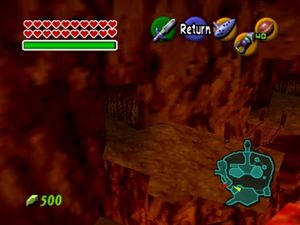
Near the entrance to Goron City from the Crater, you should find a cave blocked by two boulders. Destroy them with the Megaton Hammer. The cave turns out to be a Great Fairy's Fountain. The fairy inside will double your magic power.
- Death Mountain Trail: Go to the spot where you used to a Bomb Flower to unblock Dodongo Cavern, and look for a red rock. Destroy it with the Megaton Hammer to uncover a Skulltula.
- Death Mountain Trail: At night, go to the climbable wall near the summit of Death Mountain. Near the base of the wall is another red rock concealing a Skulltula.
- Goron City: This Skulltula resides on the back of the pedestal in the center of Goron City where the Spiritual Stone of Fire once rested. Stand on one of the nearby ropes so that you can see the Skulltula and Hookshot it. Be careful not to hit the wooden platform instead. Do this at night.
- Death Mountain Crater: As a child, use the Bolero of Fire to warp to Death Mountain Crater. Drop a Bottle of Bugs on the nearby patch soil to force out a Skulltula. Don't stay too long or you'll catch on fire and die!

