This chapter is very different from the previous ones. First of all, allies cannot be brought to life with Arks (nor by any other means). Then, the Hero cannot go back to the Shrine Island until this quest is complete. Third, all the world consists of a single indoors dungeon.
There are no enemies that the Crystal can show. Instead, there is a chance to encounter a monster whenever you walk through a door.
The door to the world of darkness[edit]

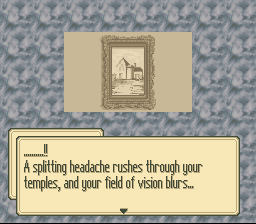
The door to the World of Darkness is inside the Shrine, but it is in two parts. First, go upstairs in the clock room and use the Ark of Wood on the pencil: the Ark will bring it away. Then, go downstairs and check the canvas: now a house has been drawn on it (supposedly by the Ark of Wood using the wooden pencil). Touch or hit it and enter a new world.
Ground floor[edit]
- "I've been here forever. Why can't I get out? Will I be stuck here forever indeed?... and... th..."
Leave the small room you started from, but you cannot go back! You can rest in the bed and save.
- "The leftover number holds the answer."
The next corridor features two doors and a hint (above) scribbled on the wall. One door is locked, so go in the other room. Search the books on the floor and find a dirty magazine. Read the diary on the desk, and the locked door in the corridor opens.
- "When the two skies overlap, the way will open."
- "...est... your memory."
In the next corridor you can see another writing on the wall and two paintings. You can enter the room to the north for a further hint. If you turn on and kick the television, "four lights lit up: red blue yellow green". In order to unlock the south door, examine the paintings. Shake them to change their appearance; each painting has four different "skies", test your memory and find the identical two.
- "Search for the number to burn."
You are now in a larger room. The hint is on the wall near the entrance door; it refers to the numbers of the clock. Examine and hit the clock on a wall, and a numbers falls off it; put that number in the fireplace, and a door opens.
If you search the pot down the steps and to the left, a monster attacks you. You can search again, and it can be useful to earn experience and gold.
- "Round square long skinny... box..."
Open the boxes on the tables in three different rooms: first the box on the round table, then the box on the square table (south-east room), lastly the box on the long skinny table. When all three are open, a door in the round tables room will open as well.
- "There's a... that opens the sealed door."
- "...the last box you opened..."
Walk all the way down the corridor. In the room at the end you can sleep in the bed. Go back to the previous rooms, and shake the box on the long skinny table: you will find the key to open the box in the bedroom. Once you unlock the box, the door to the basement will get unlocked as well.
Basement floor[edit]
- "It's hiding somewhere."
- "The butterfly has sealed the door."
There is a room to the south with a bedroom and a save point. Read the writings on the walls, then examine the spiderweb. Blow repeatedly on the spiderweb until the butterfly flies free and the door unlocks.
- "Break the eggshell."
In order for the egg to hatch, raise the temperature in the room by poking the fire. Then, keep looking at the egg until it breaks. You probably expected a bird, but a baby lizard comes out of it instead. Somehow, the birth of the reptilian triggers the door lock.
- "The machine controls light and water."
- "The three doors open together."
- "The pot..."
In the next corridor, only the south-west door is unlocked. Inside, walk along the southern wall and search a pot to the right. Turn it over to get rid of dust, then shake it and turn it over again to get the cabinet key. When you open the cabinet, a bat flies out and another door opens.
Proceed to the door that is now open, and press the button on the machine in that room. The water stops flowing and you can access a new area from the corridor.
Side quest[edit]
These puzzles and rooms are completely optional, but they allow you to earn four unique items that are found nowhere else in the game. Also, you will gain the ability to reduce or increase the encounter rate in this world.
- "Get the tail..."
- "Give it food."
- "There is a way to get light."
Go back to the room with the lizard egg. Touch the baby lizard, and get its tail. Feed the tail to the sickly bird in the north-east room. The door that opened is to the south-east, and it was a cage for the Beast. Remember the very first hint you read in this dungeon? Press that button! (If you cannot remember, scroll up this webpage.)
Boss: the Beast[edit]

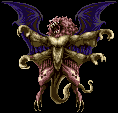
The Beast uses physical attacks only, and is weak against thunder.
- "Light... th..."
After you defeat the Beast, you should first of all backtrack to the bedroom and rest. After that, go north: the three doors are now open, and you can find many useful items: a crest of death, a magical buckle, a crystal shield (for Hero/Ninja/Ogre), a thorn robe (for Priestess/Witch).
In the last room, you can adjust the level of the lights all over the house. Probably it affects the encounter rate: enemies attack you more often in deeper darkness and hide away in strong light. By the way, on the upper floor you can meet Undead Chimeras, that are definitely stronger than Ghosts and Dancers.
Upper floor[edit]
- "Wet the..."
- "Your throat is burning."
In one of the rooms there is a bed and a save point. Afterwards, examine the cupboard and get the wine glass. In another room, get the wine bottle. Examine the table, but bottle and glass on it, fill the glass and drink it. A door will unlock.
- "A different bell opens the eyes."
Whenever you search the fireplace, a monster attacks you.
Ring the bell on the table, and a statue opens its eyes. Hit the wall on the clock, get the screw, put it in the golden pot in another room, then shake the pot as if it was a "different bell": the other statue opens its eyes, and a door unlocks.
- "Break the seal, close their eyes."
- "The purple crystal invites you to the world of dreams."
Search the bottles in the small room until you find a purple crystal. One of the pots triggers releases monsters whenever you examine it, instead. Use the purple crystal to close the eyes of all the statues, including the two whose eyes you just opened. When you're done, the sealed door opens.

- "It's right nearby..."
- "Remember the four colors."
When you enter the room the first time, an Undead Chimera attacks. The game said earlier on that it was testing your memory. Light the four colored candles in the same order as the colors shown on the television screen earlier on (if you cannot remmeber, scroll up this webpage).
- "In order to get out of here... need the... Ark... only way... get the ark that controls the space here this world will vanish..."
This is good news: just open the chest, and the Ark of Water is inside. You will return to the Shrine Island, and Darkness talks menacingly to you about himself and that world.
Aftermath[edit]
Infuse the Ark of Water into any armor part, and it should increase its protection value. Also, if you infuse the Ark into a figurine, it progressively refills the character's health points as you walk, although it does not bring the figurine to life.
If you go back to the synthesis machine in Metalimo, you can dispose of either the pornographic magazine or the purple crystal. Insert either item and any solid item in the machine, and it will return an alkaloid bucket, the best headgear for Lux the Tetsujin. If you also use the second item, you will just get a second, identical helm.